troy bilt pressure washer 2700 psi owners manual

Troy Bilt 2700 PSI Pressure Washer Owners Manual: A Comprehensive Guide

This manual provides essential guidance for operating and maintaining your Troy-Bilt 2700 PSI pressure washer‚
ensuring optimal performance and longevity.
It details assembly‚ safety‚ operation‚ troubleshooting‚ and warranty information for this powerful cleaning tool.

Welcome to the world of powerful cleaning! Your Troy-Bilt 2700 PSI Pressure Washer is a robust tool designed for a multitude of outdoor cleaning tasks.
From revitalizing decks and siding to washing vehicles and concrete surfaces‚ this pressure washer delivers exceptional cleaning performance.

This manual serves as your comprehensive guide‚ providing detailed instructions on safe operation‚ proper maintenance‚ and effective troubleshooting.
Understanding the capabilities of your 2700 PSI model is crucial for achieving optimal results and extending the life of your equipment.
Archaeological evidence suggests Troy was settled around 3600 BC‚ mirroring the enduring quality built into your Troy-Bilt machine.

Before first use‚ carefully review the safety precautions and assembly instructions.
Familiarize yourself with all components and their functions to ensure a safe and efficient cleaning experience.

Safety Precautions and Warnings

Prioritize safety during operation! Your Troy-Bilt 2700 PSI Pressure Washer generates high-pressure water‚ demanding strict adherence to safety guidelines.
Always wear safety glasses or goggles to protect your eyes from debris and spray. Closed-toe shoes are essential for foot protection.

Never point the wand at yourself or others. Keep children and pets a safe distance away from the operating area.
Avoid contact with electrical sources when using the pressure washer. Inspect hoses for damage before each use‚ replacing any worn or cracked components.

Like the ancient city of Troy‚ besieged for ten years‚ neglecting safety can lead to prolonged consequences.
Do not modify the pressure washer in any way. Disconnect the power supply and water source before performing maintenance or changing accessories.
Always follow the instructions outlined in this manual to prevent injury and ensure safe operation.

Understanding Your Pressure Washer

Familiarize yourself with the Troy-Bilt 2700 PSI model’s components‚ specifications‚ and symbols for safe and effective operation‚ mirroring archaeological study of Troy.

Key Components and Their Functions

The Troy-Bilt 2700 PSI pressure washer comprises several key components working in unison. The engine provides the power‚ while the high-pressure pump generates the water pressure. The pressure hose delivers pressurized water to the spray gun and selected nozzle.

Nozzles determine spray pattern – from wide-angle cleaning to pinpoint jets. The detergent tank allows for soap application‚ enhancing cleaning power. A water inlet filter prevents debris from damaging the pump. The unloader valve regulates pressure‚ preventing overload.

Understanding each component’s role‚ similar to understanding layers of Troy’s history‚ is crucial for proper operation and maintenance. Regular inspection of these parts ensures optimal performance and extends the lifespan of your pressure washer‚ much like preserving archaeological finds.

Pressure Washer Specifications (2700 PSI Model)

The Troy-Bilt 2700 PSI pressure washer boasts impressive specifications for robust cleaning power. Maximum Pressure is rated at 2700 PSI (pounds per square inch)‚ delivering substantial force. Flow Rate measures 2.3 GPM (gallons per minute)‚ indicating water volume.

Engine Type is typically a Briggs & Stratton‚ offering reliable performance. Pump Type is an Axial Cam‚ known for durability. Nozzle Sizes included often range from 0°‚ 15°‚ 25°‚ and 40° for versatile cleaning. Detergent Tank Capacity is approximately 0.5 quarts.

Weight generally falls around 62 pounds‚ offering portability. Similar to the layers discovered at Troy‚ these specifications represent a carefully engineered system. Understanding these details aids in selecting the right tool for your cleaning tasks and ensuring optimal results.

Symbols and Pictograms Explained

Understanding the symbols on your Troy-Bilt 2700 PSI pressure washer is crucial for safe and effective operation. The exclamation mark within a triangle signifies a warning‚ indicating potential hazards. A crossed-out circle denotes prohibited actions‚ like using flammable liquids.

The symbol of a person with a spray warns of the risk of injury from the high-pressure spray. A grounding symbol highlights electrical safety precautions. Pictograms illustrating proper nozzle attachment ensure correct usage. Like the archaeological layers of Troy‚ each symbol reveals a layer of safety information.

Refer to the manual’s diagram for a complete list and detailed explanations. Ignoring these symbols could lead to damage or personal injury. Familiarize yourself with each pictogram before operating the pressure washer to ensure a safe cleaning experience.

Assembly and Setup

Proper assembly is vital for safe operation. This section details unboxing‚ hose and nozzle attachment‚ water supply connection‚ and initial power-up procedures.

Unboxing and Initial Inspection

Carefully unpack your Troy-Bilt 2700 PSI pressure washer‚ verifying all components are present. Refer to the parts list within this manual to confirm you have received everything.
Inspect the unit for any visible damage incurred during shipping – dents‚ scratches‚ or broken parts.

If damage is detected‚ do not attempt to operate the pressure washer. Contact customer support immediately for assistance and potential replacement parts.
Retain all packaging materials until you are satisfied with the condition of the unit.

Before proceeding‚ ensure the engine oil level is correct (refer to the specifications section).
Check the hose connections for tightness and inspect the nozzles for any obstructions.
A thorough initial inspection prevents potential issues and ensures safe‚ efficient operation.

Attaching Hoses and Nozzles

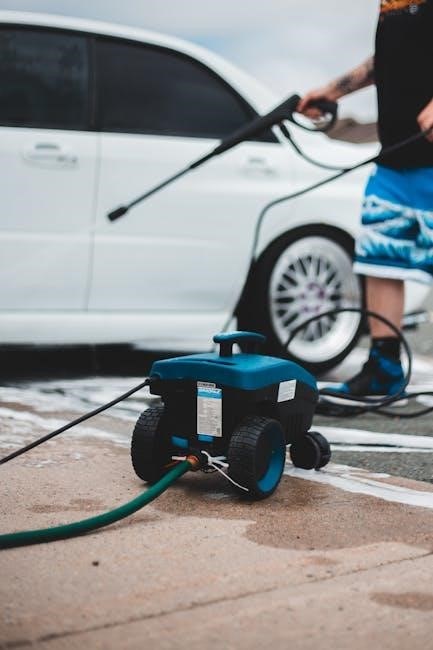
Begin by securely connecting the high-pressure hose to both the pressure washer pump outlet and the spray gun. Ensure a tight‚ hand-tightened connection to prevent leaks during operation.
Next‚ attach the desired nozzle to the spray gun‚ aligning it and twisting until it clicks into place.

Troy-Bilt 2700 PSI models typically include a selection of nozzles for various cleaning applications – 0°‚ 15°‚ 25°‚ and 40° degrees‚ plus a soap nozzle.
Always verify the nozzle is properly secured before starting the engine.

Inspect the hose for kinks or damage before use. A damaged hose can burst under pressure‚ posing a safety hazard.
Proper hose and nozzle attachment is crucial for optimal performance and user safety.

Connecting to a Water Supply

Before starting‚ ensure a reliable water source is available‚ delivering at least 20 PSI and 4 gallons per minute. Connect the water inlet adapter to a standard garden hose.

Attach the garden hose to the water inlet on the pressure washer‚ tightening securely to prevent leaks.
A water filter is often included; install it between the hose and the pressure washer to protect the pump from debris.

Fully open the water supply valve before starting the engine. This prevents the pump from running dry‚ which can cause damage.
Check for leaks at all connections.

If using a water source with low pressure‚ consider a water pressure booster to ensure optimal performance. Always follow local water regulations;

Powering Up the Unit

Before starting‚ double-check all connections – water hose‚ nozzles‚ and spray wand – ensuring they are securely fastened. Verify the unit is on a stable‚ level surface.

Locate the power switch‚ typically found near the engine. Ensure it’s in the “OFF” position before plugging in the power cord. Connect the pressure washer to a grounded‚ 120V outlet‚ using a properly rated extension cord if necessary.

Turn the power switch to the “ON” position. The engine should start (if equipped with an electric start) or be ready for pull-starting (if recoil start).

Allow the engine to warm up for a few moments before engaging the spray gun trigger. Never operate the unit with a damaged power cord or outlet.

Operation Instructions

Successfully utilize your Troy-Bilt 2700 PSI pressure washer by mastering start-up‚ pressure adjustments‚ nozzle selection‚ and effective spraying techniques for optimal cleaning.

Starting and Stopping the Engine

Before starting‚ ensure the pressure washer is on a level surface and connected to both a water supply and a power source. Verify the fuel tank contains fresh gasoline and the oil level is correct. To start‚ turn the ignition switch to the ‘ON’ position and pull the starter cord firmly and steadily until the engine ignites. Allow the engine to warm up for a few moments before engaging the spray gun.

To stop the engine‚ release the spray gun trigger and turn the ignition switch to the ‘OFF’ position. Disconnect the spray gun to relieve pressure within the system. Never attempt to force the engine to stop; allow it to idle down naturally. Regularly check the engine’s condition and follow the maintenance schedule outlined in this manual for continued reliable operation. Always disconnect the spark plug wire for extended periods of non-use or during maintenance.

Adjusting Pressure Settings

Your Troy-Bilt 2700 PSI pressure washer features adjustable pressure settings to accommodate various cleaning tasks. The pressure is typically regulated using an unloader valve‚ often controlled by a knob or dial. Turning the knob clockwise generally increases pressure‚ while turning it counterclockwise decreases it. Begin with the lowest pressure setting and gradually increase it until you achieve the desired cleaning power.

Always test the pressure on an inconspicuous area first to avoid damaging the surface being cleaned. Be mindful of the material you are cleaning; delicate surfaces require lower pressure. Incorrect pressure settings can lead to damage or ineffective cleaning. Refer to the nozzle chart for recommended pressure levels for different applications. Regularly inspect the unloader valve for proper function and adjust as needed.

Selecting the Right Nozzle

Choosing the correct nozzle is crucial for effective and safe cleaning with your Troy-Bilt 2700 PSI pressure washer. Different nozzles deliver varying spray patterns and intensities. A 0-degree nozzle provides a concentrated‚ powerful stream for stubborn dirt‚ but use it cautiously to avoid damage. A 15-degree nozzle is suitable for tougher stains on durable surfaces.

A 25-degree nozzle offers a wider spray for general cleaning‚ while a 40-degree nozzle is ideal for delicate surfaces like painted wood. The soap nozzle‚ typically black‚ is designed for applying detergent. Always refer to the nozzle color-coding guide in this manual. Incorrect nozzle selection can result in ineffective cleaning or surface damage. Ensure the nozzle is securely attached before operation.

Proper Spraying Techniques

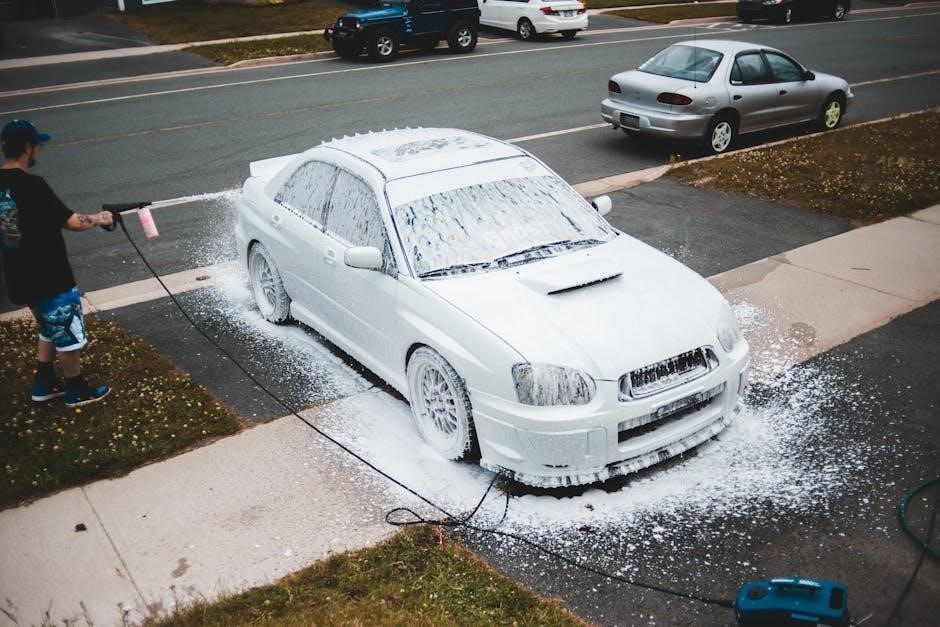
Employing correct spraying techniques maximizes cleaning efficiency and minimizes potential damage when using your Troy-Bilt 2700 PSI pressure washer. Maintain a consistent distance of approximately 8-12 inches from the surface‚ adjusting as needed based on the nozzle and surface type. Always start with a wider spray angle and gradually increase intensity if necessary.

Use smooth‚ sweeping motions‚ overlapping each pass slightly to ensure complete coverage. Avoid holding the nozzle too close‚ which can etch or damage the surface. Test on an inconspicuous area first. When cleaning upwards‚ start from the bottom and work your way up to prevent streaking. Rinse thoroughly after applying detergent. Prioritize safety and wear appropriate eye protection.

Maintenance and Troubleshooting

Regular maintenance extends the life of your Troy-Bilt 2700 PSI pressure washer. This section details routine checks‚ cleaning procedures‚ and solutions for common operational issues.

Routine Maintenance Schedule

To ensure peak performance and longevity of your Troy-Bilt 2700 PSI pressure washer‚ adhere to this maintenance schedule. After each use‚ thoroughly flush the detergent tank and nozzle with clean water to prevent clogging and corrosion. Inspect hoses for cracks‚ kinks‚ or leaks‚ replacing them if damaged.

Every 25 hours of operation‚ clean the water inlet filter to maintain adequate water flow. Check the oil level (if applicable to your model) and replenish as needed‚ using the recommended oil type. Annually‚ inspect the high-pressure hose connections and tighten if necessary. Consider using a fuel stabilizer if the unit will be stored for extended periods. Regularly clean the exterior surfaces with a damp cloth. Proper maintenance prevents costly repairs and ensures reliable operation for years to come.

Cleaning and Storing the Pressure Washer

Proper cleaning and storage are crucial for maintaining your Troy-Bilt 2700 PSI pressure washer’s condition. After each use‚ disconnect the water supply and nozzle. Flush the pump and hoses with clean water to remove any remaining detergent or debris‚ preventing internal corrosion. Wipe down the exterior surfaces with a damp cloth to remove dirt and grime.

For long-term storage‚ drain all water from the pump‚ hoses‚ and detergent tank to avoid freezing damage. Store the unit in a clean‚ dry‚ and frost-free location. Consider applying a pump protector to safeguard internal components during extended periods of inactivity. Ensure the power cord is neatly coiled and secured. Proper storage extends the lifespan and ensures readiness for the next cleaning task.

Troubleshooting Common Issues (No Start‚ Low Pressure)

If your Troy-Bilt 2700 PSI pressure washer fails to start‚ first check the power source and ensure the engine switch is in the “on” position. Verify sufficient oil levels‚ as low oil can prevent starting. For low pressure issues‚ inspect the nozzle for clogs and clean or replace it as needed. Examine the water inlet filter for obstructions‚ ensuring a steady water supply.

Additionally‚ check the high-pressure hose for kinks or damage. If problems persist‚ the pump may require servicing. Never attempt internal repairs yourself; consult a qualified technician. Always disconnect the power supply before performing any troubleshooting steps. Refer to the full manual for detailed diagrams and safety precautions.

Winterizing Your Pressure Washer

Proper winterization is crucial to prevent damage to your Troy-Bilt 2700 PSI pressure washer during freezing temperatures. Begin by disconnecting the water supply and running the engine until all water is expelled from the pump. Then‚ pump through a pump protector solution (antifreeze specifically designed for pressure washers) to safeguard internal components.

Remove all nozzles and hoses‚ draining any remaining water. Store them indoors‚ if possible. Change the engine oil before long-term storage. Disconnect the spark plug wire to prevent accidental starting. Cover the unit to protect it from dust and debris. Always consult the full owner’s manual for detailed instructions and recommended products.

Parts and Accessories

Genuine Troy-Bilt replacement parts and compatible accessories‚ like nozzles‚ hoses‚ and detergent tanks‚ are readily available to maintain and enhance your 2700 PSI unit.

Replacement Parts List

Maintaining your Troy-Bilt 2700 PSI pressure washer is simplified with readily available replacement parts. Key components‚ subject to wear and tear‚ include high-pressure hoses‚ spray nozzles (various degrees for different cleaning tasks)‚ and the trigger gun assembly.

The engine also requires periodic maintenance; replacement spark plugs‚ air filters‚ and oil are crucial for optimal performance. Inspect and replace the unloader valve if pressure fluctuations occur. Don’t forget essential smaller parts like hose connectors‚ nozzle tips‚ and O-rings.

For a comprehensive list and part numbers‚ consult the official Troy-Bilt parts diagram available online at the Troy-Bilt website or through authorized service centers. Always use genuine Troy-Bilt parts to ensure compatibility and maintain the integrity of your pressure washer. Incorrect parts can lead to damage and void the warranty.

Compatible Accessories (Nozzles‚ Hoses‚ Detergent Tanks)

Enhance the versatility of your Troy-Bilt 2700 PSI pressure washer with a range of compatible accessories; Nozzles are paramount; options include 0°‚ 15°‚ 25°‚ 40°‚ and soap nozzles for diverse cleaning applications‚ from delicate surfaces to heavy-duty grime removal.

Extend your reach with longer-length replacement hoses‚ available in various diameters and materials. For efficient detergent application‚ utilize a dedicated detergent tank or siphon hose‚ ensuring proper dilution and preventing damage to the pump.

Surface cleaners are also available‚ dramatically reducing cleaning time on patios and driveways. Always verify accessory compatibility with the 2700 PSI model before purchase‚ and prioritize genuine Troy-Bilt or reputable third-party brands for optimal performance and safety.

Warranty Information

Troy-Bilt provides a warranty covering defects in materials and workmanship on your 2700 PSI pressure washer‚ offering peace of mind and protection.

Troy Bilt Warranty Details

The Troy-Bilt warranty for the 2700 PSI pressure washer generally covers defects in materials and workmanship for a specified period‚ typically starting from the original purchase date. This coverage usually extends for a limited time‚ such as one or two years‚ depending on the specific component. The engine itself may have a separate warranty provided directly by the engine manufacturer‚ like Briggs & Stratton‚ with its own terms and duration.

Warranty claims require proof of purchase‚ such as a receipt or invoice. The warranty will cover the cost of repair or replacement of defective parts‚ at Troy-Bilt’s discretion. However‚ it does not cover damage caused by misuse‚ abuse‚ neglect‚ improper maintenance‚ or normal wear and tear. Modifications or alterations to the pressure washer will also void the warranty. Always refer to the official warranty statement included with your product for the most accurate and up-to-date information.

Contacting Customer Support

For assistance with your Troy-Bilt 2700 PSI pressure washer‚ several customer support options are available. You can visit the official Troy-Bilt website to access a comprehensive FAQ section‚ troubleshooting guides‚ and downloadable resources‚ including parts diagrams. A dedicated online support portal allows you to submit inquiries and track their progress.

Alternatively‚ you can reach Troy-Bilt customer service directly via phone. The phone number is readily available on their website. Live chat support is also often offered during business hours for immediate assistance. When contacting support‚ have your model number and serial number readily available to expedite the process. For parts inquiries or replacement requests‚ you can also contact authorized Troy-Bilt dealers or visit their online parts store. Ensure you have your proof of purchase for warranty-related issues.

stihl ms 180 c-be manual

Stihl MS 180 C-BE Manual: A Comprehensive Guide

This manual provides detailed instructions for the Stihl MS 180 C-BE chainsaw, covering operation, maintenance, and safety. Download the PDF for free!

Essential information includes chain sharpening, fuel mixing ratios, and identifying genuine Stihl products versus counterfeits. Refer to the code table.

The Stihl MS 180 C-BE is a lightweight, user-friendly chainsaw ideal for homeowners and occasional users. This manual serves as a comprehensive resource for understanding and safely operating this powerful tool. It details everything from initial assembly to routine maintenance, ensuring optimal performance and longevity.

Users will find guidance on proper cutting techniques, fuel mixing, and troubleshooting common issues. Accessing the downloadable PDF provides a readily available reference for all aspects of the chainsaw’s operation, helping to maximize efficiency and minimize potential problems.

Safety Precautions and Warnings

Operating a chainsaw demands strict adherence to safety guidelines. Always wear appropriate personal protective equipment (PPE), including safety glasses, gloves, and hearing protection. The manual emphasizes the dangers of kickback and provides instructions for avoiding it. Never operate the MS 180 C-BE with a damaged chain or dull blade.

Ensure a firm grip and maintain a safe distance from bystanders. Always disconnect the spark plug before performing any maintenance. Read and understand all warnings within this manual before using the chainsaw to prevent serious injury.

Understanding the Components of the MS 180 C-BE

The Stihl MS 180 C-BE features a robust construction designed for efficient cutting. Key components include the engine, guide bar, saw chain, fuel tank, and air filter system. The manual details each part’s function and location. Familiarize yourself with the chain tensioning system and the location of safety features.

Understanding these elements is crucial for proper maintenance and operation. Refer to the identification code table to accurately identify your specific model and its corresponding parts for ordering replacements.

Assembly Instructions

Before first use, careful assembly is required. The manual provides step-by-step guidance for attaching the guide bar and chain, emphasizing safety precautions. Always wear protective gloves to avoid injury from the sharp cutting teeth. Ensure the bar is correctly aligned and securely fastened.

Proper chain tensioning is vital for optimal performance and safety. Follow the instructions closely to achieve the correct tension, preventing derailment or damage. Incorrect assembly can lead to malfunctions.

Attaching the Guide Bar and Chain

Begin by removing the bar cover. Position the chain around the guide bar, ensuring the cutting teeth face the correct direction. Carefully align the drive links with the sprocket. Then, fit the guide bar onto the chainsaw, making sure it seats properly.

Secure the bar with the bar nut, tightening it hand-tight initially. Refer to the manual for specific torque recommendations. Always wear gloves during this process to protect against sharp edges.

Chain Tensioning

Proper chain tension is crucial for safe and efficient operation. Loosen the bar nut slightly to allow for adjustment. Use the tensioning screw to achieve the correct tension – the chain should be snug against the guide bar, but still able to be pulled around by hand.

Tighten the bar nut securely after tensioning. Check tension frequently during use, as it can change with temperature and wear. Refer to the manual for detailed instructions and illustrations.

Starting the Stihl MS 180 C-BE

Before starting, ensure the chain brake is engaged and the saw is on a firm, level surface. Activate the choke for cold starts, and follow the sequence: fuel supply on, prime the carburetor (press the primer bulb several times), and pull the starter cord firmly.

For warm starts, disengage the choke. Always maintain a firm grip and be prepared for the engine to start. Consult the manual for detailed procedures and safety precautions.

Cold Start Procedure

Begin with the chain brake engaged and the saw securely positioned. Turn on the fuel supply and activate the choke lever. Press the primer bulb repeatedly until fuel is visible. Gently pull the starter cord until resistance is felt, then pull briskly. Repeat if necessary, disengaging the choke once the engine sputters.

Allow the engine to warm up before applying a load. Refer to the manual for specific details and troubleshooting tips. Always prioritize safety during the starting process.

Warm Start Procedure

Ensure the chain brake is engaged for safety. Turn on the fuel supply. Typically, a warm engine doesn’t require choking. Gently pull the starter cord – it should start with less effort than a cold start. If it doesn’t start immediately, briefly engage the choke and try again.

Avoid excessive pulling, which can flood the engine. Consult the manual for specific guidance. Proper warm starting minimizes wear and tear on the engine components.

Operating Instructions

Always wear appropriate safety gear, including eye and ear protection. Ensure a firm grip on the chainsaw with both hands. Maintain a safe distance from bystanders. Use proper cutting techniques, avoiding kickback. Be aware of your surroundings and potential hazards.

Regularly inspect the chain for sharpness and tension. Follow the manual’s guidelines for safe and efficient operation. Never overreach or cut above shoulder height.

Proper Cutting Techniques

Always maintain a firm stance and secure footing while operating the Stihl MS 180 C-BE. Avoid pinching the bar, utilizing techniques to relieve pressure. Plan your cuts carefully, considering the wood’s weight and potential movement. Use the correct chain for the material being cut.

Be mindful of kickback, keeping the chain nose away from your body. Never cut with the tip of the bar. Ensure proper chain tension for optimal performance and safety.

Felling Small Trees

When felling, assess the tree’s lean, wind direction, and surrounding obstacles. Create a notch on the side of the intended fall, approximately one-fifth to one-third of the tree’s diameter. Follow with a back cut, leaving a hinge to control the fall.

Use escape routes angled away from the falling tree. Be aware of potential kickback during the back cut. Never fell a tree beyond your skill level; seek professional assistance if needed.

Fueling and Mixing

Always mix fuel in a clean container, adhering to the recommended ratio. Stihl specifies a precise fuel-to-oil mixture for optimal performance and engine longevity. Use high-quality 2-stroke engine oil.

Ensure proper ventilation during mixing and fueling. Wipe up any spills immediately. Never use straight gasoline; it will damage the engine. Refer to the manual for the correct ratio, typically 50:1.

Recommended Fuel Mixture Ratio

The Stihl MS 180 C-BE requires a precise fuel mixture for reliable operation. Generally, a 50:1 ratio is recommended – this translates to 50 parts gasoline to 1 part high-quality 2-stroke engine oil.

Always verify this ratio in your specific manual, as variations can occur. Using the incorrect ratio can lead to engine damage. Stihl recommends Stihl HP Ultra 2-stroke oil for optimal performance and longevity. Do not deviate from these guidelines.

Fueling Procedure

Before fueling your Stihl MS 180 C-BE, ensure the engine is cool and the chainsaw is switched off. Clean the area around the fuel tank cap to prevent contamination. Carefully mix the fuel and oil according to the recommended 50:1 ratio.

Slowly pour the mixture into the tank, avoiding spillage. Do not overfill. Securely tighten the fuel cap. Wipe away any spilled fuel immediately. Always fuel in a well-ventilated area, away from sparks or flames.

Chain Maintenance

Regular chain maintenance is crucial for safe and efficient operation of your Stihl MS 180 C-BE. Sharpening the chain ensures clean cuts and reduces strain on the engine. Inspect the chain frequently for damage, cracks, or worn teeth.

Replace the chain when it becomes excessively worn or damaged. Use a proper chain sharpening tool, like a file, to maintain the correct cutting angles. Proper tensioning, detailed elsewhere, also extends chain life.

Sharpening the Chain

Maintaining a sharp chain is vital for the Stihl MS 180 C-BE’s performance. Use a round file of the correct size, guided by a sharpening gauge to maintain the correct depth gauges and angles. File each tooth consistently, following the existing bevel.

Avoid overheating the chain during sharpening. Check the rakers and file them down if necessary. A properly sharpened chain cuts efficiently, reducing fatigue and improving safety. Regular sharpening prevents damage to the bar.

Chain Replacement

Replacing the chain on your Stihl MS 180 C-BE requires careful attention. First, disconnect the spark plug wire for safety. Remove the chain from the guide bar and note its direction; Install the new chain, ensuring the drive links face the correct way.

Proper tensioning is crucial after replacement – see the chain tensioning section. Always use a chain of the correct pitch and gauge. A worn or damaged chain should be replaced immediately for safe operation.

Bar Maintenance

Maintaining your guide bar is vital for smooth and safe operation of the Stihl MS 180 C-BE. Regular cleaning removes sawdust and debris, preventing premature wear. Inspect the rails frequently for burrs or damage, filing them down as needed.

Proper bar lubrication ensures reduced friction and extends its lifespan. Periodically check for straightness and replace if bent. A well-maintained bar contributes significantly to efficient cutting and overall chainsaw performance.

Cleaning the Guide Bar

Regularly cleaning the guide bar of your Stihl MS 180 C-BE is crucial for optimal performance. After each use, remove sawdust and pitch buildup with a scraper or brush. Pay close attention to the bar rails and groove, ensuring they are free of obstructions.

Use a solvent if necessary to dissolve stubborn residue. A clean bar reduces friction, improves chain lubrication, and prevents premature wear, extending both bar and chain life. Inspect for damage during cleaning.

Bar Rail Maintenance

Maintaining the rails of your Stihl MS 180 C-BE’s guide bar is vital for smooth chain operation. Regularly check for burrs or damage using a file. Carefully remove any imperfections to prevent chain binding and uneven wear. Ensure the rails are straight and free of debris.

Proper rail maintenance minimizes friction, extends chain life, and improves cutting efficiency. Periodically, a light oiling of the rails can further reduce wear. Inspect frequently during cleaning and sharpening procedures.

Air Filter Maintenance

Consistent air filter maintenance is crucial for optimal Stihl MS 180 C-BE performance. Regularly inspect the filter for dirt and debris after each use, or daily with heavy use. Cleaning involves tapping it to remove loose particles or washing with mild soap and water.

Replace the air filter when it becomes excessively dirty or damaged, ensuring proper engine airflow. A clogged filter restricts air, reducing power and increasing fuel consumption. Follow the manual’s guidelines for filter replacement intervals.

Cleaning the Air Filter

To clean the air filter on your Stihl MS 180 C-BE, begin by removing it carefully from the housing. Gently tap the filter against a clean surface to dislodge loose dirt and sawdust. For more stubborn debris, wash the filter in warm, soapy water – use a mild detergent.

Rinse thoroughly and allow the filter to air dry completely before reinstalling. Avoid using compressed air, as it can damage the filter material. Regular cleaning maintains optimal engine performance.

Replacing the Air Filter

To replace the air filter on your Stihl MS 180 C-BE, first, release the air filter cover. Carefully remove the old, dirty filter. Ensure the new filter is the correct type for your model – consult your manual or a Stihl dealer.

Install the new filter, ensuring it seats properly within the housing. Secure the air filter cover, confirming it’s firmly latched. Regular replacement, as needed, guarantees clean air intake and optimal engine function.

Spark Plug Maintenance

Regular spark plug maintenance is crucial for optimal Stihl MS 180 C-BE performance. Periodically check the spark plug for fouling or damage. A properly functioning spark plug ensures reliable starting and efficient combustion. Disconnect the spark plug wire before inspection.

If the plug is dirty, clean it with a wire brush. If damaged or worn, replace it with a new Stihl-recommended spark plug. Correct gap setting is vital; consult your manual for specifications.

Checking the Spark Plug

Before checking the Stihl MS 180 C-BE spark plug, ensure the engine is off and cool. Disconnect the spark plug wire to prevent accidental starting. Visually inspect the plug for carbon buildup, cracking, or electrode wear. A healthy plug exhibits a light tan or gray color.

Remove the spark plug using a socket wrench. Examine the threads for damage. Look for signs of oil fouling or excessive burning. These indicators suggest potential engine issues requiring further diagnosis.

Replacing the Spark Plug

To replace the Stihl MS 180 C-BE spark plug, use the correct replacement specified in your manual. Gap the new plug to the manufacturer’s recommended setting using a feeler gauge. Carefully thread the new plug into the cylinder head by hand to avoid cross-threading.

Tighten the spark plug with a socket wrench to the specified torque. Reconnect the spark plug wire securely. A properly installed spark plug ensures optimal engine performance and efficient combustion.

Troubleshooting Common Issues

If your Stihl MS 180 C-BE fails to start, check the fuel mixture, spark plug, and air filter. Poor performance could indicate a dirty air filter, dull chain, or incorrect chain tension. Engine stalling may be due to a clogged carburetor or fuel line.

Refer to the manual for detailed diagnostics and solutions. Always disconnect the spark plug wire before performing any maintenance. Ensure proper safety precautions are followed when addressing any issues.

Engine Starting Problems

Difficulty starting your Stihl MS 180 C-BE? First, verify the fuel mixture is correct and the fuel is fresh. Check the spark plug for fouling or damage, and ensure it’s properly gapped. A flooded engine requires specific procedures – consult the manual.

Confirm the choke is engaged correctly for cold starts. Inspect the air filter for obstructions. If problems persist, professional servicing may be necessary to diagnose internal engine issues.

Chain Saw Performance Issues

Reduced cutting power in your Stihl MS 180 C-BE? A dull chain is the most common cause – sharpen or replace it. Incorrect chain tension also impacts performance; adjust as needed. Check the air filter for blockage, restricting airflow.

Ensure proper fuel mixture and a clean fuel filter. Inspect the guide bar for wear or damage. If issues continue, a professional diagnosis may reveal carburetor or engine problems.

Identifying Your Stihl MS 180 C-BE (Code Table)

Locating your Stihl MS 180 C-BE’s identification code is crucial for ordering parts and verifying authenticity. The code is typically found on the engine housing or near the rear handle.

Stihl utilizes a specific alphanumeric system. Refer to the official Stihl documentation or dealer for a comprehensive code table. This table decodes the manufacturing date and equipment specifications, ensuring correct part selection and confirming a genuine product.

Storage and Transportation

Proper storage and transportation are vital for maintaining your Stihl MS 180 C-BE’s longevity and safety. Before long-term storage, drain the fuel tank and carburetor to prevent gumming. Secure the chainsaw with a scabbard during transport, protecting the chain and preventing accidental activation.

Store in a dry, locked location inaccessible to children. Regularly inspect for damage before each use. Always disconnect the spark plug wire for added safety during storage and transport.

Distinguishing Genuine Stihl MS 180 from Counterfeits

Protect your investment by learning to identify genuine Stihl MS 180 chainsaws. Counterfeits often exhibit poor build quality, inferior materials, and lack the precision engineering of authentic Stihl products. Inspect the labeling carefully; genuine models feature clear, crisp markings and a unique identification code.

Verify the serial number against Stihl’s database. Beware of unusually low prices and purchase only from authorized Stihl dealers to ensure authenticity and receive genuine parts.

canon p170 dh instruction manual

Canon P170-DH Instruction Manual: Overview

This manual details the Canon P170-DH calculator’s functions, offering guidance on setup, operation, troubleshooting, and maintenance. Download the PDF for comprehensive instructions!

The Canon P170-DH is a reliable, 12-digit desktop calculator designed for everyday calculations. This user manual provides essential information for optimal use, covering everything from initial setup to advanced functions. It’s a practical tool for office, school, or home use, offering clear and efficient operation.

Users can access a downloadable PDF version of the instruction manual online, offering detailed guidance. The calculator is known for its fluorescent display and straightforward functionality. This guide will help you understand its features, troubleshoot potential issues, and ensure long-lasting performance. Explore the manual to unlock the full potential of your Canon P170-DH!

Key Features and Specifications

The Canon P170-DH boasts a clear, 12-digit fluorescent display for easy readability. It features a standard full-size keyboard, ensuring comfortable and accurate input. This desktop calculator is powered by both battery and AC adapter (not included), offering flexible power options.

Key functions include basic arithmetic, percentage calculations, and square root determination. Its compact design makes it suitable for various workspaces. While specific dimensions and weight details require consulting the full manual, it’s a lightweight and portable device. Compliance information regarding radio frequency energy is also detailed within the documentation, ensuring safe operation.

Getting Started

Begin with unboxing and carefully reviewing all included components. Proper initial setup and understanding the power source are crucial for optimal performance.

Unboxing and Initial Setup

Carefully remove the Canon P170-DH calculator from its packaging. Verify that all components are present, including the calculator itself and any accompanying documentation – such as this instruction manual. Inspect the calculator for any visible signs of damage that may have occurred during shipping. Before first use, gently wipe down the surface with a soft, dry cloth to remove any dust or debris.

Position the calculator on a stable, flat surface. Ensure adequate lighting for clear visibility of the display. Familiarize yourself with the layout of the keys and functions. The initial setup primarily involves understanding the key functions and preparing for basic calculations. No complex configuration is typically required for this desktop calculator.

Power Source and Battery Information

The Canon P170-DH calculator operates on both solar power and battery power, providing reliable functionality in various lighting conditions. A primary battery typically powers the calculator, ensuring operation even in low light. The solar panel supplements power, extending battery life. Battery replacement is straightforward; access the battery compartment on the calculator’s underside.

Use only the specified battery type (often LR44 or similar) for optimal performance and to avoid damage. Properly dispose of used batteries according to local regulations. Battery life varies depending on usage and display brightness. Conserving power by minimizing display usage will prolong battery duration.

Basic Operations

This section covers fundamental calculator use, including number input, addition, subtraction, multiplication, and division. Learn to efficiently perform everyday calculations.

Performing Calculations

To begin calculations, press the numeric keys to enter the desired values. The Canon P170-DH features a 12-digit display for clear visibility. Utilize the basic arithmetic keys – addition (+), subtraction (-), multiplication (x), and division (÷) – to perform operations. After entering the first number, press the operator key, then input the second number.

Press the equals (=) key to display the result. The calculator follows standard order of operations. For chained calculations, simply continue entering operators and numbers. Remember to clear the display using the ‘AC’ (All Clear) key before starting a new calculation to avoid unexpected results from previous operations. Practice these steps for efficient and accurate computation.

Clear and Reset Functions

The Canon P170-DH provides several clear and reset functions for accurate calculations. The ‘AC’ (All Clear) key completely clears the display and resets the calculator to its initial state, erasing all entered numbers and operations. The ‘C’ (Clear) key typically removes only the last entered digit or number, allowing for quick corrections without restarting the entire calculation.

Utilize ‘CE’ to clear the entry. Understanding the difference between these keys is crucial for efficient use. Regularly using these functions prevents errors and ensures precise results. If an error occurs during a calculation, the ‘AC’ key is the most reliable way to begin anew, guaranteeing a clean slate for subsequent operations.

Memory Functions

The Canon P170-DH incorporates essential memory functions for storing and recalling numerical values. The ‘M+’ key adds the displayed number to the memory, while ‘M-’ subtracts it. ‘MR’ (Memory Recall) retrieves the stored value and displays it. ‘MC’ (Memory Clear) erases the content of the memory, resetting it to zero.

These functions are invaluable for multi-step calculations. Efficiently store intermediate results and reuse them later, streamlining complex operations. Remember to clear the memory when no longer needed to avoid unintended use of previously stored values. Proper utilization of these features enhances calculation speed and accuracy.

Advanced Functions

Explore beyond basic arithmetic with features like percentage calculations, square root determination, and efficient constant calculations on your Canon P170-DH.

Percentage Calculations

The Canon P170-DH simplifies percentage calculations for various applications. To calculate a percentage of a number, enter the number, press the “%” key, and then enter the percentage value. The display will show the result directly. For example, to find 15% of 80, input 80, press “%”, then input 15, resulting in 12.

To calculate a percentage increase or decrease, first enter the original value. Then, calculate the difference, press “%”, and finally add or subtract from the original value. This calculator efficiently handles percentage-related tasks, making it ideal for business, finance, and everyday calculations. Remember to clear the display after each operation for accurate results.

Square Root Function

The Canon P170-DH features a dedicated square root function for quick mathematical operations. To utilize this function, simply enter the number for which you want to determine the square root. Then, press the “√” key. The calculator will immediately display the square root of the entered number.

This function is particularly useful in scientific and engineering applications, as well as for solving various mathematical problems. Ensure the display shows the correct number before pressing the square root key to avoid errors. The P170-DH provides a straightforward method for calculating square roots, enhancing its versatility for diverse computational needs.

Constant Calculations

The Canon P170-DH simplifies repeated calculations involving constants. After performing an operation with a constant value, the calculator retains that value for subsequent calculations. This eliminates the need to re-enter the constant repeatedly, saving time and reducing the risk of input errors.

To utilize this feature, perform the initial calculation as usual. The result, or the constant used, remains stored. Subsequent operations will automatically incorporate this stored value. This is especially beneficial in scenarios like calculating percentages or applying a fixed multiplier across multiple values, streamlining complex computations efficiently.

Troubleshooting

This section addresses common issues with the Canon P170-DH, including error codes, display problems, and malfunctions, offering solutions for smooth operation.

Common Error Codes

While the Canon P170-DH is a robust calculator, occasional errors may occur. Unfortunately, specific error code documentation for this model is limited in readily available resources. However, general calculator errors often relate to input issues – attempting operations outside the calculator’s range (like dividing by zero) or exceeding the digit limit.

If the display shows an “E” or similar symbol, try clearing the calculator and re-entering the calculation carefully. A malfunctioning key might also trigger unexpected results. If problems persist, a reset (if available – consult the full manual) or contacting Canon support is recommended; Remember to check the power source and battery if the display is erratic.

Display Errors and Solutions

If the Canon P170-DH display appears dim or shows incorrect characters, first ensure sufficient battery power or a secure power connection. A flickering display might indicate a low battery. If segments are missing, or the display is blank despite power, try resetting the calculator – though specific reset procedures aren’t widely documented for this model.

Inputting a calculation exceeding the 12-digit capacity can result in an overflow error, often shown as “E”. Clearing the calculator and simplifying the calculation usually resolves this. For persistent display issues, consult the full manual or Canon support for further assistance and potential troubleshooting steps.

Calculator Malfunctions

Should the Canon P170-DH cease to function correctly, begin by checking the power source and ensuring proper battery installation. If keys become unresponsive, gently clean the calculator’s surface as debris can interfere with functionality. Persistent malfunctions, such as incorrect calculations or complete failure, may indicate an internal issue.

Avoid attempting self-repair, as this could void any potential warranty and cause further damage. Refer to Canon’s support website for troubleshooting guides or contact their customer service for assistance. Detailed repair information isn’t readily available, emphasizing the need for professional support.

Maintenance and Care

To ensure longevity, regularly clean the Canon P170-DH with a soft cloth. Store it in a dry place, avoiding extreme temperatures and direct sunlight.

Cleaning Instructions

Regular cleaning maintains the Canon P170-DH’s functionality and appearance. Always disconnect the power source before cleaning. Use a soft, dry cloth to wipe the exterior surfaces, removing dust and fingerprints. Avoid using abrasive cleaners, solvents, or excessive moisture, as these can damage the calculator’s finish and internal components.

For stubborn marks, lightly dampen the cloth with water and gently wipe the affected area. Ensure the calculator is completely dry before resuming use. Do not attempt to disassemble the calculator for cleaning purposes. This could void the warranty and potentially cause damage. Pay particular attention to the keys and display, ensuring they are free from debris. A clean calculator ensures accurate operation and a prolonged lifespan.

Storage Guidelines

Proper storage protects your Canon P170-DH calculator from damage and ensures its longevity. When not in use, store the calculator in a clean, dry place, away from direct sunlight, extreme temperatures, and humidity. Avoid storing it with or near objects that could scratch or damage the display or casing.

A protective case or pouch is recommended for storage, especially when transporting the calculator. Do not store the calculator with wet or damp items, as this could lead to corrosion. Remove batteries if the calculator will be stored for an extended period to prevent potential leakage. Following these guidelines will help maintain the calculator’s performance and appearance over time.

Technical Information

The Canon P170-DH is a 12-digit desktop calculator. Dimensions and weight details are crucial for placement and portability considerations for the user.

Dimensions and Weight

Understanding the physical specifications of the Canon P170-DH is essential for determining its suitability for various workspaces and applications. While precise measurements aren’t explicitly detailed in readily available online resources, the calculator is generally considered a standard desktop model.

Its compact footprint allows for efficient use of desk space, making it ideal for offices, homes, or educational settings. The weight is substantial enough to provide stability during operation, preventing accidental movement while performing calculations.

Although specific dimensions (length, width, height) and weight in grams or ounces aren’t universally published, users can expect a typical size for a 12-digit desktop calculator, prioritizing functionality and ease of use within a practical form factor.

Compliance Information

The Canon P170-DH calculator, like all electronic devices, is designed to meet specific regulatory compliance standards. Information regarding these standards is crucial for ensuring safe and legal operation within different regions.

Available documentation suggests the device generates and utilizes radio frequency energy, necessitating adherence to installation and usage guidelines to prevent potential interference. Compliance with electromagnetic compatibility (EMC) directives is likely, ensuring the calculator doesn’t disrupt other electronic equipment.

Further details regarding specific certifications (e.g., FCC, CE) and adherence to environmental regulations (e.g., RoHS) can typically be found within the full instruction manual or on Canon’s official website, guaranteeing responsible manufacturing and product lifecycle management.

Resources

Access the complete Canon P170-DH manual online as a PDF, and find additional support and frequently asked questions on the official Canon website.

Downloading the Full Manual

Obtain the comprehensive Canon P170-DH instruction manual in PDF format for detailed guidance. Several online resources provide access to this document, ensuring you have readily available support for your calculator. ManualsLib and other document-sharing platforms host the complete manual, typically spanning several pages.

These downloadable manuals cover all aspects of the P170-DH, from initial setup and basic calculations to advanced functions and troubleshooting steps. Ensure you download from a reputable source to avoid potentially corrupted files. The full manual offers a deeper understanding of the calculator’s capabilities than quick start guides, empowering you to maximize its functionality. A direct link to Canon’s support page, if available, is also recommended for the most current version.

Canon Support Website

For the most up-to-date information and direct support regarding your Canon P170-DH calculator, visit the official Canon website. While a dedicated page specifically for this model may require some navigation, Canon’s broader calculator support section is a valuable resource.

Here, you can often find downloadable manuals, FAQs, and troubleshooting guides. The Canon website (http://www.canon.fr/For_Home, as referenced in available data) provides access to a wealth of information about their products. You may also find contact information for Canon’s customer support team, allowing you to directly address any specific questions or concerns you may have about your P170-DH. Regularly checking the site ensures you have the latest updates and assistance.

jazz piano progressions pdf

Bill Boyd’s 1997 publication details essential jazz chord progressions‚ alongside resources like the Jazz Piano Equation and Hal Leonard materials‚ offering a solid foundation.

What are Jazz Piano Progressions?

Jazz piano progressions are sequences of chords‚ fundamentally building blocks for improvisation and composition within the jazz idiom. Unlike simple harmonic movements‚ they often incorporate extensions‚ alterations‚ and substitutions‚ creating richer‚ more complex sounds. Resources like Bill Boyd’s Jazz Chord Progressions (1997‚ Hal Leonard) meticulously document these structures.

These progressions aren’t merely theoretical; they’re actively used in countless jazz standards. Understanding them unlocks the ability to analyze‚ learn‚ and ultimately create jazz music. The Jazz Piano Equation and materials from Hal Leonard further illustrate how these chord sequences function‚ providing practical exercises for mastering them. They move beyond basic major/minor‚ embracing diminished chords and harmonic circles.

Why Study Jazz Piano Progressions?

Studying jazz piano progressions is crucial for any aspiring jazz musician‚ offering a pathway to improvisation and harmonic understanding. Resources like Bill Boyd’s work (1997) and Hal Leonard materials provide a structured approach to learning these essential patterns. Mastery allows for deeper analysis of jazz standards and the styles of masters like Keith Jarrett and Jay Lacy.

Furthermore‚ understanding progressions facilitates composition and arranging. The Jazz Piano Equation and associated exercises build technical skill and harmonic awareness. Exploring progressions in all 12 keys‚ as detailed in available PDFs‚ expands musical versatility. Ultimately‚ it’s about unlocking the language of jazz and developing a personal voice within the genre.

Fundamental Chord Progressions

Jazz chord progressions‚ detailed in resources like Bill Boyd’s PDF‚ often center around patterns like ii-V-I‚ I-vi-ii-V‚ and the classic I-IV-V-I.

ii-V-I Progression

The ii-V-I progression is arguably the most fundamental building block in jazz harmony‚ extensively covered in resources like Bill Boyd’s Jazz Chord Progressions PDF. This progression creates a strong pull towards resolution‚ functioning as a harmonic cadence.

In the key of C major‚ this translates to Dm7 – G7 – Cmaj7. Understanding voicings‚ as explored in Hal Leonard materials‚ is crucial. Practicing this progression in all 12 keys‚ as suggested in various exercises‚ solidifies its application.

The ii-V-I isn’t just a static chord change; it’s a springboard for improvisation and harmonic variation. Boyd’s work likely details substitutions and alterations to this core progression‚ enhancing its harmonic richness and complexity. Mastering this progression unlocks countless possibilities within jazz piano.

I-vi-ii-V Progression

The I-vi-ii-V progression‚ a common extension of the ii-V-I‚ adds a pre-dominant chord‚ creating a more colorful harmonic journey. Resources like Bill Boyd’s Jazz Chord Progressions PDF likely detail its construction and variations. In C major‚ this becomes Cmaj7 – Am7 – Dm7 – G7.

This progression offers a smoother transition than a direct ii-V-I‚ providing a gentler harmonic movement; Hal Leonard materials would likely showcase different voicings to emphasize this quality. Practicing in all keys‚ as recommended in exercises‚ is vital for internalization.

Understanding how to embellish this progression – adding extensions or alterations – is key‚ potentially covered within Boyd’s work. It’s a versatile progression used extensively in jazz standards and provides a solid foundation for improvisation.

I-IV-V-I Progression

The I-IV-V-I progression‚ a foundational element in many musical styles‚ including jazz‚ provides a strong sense of resolution. While seemingly simple‚ its application within jazz involves sophisticated voicings and harmonic extensions. Bill Boyd’s PDF likely explores these nuances‚ demonstrating how to jazz up this classic structure.

In C major‚ this translates to Cmaj7 – Fmaj7 – G7 – Cmaj7. Hal Leonard resources would likely offer variations and substitutions to add complexity. Mastering this progression in all 12 keys‚ as suggested in practice exercises‚ is crucial for fluency.

Analyzing how jazz masters utilize this progression – perhaps through studying examples – reveals its versatility. It serves as a building block for more complex harmonic ideas‚ detailed in resources like the Jazz Piano Equation.

Common Jazz Chord Voicings

Jazz chord voicings‚ detailed in resources like Boyd’s PDF and Hal Leonard materials‚ include shell voicings‚ rootless voicings‚ and upper structure triads.

Shell Voicings

Shell voicings represent a foundational technique in jazz piano‚ offering a streamlined approach to harmonic accompaniment. These voicings typically involve playing only the essential notes of a chord – the root‚ third‚ and seventh – omitting the fifth to create a lighter‚ more open sound. Resources like Bill Boyd’s Jazz Chord Progressions PDF and materials from Hal Leonard demonstrate how shell voicings facilitate smooth voice leading and harmonic clarity.

They are particularly useful for comping behind soloists‚ allowing for greater rhythmic flexibility and harmonic subtlety. Mastering shell voicings provides a strong base for exploring more complex chord voicings and harmonic concepts. The simplicity of these voicings also makes them ideal for beginners learning to navigate jazz harmony‚ as highlighted in various online tutorials and PDF guides.

Rootless Voicings

Rootless voicings are a sophisticated harmonic technique frequently employed in jazz piano‚ building upon the foundation of shell voicings. As the name suggests‚ these voicings omit the root of the chord‚ creating a more ambiguous and harmonically rich sound. Resources like the Bill Boyd PDF and Hal Leonard materials showcase how rootless voicings rely on the bass player or preceding chords to establish the tonal center.

This technique encourages greater harmonic movement and allows for smoother transitions between chords. They often incorporate extensions like 9ths‚ 11ths‚ and 13ths‚ adding color and complexity. Mastering rootless voicings‚ as explored in online tutorials‚ is crucial for developing a professional jazz piano sound and understanding advanced harmonic concepts.

Upper Structure Triads

Upper Structure Triads (USTs) represent a more advanced voicing technique‚ building upon shell and rootless voicings to create complex harmonic textures. The Bill Boyd – Jazz Chord Progressions PDF and resources from Hal Leonard demonstrate how USTs involve superimposing a triad over a seventh chord‚ creating tensions and resolutions.

Essentially‚ a triad is played above the existing chord tones‚ adding color and harmonic interest. These triads are often chosen to create specific intervals against the underlying chord‚ like a major triad over a dominant 7th. Understanding USTs‚ alongside exercises found in online tutorials‚ unlocks a deeper understanding of jazz harmony and allows for more sophisticated improvisational choices.

Advanced Harmonic Concepts

Jazz chord progressions delve into diminished chords‚ harmonic circles‚ and chromaticism‚ explored in PDFs like Bill Boyd’s work‚ expanding harmonic palettes significantly.

Diminished Chord Progressions

Diminished chord progressions represent a crucial element within advanced jazz harmony‚ offering unique color and movement. Resources like Bill Boyd’s Jazz Chord Progressions PDF illuminate how these chords function as passing chords‚ creating tension and release;

The document specifically details progressions utilizing diminished chords moving in minor thirds‚ a common technique for smooth voice leading. These progressions often resolve to more stable chords‚ adding a sophisticated touch to improvisations and compositions. Understanding these concepts‚ as presented in available PDFs‚ unlocks a deeper understanding of jazz harmonic language.

Practicing these progressions in all keys‚ as suggested by various exercises‚ is vital for internalization and fluency. Mastering diminished chord usage elevates harmonic vocabulary and improvisational skills.

Harmonic Circle Progressions

Harmonic circle progressions‚ a sophisticated jazz technique‚ involve chord changes moving through all twelve chromatic notes in the bass line. Documents‚ including those referenced in Bill Boyd’s work and related PDFs‚ explain how these progressions create a compelling harmonic journey.

These progressions often utilize diminished chords and altered dominants to facilitate smooth transitions between keys. The Jazz Piano Equation and similar resources demonstrate practical applications for improvisation and composition. Understanding the underlying theory‚ as detailed in available materials‚ is key to effective implementation.

Exercises focusing on these progressions‚ often found in practice PDFs‚ help internalize the movement and develop harmonic awareness.

Chromaticism in Jazz Progressions

Chromaticism‚ the use of notes outside the diatonic scale‚ adds color and complexity to jazz progressions. Resources like Bill Boyd’s Jazz Chord Progressions PDF and materials from Hal Leonard demonstrate how chromatic passing chords and altered harmonies enrich harmonic movement.

These techniques often involve approaching target chords by half-steps‚ creating tension and release. Understanding chromaticism is crucial for advanced improvisation and arranging. Documents detailing harmonic concepts‚ alongside exercises‚ help musicians internalize these sounds.

The Jazz Piano Equation and related tutorials showcase practical applications‚ enabling players to navigate chromatic passages with confidence and musicality.

Resources for Learning

Bill Boyd’s 1997 Jazz Chord Progressions PDF‚ alongside Hal Leonard resources‚ and online tutorials‚ provide comprehensive learning materials for aspiring jazz pianists.

Bill Boyd ― Jazz Chord Progressions PDF

Bill Boyd’s 1997 Jazz Chord Progressions‚ available as a 51.3 MB PDF‚ is a cornerstone resource for jazz piano study. This document‚ uploaded October 2nd‚ 2013‚ and receiving 13 likes on Worship Life‚ systematically explores harmonic foundations.

It delves into essential chord voicings and progressions‚ offering a practical approach to understanding jazz harmony. The PDF serves as a valuable companion for musicians seeking to expand their harmonic vocabulary and improvisational skills. Boyd’s work is frequently referenced alongside Hal Leonard materials.

The resource is particularly useful for those wanting to analyze and apply progressions‚ building a strong theoretical base for performance and composition. It’s a highly recommended starting point for serious jazz piano students.

Hal Leonard Jazz Piano Resources

Hal Leonard Corporation offers a comprehensive suite of jazz piano resources‚ frequently complementing materials like Bill Boyd’s Jazz Chord Progressions PDF. Their publications‚ including intermediate voicing books from 1991‚ provide structured learning paths for aspiring jazz pianists.

These resources cover a wide range of topics‚ from fundamental chord progressions to advanced harmonic concepts‚ often incorporating exercises to solidify understanding. Hal Leonard materials are known for their clarity and accessibility‚ making them suitable for self-study or classroom use.

They often feature song examples demonstrating the application of theoretical concepts‚ bridging the gap between theory and practice. These resources are invaluable for building a strong foundation in jazz harmony and improvisation.

Online Jazz Piano Tutorials & PDFs

Numerous online resources supplement printed materials like Bill Boyd’s Jazz Chord Progressions PDF‚ offering diverse learning approaches. Many websites provide free jazz piano tutorials‚ covering essential chord voicings and progressions‚ often demonstrated in keys like C minor.

These digital resources frequently include downloadable PDFs containing exercises – such as descending in thirds – designed to improve technical skills and harmonic understanding. Some tutorials focus on specific techniques‚ like diminished chord progressions or harmonic circle movements.

Exploring these online platforms allows for personalized learning‚ catering to different skill levels and learning styles. They often complement traditional methods‚ providing additional practice material and alternative explanations of complex concepts.

Applying Progressions to Different Keys

PDF exercises detail practicing chord progressions through all 12 major and minor keys‚ utilizing root notes for comprehensive harmonic application and skill development.

Practicing in All 12 Keys

Mastering jazz piano progressions demands consistent practice across all twelve keys. Resources like the Bill Boyd ⎼ Jazz Chord Progressions PDF emphasize this crucial aspect of development. The provided document outlines exercises specifically designed to facilitate this process‚ guiding musicians through root notes for each key.

This systematic approach ensures a thorough understanding of harmonic relationships‚ moving beyond rote memorization to genuine musical fluency. By consistently applying progressions in different tonal centers‚ you build a strong internal ear and develop improvisational confidence. The 74-page document offers a structured path‚ enabling you to internalize these concepts effectively. Don’t simply learn *a* progression; learn it in *every* key!

Transposing Chord Progressions

The ability to transpose jazz piano progressions is fundamental to musical versatility. Utilizing resources like the Bill Boyd ⎼ Jazz Chord Progressions PDF‚ musicians can efficiently adapt harmonic structures to various keys. The document provides a framework for understanding how progressions function‚ enabling seamless transposition.

Exercises within the PDF‚ and similar materials‚ focus on moving through all twelve major and minor keys‚ solidifying this skill. Transposing isn’t merely shifting notes; it’s understanding the relationships between chords. This builds a deeper harmonic awareness‚ crucial for improvisation and arrangement. Mastering transposition unlocks a broader palette of expressive possibilities‚ enhancing your overall musicianship.

Jazz Piano Exercises

Jazz Piano Beginner Exercise 2 focuses on minor seventh chords‚ while other exercises‚ found in resources like the Bill Boyd PDF‚ build technical skills.

Minor Seventh Chord Exercises

Minor seventh chords are foundational in jazz harmony‚ and dedicated practice is crucial for fluency. Resources like the Bill Boyd ― Jazz Chord Progressions PDF (dated October 2‚ 2013) implicitly support this through their progression examples.

Exercise 2‚ specifically mentioned in online resources‚ provides a direct approach to mastering these chords. Begin by practicing these chords in root position across all inversions. Focus on smooth voice leading between each chord change‚ a hallmark of jazz piano playing.

Extend this by applying these chords within simple ii-V-I progressions in various keys. The Jazz Piano Equation and Hal Leonard materials can provide further progression ideas. Consistent practice will build muscle memory and harmonic understanding‚ essential for improvisation and comping.

Descending in Thirds Exercises

Descending in thirds is a classic jazz piano exercise‚ enhancing fluidity and harmonic awareness. Referenced within discussions of jazz piano chord progressions‚ it’s a technique for developing melodic and harmonic connections. The Bill Boyd PDF‚ while not explicitly detailing this exercise‚ provides harmonic contexts where it can be applied effectively.

Begin by descending chromatically in thirds‚ starting from a chosen root. Then‚ apply this concept over common jazz chord progressions‚ like ii-V-I‚ creating melodic lines that outline the harmony. Julian Bradley’s work demonstrates this in C minor.

This exercise builds dexterity and ear training. Explore variations using different rhythms and articulations. Resources from Hal Leonard can offer further progression ideas to practice over.

Exploring Jazz Masters’ Progressions

Keith Jarrett and Jay Lacy exemplify advanced harmonic concepts; analyzing their styles‚ alongside resources like the Bill Boyd PDF‚ unlocks deeper understanding.

Analyzing Keith Jarrett’s Harmonic Style

Keith Jarrett’s improvisational genius stems from a deep understanding of harmonic movement‚ often subtly deviating from standard jazz chord progressions. His style isn’t about flashy complexity‚ but rather a nuanced approach to voicing and reharmonization. Studying his work‚ in conjunction with resources like Bill Boyd’s Jazz Chord Progressions PDF‚ reveals a masterful command of tension and release.

Jarrett frequently employs extended harmonies and altered chords‚ building upon fundamental progressions. He’s known for his use of space and melodic development over harmonic structures‚ rather than simply showcasing harmonic virtuosity. Examining transcriptions of his solos‚ alongside the foundational knowledge provided in resources from Hal Leonard‚ can illuminate his unique harmonic language. His approach blends elements of classical music with jazz‚ creating a distinctive and influential style.

Learning from Jay Lacy’s Chord Voicings

Jay Lacy’s rare book focuses on jazz guitar chords‚ but the underlying harmonic principles are directly applicable to piano. His voicings emphasize melodic content within the chords‚ creating a smoother and more sophisticated sound. Integrating Lacy’s concepts with a foundational understanding of jazz chord progressions – as detailed in resources like Bill Boyd’s PDF – expands harmonic vocabulary.

Lacy’s approach often involves utilizing upper structure triads and altered extensions‚ adding color and complexity to standard progressions. Studying his voicings alongside transcriptions of his playing reveals a focus on voice leading and creating interesting harmonic textures. Combining his techniques with the exercises found in Hal Leonard materials can significantly improve improvisational skills and harmonic awareness.

hcg 500 calorie diet plan pdf

HCG 500 Calorie Diet Plan: An Overview (February 16, 2026)

HCG diet plans, particularly the 500-calorie protocol, combine HCG hormone administration with a very low-calorie diet, aiming for rapid weight loss and improved well-being.

What is the HCG Diet?

The HCG (Human Chorionic Gonadotropin) diet is a weight-loss program that involves the use of HCG, a hormone naturally produced during pregnancy, alongside a severely restricted calorie intake. Typically, this involves consuming only 500 calories per day, focusing on lean proteins, specific vegetables, and limited fruits.

This regimen isn’t simply about calorie restriction; the HCG is believed to aid in mobilizing stored fat, making it more accessible for the body to use as energy. The diet’s origins trace back over 60 years, with proponents claiming it’s a safe and effective method for rapid weight loss – potentially 1-2 kg of fat daily. However, it’s crucial to understand that the HCG diet is a complex protocol requiring strict adherence and careful consideration.

The Role of HCG in Weight Loss

Proponents of the HCG diet believe the hormone plays a crucial role in facilitating weight loss, despite ongoing debate within the medical community. The theory suggests HCG helps to reset the hypothalamus, the part of the brain controlling metabolism, hunger, and fat storage. This, in turn, is thought to mobilize stored fat, making it more readily available for the body to burn, even with a drastically reduced calorie intake.

However, it’s important to note that the FDA has not approved HCG for weight loss and considers it ineffective for this purpose when not combined with calorie restriction. The weight loss experienced on the diet is largely attributed to the extremely low-calorie intake (500 calories), rather than the HCG itself.

Understanding the 500 Calorie Protocol

The 500-calorie protocol is a severely restrictive phase of the HCG diet, demanding strict adherence to approved foods and precise portion control for optimal results.

Why 500 Calories?

The extremely low 500-calorie intake within the HCG diet protocol is believed to mobilize stored fat for energy, while the HCG hormone purportedly prevents muscle and nutrient loss during this process. This calorie restriction aims to create a significant caloric deficit, forcing the body to utilize fat reserves.

Proponents suggest this approach allows for rapid weight loss – potentially 1-2 kg daily – by targeting abnormal fat deposits. However, it’s crucial to understand that such a low-calorie intake is significantly below recommended daily requirements and should only be undertaken under strict medical supervision. The combination with HCG is intended to mitigate the negative effects typically associated with very low-calorie diets.

HCG Dosage and Administration

Typically, the HCG diet involves administering HCG daily, often via subcutaneous injection, though oral drops are also available. A common dosage is 125 IU (International Units) daily, but this can vary based on individual needs and a healthcare professional’s guidance. It’s generally recommended to take HCG first thing in the morning.

Proper administration technique is vital for effectiveness. Self-injection requires careful instruction and adherence to sterile procedures. It’s essential to follow a doctor’s specific instructions regarding dosage, frequency, and method of administration. The HCG is used in conjunction with the 500-calorie diet, and is not a standalone weight loss solution.

Approved Foods List for the 500 Calorie HCG Diet

The HCG diet emphasizes lean proteins, specific vegetables, and limited fruits, all consumed in measured portions to maintain the strict 500-calorie daily intake.

Lean Protein Sources

HCG diet protocols heavily prioritize lean protein intake, crucial for preserving muscle mass during the very low-calorie phase; Approved sources typically include 3.5 ounces of skinless chicken breast, or a similar portion of lean ground beef (90% lean or higher).

White fish like cod, haddock, or tilapia are excellent choices, as are shrimp and other shellfish. A single egg or egg white is also permitted daily. It’s vitally important to weigh all protein servings raw before cooking, adhering strictly to the specified portion sizes.

These protein sources provide essential amino acids while remaining low in fat, supporting metabolic function and satiety throughout the diet. Remember, variety within these approved options can help maintain adherence and nutritional balance.

Vegetable Choices

The HCG diet allows for a limited selection of non-starchy vegetables, providing essential nutrients and fiber while remaining low in calories. Approved options include spinach, lettuce, tomatoes, asparagus, cabbage, onions, and cucumbers. These vegetables can be consumed in relatively generous quantities, helping to fill you up and reduce hunger.

However, it’s crucial to remember that all vegetable servings must be weighed raw to ensure adherence to the 500-calorie protocol. Avoid starchy vegetables like potatoes, corn, and peas, as they are too high in carbohydrates.

Focus on leafy greens and cruciferous vegetables for maximum nutritional benefit. Seasoning is limited, so explore using herbs and spices to enhance flavor without adding calories.

Fruit Options (Limited)

Fruit intake on the 500-calorie HCG diet is severely restricted due to its natural sugar content. While not entirely prohibited, fruit should be considered a treat and consumed in very small portions – typically one apple, orange, grapefruit, or a handful of berries per day, if included at all.

These fruits provide some essential vitamins and antioxidants, but exceeding the recommended amount can easily disrupt the strict calorie limit. Prioritize lower-sugar options like berries over higher-sugar fruits like bananas or grapes.

Remember to weigh the fruit raw to accurately track your calorie intake. Many individuals on the HCG diet choose to eliminate fruit entirely during the initial weight loss phase.

Sample 3-Day Meal Plan

A typical HCG diet meal plan focuses on lean proteins, vegetables, and limited fruits, consumed in small, measured portions throughout the day for optimal results.

Day 1 Meal Ideas

Day 1 of the 500-calorie HCG diet emphasizes lean protein and non-starchy vegetables. Begin with a 100-gram portion of grilled chicken breast for lunch, paired with 200 grams of steamed spinach. A mid-afternoon snack could be a small apple (approximately 50 grams).

Dinner should consist of 120 grams of baked white fish, such as cod or tilapia, alongside 150 grams of asparagus. Remember to weigh all food before cooking, adhering to raw measurements. Throughout the day, prioritize water intake – at least 64 ounces – especially two glasses before each meal. This supports the HCG protocol and aids in satiety.

Avoid oils, sugars, and processed foods entirely.

Day 2 Meal Ideas

Day 2 continues the focus on lean protein and low-calorie vegetables within the 500-calorie limit. Start with a 100-gram serving of shrimp, steamed or grilled, accompanied by 200 grams of green beans. A small handful of berries (around 50 grams) can serve as a mid-afternoon snack, providing a touch of sweetness.

For dinner, enjoy 120 grams of lean ground turkey (99% lean) prepared simply, alongside 150 grams of kale. Remember the crucial rule: weigh all portions in their raw state before cooking. Consistent hydration is key – aim for a minimum of 64 ounces of water daily, including two glasses before meals.

Strictly avoid any added fats, sugars, or processed items.

Day 3 Meal Ideas

Day 3 maintains the strict 500-calorie regimen with another emphasis on lean protein and non-starchy vegetables. Begin your day with a 100-gram portion of chicken breast, baked or poached, paired with 200 grams of spinach. A small apple (approximately 80 grams) can be enjoyed as a mid-afternoon snack, offering a limited fruit intake.

For dinner, consider 120 grams of white fish (cod or tilapia) seasoned simply, served with 150 grams of asparagus. Remember to weigh all food before cooking, adhering to raw measurements. Prioritize water intake – at least 64 ounces daily, including two glasses before each meal, is essential.

Avoid all sugars, oils, and processed foods.

Important Considerations & Reminders

Success relies on strict adherence: weigh all food raw, drink ample water (64oz minimum), and be aware of potential, though typically mild, side effects.

Water Intake Requirements

Hydration is paramount during the HCG diet, especially when following the 500-calorie protocol. Consuming sufficient water aids in metabolic processes, helps flush out toxins released during rapid fat mobilization, and can even help suppress appetite;

The recommended daily intake is a minimum of 64 ounces – that’s roughly one gallon – of water. Crucially, the provided resources emphasize drinking at least two tall glasses of water before each meal. This pre-meal hydration contributes to a feeling of fullness, potentially reducing overall calorie consumption and supporting adherence to the strict diet.

Adequate water intake also supports kidney function, which is vital when the body is processing increased levels of fat. Prioritizing hydration is a non-negotiable aspect of the HCG diet for optimal results and well-being.

Weighing Food (Raw Measurements)

Accuracy is key when adhering to the 500-calorie HCG diet protocol. The provided documentation consistently stresses the importance of weighing all food servings in their raw, uncooked state. This is a critical step to ensure precise calorie counting and prevent accidental overconsumption, which could hinder weight loss progress.

Cooking methods can significantly alter the weight and volume of food. Therefore, measuring before cooking provides a more reliable calorie estimate. The HCG diet demands strict adherence to portion sizes, and relying on estimations or visual cues is discouraged.

Investing in a kitchen scale is highly recommended. Consistent, accurate raw measurements are fundamental to the success of this very low-calorie plan and maximizing its potential benefits.

Potential Side Effects

The HCG diet, due to its extremely low-calorie nature, can induce several side effects. Common experiences include fatigue, headaches, and irritability. Some individuals report experiencing muscle weakness or sensitivity to cold. Digestive issues like constipation are also frequently noted, stemming from the limited dietary intake.

Because of the significant calorie restriction, feelings of hunger and potential emotional distress, including mood swings, are common. It’s crucial to maintain adequate hydration – at least 64 ounces of water daily – to mitigate some of these effects.

Consulting a healthcare professional before starting is vital to assess individual risk factors and manage any adverse reactions effectively.

HCG Diet Stages

The HCG diet typically involves distinct phases: weight loss with HCG and a restricted diet, followed by stabilization and long-term maintenance phases.

Stage One: Weight Loss Phase

Stage one of the HCG weight loss program fundamentally combines initiating HCG injections or drops with adherence to the strict, very low-calorie diet plan – typically around 500 calories daily. This phase is designed to mobilize and burn stored fat, leading to significant weight reduction.

During this initial stage, individuals are expected to meticulously follow the approved foods list, focusing on lean proteins, specific vegetables, and limited fruit intake. It’s crucial to weigh all food portions raw to ensure accurate calorie counting. Consistent HCG administration, alongside diligent dietary compliance, is key to maximizing results during this intensive weight loss period.

This phase aims to reset metabolic processes and prepare the body for subsequent stages focused on stabilization and maintenance.

Long-Term Maintenance After the HCG Diet

Successful long-term maintenance involves gradually transitioning to a normal diet while preventing weight regain through mindful eating and sustained lifestyle changes.

Transitioning to a Normal Diet

Following the strict 500-calorie HCG diet phase, a careful and gradual reintroduction of calories is crucial. Avoid immediately returning to previous eating habits, as this significantly increases the risk of rapid weight regain. Begin by adding small portions of healthy fats and complex carbohydrates each day.

Focus on incorporating lean proteins, non-starchy vegetables, and limited fruits. Prioritize whole, unprocessed foods and continue to practice portion control. It’s recommended to increase caloric intake slowly, monitoring your weight and adjusting as needed. This phased approach helps your metabolism adapt and supports sustainable weight management. Remember, the goal isn’t just weight loss, but establishing a healthier, long-term lifestyle.

Preventing Weight Regain

Sustaining weight loss after the HCG diet requires ongoing commitment to healthy habits. Continue prioritizing whole, unprocessed foods, focusing on lean proteins and plenty of non-starchy vegetables. Regular physical activity is essential – aim for at least 30 minutes of moderate-intensity exercise most days of the week.

Mindful eating practices, such as paying attention to hunger cues and practicing portion control, are also vital. Address any emotional eating patterns that may have contributed to weight gain previously. Consistent monitoring of your weight and making adjustments to your diet and exercise routine as needed will help maintain long-term success.

brother hl 2270dw manual

Brother HL-2270DW Manual: Comprehensive Guide

This comprehensive guide details setup, printing, maintenance, and troubleshooting for the Brother HL-2270DW. It covers features like duplex printing and barcode functionality.

Welcome to the Brother HL-2270DW monochrome laser printer! This manual serves as a complete resource for understanding and utilizing all the features of your new printer. The HL-2270DW is designed for efficient and reliable printing in both home and office environments. It’s compatible with a range of Brother models including HL-2250, HL-2250DN, and others.

This printer boasts impressive specifications and capabilities, offering high-quality prints with fast speeds. Whether you’re printing documents, reports, or essential paperwork, the HL-2270DW delivers consistent performance. This guide will walk you through everything from initial setup and driver installation to advanced features and troubleshooting common issues, ensuring a seamless printing experience.

Key Features and Specifications

The Brother HL-2270DW offers a robust set of features designed for productivity. Key highlights include high-speed monochrome laser printing, automatic duplex (two-sided) printing, and versatile connectivity options – both wired and wireless networking. It supports various paper sizes and types, ensuring flexibility for diverse printing needs.

Specifications include: Print speed up to 26 pages per minute, a monthly print volume of up to 8,500 pages, and a 250-sheet paper tray capacity. It utilizes toner cartridges TN-2235/TN-2275 and a separate drum unit. The printer is compatible with Windows and macOS operating systems. Advanced features like barcode printing (HL-2250DN/HL-2270DW specific) and a web browser interface enhance usability and control.

Setting Up Your Printer

Initial setup involves unboxing, driver installation, and network connection (wired or wireless). Follow the quick setup guide for a seamless experience.

Unboxing and Initial Setup

Carefully unpack your Brother HL-2270DW printer, ensuring all packing materials are removed from both inside and outside the box. Verify that all included accessories are present: the printer itself, power cord, toner cartridge, drum unit, and accompanying documentation – including the quick setup guide and safety instructions.

Remove the protective tape and plastic sheets from both the exterior and interior of the printer. Install the toner cartridge and drum unit following the diagrams in the setup guide. Connect the power cord to the printer and a grounded electrical outlet. Power on the printer; it will initiate a self-test. The initial setup process is now complete, preparing the printer for driver and software installation.

Installing Drivers and Software

To install the necessary drivers and software, insert the installation disc provided with your Brother HL-2270DW. Alternatively, download the latest versions from the official Brother support website. Run the downloaded or disc-based installer and follow the on-screen prompts.

The installation process typically includes selecting your language, accepting the license agreement, and choosing the installation type (full or custom). A custom installation allows you to select specific components. Ensure your printer is powered on and connected to your computer (via USB or network) during installation. Once complete, test the installation by printing a test page from your computer.

Connecting to a Network (Wired & Wireless)

For a wired connection, connect an Ethernet cable from your Brother HL-2270DW to an available port on your router or network switch. The printer will automatically obtain an IP address via DHCP. For wireless setup, access the printer’s control panel and navigate to the network settings. Select your Wi-Fi network from the list of available networks and enter the password when prompted.

Alternatively, use the Brother Mobile Connect app or the Web Browser Interface to configure wireless settings. Once connected, verify the connection by printing a network configuration page from the printer’s menu. Ensure your computer and printer are on the same network.

Understanding the Control Panel

The control panel features buttons for Go, Stop/Clear, and Start, alongside an LCD display showing printer status and error messages for easy operation.

Button Functions and Indicators

The Brother HL-2270DW control panel utilizes several key buttons for printer operation. The ‘Go’ button initiates printing or confirms selections within the menu. ‘Stop/Clear’ halts current processes and acknowledges error messages. ‘Start’ begins the printing process after a print job is selected.

Indicator lights provide crucial status information. The ‘Toner’ light illuminates when toner is low, prompting replacement. The ‘Drum’ light signals the drum unit’s nearing end-of-life. A ‘Paper Jam’ indicator alerts users to obstructions. The ‘Ready’ light confirms the printer is operational, while the ‘Error’ light signifies a problem requiring attention. Understanding these indicators ensures efficient printer management and quick issue resolution.

Display Messages and Error Codes

The Brother HL-2270DW’s display presents various messages and error codes to assist users. Common messages include “Toner Low,” prompting cartridge replacement, and “Drum End,” indicating the drum unit needs attention. Error codes, such as “50,” typically signify a paper jam, requiring inspection and removal of obstructions.

Decoding these codes is crucial for effective troubleshooting. “60” often indicates a printer cover is open, while other codes may relate to connectivity or internal malfunctions. Referencing the printer’s documentation or the Brother support website with the specific error code provides detailed solutions. Understanding these messages minimizes downtime and ensures optimal printer performance.

Printing Basics

Initiate printing by ensuring proper paper loading and a stable connection. Utilize the printer driver from your computer to send print jobs easily.

Loading Paper Correctly

Proper paper handling is crucial for optimal printing with your Brother HL-2270DW. Begin by lowering the paper tray and adjusting the paper guides to fit the paper size you’re using. Ensure the guides aren’t too tight, which can cause jams, or too loose, leading to skewed prints.

Fan the stack of paper before loading to prevent sheets from sticking together. Load paper with the print side facing down. The maximum paper capacity is 250 sheets of standard weight paper. Avoid overfilling the tray.

Supported paper types include plain paper, recycled paper, and envelopes. Always refer to the printer’s specifications for compatible paper weights and sizes to prevent issues. Correct loading minimizes paper feed problems and ensures consistent print quality.

Basic Printing Operations

Initiating a print job with your Brother HL-2270DW is straightforward. First, ensure the printer is powered on and connected to your computer. Open the document you wish to print from your chosen application – like Microsoft Word or Adobe Reader.

Navigate to the “File” menu and select “Print.” In the print dialog box, select “Brother HL-2270DW” as your printer. Adjust print settings like paper size, orientation (portrait or landscape), and print quality as needed.

Click the “Print” button to begin. The Status Monitor will display the print progress. For multiple copies, specify the desired number before clicking print. Always check the preview to confirm your settings.

Printing from Different Applications

The Brother HL-2270DW seamlessly integrates with various applications. From standard office suites like Microsoft Office (Word, Excel, PowerPoint) to Adobe Acrobat for PDF documents, printing is generally consistent. However, specific application settings can influence output.

When printing from web browsers, ensure the webpage is fully loaded before selecting “Print.” Preview the print area to avoid unwanted elements. For image editing software, select appropriate resolution settings for optimal print quality.

Some applications may offer advanced printing options, like booklet printing or scaling. Explore these features within each application’s print dialog box. Always verify printer selection and settings before initiating the print process.

Advanced Printing Features

Explore enhanced capabilities like duplex (two-sided) printing, secure print for confidential documents, and specialized barcode printing—exclusive to the HL-2270DW model.

Duplex Printing (Two-Sided Printing)

The Brother HL-2270DW offers automatic duplex printing, significantly reducing paper consumption and costs. This feature allows you to print on both sides of a sheet of paper effortlessly. To enable duplex printing, access the print settings within your application and select the “Two-Sided Printing” option.

You can typically choose between long-edge binding (like a book) or short-edge binding (like a notepad). Ensure your paper type is supported for duplex printing; heavier paper stocks may not feed correctly. The printer automatically flips the paper for the second side, creating professional-looking documents with a reduced environmental impact. Experiment with different settings to achieve your desired output.

Secure Print Functionality

The Brother HL-2270DW incorporates secure print functionality, enhancing document confidentiality. This feature requires a PIN to be entered on the printer’s control panel before a print job is released. To utilize secure print, select the “Secure Print” option within the printer driver settings before initiating the print.

The printer will then hold the job in its memory until you enter the correct PIN on the printer itself. This prevents sensitive documents from being left unattended in the output tray. Secure print is ideal for environments where document security is paramount. Remember to note the assigned PIN for retrieval; otherwise, the job will be deleted after a set period.

Printing Barcodes (HL-2270DW Specific)

The Brother HL-2270DW uniquely supports direct barcode printing, a valuable feature for retail, inventory, and labeling applications. This functionality allows you to print various barcode symbologies directly from your applications, utilizing embedded barcode fonts and control commands. Accessing this feature typically involves selecting specific barcode settings within your printing software or utilizing specialized barcode printing utilities.

The printer supports barcode human readable lines, quiet zones, and unit adjustments. Detailed command references are available in the printer’s documentation for precise control over barcode parameters. Ensure your software is configured to send the correct barcode commands for optimal results. This capability streamlines barcode creation without needing external software.

Maintenance and Troubleshooting

Regular cleaning, toner replacement (TN-2235/TN-2275), and drum unit changes are vital for optimal performance. This section guides you through these procedures and common issue resolution.

Cleaning the Printer

Maintaining a clean printer is crucial for consistent print quality and longevity. Regularly cleaning the interior removes dust and toner particles that can cause smudges or jams. Begin by powering off the printer and disconnecting the power cord for safety. Open the front cover and carefully remove the toner cartridge and drum unit.

Use a soft, lint-free cloth to gently wipe the interior surfaces, focusing on the areas where toner tends to accumulate. Avoid using abrasive cleaners or excessive moisture. Pay particular attention to the corona wire within the drum unit – it’s delicate and easily damaged.

Clean the exterior of the printer with a slightly damp cloth. Ensure no liquid enters the internal components. After cleaning, reinstall the drum unit and toner cartridge, then reconnect the power cord and power on the printer. Regular cleaning prevents print defects and ensures reliable operation.

Replacing the Toner Cartridge (TN-2235/TN-2275)

When print quality fades, it’s time to replace the toner cartridge (TN-2235 or TN-2275). First, ensure the printer is powered on. Open the front cover to access the toner cartridge and drum unit assembly. Press the green release button to unlock and gently pull out the entire unit.

Remove the old toner cartridge from the drum unit by pressing the blue lever and lifting it out. Unpack the new toner cartridge, remove the protective cover, and gently shake it to distribute the toner. Align the new cartridge with the drum unit and push until it clicks into place.

Reinstall the combined drum unit and toner cartridge back into the printer, ensuring it locks securely. Close the front cover. The printer will automatically recognize the new cartridge and resume printing. Dispose of the used cartridge responsibly.

Replacing the Drum Unit

The drum unit requires replacement after several toner cartridge cycles, typically indicated by print quality issues like streaks or spots. Begin by powering on the printer and opening the front cover to access the drum and toner assembly. Press the green release button and carefully remove the combined unit.

Separate the drum unit from the toner cartridge by pressing the blue lever. Remove the protective cover from the new drum unit and gently shake it to distribute the toner. Align and insert the new drum unit, ensuring it clicks securely into place.

Reinstall the drum unit and a new toner cartridge back into the printer, locking it firmly. Close the front cover. The printer will reset the page counter. Dispose of the old drum unit responsibly, following local regulations.

Resolving Common Issues

This section provides solutions for paper jams, connectivity problems, and error codes encountered with the Brother HL-2270DW printer, ensuring smooth operation.

Paper Jams: Identification and Removal

Paper jams can disrupt printing, but are usually easily resolved. First, power off the Brother HL-2270DW. Carefully check all access points: the paper tray, the rear cover, and inside the printer itself. Gently remove any jammed paper, pulling in the direction of the paper path – avoid tearing.

Inspect for small scraps that might remain. Ensure all paper guides are correctly adjusted to prevent future jams. If a jam persists, check the paper type; using unsupported paper can cause issues. Refer to the printer’s display for specific jam locations indicated by error messages. Always power the printer back on after completely removing all obstructions.

Connectivity Problems and Solutions

Experiencing connectivity issues with your Brother HL-2270DW? First, verify the network cable is securely connected for wired connections, or confirm Wi-Fi is enabled and the correct password entered. Restart both your printer and router. Ensure the printer is within range of the wireless signal.

Check the printer’s IP address via the control panel and ping it from a computer to confirm network access. Update the printer’s drivers and firmware through the web interface. If using a USB connection, try a different cable or port. Consult the Brother support website for specific troubleshooting steps related to your operating system.

Error Code Troubleshooting Guide

Encountering an error code on your Brother HL-2270DW? Refer to the printer’s display panel for the specific code. Common codes indicate paper jams, toner issues, or drum unit problems. Consult the manual or Brother’s support website for a detailed explanation of each code and recommended solutions.

For example, a “Replace Toner” message requires a new TN-2235/TN-2275 cartridge. A “Replace Drum” code signals the need for a new drum unit. If the error persists after addressing the indicated issue, try restarting the printer. If problems continue, contact Brother support for further assistance, providing the exact error code.

Web Browser Interface

Access printer settings and perform network configuration, including firmware updates, directly through your web browser using the HL-2270DW’s built-in web server.

Accessing the Web Interface

To access the Brother HL-2270DW’s web interface, first, ensure your printer is connected to the same network as your computer. Open a web browser (like Chrome, Firefox, or Edge) and enter the printer’s IP address into the address bar. You can find the IP address printed on a network configuration page, obtainable through the printer’s control panel menu – typically under Network settings.

Alternatively, you can use the Brother Status Monitor software installed on your computer to locate the IP address. Once entered correctly, the printer’s web interface will load, presenting a dashboard with various configuration options. This allows remote management of printer settings without directly interacting with the device itself.

Network Configuration via Web Interface

The web interface provides extensive network configuration options for the Brother HL-2270DW. Within the ‘Network’ section, you can verify the current IP address, subnet mask, and default gateway. You can switch between static and DHCP IP addressing. For a static IP, manually enter the desired settings.

DHCP automatically assigns an IP address from your router. The interface also allows you to configure wireless settings, including SSID and security protocol (WEP, WPA, WPA2). You can test the network connection and print a network configuration page directly from the web interface to confirm settings. Proper network setup ensures seamless printing across your network.

Firmware Updates

Regular firmware updates are crucial for maintaining optimal performance and security of your Brother HL-2270DW. Access the ‘Firmware Update’ section within the web interface to check for available updates. The printer will automatically scan the Brother support website for the latest version.

If an update is found, download it to your computer and then upload it to the printer via the web interface. Do not interrupt the update process, as this could damage the printer’s firmware. The printer will restart automatically upon completion. Firmware updates often include bug fixes, enhanced features, and improved compatibility.

Additional Resources

For further assistance, visit the official Brother support website for FAQs, downloadable drivers, and troubleshooting guides specific to the HL-2270DW model.

Brother Support Website

The official Brother support website is an invaluable resource for HL-2270DW owners. You’ll find a wealth of information, including downloadable drivers for various operating systems (Windows, macOS), ensuring optimal printer performance and compatibility. Detailed FAQs address common issues, potentially resolving problems quickly without needing direct support.

Furthermore, the website provides access to the complete user manual in PDF format, offering in-depth guidance on all printer functions. Troubleshooting guides assist with error codes and connectivity problems. You can also find firmware updates to enhance printer functionality and security. Brother’s online support portal often includes helpful video tutorials demonstrating procedures like toner replacement and paper jam clearance, making maintenance easier.

Frequently Asked Questions (FAQ)

Q: How do I clear a paper jam? A: Refer to the manual’s section on paper jams, carefully removing any obstructions from the paper path. Q: What toner does the HL-2270DW use? A: It utilizes the TN-2235 or TN-2275 toner cartridge. Q: Can I print wirelessly? A: Yes, the HL-2270DW supports wireless connectivity after network setup.

Q: How do I install the drivers? A: Download the latest drivers from the Brother support website and follow the on-screen instructions; Q: What do the indicator lights mean? A: The manual details each light’s status and corresponding meaning. Q: How do I access the web interface? A: Enter the printer’s IP address into a web browser.

amc 8 2023 pdf

AMC 8 2023 PDF: A Comprehensive Guide

The 2023 AMC 8 problems and solutions are now freely downloadable! This guide provides access to the 25-question, multiple-choice exam held between January 17th and 23rd, 2023.

What is the AMC 8?

The AMC 8 is a prestigious, multiple-choice contest designed to challenge and inspire mathematically gifted students in eighth grade or below. It’s a cornerstone event for young mathematicians, fostering a love for problem-solving and analytical thinking. Administered by the American Mathematics Competitions (AMC), a part of the Mathematical Association of America (MAA), the AMC 8 serves as the first step in a series of competitions that can lead to national and international recognition.

The 2023 AMC 8, held between January 17th and January 23rd, consisted of 25 questions, each worth one point, testing students’ abilities in areas like counting, probability, geometry, and number theory. It’s not simply about memorizing formulas; the AMC 8 emphasizes creative problem-solving and logical reasoning. Access to the 2023 exam, including the problems and detailed step-by-step solutions, is now readily available in PDF format.

This accessibility allows students to review their performance, understand solution strategies, and prepare for future competitions. The availability of the 2023 materials is a valuable resource for both students and educators aiming to enhance mathematical skills and cultivate a passion for mathematics.

Eligibility and Registration for the 2023 AMC 8

Generally, the AMC 8 is open to all students in eighth grade or below, regardless of their school affiliation. There are no specific prerequisites beyond grade level. However, registration procedures are crucial for participation. Schools typically register students as a group through the AMC website, managing the process and ensuring proper test administration.

For the 2023 AMC 8, registration was completed prior to the exam dates of January 17th-23rd, 2023. Individual student registration isn’t typically offered; it’s primarily a school-based process. The availability of the 2023 exam materials in PDF format doesn’t alter the past registration requirements, but it does provide valuable resources for future participants.

While direct registration details for the 2023 exam are no longer relevant, understanding the process is vital for those planning to participate in subsequent AMC 8 competitions. Schools can find detailed registration guidelines and deadlines on the official AMC website, ensuring a smooth and compliant participation experience. Accessing the 2023 problems and solutions is independent of past registration status.

Key Dates for the 2023 AMC 8

The core timeframe for the 2023 AMC 8 competition spanned from January 17th to January 23rd, 2023. This seven-day window allowed for flexible test administration by participating schools, accommodating varying schedules and logistical considerations. However, a particularly significant date was Monday, January 23rd, 2023, at 11:59 PM Eastern Standard Time.

This specific time marked the official release of the 2023 AMC 8 Problems and Answers. Following this release, the complete set of test questions, alongside their corresponding solutions, became publicly available in PDF format. This allowed students and educators to review the exam, analyze performance, and gain valuable insights into the competition’s content and difficulty.

While the exam period itself has passed, these dates remain crucial for anyone seeking to study the 2023 materials. The release date is particularly important as it signifies when the full solutions became accessible. Accessing the PDF resources allows for self-assessment and preparation for future AMC 8 competitions, even outside the original testing window.

Exam Format: Structure and Scoring

The 2023 AMC 8 exam adhered to a standardized format designed to assess middle school students’ mathematical reasoning. The test consisted of 25 multiple-choice questions, each presenting a unique problem requiring careful thought and problem-solving skills. Students were provided with a dedicated time limit to complete the exam, encouraging efficient time management.

Scoring was straightforward: each correct answer earned the student one point. There was no penalty for incorrect answers, meaning students were encouraged to attempt every question, even if unsure of the solution. This approach promotes risk-taking and exploration of different problem-solving strategies.

No external aids, such as calculators, rulers, or protractors, were permitted during the exam. This emphasizes the importance of mental math, logical deduction, and a strong foundational understanding of mathematical concepts; The focus is on assessing inherent mathematical ability rather than reliance on tools. The PDF resources available allow students to practice under these same conditions.

Number of Questions and Point Values

The 2023 AMC 8 exam was comprised of a total of 25 questions, meticulously crafted to evaluate a student’s mathematical prowess. These questions spanned a range of topics, designed to challenge students at the middle school level. Each question presented a unique problem, requiring analytical thinking and a solid grasp of fundamental mathematical principles.

The scoring system for the AMC 8 is remarkably simple and direct. Each correctly answered question is awarded one point. This straightforward approach ensures that a student’s score directly reflects their number of accurate solutions. Importantly, there is no deduction for incorrect answers.

This “no penalty for guessing” policy encourages students to attempt every question on the exam, even if they are uncertain of the correct answer. It promotes a strategy of thoughtful engagement with all problems, maximizing the potential for earning points. The available 2023 AMC 8 PDF resources allow students to practice this strategy effectively.

Topics Covered in the 2023 AMC 8

The 2023 AMC 8 exam comprehensively assessed students’ understanding across several core mathematical areas. These included, but weren’t limited to, counting and probability, elementary number theory, algebra, geometry, and data analysis. Problems often required students to integrate concepts from multiple areas to arrive at a solution.

Specifically, students encountered questions involving arithmetic operations, fractions, decimals, percentages, ratios, and proportions. Number theory problems tested understanding of divisibility, prime numbers, and remainders. Algebraic thinking was crucial for solving equations and inequalities, while geometric problems focused on shapes, areas, and volumes.

Data analysis questions involved interpreting charts, graphs, and tables. The 2023 AMC 8 PDF resources provide a valuable opportunity to familiarize oneself with the breadth of topics covered. Thorough preparation necessitates a strong foundation in these areas, alongside the ability to apply mathematical reasoning to novel problems.

Difficulty Level and Preparation

The AMC 8 is designed to challenge high-performing middle school students, typically those in the 8th grade, though students of any age are eligible. The difficulty level is considered moderate, requiring more than just rote memorization of formulas. Problems emphasize problem-solving skills and mathematical reasoning, often presented in a non-routine manner.

Effective preparation for the 2023 AMC 8, and future exams, involves consistent practice with past papers. Utilizing the 2023 AMC 8 PDF is an excellent starting point, allowing students to become familiar with the exam’s style and question types. Supplementing this with additional practice problems from various sources is highly recommended.

Focus should be placed on strengthening foundational mathematical concepts and developing efficient problem-solving strategies. Time management is also crucial, as the exam requires completing 25 questions within a 75-minute timeframe. Reviewing solutions and understanding the underlying principles are key to improving performance.

Accessing the 2023 AMC 8 PDF

Fortunately, accessing the 2023 AMC 8 PDF containing the problems and solutions is readily available online. Several websites host the official document released after the exam period, which ran from January 17th to January 23rd, 2023. A simple web search for “2023 AMC 8 Problems and Solutions” will yield numerous results, directing you to downloadable PDFs.

These PDFs typically include the complete set of 25 questions, along with an answer key. Some resources also provide detailed, step-by-step worked solutions, invaluable for understanding the problem-solving approaches. Be sure to verify the source’s credibility to ensure you are accessing the official AMC materials.

Downloading the PDF allows for offline access, enabling students to practice without an internet connection. It’s a convenient way to review past problems and prepare for future AMC 8 competitions. Remember to save the file securely for future reference and study sessions.

Downloading the 2023 AMC 8 Problems

Downloading the 2023 AMC 8 problems is a straightforward process, with the official document readily accessible through various online platforms. Numerous websites offer the PDF containing all 25 questions from the exam held between January 17th and 23rd, 2023. A quick internet search using keywords like “Download 2023 AMC 8 Problems” will lead you to direct download links.

Before downloading, ensure the website appears reputable to guarantee you’re receiving the official AMC materials. The file is typically in PDF format, making it easily viewable on most devices. Once downloaded, you can save the document to your computer or mobile device for convenient offline access.

This allows students to practice at their own pace, without requiring an internet connection. Having the problems readily available is crucial for effective preparation and familiarization with the exam’s style and difficulty level. Remember to keep the downloaded file organized for easy retrieval during study sessions;

2023 AMC 8 Answer Key Availability

The official answer key for the 2023 AMC 8 exam was released on January 23, 2023, at 11:59 PM Eastern Standard Time. This key accompanies the 25-question multiple-choice exam, allowing students to verify their solutions and identify areas for improvement. Access to the answer key is typically bundled with the downloadable PDF containing the exam problems themselves.

Several websites specializing in math competition resources host the answer key alongside the problem set. These resources often present the answers in a clear and concise format, facilitating easy checking. Students can use the answer key to self-assess their performance and pinpoint specific concepts requiring further study.

It’s important to note that some platforms may require registration or a small fee to access the complete solution set, including step-by-step explanations. However, the basic answer key is generally available for free download from official sources and reputable math education websites. Utilizing the answer key effectively is a vital step in the learning process.

Step-by-Step Solutions for 2023 AMC 8 Problems

Beyond simply checking answers, comprehensive step-by-step solutions for the 2023 AMC 8 problems are readily available online. These detailed explanations are invaluable for understanding the underlying mathematical concepts and problem-solving techniques employed in each question. Several resources offer these solutions, often in PDF format, complementing the exam problems and answer key.

These solutions aren’t merely about arriving at the correct answer; they demonstrate the logical progression of thought required to tackle each problem effectively. They break down complex problems into manageable steps, illustrating various strategies like drawing diagrams, identifying patterns, and applying relevant formulas.

Accessing these detailed solutions allows students to learn from their mistakes and grasp the nuances of each problem. Some platforms offer video explanations alongside written solutions, catering to different learning styles. Utilizing these resources significantly enhances the learning experience and prepares students for future math competitions.

Official Release Date of the 2023 AMC 8

The official release of the 2023 AMC 8 problems and answers occurred at 11:59 PM on Monday, January 23, 2023, Eastern Standard Time. This marked the moment when students and educators could finally access the complete exam materials, including the problems themselves and the corresponding answer key.

Prior to this date, anticipation had been building among participants eager to review their performance and understand the solutions. The release was highly anticipated, allowing for self-assessment and focused study. The timing ensured a consistent experience for all test-takers, regardless of their location or testing window within the January 17th-23rd timeframe.

Following the official release, numerous websites and educational platforms promptly made the problems and solutions available for download, often in convenient PDF format. This accessibility facilitated widespread review and analysis, contributing to a deeper understanding of the exam’s content and difficulty level.

Where to Find Past AMC 8 Exams (Beyond 2023)

While the 2023 AMC 8 problems and solutions are readily available through various online resources, students seeking broader practice opportunities can explore archives of past exams. Accessing these older tests is crucial for comprehensive preparation and familiarization with the exam’s style and difficulty.

Several platforms offer collections of AMC 8 problems from previous years, often requiring membership or a subscription fee. However, many resources provide limited free access to sample questions or older exams. It’s important to verify the source’s legitimacy and ensure the problems are officially sanctioned.

Furthermore, the AMC website itself may offer a selection of past exams for purchase or access to members. Utilizing these resources, alongside the 2023 materials, allows students to build a strong foundation and refine their problem-solving skills. Consistent practice with a diverse range of problems is key to success.

Resources for AMC 8 Preparation

Beyond accessing the 2023 AMC 8 problems and solutions, a wealth of resources exists to bolster preparation. Numerous websites and publications cater specifically to middle school math competition training, offering practice problems, strategy guides, and even full-length mock exams.

Many online platforms provide interactive lessons covering the core mathematical concepts tested on the AMC 8. These platforms often feature personalized learning paths and adaptive assessments to identify areas needing improvement. Books dedicated to AMC 8 preparation are also valuable, providing detailed explanations and challenging problems.

Furthermore, consider joining a math club or seeking guidance from a qualified math tutor. Collaborative learning and personalized instruction can significantly enhance understanding and build confidence. Remember to utilize the official AMC website for updates, rules, and additional practice materials. A multifaceted approach is key to maximizing your potential.

Strategies for Solving AMC 8 Problems

Successfully tackling the AMC 8 requires a strategic approach beyond just mathematical proficiency. Begin by carefully reading each problem, identifying key information, and understanding what is being asked. Don’t immediately jump into calculations; consider if estimation or logical reasoning can provide a quick solution.

Time management is crucial. If you’re stuck on a problem, don’t dwell on it for too long. Move on and return to it later with a fresh perspective. Utilize the process of elimination to narrow down answer choices, even if you can’t determine the exact solution.

Practice working through problems under timed conditions to simulate the exam environment. Familiarize yourself with common problem types and develop efficient solution techniques. Remember, each correct answer earns one point, so attempting every problem is advisable. Reviewing the 2023 AMC 8 problems and solutions is an excellent way to refine these strategies.

Common Mistakes to Avoid on the AMC 8

Many students stumble on the AMC 8 due to preventable errors; A frequent mistake is misreading the problem – ensure you fully grasp what’s being asked before attempting a solution. Careless arithmetic errors are also common; double-check your calculations, especially with fractions or decimals.

Failing to manage time effectively can lead to rushing through problems and making silly mistakes. Avoid leaving questions blank, as there’s no penalty for incorrect answers. Don’t assume answers based on patterns without proper justification.

Another pitfall is overlooking important details within the problem statement. Thoroughly analyze all given information. Utilizing the 2023 AMC 8 problems and solutions for review can highlight these common errors, allowing you to learn from them and improve your accuracy. Practicing with past papers helps build confidence and reduces anxiety.

AMC Theatres Locations and Showtimes (Unrelated but Present in Search Results)

Interestingly, searches for the “2023 AMC 8 PDF” also frequently return results for AMC Theatres showtimes and locations; As of today, February 16, 2026, AMC Highlands Ranch 24 in Colorado, AMC River Park Square 20 in Spokane, Washington, and AMC Lakewood Mall 12 in Lakewood, Washington, are all displaying movie schedules.

Further locations include AMC Clifton Commons 16 in New Jersey, AMC CLASSIC Salina 10 in Kansas, AMC Rolling Hills 20 in Torrance, California, and AMC Regency 24. These theatres offer a variety of films and showtimes, with details available online regarding features and special offers.

This overlap in search results highlights the common use of the “AMC” acronym, leading to unrelated information appearing alongside resources for the American Mathematics Competition. It’s important to refine search terms for focused results.

barkan tv mount instructions

Barkan TV Mount Instructions: A Comprehensive Guide

Barkan offers diverse TV mounting solutions, with readily available installation videos and detailed assembly instructions for models like E317 and 3400.

Understanding Your Barkan TV Mount

Barkan TV mounts are designed for a range of screen sizes and types, including flat and curved displays. Before beginning, familiarize yourself with the specific model’s capabilities – full motion, tilt, or fixed – as features vary.

These mounts prioritize ease of installation, often incorporating tool-free tilt mechanisms (0 to 15 degrees) and leveling adjustments ( /-5 degrees) post-installation. Safety is paramount; always heed included warnings and instructions.

Understanding the swivel range (up to 40 degrees in some models) and extension capabilities (like the 11/28 cm extension) will help optimize your viewing experience. Review product pages for detailed content and ensure compatibility with your TV.

Identifying Mount Components

A typical Barkan TV mount kit includes a wall plate, a TV plate, and various adaptors (like the four adaptors labeled ‘C’). Screws are essential, and often multiple sizes are provided to accommodate different TV models.

Carefully unpack all components and compare them to the parts list in the assembly instructions. The kit will also contain hardware for attaching the wall plate to wall studs.

Familiarize yourself with the locking mechanisms and any tool-free adjustment features. Identifying each part before you start will streamline the installation process and ensure you have everything needed for a secure and proper mount.

Tools Required for Installation

Successful Barkan TV mount installation requires a few essential tools. A stud finder is crucial for locating wall studs accurately, ensuring a secure attachment. You’ll need a drill with appropriate drill bits for pilot holes and securing the wall plate.

A level is vital for ensuring the wall plate and subsequently the TV, are perfectly horizontal. A screwdriver (or drill with screwdriver bits) is needed for tightening screws.

A measuring tape helps with precise placement, and a pencil is useful for marking stud locations. While some mounts offer tool-free tilt adjustments, having a wrench set can be beneficial for certain hardware.

Pre-Installation Considerations

Prior to installation, verify wall type compatibility, confirm your TV’s size and weight align with the mount’s limits, and accurately locate wall studs.

Wall Type Compatibility

Determining your wall type is crucial for a secure Barkan TV mount installation. Most mounts are designed for standard wood stud walls, requiring direct attachment to wooden studs for optimal support.

However, compatibility varies; some Barkan mounts can be adapted for concrete or brick walls, but necessitate specialized anchors and drilling techniques.

Avoid mounting on drywall alone, as it lacks the necessary strength. Always consult the mount’s specifications and included safety instructions to confirm suitability for your specific wall construction. Improper wall attachment can lead to TV detachment and potential damage or injury.

TV Size and Weight Limits

Barkan TV mounts are engineered to support specific TV sizes and weights; exceeding these limits compromises safety. Carefully check the mount’s packaging and installation manual for the maximum screen size (diagonal measurement) and weight capacity in pounds or kilograms.

Using a mount rated for a lighter TV with a heavier model risks detachment. Conversely, a mount designed for larger TVs may not provide adequate support for a smaller, heavier display.

Always verify your TV’s weight (found in the TV’s specifications) before selecting a Barkan mount.

Stud Location and Marking

Securely attaching the wall plate to wall studs is crucial for a safe TV installation. Use a stud finder to accurately locate the wooden or metal studs behind your wall. Mark the stud locations clearly with a pencil; typically, studs are spaced 16 or 24 inches apart.

Confirm stud locations by tapping the wall – a solid sound indicates a stud. Avoid mounting directly into drywall, as it lacks the necessary strength to support the TV and mount.

Precise marking ensures the wall plate aligns with multiple studs for maximum stability.

Mounting Bracket Installation

Installation involves attaching the wall plate to studs using appropriate hardware, ensuring it’s level, and confirming a secure connection for TV support.

Attaching the Wall Plate to Studs

Successfully securing the wall plate directly to wall studs is paramount for a safe and stable TV mount. Begin by precisely locating the studs using a stud finder, marking their positions clearly on the wall. Align the wall plate with the marked stud locations, ensuring it’s centered where desired.

Utilize the provided lag bolts and washers – the correct hardware is crucial. Drill pilot holes slightly smaller than the lag bolt diameter to facilitate easier installation and prevent wood splitting. Carefully drive the lag bolts through the wall plate and into the studs, tightening them firmly but avoiding over-tightening, which could strip the wood. Double-check that all bolts are securely fastened before proceeding.

Ensuring Wall Plate Leveling

Achieving a perfectly level wall plate is critical for optimal TV viewing and aesthetic appeal. After attaching the plate to the studs, use a spirit level – both horizontally and vertically – to verify its alignment; If adjustments are needed, slightly loosen the lag bolts and gently reposition the plate until level.

Retighten the bolts, rechecking the level after each adjustment. Some Barkan mounts offer a /-5 degree leveling feature after installation, but a level base ensures the best starting point. Precise leveling prevents the TV from appearing tilted and contributes to a professional-looking installation.

Using the Correct Hardware

Selecting the appropriate hardware is paramount for a secure TV mount installation. Barkan mounts typically include lag bolts for stud mounting, but ensure they are the correct length and gauge for your wall’s studs. Never substitute hardware; use only the components provided or those specifically recommended by Barkan.

If mounting to concrete or brick, use appropriate concrete anchors (not included). Always pre-drill pilot holes before inserting screws or bolts to prevent wood splitting or damage to masonry. Confirm the hardware is fully tightened, but avoid over-tightening, which could strip threads or damage the wall.

TV Plate Assembly

Assemble the TV plate by connecting adaptors (C) using provided screws, ensuring a secure fit before attaching it to your television set.

Attaching the TV Plate to the TV

Carefully position the assembled TV plate against the back of your television, aligning it with the VESA mounting holes. It’s crucial to disassemble and reassemble screws with the adaptors (C) for a proper fit.

Select the appropriate screws from the hardware kit, ensuring they are the correct length and diameter for your specific TV model – avoid over-tightening.

Confirm a secure attachment by gently testing the plate’s stability; it should not wobble or shift. Double-check all screws are firmly in place before proceeding to the next installation step. A stable connection is paramount for safety.

Selecting Appropriate Screws for Your TV

Choosing the correct screws is vital for a secure TV plate attachment. Barkan mounts typically include a variety of screw sizes to accommodate different TV models and VESA patterns.

Consult your TV’s manual to determine the correct screw length and diameter; using screws that are too long can damage internal components.

Carefully match the screw type to your TV’s mounting holes – flat head screws are common, but some TVs require pan head or button head screws. Avoid forcing screws; if resistance is met, double-check the size and type.

Confirming Secure Attachment

After attaching the TV plate, rigorously test its stability. Gently attempt to move the plate – it should not wobble or shift. Ensure all screws are tightened firmly, but avoid over-tightening, which could strip the threads or damage the TV.

Double-check that all four corners of the TV plate are securely fastened to the TV. A loose connection poses a significant safety risk.

Periodically re-inspect the screws in the first few weeks after installation to confirm they remain tight, as vibrations can sometimes cause loosening.

Mounting the TV to the Wall Plate

Carefully lift and align the TV with the wall plate, engaging the locking mechanism to ensure a secure and stable connection.

Lifting and Aligning the TV

Successfully mounting your TV hinges on carefully lifting and precisely aligning it with the installed wall plate. It’s highly recommended to have assistance during this step, especially for larger screens, to prevent strain or accidental damage. Gently raise the TV, ensuring the mounting brackets on the back align with the corresponding slots or hooks on the wall plate.

Take your time and double-check the alignment before proceeding. A misaligned lift could strain the mounting system or even cause the TV to become unstable. Once aligned, slowly and steadily lower the TV onto the wall plate, confirming that all brackets are securely engaged.

Locking Mechanism Engagement

After carefully lowering the TV onto the wall plate, the crucial step is engaging the locking mechanism to ensure a secure and stable mount. Barkan mounts often feature a locking lever, screw, or clip designed to prevent accidental disengagement. Carefully locate and activate this mechanism, following the specific instructions for your TV mount model.

Confirm that the locking mechanism is fully engaged and provides a firm hold. Gently attempt to move the TV to verify its stability – it should not wobble or shift. A properly engaged locking mechanism is paramount for safety and prevents potential falls, protecting your investment and ensuring peace of mind.

Post-Installation Adjustments

Following secure mounting, Barkan mounts often allow for fine-tuning to achieve the optimal viewing experience. Utilize the tilt and swivel functionalities to eliminate glare and find the perfect angle. Many models offer a leveling adjustment, typically within +/- 5 degrees, to correct minor imperfections in wall alignment.

Carefully adjust these features, ensuring all locking mechanisms remain engaged during the process. Double-check the stability of the mount after each adjustment. Proper post-installation adjustments maximize viewing comfort and demonstrate the versatility of Barkan’s mounting solutions, providing a customized setup.

Tilt and Swivel Functionality

Barkan mounts feature adjustable tilt (up to 15 degrees) and swivel capabilities, allowing for customized viewing angles and optimal screen positioning.

Adjusting Tilt Angle

Barkan mounts often provide a tool-free tilt mechanism, enabling easy adjustments from 0 to 15 degrees. This feature optimizes viewing comfort by reducing glare and enhancing visibility from various seating positions.

To adjust the tilt, gently apply pressure to the TV screen while loosening the tilt adjustment knobs or levers. Once the desired angle is achieved, securely tighten these components to lock the TV in place.

Ensure the tilt angle is stable before releasing the TV, preventing accidental movement. Regularly check the tightness of the tilt mechanism to maintain a secure and enjoyable viewing experience. Proper adjustment minimizes strain and maximizes picture quality.

Utilizing Swivel Range

Many Barkan full-motion TV mounts boast a wide swivel range, often up to 40 degrees, allowing for flexible viewing angles from multiple locations in a room. This is particularly useful for open-concept living spaces.

To swivel the TV, gently rotate it left or right while ensuring it’s securely attached to the wall plate. Some models feature smooth, effortless swivel action, while others may require slight resistance.

Always verify the swivel mechanism is locked in the desired position after adjustment. Avoid excessive force, and periodically inspect the swivel joints for stability. Proper utilization enhances the viewing experience and maximizes the mount’s functionality.

Leveling After Installation

Achieving a perfectly level TV is crucial for optimal viewing and aesthetics. Many Barkan mounts offer a /-5 degree leveling adjustment post-installation, compensating for minor wall imperfections.

Use a spirit level placed on top of the TV to check for levelness. If adjustments are needed, carefully loosen the leveling screws (if present) and gently tilt the TV until level. Retighten the screws securely.

Regularly re-check the level, especially after any accidental bumps or movements. A level TV not only looks better but also prevents eye strain during prolonged viewing sessions, ensuring a comfortable experience.

Safety Precautions and Warnings

Barkan emphasizes reading all safety instructions before assembly, adhering to weight limits, and practicing careful cable management for secure TV mounting.

Weight Capacity Adherence

Barkan TV mounts are engineered for specific weight ranges; exceeding these limits compromises safety and mount integrity. Carefully verify your television’s weight before beginning installation.

Consult the mount’s specifications – often found in the installation manual or on the product packaging – to determine the maximum supported weight.

Using a mount rated for a lower weight than your TV can lead to catastrophic failure, potentially damaging the television, the wall, and causing injury.

Always prioritize a mount with a weight capacity greater than your TV’s weight to provide a safety margin. Regular inspection helps ensure continued adherence to weight limits.

Cable Management Tips

Neat cable management enhances the aesthetic appeal and prevents strain on connections. Utilize cable ties, sleeves, or channels to bundle and conceal wires behind the TV and along the wall.

Consider running cables inside the wall (if structurally feasible and permitted by local codes) for a truly clean look.

Leave some slack in the cables to accommodate TV adjustments like swivel or tilt. Avoid tightly wrapping or bending cables, as this can damage them.

Label cables for easy identification during future maintenance or adjustments. Regularly inspect cables for wear and tear, replacing them as needed.

Regular Inspection and Maintenance

To ensure long-term safety and optimal performance, periodically inspect your Barkan TV mount. Check all mounting hardware – screws, bolts, and wall anchors – for tightness at least twice a year.

Verify the wall plate remains securely attached to the wall studs, showing no signs of loosening or pulling. Examine the TV plate connection for any deformation or stress.

Dust the mount regularly to prevent buildup. Avoid overloading the mount with a TV exceeding its weight capacity. Address any issues promptly to prevent potential accidents.

size guide scotch and soda

Scotch & Soda Size Guide: A Comprehensive Overview (Updated February 16, 2026)

Scotch & Soda offers diverse styles; understanding their sizing is crucial for a perfect fit. This guide details measurements for men, women, and children, ensuring confident shopping.

Scotch & Soda distinguishes itself with a unique blend of vintage inspiration and modern design, resulting in clothing that often features distinctive cuts and fabrics. Consequently, understanding their sizing system is paramount to ensuring a flattering and comfortable fit. Unlike some brands adhering to standard measurements, Scotch & Soda often incorporates tailored silhouettes, necessitating a careful review of their specific size charts.

This comprehensive guide aims to demystify Scotch & Soda sizing, providing detailed information for men, women, and children. We’ll cover everything from chest and waist measurements to international size conversions, helping you navigate their collections with confidence. Remember that variations can occur between different styles and materials, so always consult the individual product page for specific sizing recommendations. Accurate measurements are key to avoiding returns and enjoying your new Scotch & Soda pieces.

Understanding Scotch & Soda’s Fit Philosophy

Scotch & Soda embraces a philosophy centered around individuality and relaxed sophistication. Their designs frequently incorporate a slightly tailored, yet comfortable, aesthetic, moving away from overly restrictive fits. You’ll often find a balance between classic silhouettes and contemporary detailing, influencing how their garments are sized.

The brand often utilizes a “slim-fit” and “regular-fit” approach, but these can differ subtly from standard industry definitions. Scotch & Soda’s slim fit isn’t always ultra-tight; it’s designed to be flattering without feeling constricting. Their regular fit offers more room for movement while still maintaining a polished appearance. Understanding this nuance is crucial when selecting your size. Always consider the fabric composition – stretch fabrics will offer more give, while structured materials may require a more precise fit. Prioritizing comfort alongside style is central to the Scotch & Soda experience.

Men’s Tops Size Guide

Scotch & Soda men’s tops offer a range of sizes, typically spanning from XS to XXL, and corresponding to EU, UK, and US standards. Accurate measurement is key to finding your ideal fit. Begin by measuring your chest circumference at its fullest point, keeping the tape measure level. Next, measure your waist at its natural waistline.

Refer to the following approximate size chart as a starting point: Size S typically corresponds to a 36 EU, 8 UK, and 6 US, with a 36-inch chest and 30;5-inch waist. Size M is generally 48 EU, 10 UK, 8 US, with a 38.5-inch chest and 33-inch waist. Remember these are guidelines; variations exist between styles. Always consult the specific product page for detailed sizing information. Consider the intended fit – a slim-fit shirt will require a closer measurement than a relaxed-fit option.

Chest Measurements for Men’s Tops

Accurately measuring your chest is paramount when selecting a Scotch & Soda men’s top. Use a flexible measuring tape, ensuring it remains level around your back and under your armpits, across the fullest part of your chest. Don’t pull the tape too tightly; it should be snug but comfortable. Have a friend assist for the most precise measurement, if possible.

Refer to the size chart for guidance: a Small typically fits a 36-inch chest, Medium a 38.5-inch chest, Large a 41-inch chest, and Extra Large a 43-inch chest. For XXL, expect a 45.5-inch chest. If your measurement falls between sizes, consider your desired fit. A closer fit might necessitate sizing up, while a looser style allows for staying with your measured size. Always check individual product details, as variations can occur.

Waist Measurements for Men’s Tops

Determining your waist size is essential for achieving the correct fit in Scotch & Soda men’s tops, particularly those with a tailored or fitted silhouette. Measure your natural waistline, which is typically the narrowest part of your torso, usually about an inch above your belly button. Keep the measuring tape comfortably snug, not overly tight. Breathe normally during measurement to avoid inaccurate results.

According to the size guide, a Small generally corresponds to a 30.5-inch waist, Medium to 33 inches, Large to 35.5 inches, and Extra Large to 38 inches. An XXL typically fits a 38-inch waist. If your measurement is between sizes, consider the top’s style. For a relaxed fit, stick to your measurement; for a more fitted look, size up. Remember to consult the specific product description for any unique sizing recommendations.

International Size Conversions (Men’s Tops) ー EU, UK, US

Scotch & Soda caters to a global audience, so understanding international size conversions for men’s tops is vital for accurate online shopping. A European size 46 typically equates to a UK Small and a US Small. Moving up, a size 48 in EU corresponds to a UK Medium and a US Medium. For a European size 50, you’ll find a UK Large and a US Large.

Further conversions include EU 52 aligning with UK XL and US XL, while EU 54 translates to UK XXL and US XXL. It’s crucial to remember these are general guidelines, and slight variations can occur depending on the specific garment’s cut and style. Always cross-reference with the chest measurement chart for the most precise fit. When in doubt, consult the Scotch & Soda website’s detailed size guide or contact customer support.

Men’s Bottoms Size Guide

Scotch & Soda men’s bottoms require careful attention to both waist and inseam measurements for optimal comfort and style. Accurate sizing ensures a flattering fit across their diverse range of trousers and shorts. Waist sizes are typically presented in both inches and centimeters, allowing for convenient conversion. For example, a 32-inch waist equates to approximately 81 centimeters. A 36-inch waist is around 91 centimeters, and a 40-inch waist measures roughly 102 centimeters.

Inseam length is equally important, influencing the overall silhouette. Standard inseam options often include 30, 32, and 34 inches. Refer to the detailed size charts on the Scotch & Soda website for specific garment measurements. Remember to measure your natural waist and preferred inseam length for the most accurate selection.

Waist Size Chart for Men’s Bottoms (Inches & CM)

Below is a comprehensive waist size chart for Scotch & Soda men’s bottoms, presented in both inches and centimeters to facilitate accurate selection. Please note that variations may occur depending on the specific style and fabric of the garment. Always refer to individual product descriptions for detailed sizing information.

UK Size Waist (Inches) Waist (CM)
S 28-30 71-76
M 32-34 81-86
L 36-38 91-97
XL 40-42 102-107
XXL 44-46 112-117

For the best fit, measure your natural waistline and compare it to this chart. Consider your body type and preferred fit when making your selection.

Inseam Measurements for Men’s Bottoms

Determining the correct inseam length is vital for achieving a well-proportioned look with Scotch & Soda men’s trousers and jeans. Inseam refers to the distance from the crotch seam to the bottom hem of the leg. This measurement significantly impacts how your bottoms drape and fit with your footwear.

To accurately measure your inseam, stand with your feet shoulder-width apart and measure from your crotch down to where you want the hem to fall on your shoe. Common inseam lengths include 30, 32, 34, and 36 inches.

Scotch & Soda often provides inseam information alongside waist sizes. Consider your height and preferred style – a shorter inseam creates a cropped look, while a longer inseam allows for a stacked appearance with boots.

International Size Conversions (Men’s Bottoms) ー EU, UK, US

Navigating international sizing can be tricky when purchasing Scotch & Soda men’s bottoms. This conversion chart provides a general guideline, but slight variations may occur depending on the specific style and fit. Always refer to the individual product’s size chart for the most accurate information.

Typically, a US size 32 waist equates to a UK size 32 and a European size 46. A US size 34 waist generally corresponds to a UK 34 and EU 48. For larger sizes, a US 36 is often a UK 36 and EU 50, while a US 38 translates to a UK 38 and EU 52.

Remember these are approximations. It’s always best to measure your waist and compare it to Scotch & Soda’s specific size chart to ensure the perfect fit, avoiding unnecessary returns or exchanges.

Women’s Tops Size Guide

Finding the perfect fit with Scotch & Soda women’s tops requires understanding their sizing system. This guide provides essential bust and waist measurements to help you select the correct size. Remember that Scotch & Soda designs often feature unique cuts and fabrics, so checking individual product details is always recommended.

Accurate measurement is key. Use a soft measuring tape and measure the fullest part of your bust and your natural waistline. Compare these measurements to the chart below to determine your corresponding Scotch & Soda size.

Sizes generally range from XS to XXL, correlating with EU sizes 34 to 54. Prioritize comfort and style by choosing a size that allows for ease of movement while still flattering your figure.

Bust Measurements for Women’s Tops

To determine your ideal Scotch & Soda women’s top size, accurate bust measurement is paramount. Stand naturally and have someone measure around the fullest part of your bust, keeping the tape measure level and snug, but not tight. Ensure the tape measure goes all the way around your body.

Here’s a general guide correlating bust measurements with Scotch & Soda sizes: XS (80 cm / 31.5 inches), S (85 cm / 33.5 inches), M (90 cm / 35.4 inches), L (95 cm / 37.4 inches), XL (100 cm / 39.4 inches), and XXL (105 cm / 41.3 inches).

If your measurement falls between sizes, we recommend sizing up for a more comfortable fit, especially with fitted styles; Remember to consider the fabric; stretchier materials may allow for a closer fit. Always consult the specific product description for any size-specific guidance.

Waist Measurements for Women’s Tops

Accurately measuring your waist is essential for selecting the correct size in Scotch & Soda women’s tops, particularly those with a defined waistline or fitted silhouette. Locate your natural waistline – typically the narrowest part of your torso, above your belly button. Keep the tape measure comfortably loose, allowing for breathing room.

Scotch & Soda’s waist measurements generally correspond as follows: XS (64 cm / 25.2 inches), S (69 cm / 27.2 inches), M (74 cm / 29.1 inches), L (79 cm / 31.1 inches), XL (84 cm / 33.1 inches), and XXL (89 cm / 35 inches).

If your measurement is close to the upper limit of a size range, consider sizing up for optimal comfort. Different styles may have varying fits; looser-fitting tops offer more flexibility. Always check the individual product details for specific sizing recommendations and fabric composition.

International Size Conversions (Women’s Tops) ‒ EU, UK, US

Navigating international sizing can be tricky, but Scotch & Soda provides clear conversions for women’s tops. Understanding these differences ensures a perfect fit, regardless of your location. Here’s a comprehensive guide to help you translate sizes accurately.

Generally, EU sizes correspond to: XS (34), S (36), M (38), L (40), XL (42), and XXL (44). UK sizes align as: XS (6), S (8), M (10), L (12), XL (14), and XXL (16). US sizes are: XS (4), S (6), M (8), L (10), XL (12), and XXL (14).

However, slight variations can occur between brands. Always refer to the specific size chart provided on the Scotch & Soda website or product page for the most accurate conversion. Consider checking both chest and waist measurements for a precise fit.

Women’s Bottoms Size Guide

Finding the perfect fit in women’s bottoms from Scotch & Soda requires understanding their sizing system. This guide provides detailed information to help you select the correct size for jeans, trousers, skirts, and shorts, ensuring both comfort and style. Accurate measurements are key to a flattering silhouette.

Scotch & Soda bottoms are typically sized by waist and hip measurements. It’s crucial to measure accurately, as sizes can vary slightly between different styles and fabrics. Refer to the size chart on their website for specific garment details.

Pay close attention to both inches and centimeters when comparing your measurements to the chart. Don’t hesitate to consult customer reviews for insights into how specific styles run in terms of sizing. A well-fitted bottom enhances any outfit!

Waist Size Chart for Women’s Bottoms (Inches & CM)

Below is a comprehensive waist size chart for Scotch & Soda women’s bottoms, presented in both inches and centimeters. Please note that these are general guidelines, and slight variations may occur depending on the specific style and fabric of the garment. Always prioritize accurate self-measurement for the best fit.

Size (US) Waist (Inches) Waist (CM)
XS 24-26 61-66
S 26-28 66-71
M 28-30 71-76
L 30-32 76-81
XL 32-34 81-86

Remember to measure at your natural waistline. If you fall between sizes, we recommend sizing up for a more comfortable fit.

Hip Measurements for Women’s Bottoms

Accurate hip measurement is vital when selecting Scotch & Soda women’s bottoms, ensuring a flattering and comfortable fit. To measure, stand with your feet together and measure around the fullest part of your hips and buttocks, keeping the tape measure level. This guide correlates hip measurements with corresponding sizes.

Size (US) Hip (Inches) Hip (CM)
XS 34-36 86-91
S 36-38 91-96
M 38-40 96-101
L 40-42 101-106
XL 42-44 106-111

These measurements are approximate; consider the style of the bottom. For fitted styles, prioritize the larger measurement. Always cross-reference with the waist measurement for the best overall fit with Scotch & Soda.

International Size Conversions (Women’s Bottoms) ‒ EU, UK, US

Navigating international sizing can be tricky; this chart simplifies converting Scotch & Soda women’s bottom sizes between EU, UK, and US standards. Remember that variations can occur between brands, so these are approximate conversions. Always prioritize measurements over relying solely on size labels.

US Size EU Size UK Size
XS (2) 34 6
S (4-6) 36-38 8-10
M (8-10) 40-42 12-14
L (12-14) 44-46 16-18
XL (16+) 48+ 20+

For the most accurate fit, always refer to the specific garment’s size chart and consider your individual body measurements. Scotch & Soda’s fit can vary, so checking both waist and hip measurements is recommended.

Children’s Size Guide

Finding the right fit for children can be challenging as they grow quickly. Scotch & Soda’s childrenswear sizing aims to provide comfortable and stylish clothing for every age. This guide offers a comprehensive overview to help you select the perfect size, considering body length, chest, waist, and hip measurements. Accurate measurements are key to ensuring a good fit and allowing for comfortable play;

Remember that age-based charts are approximate, as children of the same age can vary significantly in size. Prioritize measuring your child to determine their current dimensions; Regularly checking their size is recommended to accommodate growth spurts. Scotch & Soda prioritizes quality and comfort in their children’s collections.

Children’s Body Length Measurements

Accurate body length measurement is fundamental for selecting correctly sized Scotch & Soda children’s clothing. To measure, have your child stand straight with their back against a wall, wearing minimal clothing. Start at the top of the head and measure down to the base of the feet. Ensure the measuring tape is taut but not constricting. This measurement directly impacts the fit of dresses, jumpsuits, and outerwear.

Refer to the Scotch & Soda size chart for corresponding body length ranges for each age or size. If a measurement falls between sizes, consider sizing up for room to grow or opting for a slightly looser fit. Consistent measurement ensures optimal comfort and allows for layering during colder months. Remember to re-measure periodically as children grow rapidly.

Children’s Chest & Waist Measurements

Determining accurate chest and waist measurements is vital when choosing Scotch & Soda apparel for children. For chest measurement, have your child stand naturally with arms relaxed at their sides. Measure around the fullest part of the chest, keeping the tape measure level. For waist measurement, find the natural waistline – typically the narrowest part of the torso.

Ensure the tape measure is snug but not tight, allowing for comfortable breathing. Compare these measurements to the Scotch & Soda size chart to find the appropriate size. If measurements differ between chest and waist, use the larger measurement to ensure a comfortable fit. Consider the garment’s style; looser fits may allow for some variation. Regular measurement is key as children grow quickly.

Age-Based Size Chart (Children) ー UK, US, Years

Scotch & Soda children’s sizing correlates with age, UK dress size, and US sizes, but individual builds vary. Here’s a general guide, though referencing chest and waist measurements is always recommended. For 4 Years (UK 3-4, US 4T), body length is approximately 104cm, chest 68cm, and waist 60cm. At 6 Years (UK 5-6, US 5), measurements are roughly 116cm, 72cm, and 64cm.

For 8 Years (UK 7-8, US 7/8), expect 128cm, 76cm, and 68cm. 10 Years (UK 9-10, US 10) is around 140cm, 80cm, and 72cm. These are averages; always prioritize accurate body measurements. Scotch & Soda’s styles may run slightly different, so checking specific product details is advisable. This chart provides a starting point for selecting the correct size for your child’s comfort and style.

Underwear & Loungewear Size Guide

Scotch & Soda’s underwear and loungewear sizing focuses primarily on waist measurements for both men and women. For men’s bottoms, a waist size of 28-30 inches corresponds to a UK size Small. A 32-34 inch waist fits a UK Medium, while 36-38 inches equates to a UK Large. Sizes extend to XXL, accommodating a 40-42 inch waist.

Women’s underwear waist sizes follow a similar pattern, though specific styles may vary slightly. Accurate measurement is key for comfort. Loungewear often offers a more relaxed fit, but referencing the size chart ensures the best experience. Scotch & Soda prioritizes comfort and quality in its intimate apparel and loungewear collections, so selecting the correct size enhances enjoyment.

Men’s Underwear Waist Size Chart (UK, Inches)

Finding the perfect fit in Scotch & Soda men’s underwear begins with accurate waist measurement. This chart provides a clear guide to UK sizes based on inch measurements. A waist measuring 28-30 inches corresponds to a UK size Small, offering a comfortable, secure fit for slimmer builds. For those with a 32-34 inch waist, a UK Medium provides the ideal balance of support and freedom of movement.

Moving up the scale, a 36-38 inch waist fits a UK Large, while individuals with a 40-42 inch waist should select an XXL for optimal comfort. Remember that these are general guidelines; variations may occur depending on the specific style and fabric. Prioritizing accurate measurement ensures a confident and comfortable experience with Scotch & Soda’s quality underwear.

Women’s Underwear Waist Size Chart (UK, Inches)

Scotch & Soda women’s underwear prioritizes both style and comfort, and selecting the correct size is paramount. This chart translates your waist measurement in inches into the corresponding UK size. A waist measuring between 26-28 inches typically aligns with a UK size 8, offering a flattering and comfortable fit. For those with a 29-31 inch waist, a UK size 10 is recommended, providing gentle support and a smooth silhouette.

If your waist measures 32-34 inches, a UK size 12 will likely be the best fit, while a 35-37 inch waist corresponds to a UK size 14. Larger sizes, such as a UK 16 (38-40 inch waist) and UK 18 (41-43 inch waist), are also available. Always refer to the specific product details, as slight variations can occur. Accurate measurement ensures you enjoy the quality and style Scotch & Soda offers.

General Sizing Tips for Scotch & Soda

Scotch & Soda garments often present a unique fit, blending classic tailoring with modern aesthetics. For optimal results, accurate self-measurement is crucial. Use a flexible measuring tape, ensuring it’s snug but not tight against your body. Consider the fabric composition; stretchier materials may allow for a closer fit, while more structured fabrics might require a bit more room.

Pay attention to the brand’s fit philosophy – Scotch & Soda frequently offers both slim and regular fits. Slim fit styles are designed to be closer to the body, while regular fits provide a more relaxed silhouette. When in doubt, consult the specific product description for detailed fit information. Comparing your measurements to the size chart is essential, and remember that sizes can vary slightly between different styles;

How to Accurately Measure Yourself

Precise measurements are key to finding your perfect Scotch & Soda fit. For chest measurements, stand naturally and measure around the fullest part of your chest, keeping the tape measure level. Waist measurements should be taken at your natural waistline, typically the narrowest part of your torso. Ensure the tape is comfortably snug, not constricting.

When measuring hips, stand with your feet together and measure around the fullest part of your hips. For bottoms, measure your waist as described above and also determine your inseam – from your crotch to the bottom of your ankle. It’s best to have someone assist you for greater accuracy. Double-check all measurements before comparing them to the Scotch & Soda size charts.

Considering Different Fabrics and Styles

Scotch & Soda utilizes a variety of fabrics, each impacting fit. Stretchy materials like those found in some loungewear may offer more flexibility, potentially allowing you to size down. Conversely, rigid fabrics like denim may require a slightly larger size for comfort and movement. Consider the garment’s style too; slim-fit items will naturally feel more fitted than regular-fit options.

Pay attention to the garment’s description – it often indicates whether it runs true to size, small, or large. Layering also plays a role; if you plan to wear items with layers underneath, consider sizing up. Always review customer reviews for insights into specific styles and fabrics. Remember, a little extra attention to these details ensures a satisfying Scotch & Soda experience.

Scotch & Soda’s Slim Fit vs. Regular Fit

Scotch & Soda offers both slim and regular fit options, catering to diverse preferences. Slim fit garments are designed to follow the body’s natural lines, providing a more tailored and modern silhouette. These typically have a closer fit through the chest, waist, and sleeves. Regular fit, conversely, offers a more relaxed and comfortable feel, with more room throughout the garment.

When choosing between the two, consider your body type and desired look. If you prefer a closer, more defined fit, slim fit is ideal. For a more classic and comfortable style, opt for regular fit. Review the specific product description, as fit can vary slightly between styles. Measuring yourself accurately is crucial to determine the best fit for your body.

the book the ultimate guide to rebuilding civilization

The Book: The Ultimate Guide to Rebuilding Civilization ౼ Article Plan (02/16/2026 14:50:22)

This article dissects “The Book,” a visually stunning yet debated guide. It explores its aspirational scope versus practical application, contrasting it with resources like Machinery’s Handbook.

Initial impressions suggest a coffee table book aesthetic, lacking detailed survival instructions despite its ambitious title and captivating imagery.

“The Book: The Ultimate Guide to Rebuilding Civilization” has rapidly become a talking point, generating both excitement and skepticism. Released to considerable fanfare, it presents itself as a comprehensive manual for societal reconstruction, promising a roadmap for starting anew after a catastrophic event. However, early reviews paint a more nuanced picture.

The book’s most immediate feature is its visual presentation. It’s lavishly illustrated, resembling a high-end coffee table book more than a practical survival guide. This aesthetic choice is at the heart of the controversy, with many questioning whether style has been prioritized over substance. While the imagery is captivating, critics argue it often feels disconnected from the daunting task of rebuilding civilization.

The core debate centers on the book’s actual utility. Is it a genuine resource for those contemplating a post-apocalyptic world, or simply an inspirational, albeit expensive, thought experiment?

What is “The Book”? ౼ Overview and Initial Impressions

“The Book” is presented as an all-encompassing guide, touching upon a vast array of topics essential for rebuilding society – from agriculture and energy production to governance and education; It aims to provide a foundational understanding of the skills and knowledge required to establish a functioning civilization from scratch. However, initial impressions reveal a significant gap between ambition and execution.

Readers consistently describe it as visually appealing, a “great picture book for adults” filled with striking, though often irrelevant, illustrations. The content is broad but shallow, offering a cursory overview of complex subjects without delving into practical details or step-by-step instructions. It’s a compendium of ideas, rather than a hands-on manual.

Many reviewers express disappointment, noting the lack of concrete survival information despite the book’s suggestive title. It appears to be more aspirational than functional.

The Core Concept: Rebuilding from Scratch

“The Book” posits a scenario of complete societal collapse, requiring a return to first principles. The core concept revolves around establishing a new civilization, starting with the most fundamental needs – food, water, shelter – and progressively building towards complex systems of technology, governance, and knowledge preservation. It envisions a holistic approach, acknowledging the interconnectedness of various disciplines.

The book attempts to cover the entire spectrum of rebuilding, from basic mechanics and toolmaking to renewable energy sources and early-stage communication systems. However, critics argue that this breadth comes at the expense of depth, offering only superficial treatments of each topic.

The underlying idea is compelling – a thought experiment exploring the challenges and necessities of starting anew, but its practical application is heavily questioned.

Target Audience: Who is This Book For?

“The Book” primarily appeals to those fascinated by dystopian scenarios and thought experiments, rather than serious preppers or survivalists seeking actionable guidance. Its visually rich presentation and broad scope suggest an audience interested in the idea of rebuilding civilization, rather than the gritty realities involved.

The book seems geared towards individuals with a general curiosity about various fields – agriculture, engineering, social science – but lacking specialized knowledge in any one area. It’s a conversation starter, a source of inspiration, and a visually engaging exploration of complex themes.

Ultimately, it’s likely to resonate with readers who appreciate its aesthetic qualities and aspirational vision, rather than its practical utility.

Content Analysis & Key Themes

The book broadly covers survival basics, essential technologies, and societal structures, but lacks depth. It prioritizes visual appeal over detailed, practical instruction.

Section 1: Foundational Knowledge ⎯ The Basics of Survival

“The Book” touches upon foundational survival elements, including agriculture, water management, and shelter construction. However, reviews consistently point to a superficial treatment of these critical topics. While it acknowledges the necessity of food production, it doesn’t delve into specifics of crop rotation or pest control.

Similarly, water purification is mentioned, but lacks detailed guidance on building effective filtration systems. Shelter construction receives similar brief coverage, focusing more on conceptual ideas than practical building techniques. The book presents these areas as concepts to consider, rather than actionable steps for rebuilding a civilization from scratch.

Essentially, this section offers a broad overview, serving as an introductory glimpse into survival necessities without providing the in-depth knowledge required for actual implementation.

1.1 Agriculture and Food Production

“The Book” briefly addresses agriculture and food production as cornerstones of rebuilding civilization, yet falls short of providing practical guidance. It acknowledges the need for sustainable food sources, but lacks specifics on soil analysis, seed saving, or efficient farming techniques.

The presentation remains largely conceptual, showcasing imagery without detailed instructions on establishing viable agricultural systems. It doesn’t cover crucial aspects like irrigation, fertilization, or dealing with crop diseases. Reviews highlight this as a significant weakness, noting the absence of actionable information for securing a long-term food supply.

Essentially, the section offers a high-level overview, failing to equip readers with the knowledge needed to actually cultivate food in a post-collapse scenario.

1.2 Water Management and Purification

“The Book” touches upon the critical importance of water, recognizing it as fundamental for survival and societal reconstruction. However, similar to its approach to agriculture, the treatment of water management and purification remains superficial and lacks practical depth.

The guide acknowledges the necessity of finding and securing water sources, but provides minimal instruction on building effective filtration systems or identifying potable water in various environments. It doesn’t delve into rainwater harvesting techniques, well construction, or methods for large-scale water storage.

Reviewers consistently point out this deficiency, emphasizing that the section offers theoretical concepts without the crucial “how-to” details needed to ensure access to safe drinking water.

1.3 Shelter Construction and Materials

“The Book” briefly addresses the need for shelter, framing it as a basic requirement for protection from the elements and establishing a secure base. However, the section suffers from the same shortcomings as others – a lack of actionable guidance.

It presents a broad overview of potential building materials – wood, stone, earth – but fails to provide detailed instructions on construction techniques. There’s no discussion of foundational principles, structural integrity, or adapting shelter designs to different climates and available resources.

Critics highlight the disconnect between the book’s imagery and the realities of building durable, functional shelters. The beautiful illustrations offer inspiration, but little practical assistance for those facing a genuine rebuilding scenario.

Section 2: Essential Technologies ౼ Re-establishing Infrastructure

This section of “The Book” attempts to cover the vast landscape of re-establishing essential technologies, from basic mechanics to energy production and communication. However, it largely remains at a conceptual level, offering a superficial overview rather than practical instruction.

The book touches upon renewable and non-renewable energy sources, but lacks specifics on building generators, refining fuel, or establishing sustainable energy grids. Similarly, the discussion of toolmaking and mechanics is broad, failing to provide step-by-step guides for crafting essential tools.

Early-stage communication systems are mentioned, but the book doesn’t delve into the complexities of building radios or establishing reliable communication networks from scratch. The overall impression is one of aspirational ideas, rather than actionable plans.

2.1 Basic Mechanics and Toolmaking

“The Book” briefly acknowledges the critical importance of basic mechanics and toolmaking for rebuilding civilization, yet disappointingly, it offers minimal practical guidance. The section presents a high-level overview of necessary tools – levers, pulleys, simple machines – but lacks detailed instructions for their construction.

Readers hoping for blueprints or step-by-step guides will find themselves wanting. The book doesn’t explain how to forge metal, create molds, or even effectively utilize salvaged materials for tool creation. It’s a conceptual nod to the subject, rather than a hands-on manual.

The absence of practical information is a recurring criticism, highlighting the book’s focus on aesthetics over functionality in this crucial area of infrastructure re-establishment.

2.2 Energy Production (Renewable & Non-Renewable)

“The Book” touches upon energy production, outlining both renewable and non-renewable sources, but again, falls short on practical application. It broadly mentions solar, wind, hydro, and fossil fuels, acknowledging their roles in powering a civilization. However, the section lacks specifics on building even rudimentary generators or refining processes.

There’s no guidance on creating sustainable energy systems from scratch, or adapting existing infrastructure for post-collapse scenarios. The discussion remains theoretical, presenting concepts without detailing how to implement them with limited resources.

Critics point to this as a significant flaw, given energy is fundamental to rebuilding. The book’s treatment feels superficial, offering a broad overview instead of actionable knowledge.

2.3 Communication Systems (Early Stage)

“The Book” briefly addresses early-stage communication, hinting at methods like signal fires, messengers, and basic radio technology. It acknowledges the necessity of re-establishing communication networks for coordination and information dissemination after a societal collapse. However, the section suffers from the same issue as others – a lack of practical detail.

It doesn’t explain how to construct a functional radio transmitter or receiver using salvaged materials, nor does it offer guidance on establishing a reliable messenger system. The discussion remains conceptual, failing to provide actionable steps for rebuilding communication infrastructure.

Reviewers note this is a missed opportunity, as communication is vital for community building and governance.

Section 3: Social Structures and Governance

This section of “The Book” touches upon the crucial aspects of rebuilding societal order, including establishing laws, preserving knowledge, and fostering community cooperation. It recognizes that technical skills alone aren’t enough; a functioning society requires a framework for governance and shared values.

However, the treatment of these topics is superficial. The book offers broad concepts – the need for laws and education – without delving into the complexities of implementation. It doesn’t address potential conflicts, power dynamics, or the challenges of creating a just and equitable system.

Critics point out this lack of depth, arguing that a truly “ultimate guide” would offer more concrete strategies for navigating the social and political challenges of rebuilding civilization.

3.1 Establishing Laws and Order

“The Book” acknowledges the necessity of laws and order for a functioning post-collapse society, briefly outlining the need for a governing structure. It suggests establishing rules to prevent chaos and protect individuals, a foundational element for rebuilding. However, the discussion remains remarkably abstract and lacks practical guidance.

The book fails to address the difficult questions inherent in lawmaking: What legal system should be adopted? How are disputes resolved? What constitutes justice in a resource-scarce environment? It doesn’t explore the potential for corruption or the challenges of enforcing laws without established institutions.

This omission is a significant weakness, as establishing a fair and effective legal framework is arguably one of the most critical tasks in rebuilding civilization.

3.2 Education and Knowledge Preservation

“The Book” touches upon the importance of education and preserving knowledge for future generations, recognizing that a loss of accumulated wisdom would severely hinder rebuilding efforts. It broadly suggests establishing systems for teaching essential skills and documenting vital information.

However, the book provides little detail on how this should be achieved. What curriculum should be prioritized? How do you establish a learning environment without resources? How do you safeguard knowledge from loss or destruction in a volatile world? These crucial questions remain unanswered.

The lack of concrete strategies is a major shortcoming, as effective education and knowledge preservation are fundamental to long-term societal recovery and preventing repeating past mistakes.

3.3 Community Building and Cooperation

“The Book” acknowledges that successful civilization rebuilding hinges on strong community bonds and widespread cooperation. It implicitly recognizes that individual survival is inextricably linked to collective effort and mutual support in a post-collapse scenario.

Yet, the book offers minimal guidance on fostering these crucial social dynamics. How do you establish trust in a fractured society? How do you resolve conflicts without established legal structures? What mechanisms promote equitable resource distribution and prevent exploitation?

These are complex challenges requiring nuanced solutions, and “The Book” largely skirts around them, presenting a somewhat idealistic view of human interaction without addressing the inherent difficulties of rebuilding social cohesion.

Criticisms and Limitations

Despite its visual appeal, “The Book” faces criticism for prioritizing style over substance. Many reviewers find it lacking practical instruction and disconnected from rebuilding realities.

The “Coffee Table Book” Critique ⎯ Style Over Substance

A recurring criticism centers on “The Book’s” presentation as a visually impressive, but ultimately superficial, guide. Many reviewers describe it as more suited for casual browsing than serious preparation for societal reconstruction. The book’s striking imagery, while aesthetically pleasing, is often perceived as irrelevant to the harsh realities of rebuilding civilization.

Critics argue that the focus on aesthetics overshadows any genuine instructional content. It’s frequently labeled a “coffee table book” – something to display and flip through, rather than a practical manual. This perception stems from the book’s broad scope and lack of detailed, step-by-step guidance on essential survival skills. The emphasis appears to be on inspiration rather than actionable knowledge, leaving readers wanting more substance.

Lack of Practical, Step-by-Step Instructions

A significant deficiency highlighted by numerous reviews is the absence of concrete, actionable instructions. While “The Book” touches upon a vast array of topics – from agriculture to energy production – it fails to provide the detailed guidance necessary for practical implementation. Readers seeking a genuine survival manual are consistently disappointed by this omission.

The book offers a broad overview, but lacks the depth required to actually do anything. It doesn’t explain how to build a shelter, purify water, or establish a functional communication system. This lack of specificity renders much of the information theoretical and inaccessible to those without pre-existing expertise. The absence of practical details transforms the book from a guide into a collection of concepts.

The Disconnect Between Imagery and Reality

A recurring criticism centers on the jarring incongruity between the book’s visuals and the grim realities of rebuilding civilization. Reviews frequently point out that the illustrations are often whimsical and bear little resemblance to the arduous tasks involved in societal reconstruction. This stylistic choice undermines the book’s credibility as a serious survival guide.

The cartoonish imagery feels tonally inappropriate for a subject matter demanding practicality and realism. Instead of depicting the challenges of resource scarcity or the complexities of infrastructure development, the book presents idealized and often irrelevant scenes. This disconnect creates a sense of detachment, suggesting the authors prioritized aesthetics over genuine utility, further solidifying its reputation as a “coffee table book.”

Comparison to Practical Guides: Machinery’s Handbook

In stark contrast to “The Book’s” broad, superficial approach, Machinery’s Handbook represents the epitome of practical, detailed instruction. While “The Book” offers a sweeping overview of rebuilding concepts, Machinery’s Handbook dives deep into the specifics of toolmaking, mechanics, and engineering – essential skills for actual reconstruction.

Readers seeking genuine survival knowledge consistently recommend Machinery’s Handbook as the definitive guide. It provides step-by-step instructions, precise measurements, and technical diagrams, empowering individuals to build and repair essential infrastructure. This hands-on focus distinguishes it sharply from “The Book’s” largely theoretical and visually-driven content, highlighting the latter’s limitations.

Essentially, one is aspiration, the other, application.

Reader Reception and Reviews

Reviews are polarized: visual appeal and scope are praised, but many find “The Book” lacking practical survival information, deeming it more of an inspirational picture book;

Positive Aspects: Visual Appeal and Broad Scope

Despite criticisms, “The Book” consistently receives praise for its stunning visual presentation. Readers describe it as a captivating and beautifully designed volume, enjoyable simply to flip through. The book’s strength lies in its ambitious attempt to cover a remarkably broad range of topics essential for rebuilding civilization, from agriculture to energy production.

Many appreciate the sheer scope of knowledge touched upon, even if not in exhaustive detail. It sparks imagination and offers a high-level overview of complex systems. Some reviewers acknowledge its value as a thought experiment, prompting consideration of the challenges inherent in societal reconstruction. The book’s aesthetic quality elevates it beyond a purely instructional manual, making it a visually engaging experience.

Negative Feedback: Unfulfilled Expectations

A significant portion of the criticism surrounding “The Book” centers on a perceived disconnect between its marketing and actual content. Many purchasers anticipated a practical, step-by-step survival guide, only to find a visually appealing but largely superficial overview of complex topics. The lack of detailed instructions is a recurring complaint, with reviewers noting the absence of actionable information.

Several comments highlight the incongruity between the book’s imagery and the realities of rebuilding civilization, labeling the illustrations as humorous and irrelevant; Readers express disappointment that it doesn’t function as the “survival bible” it was initially presented as, instead resembling an adult picture book. The feeling of unfulfilled expectations is prevalent in negative reviews.

Overall Assessment: Aspirational vs. Functional

“The Book: The Ultimate Guide to Rebuilding Civilization” ultimately presents itself as more aspirational than functional. While visually engaging and broad in scope, it falls short of providing the practical knowledge needed for actual societal reconstruction. Reviewers suggest it’s best viewed as a thought experiment or a conversation starter, rather than a definitive survival manual.

The core issue lies in its prioritization of aesthetics over substance. It touches upon numerous subjects but lacks the depth required for genuine application. Comparisons to resources like Machinery’s Handbook underscore this deficiency, highlighting the need for detailed, actionable guidance. It’s a compelling concept, but ultimately, a beautiful coffee table book.

A Thought Experiment, Not a Survival Manual

“The Book: The Ultimate Guide to Rebuilding Civilization” is best understood as a fascinating thought experiment, not a practical survival guide. Its value resides in prompting consideration of the complexities involved in rebuilding society, rather than offering concrete solutions. The striking visuals and broad thematic coverage spark imagination, but shouldn’t be mistaken for actionable instruction.

Ultimately, the book’s limitations highlight the gap between aspirational ideals and the harsh realities of survival. For those seeking genuine preparedness, resources like Machinery’s Handbook provide the detailed, step-by-step guidance truly needed. “The Book” serves as an intriguing starting point for discussion, but falls short of being a comprehensive rebuilding blueprint.