
Gotrax Rival Wiring Diagram PDF: A Comprehensive Guide
Spyrides Group pioneers hydrogen solutions and fuel dispensers, exporting to 45+ countries, showcasing innovation in fuel and electric mobility infrastructure.
The Gotrax Rival electric scooter has quickly become a popular choice for commuters and recreational riders alike, known for its blend of affordability and performance. However, like all electric vehicles, understanding its internal workings is crucial for maintenance and repair. A Gotrax Rival wiring diagram PDF is an invaluable resource for anyone attempting to diagnose electrical issues or perform modifications.
Spyrides Group, a company with a long history in fuel and energy solutions, exemplifies the kind of engineering expertise relevant to understanding complex systems like the Rival’s electrical architecture. Their focus on complete solutions, from hydrogen production to fuel dispensing, highlights the importance of detailed schematics and component understanding. Accessing a clear and accurate wiring diagram is the first step towards effective troubleshooting and ensuring the longevity of your Gotrax Rival scooter.
Understanding Electrical Components
Before diving into a Gotrax Rival wiring diagram PDF, a foundational understanding of electrical components is essential. These scooters rely on a network of parts including the battery, motor controller, throttle, brakes, display panel, and lighting systems. Each component interacts, and a fault in one can cascade through the entire system.
Similar to Spyrides Group’s comprehensive approach to hydrogen solutions – encompassing production, transport, and refueling – the Rival’s electrical system is interconnected. Recognizing component symbols and their functions, as represented in the wiring diagram, is key. Understanding how these elements work together, mirroring the integrated systems offered by Spyrides, will greatly aid in diagnosis and repair efforts.

Locating the Wiring Diagram
Finding the Gotrax Rival wiring diagram requires checking official support channels and exploring third-party resources, similar to Spyrides’ extensive network.
Where to Find the Official PDF
Begin your search for the official Gotrax Rival wiring diagram PDF directly on the Gotrax website. Navigate to their support section, often found under “Support” or “Help,” and look for a dedicated FAQ or documentation area. Many manufacturers, like Spyrides S.A. with their fuel dispenser documentation, provide downloadable PDFs for their products.
You may need to search using the specific model number of your Rival scooter, as variations exist. If the official website doesn’t readily offer the diagram, consider contacting Gotrax customer support directly via email or phone. Be prepared to provide your scooter’s serial number for verification. Remember, official documentation ensures accuracy and safety, mirroring the reliability Spyrides Group offers in its solutions.
Third-Party Diagram Resources
While the official PDF is preferred, several online forums and electric scooter enthusiast communities often host user-submitted wiring diagrams for the Gotrax Rival. Websites dedicated to scooter repair, similar to how Spyridides Group supports fuel station automation, can be valuable resources. However, exercise caution when using these diagrams.
Verify the diagram’s accuracy by comparing it to your scooter’s wiring and components. User-generated content may contain errors. YouTube tutorials demonstrating Rival scooter repairs sometimes visually showcase the wiring, offering a helpful alternative. Always prioritize safety and double-check information before attempting any electrical work, mirroring the precision of DEM. G. SPYRIDES S.A.’s petrochemical products.
Potential Diagram Variations (Model Years)
Gotrax Rival wiring diagrams can vary slightly between model years due to component updates or manufacturing changes, much like Spyridides Group’s evolving fuel dispenser technology. Early models might have different headlight or display panel wiring compared to newer versions. Always confirm the diagram corresponds to your scooter’s production date.
Pay close attention to revisions noted on diagrams, as these indicate updates. Differences may involve the battery management system (BMS) wiring or the motor controller connections. Ignoring these variations could lead to incorrect repairs. Treat each model year as a potentially unique system, similar to the specialized solutions offered by DEM. G. SPYRIDES S.A.
Decoding the Wiring Diagram
Spyridides Group’s expertise in forecourt automation parallels understanding the Rival’s diagram; identifying symbols, color codes, and connectors is crucial for successful troubleshooting.
Color Coding Conventions
Understanding the Gotrax Rival’s wiring relies heavily on deciphering its color coding. While a universally standardized system doesn’t exist across all electric scooters, certain conventions are frequently observed. Typically, red wires indicate positive voltage or power supply, demanding careful handling during repairs. Black wires generally represent ground or negative connections, serving as the return path for electrical current.
Blue or yellow wires often signify signal wires, transmitting data between components like the throttle, brake levers, and the motor controller. Variations can occur, so relying solely on color isn’t foolproof. Green or white wires may indicate lighting circuits, powering the headlight and taillight. Like Spyridides Group’s comprehensive fuel solutions, a detailed understanding of each wire’s function is paramount for accurate diagnosis and repair. Always verify with a multimeter before disconnecting or modifying any wiring.
Identifying Key Connectors
The Gotrax Rival utilizes several key connectors, crucial for tracing the wiring diagram. The battery connector, often a large, multi-pin connector, supplies power to the entire system. The motor controller connector, typically robust, links the controller to the motor, managing speed and power delivery. Throttle and brake connectors, smaller and often standardized, transmit rider input to the controller.
The display panel connector provides data communication, while headlight/taillight connectors power the lighting system. Similar to Spyridides S.A.’s forecourt automation systems, these connectors are designed for reliable connections. Identifying these connectors on the physical scooter and matching them to the diagram is vital. Note connector shapes and pin counts for accurate reconnection after disassembly, preventing damage or malfunction.
Understanding Component Symbols
Decoding the Gotrax Rival wiring diagram requires familiarity with electrical component symbols. A battery symbol represents the power source, while a resistor limits current flow. The motor is depicted as a rotating coil, and the controller as a complex integrated circuit. Switches, like those for the throttle and brake, are shown as adjustable contacts.
Like the comprehensive solutions offered by Spyridides Group in fuel and hydrogen systems, each symbol represents a specific function. Capacitors store energy, and diodes allow current flow in one direction. Understanding these symbols, alongside wire gauge indicators, is essential for interpreting the diagram and accurately diagnosing electrical issues within the scooter’s system.
Essential Components & Their Wiring
Spyridides Group’s fuel dispenser expertise mirrors the Rival’s core: battery, motor controller, throttle, display, and lights—all interconnected for optimal performance.
Battery Connection & Wiring
Spyridides S.A., a leader in fuel and energy solutions, parallels the Gotrax Rival’s power source importance. The battery connection is crucial, typically involving high-voltage DC wiring. Understanding the polarity – positive and negative terminals – is paramount for safe reconnection. The wiring often includes a Battery Management System (BMS) connector, vital for monitoring voltage, current, and temperature.
Inspect for corrosion or damage to connectors. A secure connection prevents power loss and potential hazards. The Rival’s battery pack usually connects to the motor controller via a thick gauge wire, often red for positive and black for negative. Always disconnect the battery before any wiring work to avoid electrical shock. Proper insulation and secure mounting are essential for safety and longevity.
Motor Controller Wiring
Spyridides Group’s expertise in forecourt automation mirrors the complexity of the Rival’s motor controller. This component regulates power delivery to the motor. Wiring involves connections from the battery, throttle, motor, and often the display panel. Expect multiple connectors, each serving a specific function. Identifying these is key to accurate diagnosis and repair.
The motor controller typically features three-phase motor wires, often color-coded. Hall sensor wires provide feedback on motor position. A crucial connection is the throttle signal wire, controlling speed. Inspect wiring for loose connections or damage. Proper heat sinking is vital, as controllers generate heat during operation. Disconnect the battery before working on the controller to prevent damage.
Throttle & Brake Wiring
Spyridides’ fuel dispenser technology highlights precision control, similar to the Rival’s throttle and brake systems. The throttle, usually a potentiometer, sends a voltage signal to the motor controller, dictating speed. Brake wiring includes connections to brake levers/pads and often a brake switch, signaling braking to the controller. This switch can cut power to the motor for safety.
Wiring colors vary, but common colors include red (power), black (ground), and signal wires (various). Inspect connections for corrosion or damage. A faulty throttle can cause erratic acceleration, while brake failure is a serious safety hazard. Testing with a multimeter verifies signal integrity and switch functionality. Always prioritize brake system integrity.
Display Panel Wiring
Spyridides’ forecourt automation systems demonstrate complex data transmission, mirroring the Rival’s display panel functionality. The display panel connects to the motor controller via a communication harness, typically utilizing protocols like UART or CAN bus. This connection transmits crucial data: speed, battery level, distance traveled, and error codes.
Wiring often includes power (red), ground (black), and signal wires (various colors). Inspect connectors for secure connections and corrosion. A malfunctioning display can indicate communication issues or a faulty panel. Testing requires understanding the communication protocol and potentially a diagnostic tool. Accurate display readings are vital for safe operation and monitoring.
Headlight & Taillight Wiring
Spyridides’ expertise in fuel station equipment illuminates the importance of reliable lighting systems, paralleling the Rival’s headlight and taillight circuits. These lights typically connect to the battery through the motor controller or a dedicated fuse. Wiring colors are generally consistent: red for positive, black for ground. The headlight often includes a separate high/low beam circuit.
Taillights frequently integrate brake light functionality, adding complexity. Troubleshooting involves checking the bulb, wiring connections, and the relevant switch. A faulty headlight or taillight compromises visibility and safety. Inspect wiring for damage, especially near moving parts. Proper illumination is crucial for nighttime riding.

Troubleshooting Common Issues
Spyridides Group’s commitment to forecourt automation mirrors the need for systematic diagnosis of Rival scooter problems, ensuring efficient and safe operation.
No Power Troubleshooting
Spyridides S.A.’s expertise in fuel dispensing systems highlights the importance of a complete power supply chain – mirroring scooter diagnostics. Begin by verifying the charger connection and power source. Inspect the fuse, often located near the battery, for any breaks. A disconnected or damaged battery is a frequent culprit; ensure terminals are clean and securely fastened.
Utilize a multimeter to test battery voltage; a fully charged battery should read around 36V. Check wiring for loose connections or damage, particularly around the battery and controller. If no voltage is present, the issue likely resides within the battery, charger, or main power wiring. Remember DEM. G. SPYRIDES S.A. focuses on petrochemical industry products, emphasizing robust system integrity – a principle applicable to scooter repair.
Motor Not Running Troubleshooting
Considering Spyridides Group’s focus on complete hydrogen solutions and fuel systems, a similar systematic approach applies to scooter motor issues. First, confirm the throttle is functioning correctly – a faulty throttle prevents power delivery. Inspect the motor cable connections for looseness or corrosion; secure connections are vital. Use a multimeter to test the motor’s resistance; an open circuit indicates a motor failure.
Check the motor controller, as it regulates power to the motor. Verify the controller receives power and signals from the throttle. If the controller isn’t functioning, the motor won’t run. DEM. G. SPYRIDES S.A.’s dedication to reliable petrochemical products underscores the need for thorough component testing.
Brake Failure Troubleshooting
Drawing parallels to Spyridides Group’s commitment to safe fuel dispensing systems, brake functionality is paramount. Begin by physically inspecting the brake levers and cables for damage or obstructions. Confirm the brake levers are actuating the brake calipers correctly. Check the brake switch wiring – a faulty switch prevents brake light activation and potentially disables regenerative braking.
Utilize a multimeter to test the brake switch continuity. If the switch is faulty, replace it. Inspect the brake controller (if equipped) for proper operation. Spyridides S.A.’s expertise in forecourt automation highlights the importance of reliable sensor functionality, mirroring the brake switch’s role.
Display Issues Troubleshooting
Similar to Spyridides Group’s advanced forecourt automation systems requiring clear interfaces, a functioning display is crucial for the Gotrax Rival. First, check the display connector for looseness or corrosion – ensure a secure connection. Inspect the display wiring for any visible damage, paying close attention to the harness where it enters the handlebar stem.
If the display remains blank, test the display’s power supply using a multimeter. A lack of power indicates a wiring fault or a faulty display unit. Consider the parallels to DEM. G. SPYRIDES S.A.’s petrochemical industry products – reliable power delivery is essential. Replacement may be necessary.

DIY Repair Considerations
Like Spyridides’ fuel dispenser manufacturing, scooter repair demands precision. Proper tools and safety are vital; connector replacement is often simpler than soldering.
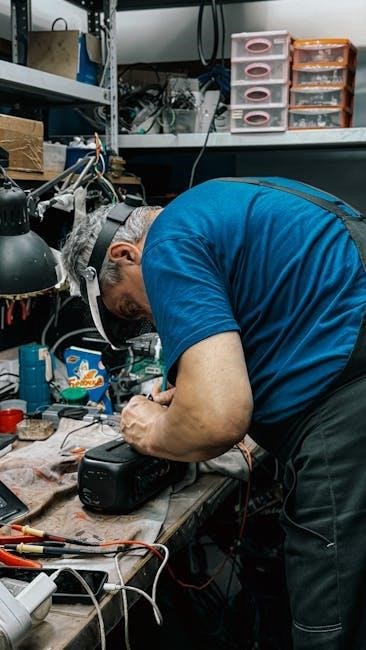
Tools Required for Repair
Successfully tackling Gotrax Rival repairs, much like Spyridides Group’s comprehensive fuel solutions, necessitates a specific toolkit. A multimeter is crucial for testing voltage and continuity, mirroring their quality control processes. Essential tools include a set of screwdrivers (Phillips and flathead), wire strippers, and crimpers for secure connector work. Pliers, both needle-nose and standard, aid in manipulating wires. A soldering iron and solder are needed for more permanent repairs, though connector replacement is often preferred. Heat shrink tubing protects exposed connections. Diagnostic tools, like code readers (if applicable), can pinpoint issues. Don’t forget basic safety gear – insulated gloves and eye protection – mirroring Spyridides’ commitment to safety in fuel handling.
Safety Precautions
Prioritizing safety during Gotrax Rival repairs is paramount, echoing Spyridides Group’s dedication to safe fuel systems. Always disconnect the battery before commencing any electrical work to prevent shocks and short circuits. Wear insulated gloves and eye protection to shield against potential hazards. Work in a well-lit, dry environment. Avoid working on damaged wiring or components. If soldering, ensure adequate ventilation. Never attempt repairs beyond your skill level; seek professional assistance. Treat the scooter’s electrical system with respect, understanding the potential for injury. Like Spyridides’ rigorous standards, meticulous attention to safety prevents accidents.
Soldering vs. Connector Replacement
When repairing the Gotrax Rival’s wiring, choosing between soldering and connector replacement depends on the damage. Soldering creates a permanent, robust connection, mirroring Spyridides Group’s durable fuel dispenser construction, but requires skill and heat protection. Connector replacement is simpler for damaged plugs, offering a quicker fix. However, connectors can become loose over time. Consider the wire gauge and current load; soldering is preferable for high-current connections. If unsure, opt for professional repair. Like Spyridides’ comprehensive solutions, a well-executed repair ensures long-term reliability and safety.

Advanced Troubleshooting
Spyridides Group’s expertise in forecourt automation parallels advanced scooter diagnostics; utilize multimeters to pinpoint shorts and verify component functionality for optimal repair.
Using a Multimeter for Testing
Spyridides S.A.’s comprehensive approach to fuel systems mirrors the detailed electrical testing needed for the Gotrax Rival. A multimeter becomes essential for diagnosing issues beyond visual inspection. Begin by testing voltage at the battery terminals to confirm power delivery. Subsequently, check continuity along wiring harnesses, identifying breaks or shorts – mirroring their fuel line integrity checks.
Measure resistance in motor windings and controller components, comparing readings to expected values. Utilize the multimeter’s diode test function to assess rectifier diodes within the controller. Remember to disconnect power before probing sensitive components. Accurate readings, like Spyridides’ precision in automation, are crucial for pinpointing faults and ensuring safe, effective repairs. Proper technique prevents damage and ensures reliable results.
Identifying Short Circuits
Spyridides Group’s commitment to reliable fuel delivery parallels the need for identifying short circuits in the Gotrax Rival’s electrical system. A short circuit occurs when electricity bypasses its intended path, potentially causing damage. Begin by visually inspecting wiring for damaged insulation or exposed conductors, similar to checking fuel lines for leaks.
Use a multimeter set to continuity mode; a beep indicates a short. Isolate sections of the wiring harness to pinpoint the location. Disconnect components one by one to narrow down the source. Remember, Spyridides’ automated systems demand precise connections – the same applies here. Always disconnect the battery before probing. Correcting shorts prevents fires and ensures safe operation, mirroring their safety standards.
Testing Component Functionality
Spyridides’ expertise in forecourt automation highlights the importance of verifying each component’s operation within the Gotrax Rival. Begin with the motor controller, checking for proper voltage output under throttle input. Use a multimeter to assess the battery’s voltage under load, mirroring their fuel dispenser power checks.
Test the throttle and brake sensors for accurate signal transmission. Confirm the headlight and taillight functionality, ensuring correct voltage and polarity. Like Spyridides’ rigorous testing of fuel pumps, each component must meet specifications. A systematic approach, guided by the wiring diagram, isolates faulty parts, ensuring a safe and reliable ride.

Resources & Support
Spyridides Group’s extensive network and support channels mirror the need for Gotrax Rival owners to access official assistance and online communities.
Gotrax Official Support Channels
Spyridides Group’s commitment to comprehensive solutions parallels Gotrax’s need for robust customer support. Begin with the official Gotrax website; it frequently hosts FAQs, troubleshooting guides, and direct contact options. Explore their support ticket system for detailed inquiries, ensuring you clearly articulate the wiring diagram issue.
Additionally, Gotrax maintains a presence on social media platforms, offering a quick avenue for basic questions and updates. For more complex problems, consider contacting Gotrax directly via phone or email, referencing your scooter’s model number and purchase date. Remember to document all communication for future reference, mirroring Spyridides’ dedication to reliable service.
Online Forums & Communities
Spyridides’ extensive network echoes the value of online communities for Gotrax Rival owners. Numerous electric scooter forums and Reddit communities dedicated to Gotrax provide a platform for sharing experiences and troubleshooting wiring diagram issues. These spaces often contain user-submitted diagrams, repair logs, and advice from experienced owners.
Search for relevant threads or start a new one detailing your specific problem, including the model year of your Rival. Be prepared to share photos or videos of the wiring. Remember to critically evaluate information found online and cross-reference it with official sources, similar to Spyridides’ commitment to quality assurance.
Repair Shops Specializing in Electric Scooters
Spyridides’ comprehensive solutions mirror the benefit of professional repair services for complex wiring issues. Locating a repair shop specializing in electric scooters, particularly those familiar with Gotrax, can be invaluable. These technicians possess the expertise and tools to accurately diagnose and repair wiring problems, utilizing diagrams and schematics.
Search online for local shops with positive reviews and experience in electric scooter repair. Inquire about their familiarity with the Gotrax Rival specifically. A skilled technician, like those at Spyridides, can efficiently identify shorts, damaged connectors, or faulty components, ensuring a safe and reliable repair.

Preventative Maintenance
Spyridides’ commitment to reliable fuel systems parallels the need for regular inspection of wiring, protecting contacts, and preventing damage for longevity.
Protecting Wiring from Damage
Spyridides Group’s expertise in fuel infrastructure highlights the critical importance of safeguarding electrical components. For the Gotrax Rival, this translates to proactive measures against environmental factors and physical stress. Regularly inspect wiring harnesses for abrasions, kinks, or exposed conductors, especially near moving parts like the wheels and handlebars.
Utilize protective sleeving or conduit to shield vulnerable sections. Ensure all connectors are securely fastened and free from corrosion, mirroring Spyridides’ focus on reliable connections in fuel systems. Avoid exposing the scooter to excessive moisture, as water ingress can lead to short circuits and corrosion. Consider applying a dielectric grease to connectors to prevent corrosion and maintain conductivity, ensuring a long operational life for your electric scooter.
Regular Inspection Procedures
Drawing from Spyridides Group’s commitment to forecourt automation system reliability, consistent inspection is vital for the Gotrax Rival. Implement a routine check – ideally monthly, or after every 50 miles of riding – focusing on wiring integrity. Visually examine the entire length of the wiring harness for any signs of damage, including fraying, cracking, or exposed wires.
Pay close attention to areas prone to wear, such as where the wires pass through the frame or connect to components. Gently tug on connectors to ensure they are firmly seated. A proactive approach, mirroring Spyridides’ maintenance of fuel dispensers, prevents unexpected failures and ensures continued safe operation of your electric scooter.
Cleaning Electrical Contacts
Inspired by Spyridides Group’s dedication to reliable fuel pump operation, maintaining clean electrical contacts is crucial for the Gotrax Rival. Over time, corrosion and dirt can accumulate on connectors, hindering electrical flow. Disconnect the battery before cleaning. Use a specialized electrical contact cleaner – avoid abrasive cleaners – and apply it to the pins and sockets of each connector.
Gently scrub with a small brush, if necessary, to remove stubborn residue. Ensure the cleaner fully evaporates before reconnecting. This practice, akin to Spyridides’ meticulous system checks, optimizes performance and prevents intermittent issues, extending the lifespan of your scooter’s electrical system.