Honeywell TH8320R1003 Installation & User Manual Overview (February 16, 2026)
Today, February 16, 2026, this overview details the TH8320R1003 installation and operation, offering PDF manuals for users and installers alike, ensuring a smooth setup experience.
Access comprehensive guides, troubleshooting steps, and FAQs, alongside resources for smart home integration and remote control via the mobile app, maximizing thermostat functionality.
Explore detailed wiring diagrams, setup procedures, and advanced features, all readily available in downloadable PDF format, supporting both basic operation and complex system configurations.
The Honeywell TH8320R1003 is a sophisticated, programmable thermostat designed for optimal home comfort and energy efficiency. This model, part of the VisionPRO 8000 series, offers advanced features like customizable scheduling, remote access, and smart home integration capabilities. Finding the correct installation manual PDF is crucial for a successful setup, and Honeywell provides extensive documentation to guide users through the process.

This thermostat caters to both DIY enthusiasts and professional installers, offering a balance of user-friendliness and advanced functionality. The TH8320R1003 supports various heating and cooling systems, including furnaces, air conditioners, and heat pumps. Accessing the PDF manual unlocks detailed wiring diagrams, step-by-step installation instructions, and troubleshooting guides.
Understanding the thermostat’s interface and programming options is simplified with the readily available PDF resources. Whether you’re replacing an existing thermostat or installing a new system, the TH8320R1003, coupled with its comprehensive manual, ensures a seamless and efficient experience.
What’s Included in the Box
Upon opening the Honeywell TH8320R1003 package, you’ll find the thermostat unit itself, a wall plate for mounting, and mounting screws for secure installation. Crucially, the box does not automatically include a printed installation manual; however, a comprehensive PDF manual is readily available online via Honeywell’s website and various support channels.
Additional components typically include wire labels to aid in correct wiring connections, and potentially, wire connectors depending on the specific kit. The PDF installation manual details each component and its purpose, ensuring you have everything needed for a successful installation. It’s vital to verify all parts are present before beginning the process.
Remember to download and review the PDF before starting. While the physical box contains the hardware, the PDF manual provides the essential software – the knowledge – to properly install and configure your new thermostat, maximizing its functionality and efficiency.
Safety Precautions
Prior to installing your Honeywell TH8320R1003, always disconnect power to your HVAC system at the breaker box to avoid electrical shock. The PDF installation manual emphasizes this critical safety step repeatedly. Incorrect wiring can damage the thermostat and potentially create a fire hazard, so meticulous attention to detail is paramount.
Never attempt installation if you are uncomfortable working with electrical wiring; consult a qualified HVAC technician. The PDF manual provides detailed wiring diagrams, but understanding electrical safety is your responsibility. Ensure hands are dry during installation, and avoid working in damp environments.
Carefully read and understand all warnings and cautions outlined in the PDF manual before proceeding. Improper installation voids the warranty and could lead to system malfunction. Always follow local electrical codes and regulations. Safety is paramount – prioritize it throughout the entire installation process.
Installation Guide
The TH8320R1003 installation manual PDF provides step-by-step instructions, covering tools, wiring, mounting, and powering on, for a successful and efficient setup process.
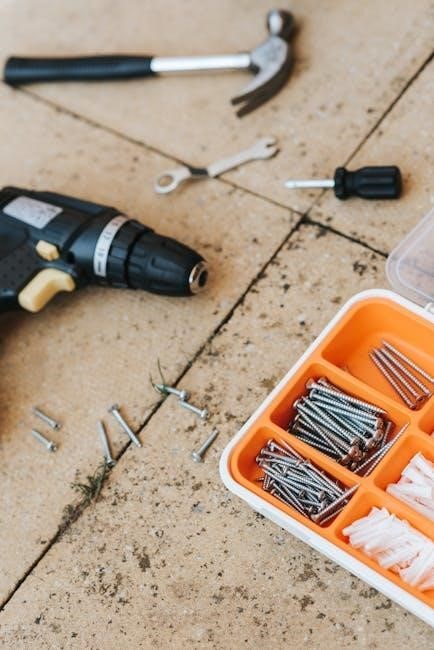
Tools Required for Installation
Before beginning the installation of your Honeywell TH8320R1003 thermostat, ensure you have the necessary tools readily available to streamline the process and avoid interruptions. The installation manual PDF details these requirements, emphasizing safety and efficiency.
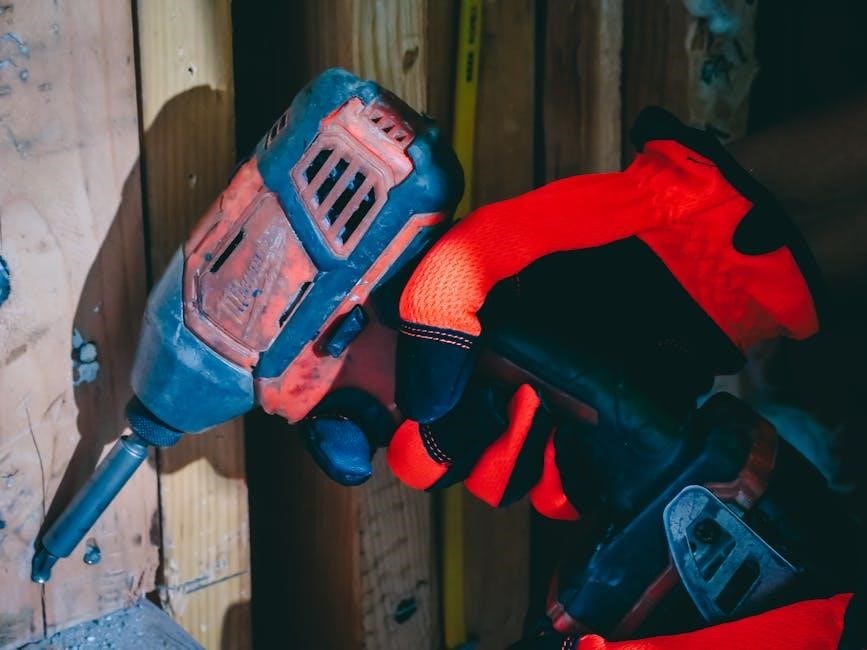
You will need a Phillips head screwdriver for securing the thermostat to the wall plate and connecting wiring. A flathead screwdriver may also be useful for certain terminal connections. Wire strippers are essential for preparing the thermostat wires, ensuring clean and secure connections. A level is crucial for mounting the wall plate straight, guaranteeing accurate temperature readings.
Additionally, a voltage tester is highly recommended to verify power is off before working with wiring, preventing electrical shock. Pliers can assist with bending and manipulating wires. Finally, having a digital multimeter available can be helpful for troubleshooting potential electrical issues during installation, as outlined in the PDF guide.
Wiring Diagram Explanation
The Honeywell TH8320R1003 installation manual PDF provides a detailed wiring diagram crucial for correct installation. Understanding this diagram is paramount for ensuring proper system functionality and avoiding damage. The diagram illustrates the connections for various system components, including heating, cooling, and common wires.
Typically, ‘R’ designates the 24V power source, while ‘C’ represents the common wire, essential for consistent power. ‘Y’ controls the cooling, ‘W’ activates heating, and ‘G’ manages the fan. The PDF clearly labels each terminal and corresponding wire color, simplifying the process.
Pay close attention to any specific wiring configurations for heat pumps or multi-stage systems, as these may differ. Incorrect wiring can lead to system malfunction or damage. Always double-check connections against the diagram before powering on the thermostat, referencing the PDF for clarification.
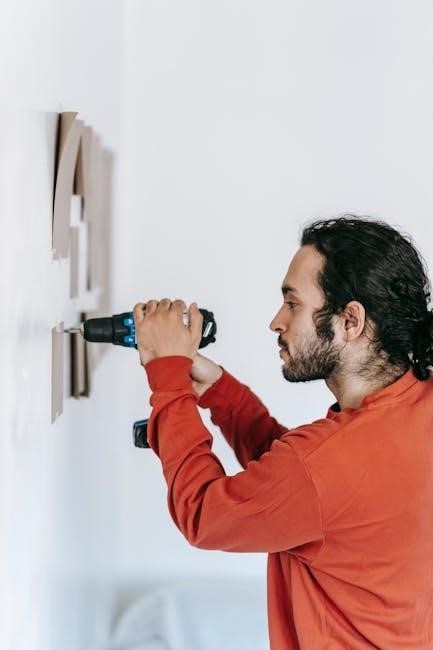
Mounting the Wall Plate
The TH8320R1003 installation manual PDF emphasizes careful wall plate mounting for a secure and aesthetically pleasing installation. Begin by selecting a suitable location, avoiding direct sunlight, drafts, or areas near heat-generating appliances. Ensure the chosen spot is level for accurate temperature readings.
The PDF details using the provided screws and anchors to firmly attach the wall plate to the wall. Pre-drilling pilot holes is recommended, especially for hard surfaces. Verify the plate is securely fastened before proceeding with wiring.
Proper mounting prevents the thermostat from shifting or becoming dislodged, ensuring reliable operation. The manual highlights the importance of concealing wires within the wall for a clean appearance. Refer to the PDF’s illustrations for correct screw placement and mounting techniques.
Connecting the Wiring
The TH8320R1003 installation manual PDF provides a detailed wiring diagram crucial for correct connection. Before starting, always disconnect power to the HVAC system at the breaker. Identify each wire using the labeling system in the PDF – common (C), heating (W), cooling (Y), and fan (G) are key.
Carefully connect each wire to the corresponding terminal on the thermostat’s base. Ensure wires are securely inserted and not loose. The PDF stresses double-checking connections against the diagram to prevent damage or malfunction.
Incorrect wiring can lead to system failure or safety hazards. If unsure, consult a qualified HVAC technician. The manual also addresses wiring for various system types, including heat pumps. Refer to the PDF’s specific instructions for your system configuration.
Powering On and Initial Setup
Following wiring, restore power to your HVAC system at the breaker. The TH8320R1003 installation manual PDF details the initial startup sequence. The thermostat should power on automatically, displaying a welcome screen. If it doesn’t, re-check wiring connections as outlined in the PDF.
The initial setup, guided by the on-screen prompts, involves setting the date, time, and system type (heating, cooling, or heat pump). The PDF provides step-by-step instructions for each stage. You’ll also configure your zip code for accurate weather information.
The manual emphasizes registering your thermostat online for warranty purposes and accessing advanced features. Follow the PDF’s instructions for connecting to Wi-Fi, enabling remote access and smart home integration. A factory reset option is also detailed within the PDF.
User Manual & Operation
The TH8320R1003 installation manual PDF unlocks full functionality, detailing display navigation, scheduling, system modes, hold features, and fan control options for optimal comfort.
Understanding the Display Interface
The Honeywell TH8320R1003’s display provides crucial information at a glance, as detailed in the installation manual PDF. The main screen showcases the current temperature, setpoint, and system mode – Heat, Cool, Auto, or Off. Navigating the interface utilizes intuitive buttons for adjusting settings and accessing menus.
Icons clearly indicate active functions like fan operation (Auto, On) and programming status. The display also presents outdoor temperature readings when connected to a compatible sensor. Understanding the backlight controls and screen brightness adjustments, outlined in the PDF, enhances visibility.
Detailed explanations within the manual cover interpreting error messages and troubleshooting common display issues. Users can customize display preferences, including temperature units (Fahrenheit or Celsius), ensuring a personalized experience. The PDF manual provides visual aids illustrating each screen element and its corresponding function, simplifying operation for all users.
Programming Temperature Schedules
The TH8320R1003, as detailed in the installation manual PDF, allows for customized temperature schedules to optimize comfort and energy savings. Users can program different setpoints for various times of the day and days of the week. The manual guides you through creating these schedules, offering flexibility to match your lifestyle.
The PDF explains how to define “Wake,” “Leave,” “Return,” and “Sleep” periods, each with its own temperature setting. You can copy schedules across multiple days, streamlining the programming process. Temporary overrides, like the “Hold” function, allow for adjustments without disrupting the programmed schedule.
The manual provides step-by-step instructions, including screenshots, to navigate the scheduling menus. Understanding the scheduling options within the PDF ensures efficient energy usage and personalized comfort. Advanced users can explore features like Smart Response, which learns your heating/cooling patterns.
Setting System Mode (Heat, Cool, Auto, Off)
The TH8320R1003’s system mode selection, thoroughly explained in the installation manual PDF, dictates how the thermostat controls your HVAC system. Users can choose between “Heat,” “Cool,” “Auto,” and “Off” modes, each serving a distinct purpose.
“Heat” activates the heating system to maintain the set temperature. “Cool” activates the cooling system. “Auto” intelligently switches between heating and cooling to maintain the desired temperature, based on indoor and setpoint values. The PDF details how to configure temperature differentials for efficient switching.
“Off” disables both heating and cooling. The installation manual PDF provides clear instructions on navigating the menu to select the desired mode. Understanding these modes is crucial for optimal comfort and energy management. The manual also clarifies how system mode interacts with programmed schedules and temporary holds.
Using the Hold Function
The TH8320R1003’s “Hold” function, detailed within the installation manual PDF, allows users to temporarily override programmed temperature schedules. This is ideal for unexpected changes in occupancy or comfort preferences. The PDF explains two primary hold options: temporary and permanent.
A temporary hold maintains the current setpoint for a specified duration, after which the thermostat reverts to the programmed schedule. The installation manual PDF illustrates how to set the hold duration. A permanent hold disables the programmed schedule entirely, maintaining the current setpoint indefinitely until manually cancelled.
The PDF provides step-by-step instructions on activating and deactivating both hold types. Understanding the hold function ensures personalized comfort control without permanently altering your established heating and cooling routines. It’s a key feature for maximizing energy efficiency and convenience.
Fan Control Options
The TH8320R1003 offers versatile fan control options, comprehensively explained in the installation manual PDF. Users can select from “Auto,” “On,” and programmable circulation settings. “Auto” mode operates the fan only during heating or cooling cycles, optimizing energy usage. The “On” setting keeps the fan running continuously, providing consistent air circulation.
The installation manual PDF details how to program a circulation schedule, allowing the fan to run periodically even when heating or cooling isn’t active. This enhances air mixing and temperature consistency throughout the home. The PDF includes clear diagrams illustrating the menu navigation for these settings.
Proper fan control contributes to improved comfort and potentially lower energy bills. Understanding these options, as outlined in the PDF, empowers users to tailor the system to their specific needs and preferences, maximizing the thermostat’s functionality.
Troubleshooting & FAQs
PDF manuals offer solutions for common issues like power failures or incorrect readings; resetting the TH8320R1003 often resolves connectivity problems, as detailed within.
Thermostat Not Powering On
If your Honeywell TH8320R1003 thermostat fails to power on, the PDF installation manual recommends a systematic troubleshooting approach. First, verify the batteries, replacing them if they exhibit low voltage, as detailed in the downloadable guide.
Next, carefully inspect the wiring connections at both the thermostat and the heating/cooling system, ensuring secure and correct placement according to the wiring diagram within the PDF. A loose connection is a frequent cause.
Consider briefly removing the thermostat from the wall plate for approximately 30 seconds, then reinstalling it; this can often reset the system and restore power. Refer to the PDF manual for specific disconnection instructions to avoid damaging the unit.
If these steps don’t resolve the issue, consult the PDF’s troubleshooting section for further guidance or contact Honeywell support for assistance, potentially indicating a more significant hardware problem.
Incorrect Temperature Readings
If the Honeywell TH8320R1003 displays inaccurate temperature readings, the PDF installation manual suggests several checks. First, ensure the thermostat isn’t directly exposed to sunlight, drafts, or heat-generating appliances, as these can skew results – details are in the PDF.
Next, verify the thermostat is level on the wall plate; an uneven installation can affect sensor accuracy. Consult the PDF for proper mounting instructions. Also, check for obstructions near the thermostat that might impede airflow around the sensor.
The PDF manual outlines a calibration procedure, allowing you to adjust the displayed temperature to match a known accurate thermometer. If calibration doesn’t resolve the issue, a faulty temperature sensor may be the cause, requiring professional service.
Review the PDF’s troubleshooting section for advanced diagnostics and contact Honeywell support if the problem persists, potentially indicating a hardware malfunction needing repair or replacement.
Connectivity Issues (Wi-Fi Models)
For Honeywell TH8320R1003 Wi-Fi models experiencing connectivity problems, the PDF installation manual provides a systematic troubleshooting guide. Initially, confirm your home Wi-Fi network is functioning correctly and that the thermostat is within range of the router – detailed in the PDF.
Next, double-check the Wi-Fi password entered during setup; incorrect credentials are a common cause of connection failures. The PDF outlines the steps to re-enter network information. Also, ensure your router’s firewall isn’t blocking the thermostat’s access.
If issues persist, try restarting both the thermostat and your Wi-Fi router. The PDF manual suggests a factory reset of the thermostat’s network settings as a last resort. Refer to the PDF for reset instructions.
Finally, consult the PDF’s FAQ section or contact Honeywell support for assistance with more complex network configurations or potential hardware limitations.
Resetting the Thermostat to Factory Defaults
The Honeywell TH8320R1003 installation manual PDF details a straightforward process for restoring factory default settings. This is useful for troubleshooting persistent issues or preparing the thermostat for a new installation. However, be aware that resetting will erase all personalized settings, schedules, and Wi-Fi configurations.
According to the PDF, the primary method involves removing the thermostat from its wall plate for a minimum of 30 seconds. This disconnects power and initiates the reset. Ensure the system power is also switched off at the breaker for added safety, as outlined in the PDF.
Upon re-installation, the thermostat will prompt you to re-enter setup information, including date, time, and network details. The PDF provides step-by-step instructions for this process. Carefully follow these instructions to avoid configuration errors.
Refer to the PDF’s troubleshooting section if the reset doesn’t resolve the initial problem or if the thermostat fails to enter setup mode.
Finding Additional Support & Resources (PDF Manuals)
The Honeywell TH8320R1003 installation manual PDF serves as a primary resource, but further support is readily available. Numerous online databases host the PDF and related documentation, including comprehensive user manuals spanning 72 pages. These resources, accessible from over 10,000 brands, offer detailed guidance.
Honeywell’s official website provides direct access to PDF versions of the installation guide and user manual. Additionally, a frequently asked questions (FAQ) section addresses common concerns. If you can’t locate a solution within the PDF, the FAQ may offer assistance.
Online forums and communities dedicated to home automation often feature discussions and troubleshooting tips specific to the TH8320R1003. These platforms can provide peer-to-peer support and alternative solutions. Remember to always verify information found on external sites.
For direct assistance, Honeywell’s customer support team can be contacted via phone or email, as detailed on their website.
Advanced Features
The TH8320R1003, detailed in the installation manual PDF, unlocks remote access via a mobile app and seamless smart home integration for enhanced control.
Remote Access & Mobile App Control
The Honeywell TH8320R1003, as outlined in the installation manual PDF, offers convenient remote access and control through a dedicated mobile application. This feature allows users to monitor and adjust their home’s temperature from virtually anywhere with an internet connection, providing unparalleled flexibility and energy savings.
The app, compatible with both iOS and Android devices, mirrors the thermostat’s interface, enabling users to view current settings, create and modify schedules, and switch between system modes (Heat, Cool, Auto, Off) with ease. Push notifications can be configured to alert users to significant temperature changes or system alerts, ensuring prompt attention to potential issues.
Detailed instructions on connecting the thermostat to your home’s Wi-Fi network and pairing it with the mobile app are thoroughly explained within the PDF manual, simplifying the setup process. This remote functionality enhances comfort and provides peace of mind, even when away from home.
Smart Home Integration
The Honeywell TH8320R1003, detailed in the installation manual PDF, seamlessly integrates with popular smart home ecosystems, enhancing automation and convenience. Compatibility extends to platforms like Amazon Alexa and Google Assistant, enabling voice control of your home’s temperature.
Through these integrations, users can adjust the thermostat using simple voice commands, such as “Alexa, set the temperature to 72 degrees,” or “Hey Google, what’s the temperature inside?” The PDF manual provides step-by-step instructions for linking the thermostat to your preferred smart home platform.
Furthermore, integration allows for the creation of customized routines and scenes, automating temperature adjustments based on time of day, occupancy, or other smart home device triggers. This feature maximizes energy efficiency and creates a more comfortable living environment, all managed through a unified smart home experience.