triazolam dental instructions

Triazolam for Dental Procedures: A Comprehensive Guide

Triazolam, a short-acting benzodiazepine, is frequently utilized in dentistry to manage patient anxiety, often inducing amnesia and sedation for a comfortable experience.

What is Triazolam?

Triazolam, commonly known by the brand name Halcion, is a potent, short-acting benzodiazepine medication primarily prescribed for the short-term treatment of insomnia. However, its anxiolytic (anti-anxiety) properties make it a valuable tool in dentistry for patients experiencing significant dental anxiety or fear. Dentists routinely employ triazolam for oral conscious sedation, allowing patients to remain awake but deeply relaxed during procedures.

Unlike some other sedatives, triazolam has a relatively quick onset and a short duration of action, minimizing lingering drowsiness post-procedure. This characteristic is particularly beneficial for dental settings, where patients need to regain alertness relatively quickly. The medication works by enhancing the effects of gamma-aminobutyric acid (GABA), a neurotransmitter that inhibits brain activity, leading to a calming effect. A notable side effect, often welcomed by patients, is amnesia – a reduced recall of the dental procedure itself.

How Triazolam Works for Dental Anxiety

Triazolam’s effectiveness in managing dental anxiety stems from its impact on the central nervous system. As a benzodiazepine, it potentiates the effects of GABA, a neurotransmitter responsible for reducing neuronal excitability throughout the brain and body. This enhancement leads to a calming effect, diminishing feelings of fear, apprehension, and stress associated with dental procedures.

Specifically, triazolam reduces activity in the amygdala, the brain region involved in processing emotions like fear. Simultaneously, it increases activity in areas promoting relaxation. The resulting state allows patients to undergo treatment with significantly less distress. Furthermore, the induced amnesia – a common side effect – contributes to a more positive experience by minimizing conscious recollection of the procedure itself. This combination of anxiolytic and amnestic effects makes triazolam a preferred choice for many dentists addressing patient anxiety.

Pre-Appointment Instructions: Preparation is Key

Prior to receiving triazolam for your dental procedure, meticulous preparation is crucial for safety and efficacy. Your dentist will thoroughly review your medical history, including all current medications, to identify potential interactions. Disclosing all prescriptions, over-the-counter drugs, and supplements is paramount. Expect detailed instructions regarding dietary restrictions, typically involving fasting for a specific period – often 6-8 hours – before your appointment to minimize the risk of nausea or aspiration.

It’s essential to understand that triazolam significantly impairs cognitive and motor functions. Therefore, arranging for a responsible adult to accompany you home and remain with you for at least 24 hours post-procedure is non-negotiable. Avoid alcohol and other sedatives in the days leading up to, and following, treatment. Adhering to these guidelines ensures a safe and comfortable experience.

Dietary Restrictions Before Taking Triazolam

Strict adherence to pre-appointment dietary guidelines is vital when preparing for triazolam sedation. Typically, patients are instructed to abstain from eating or drinking anything – including water – for a minimum of six to eight hours before their scheduled dental procedure. This restriction minimizes the risk of nausea, vomiting, and potential aspiration during sedation. The empty stomach ensures the medication is absorbed effectively and reduces the likelihood of complications.

Even seemingly minor consumption, like a small snack or a sip of juice, can interfere with the drug’s efficacy and safety profile. Your dentist will provide precise fasting instructions tailored to your specific case. It’s crucial to clarify any uncertainties regarding permissible substances or timing. Following these dietary restrictions diligently contributes significantly to a smooth and secure experience.

Medication Interactions to Disclose

Comprehensive disclosure of all medications, supplements, and herbal remedies is paramount before receiving triazolam for dental procedures. Triazolam can interact dangerously with various substances, potentially amplifying its sedative effects or causing adverse reactions. Specifically, avoid combining triazolam with other central nervous system depressants like opioids, antihistamines, alcohol, or benzodiazepines.

Inform your dentist about any pre-existing medical conditions, particularly respiratory issues, liver or kidney problems, or a history of mental health concerns. Certain medications, even over-the-counter drugs, can significantly alter triazolam’s metabolism and impact its safety. Failing to disclose this information could lead to unpredictable and potentially life-threatening consequences. Accurate and complete medication history ensures a safe and effective sedation experience.

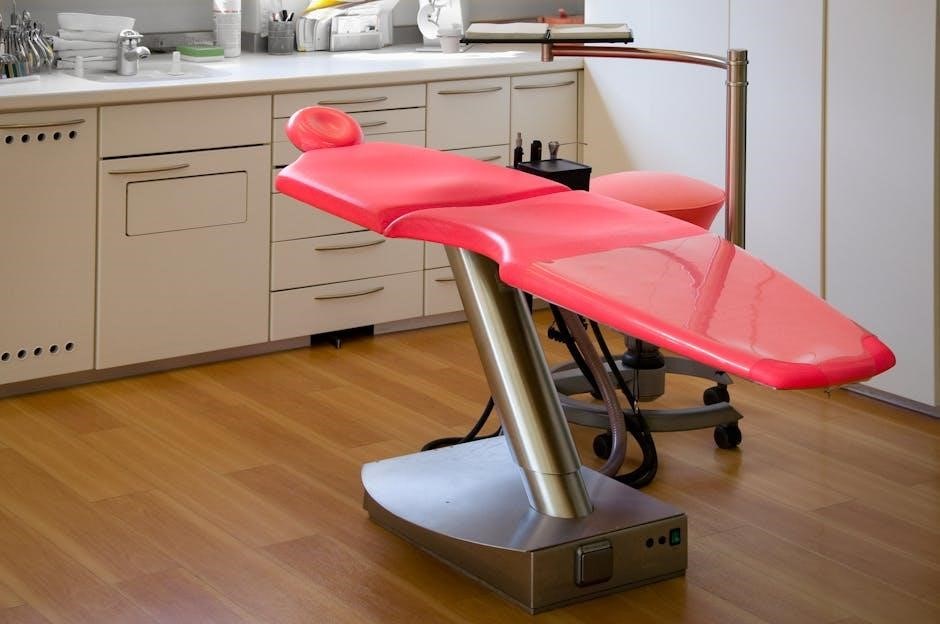
Dosage and Administration in a Dental Setting

Triazolam dosage for dental procedures is highly individualized, determined by factors like patient weight, age, anxiety level, and overall health. Typically, a single oral dose – ranging from 0.25mg to 0.5mg – is administered approximately 20-30 minutes before the scheduled appointment; Dentists carefully assess each patient to establish the lowest effective dose, minimizing potential side effects.

Administration involves a simple oral tablet taken with a small amount of water. Vital signs are continuously monitored throughout the procedure, ensuring patient safety and comfort. The dentist and dental team are trained to manage any adverse reactions that may occur. Post-procedure, patients remain under observation until the initial sedative effects begin to subside, allowing for a safe recovery.

Common Side Effects of Triazolam

Triazolam, while effective, can induce several common side effects. Drowsiness and sedation are frequently experienced, as the medication’s primary function is to calm the central nervous system. Many patients report amnesia, often considered a beneficial effect as it minimizes recollection of the dental procedure itself. This memory lapse is typically temporary and resolves as the drug wears off.

Other potential side effects include dizziness, lightheadedness, and impaired coordination. These effects usually subside within a few hours post-treatment. It’s crucial for patients to be aware of these possibilities and arrange for appropriate post-operative care, including a responsible adult for transportation. While generally mild, these side effects should be communicated to the dentist.

Amnesia: A Frequent and Often Desired Effect

Amnesia is a remarkably common side effect of triazolam administration in a dental setting, and frequently, it’s viewed positively by both patients and practitioners. This anterograde amnesia specifically impacts the formation of new memories during the procedure, meaning patients often have little to no recollection of the sights, sounds, or sensations experienced.

Dr. Kim Capehart noted that patients often appreciate not remembering the dental work. This effect can significantly reduce anxiety surrounding future appointments, as the negative experience isn’t vividly stored in memory. However, it’s important to understand that amnesia is temporary, and memories typically return as the medication’s effects diminish. Dentists routinely inform patients about this potential side effect before administration.

Drowsiness and Sedation Levels

Triazolam induces varying levels of drowsiness and sedation, dependent on dosage, individual patient factors, and concurrent medications. Patients typically experience a calming effect, ranging from mild relaxation to a deeper state of sleepiness. This sedation is crucial for minimizing anxiety and discomfort during dental procedures.

The goal is to achieve a level of sedation where the patient is responsive but significantly relaxed. It’s vital that patients understand they will feel sleepy and may have difficulty concentrating immediately following the procedure. Full alertness doesn’t return quickly, necessitating a responsible adult to provide transportation. Dentists carefully monitor sedation levels throughout the appointment, ensuring patient safety and comfort.

Rare but Serious Side Effects & Allergic Reactions

Although uncommon, serious side effects and allergic reactions to triazolam can occur, demanding immediate medical attention. These include anaphylaxis and angioedema, manifesting as swelling of the face, lips, tongue, or throat, alongside difficulty breathing. Such reactions are life-threatening and require emergency intervention.

Other rare, yet significant, adverse effects may include paradoxical reactions – agitation or increased anxiety instead of sedation – and, very rarely, hallucinations. Patients with a history of allergic reactions to benzodiazepines are at higher risk. Dentists meticulously screen patients for allergies and monitor for any signs of adverse reactions during and after administration. Prompt recognition and treatment are paramount to ensure patient safety.

Post-Procedure Care: Recovery and Monitoring

Following triazolam administration, careful post-procedure care is crucial for patient safety. Due to the drug’s sedative effects, arranging for responsible transportation – a friend, family member, or ride-sharing service – is mandatory; patients should not drive, operate machinery, or make important decisions for at least 24 hours.

Avoiding alcohol and other sedatives post-treatment is essential, as these can amplify the effects of triazolam, leading to dangerous respiratory depression. Patients should adhere to any specific dietary recommendations provided by their dentist. Dentists will monitor patients until they regain sufficient alertness and coordination before discharge, providing clear instructions regarding potential side effects and when to seek medical attention.

Arranging for Transportation After Treatment

Due to the significant sedative effects of triazolam, patients absolutely cannot drive themselves home after a dental procedure. This is a non-negotiable safety precaution. The medication impairs judgment, coordination, and reaction time, posing a serious risk to both the patient and others on the road.

Patients must pre-arrange for a responsible adult – a trusted friend or family member – to provide transportation. Alternatively, a reliable ride-sharing service or taxi can be utilized, but the accompanying adult must remain with the patient until they are fully recovered. It’s vital to emphasize this requirement during pre-appointment instructions to ensure a safe recovery process.

Avoiding Alcohol and Other Sedatives Post-Treatment

Following triazolam administration, it is critically important to abstain from alcohol and any other sedative medications – including over-the-counter sleep aids and antihistamines – for at least 24 hours, and ideally for 48 hours. Combining triazolam with these substances significantly amplifies the central nervous system depressant effects, leading to potentially dangerous consequences such as respiratory depression, profound sedation, and even coma.

Patients should be explicitly informed about this restriction during their pre-operative instructions. Even seemingly harmless combinations can be hazardous. Caregivers accompanying the patient should also be aware of this precaution to ensure adherence and patient safety during the recovery period. Prioritize clear communication regarding potential interactions.

Triazolam and Patient Safety: Considerations for Dentists

Dentists prescribing triazolam must meticulously screen patients for pre-existing medical conditions, current medications, and potential drug interactions. A thorough medical history is paramount, focusing on respiratory issues, liver or kidney dysfunction, and any history of adverse reactions to benzodiazepines. Careful dosage adjustments are crucial, considering patient weight, age, and anxiety levels.

Appropriate monitoring equipment, including pulse oximetry, should be readily available during and immediately after the procedure. Staff must be trained to recognize and manage potential complications like respiratory depression or paradoxical reactions. Detailed post-operative instructions, emphasizing the need for a responsible adult escort and avoidance of alcohol, are essential for patient safety.

Triazolam for Children Undergoing Dental Work

Utilizing triazolam in pediatric dentistry requires heightened caution and precise dosage calculations based on the child’s weight and age, typically ranging from 39 to 81 months as observed in studies. Pre-treatment assessment of gait ataxia, visual acuity, and depth perception is vital to establish a baseline and monitor potential neurological effects. Parental consent and a detailed discussion of potential side effects, including amnesia, are mandatory.

Post-procedure, close observation is crucial, ensuring the child is adequately supervised by a responsible adult. Parents should be informed about the possibility of temporary behavioral changes or drowsiness. Maintaining a calm and reassuring environment throughout the process minimizes anxiety and promotes a positive dental experience for the young patient.

Hallucinations: A Rare Reported Side Effect

Although infrequent, hallucinations have been documented as a potential, albeit unusual, adverse reaction to triazolam administration. Case reports suggest this side effect, while rare, necessitates awareness among dental professionals and patients. The underlying mechanisms are not fully understood, but may involve individual susceptibility or interactions with other factors.

Patients experiencing hallucinations post-triazolam should immediately report these symptoms to their dentist or physician. Discontinuation of the medication and supportive care are typically recommended. Thorough medical history review, including any pre-existing psychiatric conditions, is crucial before prescribing triazolam to minimize the risk. Vigilant monitoring post-procedure can aid in early detection and management of this uncommon side effect.

Alternatives to Triazolam for Dental Anxiety

For patients experiencing dental anxiety, several alternatives to triazolam exist, offering varying levels of sedation and suitability. Nitrous oxide (laughing gas) provides mild sedation and is easily titratable, making it a popular choice for less severe anxiety. Oral sedation with medications like diazepam, while longer-acting, can be effective for moderate anxiety.

Non-pharmacological approaches also play a vital role. Cognitive Behavioral Therapy (CBT) and mindfulness techniques can equip patients with coping mechanisms to manage anxiety. Hypnosis and guided imagery offer relaxation strategies. The choice of alternative depends on the patient’s anxiety level, medical history, and preferences. A comprehensive discussion with the dentist is essential to determine the most appropriate and safe approach.

Understanding the Risks vs. Benefits

Triazolam offers significant benefits for patients with dental anxiety, primarily reducing fear and discomfort during procedures, often resulting in amnesia of the experience. This can improve treatment adherence and long-term oral health. However, potential risks must be carefully considered.

Side effects, though generally mild, can include drowsiness, dizziness, and impaired coordination. Rare but serious risks involve allergic reactions, including anaphylaxis, requiring immediate medical attention. The potential for cognitive impairment and dependence, though low with short-term use, exists. A thorough patient evaluation, including medical history and medication review, is crucial. Weighing the benefits of anxiety reduction against these potential risks, in collaboration with the dentist, is paramount for informed decision-making.

Legal and Ethical Considerations for Prescribing Triazolam

Dentists prescribing triazolam must adhere to strict legal and ethical guidelines. This includes possessing a valid DEA license to administer controlled substances and complying with state-specific regulations regarding benzodiazepine prescriptions. Thorough patient screening is essential, documenting medical history, current medications, and allergy information.

Informed consent is paramount; patients must understand the risks and benefits of triazolam, including potential side effects like amnesia and the necessity for a responsible adult to provide transportation post-procedure. Maintaining accurate patient records and avoiding over-prescription are crucial ethical obligations. Dentists should prioritize patient safety, considering alternative anxiety management techniques when appropriate, and remaining vigilant for signs of potential misuse or dependence.

Long-Term Effects of Triazolam Use (Related to Dental Anxiety Management)

While triazolam is generally considered safe for short-term use in managing dental anxiety, long-term effects are less studied. Repeated use, even for dental procedures, can potentially lead to psychological dependence, though this is rare with infrequent, as-needed administration. Tolerance may develop, requiring higher doses for the same effect, increasing side effect risks.

More concerning is the potential for cognitive impairment with prolonged benzodiazepine use, impacting memory and psychomotor skills. However, in the context of dental anxiety management, where triazolam is used sporadically, these risks are minimized. Dentists should emphasize non-pharmacological anxiety reduction techniques to reduce reliance on medication and address the underlying fear contributing to dental avoidance.

When to Contact Your Doctor After Triazolam Administration

Prompt medical attention is crucial if you experience severe side effects post-triazolam administration. Seek immediate care for signs of a serious allergic reaction, including hives, difficulty breathing, or swelling of the face, lips, tongue, or throat – these could indicate anaphylaxis or angioedema.

Contact your physician if you experience prolonged or unusual drowsiness, confusion, or difficulty coordinating movements. Report any hallucinations or significant memory loss that extends beyond the expected amnesic effect. While amnesia is common, persistent cognitive issues warrant evaluation.

Furthermore, if you notice any changes in mood, such as increased depression or suicidal thoughts, inform your doctor immediately. Do not hesitate to reach out if you have any concerns regarding your physical or mental wellbeing following the procedure.

Resources for Patients with Dental Anxiety

Managing dental anxiety is achievable through various support systems. The American Dental Association (ADA) offers resources and tips for coping with fear and apprehension related to dental visits, accessible on their website (ada.org). Several organizations specialize in anxiety disorders, such as the Anxiety & Depression Association of America (ADAA), providing information and support networks (adaa.org).

Consider exploring cognitive behavioral therapy (CBT) techniques, often available through mental health professionals, to address underlying fears. Online resources and self-help guides can also offer valuable strategies for relaxation and stress reduction.

Discuss your anxieties openly with your dentist; they can tailor your experience to minimize discomfort. Support groups, both in-person and online, provide a safe space to share experiences and learn from others facing similar challenges. Remember, seeking help is a sign of strength.

frozen cauliflower pizza cooking instructions

Frozen Cauliflower Pizza Cooking Instructions: A Comprehensive Guide

Discover the secrets to perfectly cooked frozen cauliflower pizza! This guide covers oven and air fryer methods‚ ensuring a crispy crust and delicious results every time.

Frozen cauliflower pizza has rapidly gained popularity as a healthier and gluten-free alternative to traditional pizza. It caters to diverse dietary needs without sacrificing flavor or convenience. These pizzas utilize a crust crafted from cauliflower‚ offering a lower-carbohydrate and calorie option.

Cooking frozen cauliflower pizza requires a slightly different approach than conventional pizzas‚ primarily due to the unique texture of the crust. Mastering the optimal cooking method – whether oven baking or air frying – is key to achieving a satisfyingly crispy base. This guide will provide detailed instructions and helpful tips to ensure your frozen cauliflower pizza turns out perfectly every time‚ delivering a delightful and guilt-free pizza experience.

Understanding Cauliflower Pizza Crust

Cauliflower pizza crust differs significantly from traditional dough-based crusts. It’s created by processing cauliflower into rice-like pieces‚ then combining it with ingredients like cheese‚ eggs‚ and seasonings. This mixture is pressed and baked to form a surprisingly sturdy base.

However‚ its delicate nature means it requires careful handling and specific cooking techniques. Unlike wheat-based crusts‚ cauliflower crust doesn’t develop gluten‚ resulting in a softer texture. This is why achieving crispness is often a challenge. Understanding this fundamental difference is crucial for successful cooking; pre-baking and higher temperatures are often necessary to prevent a soggy outcome and enjoy a flavorful‚ healthy pizza.

Popular Brands of Frozen Cauliflower Pizza

The market offers a growing selection of frozen cauliflower pizzas‚ catering to various tastes. Costco stands out with its popular varieties like Roasted Vegetable‚ Margherita Four Cheese‚ and a classic Four Cheese Cauliflower Pizza – known for their value and flavor. Beyond Costco‚ several other brands are widely available.

These include options from Trader Joe’s‚ offering unique flavor combinations‚ and brands like Cali’flour Foods‚ specializing exclusively in cauliflower-based products. Other readily found brands provide convenient options for a quick and healthier pizza night. Each brand may have slightly different cooking instructions‚ so always check the packaging!

Costco Cauliflower Pizza Varieties

Costco consistently impresses with its range of frozen cauliflower pizzas‚ providing both quality and affordability. Currently‚ popular choices include the Roasted Vegetable Pizza‚ a vibrant medley of flavors‚ and the classic Margherita Four Cheese Pizza‚ offering a traditional taste. The Four Cheese Cauliflower Pizza remains a steadfast favorite among customers.

These pizzas are often praised for their generous toppings and surprisingly satisfying crust. Costco frequently rotates its offerings‚ so you might discover limited-edition varieties as well. Checking your local Costco’s inventory is recommended to see what’s currently available. They are a convenient and tasty option for a quick meal!

Other Widely Available Brands

Beyond Costco‚ several other brands offer frozen cauliflower pizza‚ catering to diverse dietary needs and preferences. Many grocery stores stock options from brands specializing in gluten-free or health-conscious foods. These include varieties with different cheese blends‚ vegetable combinations‚ and even meat toppings.

Exploring these brands allows for greater choice and accessibility. Look for options that clearly state their ingredients and cooking instructions. Some brands focus on creating a particularly crispy crust‚ while others prioritize flavor profiles. Reading reviews can help you determine which brand best suits your taste and cooking style‚ ensuring a satisfying pizza experience.

Cooking Methods for Frozen Cauliflower Pizza

Frozen cauliflower pizza offers convenient cooking options‚ primarily utilizing either a conventional oven or an air fryer. Each method yields slightly different results‚ impacting crust crispness and overall cooking time. Oven baking provides a more traditional approach‚ allowing for even heat distribution‚ while air frying excels at creating a remarkably crispy crust in a shorter timeframe.

Understanding the nuances of each method is key to achieving optimal results. Factors like preheating‚ temperature settings‚ and cooking duration all play crucial roles. We’ll explore detailed instructions for both techniques‚ offering tips to ensure your frozen cauliflower pizza is perfectly cooked and delightfully satisfying.

Oven Baking Instructions

Baking a frozen cauliflower pizza in the oven is a straightforward process‚ delivering consistently good results. Begin by preheating your oven to a temperature between 400°F and 425°F – this ensures even cooking and a crispy crust. The optimal baking temperature often depends on the specific brand‚ so checking the packaging is recommended.

Recommended baking time generally falls between 12 to 18 minutes. However‚ monitor the pizza closely‚ as cooking times can vary. Placing the pizza directly on the oven rack promotes better airflow and crisping; For enhanced results‚ consider utilizing a pizza stone or baking steel‚ which retain heat effectively and contribute to a superior crust texture.

Preheating the Oven

Proper oven preheating is absolutely crucial for achieving a perfectly cooked frozen cauliflower pizza. Allow your oven to fully reach the desired temperature – typically between 400°F and 425°F – before placing the pizza inside. This ensures even heat distribution‚ preventing a soggy crust and guaranteeing thorough cooking.

A fully preheated oven helps to quickly crisp the cauliflower crust‚ mimicking the results of a traditional pizza oven. Resist the urge to open the oven door frequently during preheating‚ as this can cause temperature fluctuations. Consistent heat is key! Give the oven at least 15-20 minutes to stabilize at the set temperature for optimal baking.

Optimal Baking Temperature

Determining the ideal baking temperature is vital for frozen cauliflower pizza success. Most manufacturers recommend a range of 400°F to 425°F (204°C to 218°C). However‚ 425°F generally yields the best results – a crispy crust and fully melted toppings. Lower temperatures may lead to a soft‚ undercooked crust‚ while excessively high heat could burn the crust before the toppings are heated through.

Experimentation within this range can help you find your sweet spot‚ depending on your oven and the specific brand of pizza. A higher temperature promotes quicker cooking and enhanced crispness. Consistent monitoring is still important‚ even at the optimal temperature‚ to prevent over-browning.

Recommended Baking Time

Generally‚ a frozen cauliflower pizza requires between 12 to 18 minutes of baking time in a conventional oven. This timeframe‚ however‚ is a guideline and can fluctuate based on the pizza’s brand‚ crust thickness‚ and your oven’s calibration. Starting with 12 minutes is advisable‚ then checking for doneness.

Air fryer cooking significantly reduces this time‚ typically ranging from 6 to 8 minutes‚ though some brands may need up to 15 minutes. Always refer to the packaging instructions for the manufacturer’s specific recommendations. Regular checks during the final few minutes are crucial to prevent burning and ensure a perfectly cooked pizza.

Air Fryer Cooking Instructions

Utilizing an air fryer offers a remarkably quick and convenient method for preparing frozen cauliflower pizza. This appliance excels at achieving a delightfully crispy crust in a fraction of the time compared to conventional ovens. Preheating is often unnecessary with modern air fryers‚ but consult your model’s manual.

Typically‚ cooking times range from 10 to 15 minutes‚ contingent upon the brand and crust thickness. For optimal results‚ arrange the pizza in a single layer within the air fryer basket‚ ensuring adequate air circulation; Regular monitoring during the final minutes is recommended to prevent overcooking and achieve your desired level of crispness.

Air Fryer Temperature Settings

Achieving the ideal temperature is crucial when air frying frozen cauliflower pizza for a perfectly crisp crust. Generally‚ a temperature range of 375°F to 400°F (190°C to 200°C) yields excellent results. However‚ some sources recommend 400°F (200°C) for optimal crisping‚ particularly for thicker crusts.

It’s always best practice to consult the specific instructions provided on the pizza’s packaging‚ as recommendations can vary between brands. Starting at 380°F (193°C) allows for a balance between thorough cooking and preventing the crust from burning. Adjust the temperature slightly based on your air fryer model and desired level of crispness.

Air Fryer Cooking Duration

Typically‚ air frying a frozen cauliflower pizza takes between 6 to 15 minutes‚ but this is heavily dependent on the brand‚ crust thickness‚ and your air fryer’s power. Initial cooking times often range from 8 to 12 minutes‚ but checking for doneness is vital.

For a truly crispy crust‚ consider starting with 8 minutes‚ then adding 1-2 minute increments until the cheese is melted and bubbly‚ and the crust is golden brown. Monitoring closely prevents burning. Some pizzas may require up to 15 minutes for complete cooking‚ especially those with thicker crusts or numerous toppings. Always refer to package directions!

Tips for Crispy Air Fryer Crust

Achieving a crispy crust in the air fryer requires a few key techniques. Firstly‚ avoid overcrowding the basket; cook pizzas in batches for optimal air circulation. Secondly‚ lightly spray the crust with olive oil before cooking – this promotes browning and crispness.

Consider flipping the pizza halfway through the cooking process for even heating. If your air fryer has a dedicated “pizza” setting‚ utilize it! Finally‚ preheating the air fryer is crucial for consistent results. Don’t be afraid to add an extra minute or two to the cooking time if needed to reach your desired level of crispiness.

Achieving a Crispy Crust

The biggest challenge with cauliflower pizza is often achieving a truly crispy crust. Oven temperature is paramount; consistently maintaining 400-425°F is vital for proper cooking and texture. Pre-baking the crust for a few minutes before adding toppings can also significantly improve crispness by removing excess moisture.

Investing in a pizza stone or baking steel is highly recommended. These materials retain heat exceptionally well‚ creating a hot surface that crisps the bottom of the crust beautifully. Ensure the stone or steel is preheated with the oven for at least 30 minutes before baking. Proper heat distribution is key to avoiding a soggy center and a burnt edge.

Importance of Oven Temperature

Maintaining the correct oven temperature is absolutely crucial when cooking frozen cauliflower pizza. Lower temperatures result in a soft‚ soggy crust‚ while excessively high heat can burn the toppings before the crust fully cooks. Most manufacturers recommend a range of 400°F to 425°F for optimal results.

Consistent heat ensures even cooking throughout the pizza‚ preventing a raw center and an overcooked exterior. Preheating the oven thoroughly is equally important; allow at least 20-30 minutes for it to reach the desired temperature. Using an oven thermometer can verify accuracy‚ as oven dials aren’t always precise. A well-heated oven is the foundation for a crispy‚ delicious cauliflower pizza.

Pre-Baking Techniques

To truly elevate your frozen cauliflower pizza‚ consider employing pre-baking techniques. This involves briefly baking the crust before adding toppings. Pre-baking for 5-7 minutes at 375°F helps to firm up the crust‚ minimizing sogginess later on. Ensure the crust is evenly heated during this initial stage.

Another helpful trick is to lightly brush the crust with olive oil before pre-baking; this adds flavor and promotes crisping. Alternatively‚ placing the frozen pizza directly on the oven rack (instead of a baking sheet) can improve airflow and crust texture. These simple steps create a sturdier base for your toppings‚ guaranteeing a more satisfying pizza experience.

Using a Pizza Stone or Baking Steel

For an exceptionally crispy cauliflower pizza crust‚ utilizing a pizza stone or baking steel is highly recommended. These materials retain heat incredibly well‚ creating a hot surface that mimics a professional pizza oven. Preheat the stone or steel in the oven for at least 30-60 minutes at the highest possible temperature – typically 500-550°F.

Carefully slide the frozen pizza directly onto the preheated surface. The intense heat will quickly cook the crust‚ resulting in a delightfully crunchy texture. Remember to use a pizza peel to safely transfer the pizza. Baking with a stone or steel significantly improves the overall quality and texture of your frozen cauliflower pizza.

Checking for Doneness

Determining when your frozen cauliflower pizza is perfectly cooked involves observing visual cues and‚ optionally‚ checking the crust’s temperature. Look for a golden-brown and slightly crispy crust – this is a primary indicator of doneness. The cheese should be fully melted and bubbly‚ with some areas potentially browned.

If you desire a more precise check‚ use an instant-read thermometer. Insert it into the center of the crust; a temperature of around 200-210°F suggests it’s ready; Remember that cooking times can vary‚ so these are guidelines. Always prioritize a fully cooked crust and melted cheese for a safe and enjoyable pizza experience.

Visual Cues for a Cooked Pizza

Successfully gauging the doneness of your frozen cauliflower pizza relies heavily on visual inspection. A fully cooked pizza will exhibit a golden-brown crust‚ indicating sufficient heat penetration and crisping. Observe the cheese; it should be completely melted‚ bubbly‚ and potentially have some browned spots for enhanced flavor.

The toppings should also appear heated through and slightly caramelized. If the crust is pale or the cheese isn’t fully melted‚ it requires additional cooking time. Pay close attention to the edges of the crust – they should be firm and slightly lifted. These visual indicators provide a reliable assessment of your pizza’s readiness.

Checking the Crust Temperature

For ultimate accuracy‚ verifying the crust’s internal temperature ensures a thoroughly cooked pizza. Using an instant-read thermometer‚ carefully insert the probe into the center of the crust‚ avoiding toppings. A temperature of 165°F (74°C) signifies that the pizza has reached a safe and desirable level of doneness.

This method is particularly useful for thicker crusts or when visual cues are ambiguous. Remember that cauliflower crusts may not firm up as much as traditional dough‚ so temperature is a reliable indicator. Always exercise caution when using a thermometer in a hot oven or air fryer. Confirming the temperature guarantees a perfectly baked pizza.

Topping Considerations

Selecting the right toppings is crucial for a delightful cauliflower pizza experience. Lighter toppings‚ such as roasted vegetables‚ fresh herbs‚ and lean proteins‚ work best to prevent a soggy crust. Avoid overloading the pizza‚ as excessive moisture can compromise the crust’s integrity.

Pre-cooking vegetables with high water content‚ like mushrooms or spinach‚ helps reduce excess moisture. Similarly‚ draining ingredients like olives or pineapple thoroughly is recommended. Cheese should be added in moderation; a light to medium layer ensures optimal melting without creating a soggy base. Experiment with flavors‚ but prioritize dryness for a crispy result!

Best Toppings for Cauliflower Pizza

For optimal flavor and texture‚ consider these toppings! Roasted vegetables like bell peppers‚ zucchini‚ and onions pair wonderfully with the mild cauliflower crust. Lean proteins such as grilled chicken‚ turkey pepperoni‚ or Italian sausage add a satisfying heartiness. Fresh herbs like basil‚ oregano‚ and rosemary elevate the taste profile.

Cheese options include mozzarella‚ parmesan‚ and a sprinkle of feta. Experiment with pesto‚ sun-dried tomatoes‚ or artichoke hearts for a Mediterranean twist. Remember to balance flavors and avoid overly wet ingredients. A light hand with sauce is also key to preventing sogginess – a thin layer is sufficient!

Avoiding Soggy Toppings

Soggy toppings are a common pitfall with cauliflower pizza! To combat this‚ pre-cook vegetables with high water content‚ like mushrooms or spinach‚ to release excess moisture. Pat fresh ingredients dry with paper towels before adding them to the pizza. Use a light hand with tomato sauce; too much will saturate the crust.

Consider using a thicker‚ more robust sauce to prevent it from soaking in. Avoid piling on too many toppings‚ as this can weigh down the crust and create steam. Finally‚ a sprinkle of parmesan cheese under the toppings can act as a moisture barrier‚ helping to maintain a crispy base. These simple steps ensure a delightful‚ non-soggy pizza experience!

Freezing and Storage

Proper freezing and storage are key to maintaining quality. For homemade cauliflower crust‚ cool completely before wrapping tightly in plastic wrap‚ then foil‚ or placing in a freezer-safe bag. It can be stored for up to 2-3 months. When freezing leftover cooked pizza‚ cut into portions and wrap individually to prevent sticking.

Regarding store-bought frozen cauliflower pizza‚ adhere to the “best by” date. Once opened‚ leftover cooked pizza should be refrigerated in an airtight container for up to 3-4 days. Reheating in the oven or air fryer is recommended to restore crispness‚ avoiding the microwave which can lead to sogginess. Enjoy your pizza at its best!

Freezing Homemade Cauliflower Pizza Crust

To successfully freeze your homemade cauliflower pizza crust‚ ensure it’s fully cooled after baking. This prevents ice crystal formation and maintains texture. Wrap the crust tightly in several layers – first with plastic wrap‚ ensuring no air pockets remain‚ then with a layer of aluminum foil. Alternatively‚ use a freezer-safe bag‚ squeezing out excess air before sealing.

Properly wrapped‚ the crust can be stored in the freezer for up to two to three months. When ready to use‚ thaw completely in the refrigerator before adding toppings and baking. Freezing uncooked crust is also possible‚ following the same wrapping procedure‚ but may require a slightly longer baking time. Enjoy future pizza nights!

Storing Leftover Frozen Cauliflower Pizza

Proper storage is key to enjoying leftover frozen cauliflower pizza. Allow the pizza to cool completely before storing it. Place individual slices in airtight containers or wrap them tightly in plastic wrap‚ then foil. Refrigerate immediately to maintain freshness and prevent bacterial growth.

Leftover pizza is best consumed within 3-4 days. For longer storage‚ consider freezing. Wrap slices individually as described above and store in a freezer-safe bag for up to a month. Reheat in the oven or air fryer for optimal crispness‚ avoiding the microwave which can make the crust soggy. Enjoy a second serving!

Troubleshooting Common Issues

Encountering problems with your frozen cauliflower pizza? A soggy crust is a frequent complaint. Ensure the oven temperature is high enough – 425°F is often ideal – and consider pre-baking the crust for a few minutes before adding toppings. Using a pizza stone or baking steel also helps.

Unevenly cooked pizza can be fixed by rotating the pizza halfway through the cooking time. If the toppings are burning before the crust is crisp‚ lower the oven temperature slightly or cover the toppings loosely with foil. Remember to always check for doneness using visual cues and a temperature check. Don’t be afraid to experiment!

Soggy Crust Solutions

A soggy crust is the most common issue with frozen cauliflower pizza. To combat this‚ pre-baking the crust for 5-7 minutes before adding toppings is crucial. This helps to remove excess moisture. Ensure your oven reaches 425°F and consider using a pizza stone or baking steel for direct heat transfer.

Avoid overloading the pizza with wet toppings like fresh tomatoes or too much sauce. Pat down any moist ingredients with a paper towel before adding them. Increasing the oven temperature slightly can also help‚ but watch carefully to prevent burning. Proper air circulation is key – don’t overcrowd the oven!

Unevenly Cooked Pizza Fixes

If your frozen cauliflower pizza cooks unevenly‚ rotating it halfway through baking is essential. This ensures all parts receive equal heat exposure. Check the oven’s temperature accuracy with an oven thermometer; fluctuations can cause inconsistencies. For air fryers‚ ensure the pizza isn’t touching the sides‚ allowing for proper air circulation.

If certain areas remain pale‚ briefly broil the pizza (watching closely!) to add color and crispness. Consider partially cooking the pizza‚ adding toppings‚ then returning it to the oven for a final bake. Ensure the pizza is placed in the center of the oven rack for even heating distribution.

rhode gear bike rack instructions

Rhode Gear Bike Rack Instructions: A Comprehensive Guide (Updated 02/16/2026)

Rhode Gear bike racks provide a secure transport solution for cyclists, and this guide details proper installation and usage for a safe journey.

Rhode Gear has established itself as a prominent manufacturer of bicycle racks, renowned for delivering both convenience and security in transporting your bikes. These racks are engineered for versatility and durability, offering reliable solutions for various vehicle types and cycling needs. Whether you’re planning a weekend getaway or a cross-country adventure, a Rhode Gear rack ensures your bicycles arrive safely at your destination.

Understanding the importance of a properly installed and maintained bike rack is crucial. A secure attachment prevents damage to your vehicle and, more importantly, safeguards your bicycles during travel. This comprehensive guide will walk you through each step, from selecting the right model to performing routine maintenance, ensuring a smooth and worry-free biking experience.

Understanding Different Rhode Gear Models

Rhode Gear offers a diverse range of bike racks tailored to different vehicles and cycling preferences. The Rhode Gear Shuttle is a popular trunk-mounted option, favored for its ease of installation and compatibility with many sedans and hatchbacks. It’s ideal for casual cyclists and families seeking a straightforward transport solution.

Conversely, the Rhode Gear Highway Hitch rack is designed for vehicles equipped with a hitch receiver. This model provides enhanced stability and can often carry more bikes, making it suitable for serious cyclists or those traveling with multiple riders. Understanding these key differences – mounting style, capacity, and vehicle compatibility – is essential when choosing the right Rhode Gear rack for your needs.

Rhode Gear Shuttle Bike Rack: Overview

The Rhode Gear Shuttle is a trunk-mounted bike rack known for its user-friendly design and broad vehicle compatibility. It securely holds bicycles using adjustable straps and padded clamps, protecting your bike’s finish during transport. This model typically accommodates two or three bikes, making it a great choice for small families or couples.

Installation involves strapping the rack to your vehicle’s trunk lid and securing it with additional straps that go inside the car for added stability. The Shuttle’s design prioritizes ease of use, allowing for relatively quick attachment and removal. It’s a cost-effective and convenient option for cyclists seeking a reliable bike transport solution.

Rhode Gear Highway Hitch Bike Rack: Overview

The Rhode Gear Highway Hitch bike rack is designed for vehicles equipped with a 2-inch hitch receiver, offering a robust and stable platform for transporting bicycles. Unlike trunk-mounted racks, the Highway Hitch doesn’t contact the vehicle’s paint, minimizing the risk of scratches or damage. It typically accommodates two bikes and features a tilt-away design for easy access to the rear cargo area.

Installation is straightforward, involving sliding the rack into the hitch receiver and securing it with a pin and clip. The Highway Hitch often includes integrated anti-wobble features and adjustable bike cradles to ensure a secure and comfortable ride for your bicycles. It’s a durable and convenient option for frequent bike transport.

Installation Instructions

Proper installation is crucial for safety; these steps detail how to securely attach your Rhode Gear rack to your vehicle, preventing damage or accidents.

Preparing Your Vehicle for Rack Installation

Before installing your Rhode Gear bike rack, thorough vehicle preparation is essential for a secure and damage-free fit. Begin by carefully reading your vehicle’s owner’s manual to identify any specific warnings or limitations regarding trunk-mounted or hitch-mounted accessories.

Clean the trunk lid or hitch receiver area to remove any dirt, debris, or existing residue. This ensures optimal contact between the rack and your vehicle. Inspect the trunk lid for any pre-existing damage, documenting it with photos to avoid disputes later.

For hitch-mounted racks, verify the hitch receiver is clean and the correct size for your Rhode Gear model. Ensure the hitch is securely fastened to the vehicle’s frame. For trunk-mounted racks, confirm the straps will not interfere with taillights, license plates, or any vehicle sensors.

Attaching the Rhode Gear Shuttle Rack to Your Trunk

Begin by positioning the Rhode Gear Shuttle Rack centrally on your vehicle’s trunk. Extend the support arms and adjust them to align with the contours of your trunk lid and bumper. Secure the upper straps, tightening them evenly to distribute the pressure.

Next, fasten the lower straps, ensuring they wrap around the trunk’s underside and connect firmly to the rack’s attachment points. Tighten these straps incrementally, alternating between sides to maintain balanced tension.

Crucially, avoid over-tightening, which could damage your vehicle’s paint. Once secured, firmly test the rack’s stability by applying downward and lateral pressure. A properly installed rack should exhibit minimal movement.

Securing the Rhode Gear Highway Hitch Rack to Your Hitch

Start by sliding the Rhode Gear Highway Hitch Rack’s shank into your vehicle’s hitch receiver. Ensure it’s fully inserted and aligned with the hitch opening. Next, insert the locking pin through the shank and hitch receiver, securing it with the included clip or retaining device.

Verify the connection is solid by attempting to move the rack – it should not wobble or shift. Tighten the adjustment knob or bolt on the hitch rack to eliminate any play between the shank and receiver.

Finally, double-check that the locking pin and retaining device are securely fastened before loading any bikes. A secure connection to the hitch is paramount for safe transport.

Adjusting Strap Placement for a Secure Fit

Proper strap placement is crucial for a stable and secure fit of your Rhode Gear bike rack. Begin by positioning the straps to avoid contact with any sensitive vehicle paint or trim. Run the straps around the vehicle’s trunk, door openings, or hatch, ensuring they are evenly distributed.

Tighten the straps gradually, alternating between sides to maintain balanced tension. Avoid over-tightening, which could potentially damage your vehicle’s finish. The straps should be snug enough to prevent the rack from shifting during travel, but not so tight that they cause stress.

Regularly check strap tension, especially after initial installation and during longer trips, to ensure continued security.

Loading Your Bikes

Securely loading your bikes onto the Rhode Gear rack requires understanding weight limits, proper positioning, and utilizing straps and clamps effectively.

Bike Compatibility and Weight Limits

Rhode Gear bike racks accommodate a wide range of bicycle types, but understanding compatibility is crucial for safe transport. Most models support various frame styles, including mountain, road, and hybrid bikes. However, bikes with step-through frames or fenders may require additional securing measures or adapters.

Weight limits are paramount; exceeding them compromises stability and safety. The Rhode Gear Shuttle typically handles bikes up to 35 pounds each, while the Highway Hitch rack often supports up to 50 pounds per bike. Always check your specific rack’s documentation for precise weight capacity. Distribute weight evenly across the rack to maintain vehicle balance and prevent strain on the mounting system. Prioritize safety by adhering to these guidelines.

Proper Bike Positioning on the Rack

Optimal bike positioning on your Rhode Gear rack is vital for stability and preventing damage. Generally, heavier bikes should be placed closer to the vehicle’s center to minimize sway. Alternate the direction of bike frames – one facing forward, the next backward – to balance weight distribution effectively;

Ensure the bike frames are securely seated within the designated cradles or clamps. Avoid overcrowding; leave sufficient space between bikes to prevent contact during transit. Pay attention to handlebar and pedal placement, ensuring they don’t interfere with the vehicle or other bikes. Correct positioning minimizes stress on the rack and maximizes safety during your travels.

Securing Bikes with Straps and Clamps

Properly securing your bikes with straps and clamps is paramount for safe transport. Begin by threading the straps through the bike frames and around the rack’s support arms, ensuring a snug fit. Avoid cinching straps too tightly, which could damage the frame; a firm, but not constricting, hold is ideal.

For racks utilizing clamps, verify they firmly grip the bike’s frame tubes. Double-check that all straps and clamps are securely fastened before commencing your journey. Regularly inspect these securing mechanisms during travel, especially after hitting bumps, to maintain a reliable hold.

Preventing Bike-to-Bike Contact

Avoiding contact between bicycles during transport is crucial to prevent scratches and damage. Utilize foam padding or dedicated bike protectors around contact points like handlebars and frames. Strategically position bikes on the rack, maximizing space and minimizing potential collisions.

If using a multi-bike rack, consider alternating handlebar directions to further reduce friction. Secure each bike independently with straps, preventing lateral movement that could lead to rubbing. Regularly check for any shifting during your trip and readjust as needed. Prioritizing separation safeguards your bikes’ finish and structural integrity.

Safety Precautions

Prioritize safety with pre-trip checks, moderate speeds, avoiding rack overload, and consistent strap tension monitoring throughout your travels for secure biking.

Pre-Trip Inspection Checklist

Before each journey with your Rhode Gear bike rack, a thorough inspection is crucial for a safe and enjoyable ride. Begin by verifying the rack’s overall stability and ensuring it’s firmly attached to your vehicle – whether trunk-mounted or hitch-secured.

Next, meticulously examine all straps for any signs of fraying, wear, or damage. Confirm that buckles are functioning correctly and can securely tighten. Inspect the clamps that hold your bikes, ensuring they grip firmly without causing damage to the frames.

Check that all hardware, including bolts and screws, are tightened to the manufacturer’s specifications. Finally, visually confirm that your bikes are properly positioned and secured, with no risk of contact between them or the vehicle. A quick, comprehensive checklist prevents potential roadside issues!

Recommended Driving Speed with a Bike Rack

Maintaining a safe driving speed when transporting bikes with your Rhode Gear rack is paramount for stability and control. While legal speed limits apply, it’s generally recommended to reduce your speed by 5-10 mph, especially on highways or winding roads.

This reduction accounts for the altered vehicle dynamics caused by the added weight and wind resistance. Avoid sudden acceleration, braking, and sharp turns, as these maneuvers can destabilize the rack and potentially lead to an accident.

Regularly check your rearview mirror to monitor the rack’s position and ensure everything remains secure during your trip. Prioritize smooth, predictable driving habits for a worry-free biking adventure!

Avoiding Overloading the Rack

Overloading your Rhode Gear bike rack compromises safety and can cause significant damage to both the rack and your vehicle. Always adhere to the manufacturer’s specified weight capacity, typically found in the rack’s documentation or on a label affixed to the unit.

This capacity considers the combined weight of all bikes and the rack itself. Exceeding this limit can strain the mounting hardware, leading to instability and potential failure.

Distribute the weight evenly across the rack, placing heavier bikes closer to the vehicle’s center. Regularly inspect the rack for any signs of stress or deformation, and never attempt to carry more bikes than the rack is designed for.

Checking Strap Tension During Travel

Maintaining proper strap tension is crucial for bike security throughout your journey with a Rhode Gear bike rack. Straps can loosen due to vibrations and road conditions, potentially allowing bikes to shift or detach.

Plan to stop and inspect strap tension every 50-100 miles, or after any significant changes in road surface. Ensure all straps remain snug and secure around bike frames and the rack’s mounting points.

Retighten any straps that have become loose. Avoid overtightening, as this could damage bike frames or the straps themselves. Consistent checks minimize risk and guarantee a safe, worry-free travel experience.

Maintenance and Care

Regular maintenance extends the life of your Rhode Gear bike rack; cleaning, inspection, and timely replacement of worn parts are essential.

Cleaning Your Rhode Gear Bike Rack

Consistent cleaning is vital for maintaining your Rhode Gear bike rack’s longevity and performance. After each trip, or at least monthly with frequent use, inspect the rack for dirt, grime, and road debris. Use a mild soap and water solution – avoid harsh chemicals or abrasive cleaners that could damage the finish or components.

A soft cloth or sponge works best for wiping down the frame and straps. Pay close attention to areas where straps make contact, as these can accumulate dirt. Rinse thoroughly with clean water and allow the rack to air dry completely before storing. Inspect the hardware during cleaning, looking for any signs of rust or corrosion. Addressing these issues promptly will prevent further damage and ensure continued safe operation.

Storing Your Bike Rack When Not in Use

Proper storage significantly extends the life of your Rhode Gear bike rack. When not in use, choose a dry, sheltered location away from direct sunlight and extreme temperatures. A garage, shed, or even a covered patio are suitable options. Avoid storing the rack outdoors, as prolonged exposure to the elements can cause rust and deterioration of straps and plastic components.

Before storing, ensure the rack is completely dry to prevent mildew growth. Loosen the straps slightly to relieve tension and prevent cracking. If possible, hang the rack to avoid placing weight on the straps. Regularly check the storage area for pests that might damage the rack. Careful storage ensures your rack remains ready for your next cycling adventure.

Inspecting Straps and Hardware for Wear

Regular inspection of your Rhode Gear bike rack’s straps and hardware is crucial for safety. Before each use, meticulously examine all straps for fraying, tears, or signs of weakening. Pay close attention to areas that experience the most stress, such as buckle contact points. Check the metal hardware – bolts, nuts, and pins – for rust, corrosion, or loosening.

Ensure all bolts are tightened to the manufacturer’s specifications. If you notice any damage or wear, replace the affected parts immediately. Don’t compromise safety by continuing to use damaged components. Proactive inspection and timely replacement of worn parts will maintain the rack’s reliability and protect your valuable bikes during transport.

Replacing Worn Parts

When inspection reveals worn or damaged components on your Rhode Gear bike rack, prompt replacement is essential. Rhode Gear typically offers replacement straps, buckles, and hardware kits. Consult the manufacturer’s website or contact customer support to identify the correct parts for your specific model.

When replacing straps, ensure the new ones have the same weight capacity and dimensions as the originals. For hardware, use only genuine Rhode Gear replacements to maintain compatibility and structural integrity. Follow the installation instructions carefully, ensuring all bolts are tightened to the correct torque specifications. Prioritize quality replacements to guarantee continued safety and reliability during bike transport;

Troubleshooting Common Issues

Rhode Gear bike rack problems like wobbling, strap difficulties, or bike slippage can occur; this section offers solutions for a secure ride.

Rack Wobbling During Travel

Rack wobbling is a common concern, often stemming from improper initial installation or loosening during the journey. First, re-check all attachment points – ensure the straps are tightly secured to your vehicle’s trunk or the hitch receiver. Verify the anti-wobble screws (if your model has them) are firmly tightened.

If wobbling persists, consider the weight distribution of your bikes. Evenly distribute the load across the rack to maintain balance. Inspect the hitch receiver itself; a loose hitch can amplify wobbling. For hitch-mounted racks, a hitch stabilizer is a worthwhile investment. Finally, reduce your driving speed, as excessive speed exacerbates any existing instability. Consistent monitoring throughout your trip is crucial.

Difficulty Securing Straps

Strap securing issues often arise from insufficient strap length, incorrect threading, or worn strap buckles. Ensure you’re utilizing the correct strap path as illustrated in the installation guide. If straps are too short, explore purchasing longer replacement straps specifically designed for bike racks.

Inspect the buckles for damage or stiffness; lubricating them with silicone spray can improve functionality. When tightening, pull firmly and evenly to distribute tension. Avoid over-tightening, which can damage the straps or your vehicle’s finish. If straps continue to slip, double-check that the contact points are clean and dry. Regularly inspect straps for fraying or wear, replacing them promptly if needed.

Bike Slipping on the Rack

Bike slippage is frequently caused by inadequate frame contact or insufficient strap/clamp tension. Verify that the bike frame is correctly positioned within the cradles and that the contact points are clean. Ensure the straps or clamps are tightened securely, but avoid over-tightening, which could damage the bike frame.

Consider using bike frame protectors to enhance grip and prevent scratching. For bikes with unusual frame shapes, additional padding might be necessary. Regularly check strap tension during your trip, as vibrations can cause loosening. If slippage persists, double-check the rack’s compatibility with your bike’s frame geometry.

Compatibility Issues with Vehicle Models

Rhode Gear bike racks, while versatile, may encounter compatibility issues with certain vehicle models due to trunk or hatch designs. Some vehicles with steeply sloped rear windows or large spoilers may prevent a secure fit for trunk-mounted racks. Always consult Rhode Gear’s compatibility chart before purchasing, or test-fit the rack if possible.

For hitch-mounted racks, ensure your vehicle has a compatible hitch receiver. Verify the hitch class can handle the combined weight of the rack and bikes. If issues arise, consider a hitch adapter or explore alternative rack styles. Prioritize safety and avoid forcing a fit that compromises stability.

Rhode Gear Bike Rack Accessories

Rhode Gear offers accessories like extra straps, frame protectors, and hitch adapters to enhance your rack’s functionality and protect your bikes and vehicle.

Additional Strap Options

Rhode Gear understands that one size doesn’t fit all when it comes to securing your bicycles. While your rack includes standard straps, exploring additional options can significantly improve security and accommodate diverse bike frame shapes. Consider purchasing ratchet straps for enhanced tightening and a more secure hold, especially for heavier bikes or rough terrain.

Bungee cords, though less robust, can be useful for lighter loads or as secondary restraints. Look for straps with durable buckles and weather-resistant materials to withstand various conditions. Always ensure any additional straps are compatible with your rack’s attachment points and meet the weight capacity requirements. Properly fitted straps minimize movement and prevent damage during transport, contributing to a safer and more enjoyable cycling experience.

Bike Frame Protectors

Protecting your bicycle’s finish is crucial when using a bike rack. Constant contact with metal or plastic rack components can lead to scratches and paint chips. Rhode Gear recommends utilizing bike frame protectors to mitigate this risk. These protectors, often made of soft, padded materials like neoprene or microfiber, create a barrier between the frame and the rack.

They are easily applied and come in various sizes and styles to fit different frame shapes. Consider protectors for the top tube, down tube, and any areas prone to contact. Investing in frame protectors is a small price to pay for preserving your bike’s aesthetic appeal and resale value, ensuring years of worry-free transport.

Hitch Adapters

Rhode Gear Highway Hitch racks require a compatible hitch receiver on your vehicle; However, not all hitches are created equal. If your vehicle’s hitch differs from the standard 1.25” or 2” receiver size, a hitch adapter may be necessary. These adapters allow you to utilize a Rhode Gear rack with a non-standard hitch.

Adapters are available to convert between different sizes, ensuring a secure and stable connection. Always verify the adapter’s weight capacity matches the combined weight of the rack and your bicycles. Prioritize quality adapters from reputable brands to guarantee safety and prevent wobbling during travel. Proper adapter selection is vital for a secure and enjoyable biking experience.

110cc wiring diagram instructions

Understanding a 110cc wiring diagram is crucial for successful engine projects․ These schematics illustrate electrical connections‚ aiding installation‚ troubleshooting‚ and ensuring optimal performance of your vehicle․

What is a 110cc Engine?

A 110cc engine refers to an internal combustion engine with a displacement of approximately 110 cubic centimeters․ These engines are commonly found powering smaller vehicles like mini-bikes‚ pit bikes‚ go-karts‚ and some lightweight motorcycles or ATVs․ Their compact size and relatively simple design make them popular choices for recreational use and entry-level motorized projects;

The “cc” measurement signifies the total volume displaced by all the pistons within the engine’s cylinders as they move․ A 110cc engine typically features a single cylinder‚ though variations exist․ Understanding the engine’s basic components – including the cylinder‚ piston‚ crankshaft‚ and valve train – is helpful when approaching its electrical system․

Because of their widespread use in DIY projects‚ readily available parts‚ and relatively straightforward mechanics‚ 110cc engines often require electrical system modifications or repairs․ This is where a detailed wiring diagram becomes absolutely essential for correct and safe operation․

Importance of a Wiring Diagram

A wiring diagram is fundamentally important when working with a 110cc engine’s electrical system․ It serves as a detailed roadmap‚ illustrating how each component – battery‚ ignition coil‚ starter motor‚ and more – connects and interacts․ Attempting to wire a 110cc engine without a diagram significantly increases the risk of errors‚ potentially leading to malfunctions‚ damage to components‚ or even safety hazards․

Correct wiring ensures the engine starts reliably‚ the ignition system functions properly‚ and all electrical accessories operate as intended․ A diagram simplifies troubleshooting; when issues arise‚ it allows you to systematically trace circuits and identify faulty connections or components․

Whether you’re assembling a new engine‚ repairing existing wiring‚ or modifying the electrical system‚ a clear and accurate diagram is indispensable․ It’s the difference between a frustrating‚ potentially dangerous experience and a smooth‚ successful project‚ guaranteeing a reliable and properly functioning machine․

Scope of this Guide

This guide provides a comprehensive overview of 110cc engine wiring‚ designed for both beginners and experienced mechanics․ We will delve into the core components of the electrical system‚ including the battery‚ starter‚ ignition system (coil‚ CDI‚ spark plug)‚ and associated wiring․ A key focus will be understanding and interpreting wiring diagram symbols‚ enabling accurate circuit tracing and troubleshooting․

We’ll offer step-by-step instructions for connecting the battery‚ wiring the ignition system‚ and installing the starter motor․ Furthermore‚ this resource addresses common wiring issues‚ such as no spark conditions‚ starter motor failures‚ and electrical shorts‚ providing practical troubleshooting techniques․

Finally‚ we’ll direct you to valuable resources for finding 110cc wiring diagrams‚ including online databases‚ manufacturer-specific schematics‚ and supportive community forums․ This guide aims to empower you with the knowledge and skills to confidently tackle any 110cc wiring project․

Core Components of a 110cc Electrical System

Essential components include the battery‚ starter motor‚ ignition system (CDI‚ coil‚ spark plug)‚ and control elements‚ all interconnected as shown in the wiring diagram․

Battery: Function and Specifications

The battery serves as the electrical heart of a 110cc system‚ providing the initial power to start the engine and sustaining the electrical components when the engine isn’t running․ Typically‚ a 110cc engine utilizes a 12-volt battery‚ though specifications can vary based on the specific model and application – whether it’s a mini-bike‚ dirt bike‚ or ATV․

Common battery types include sealed lead-acid (SLA) or lithium-ion options․ SLA batteries are generally more affordable but heavier‚ while lithium-ion batteries offer a lighter weight and increased lifespan‚ albeit at a higher cost․ Amp-hour (Ah) ratings typically range from 7Ah to 9Ah‚ indicating the battery’s capacity to deliver current over time․

Proper battery maintenance‚ including keeping terminals clean and ensuring a full charge‚ is vital for reliable performance․ The wiring diagram clearly illustrates the battery’s connection to the starter solenoid‚ ignition system‚ and other electrical components‚ emphasizing the importance of correct polarity during installation to prevent damage․

Starter Motor and Solenoid

The starter motor is responsible for cranking the 110cc engine‚ initiating the combustion process․ It receives power from the battery through the starter solenoid‚ a crucial intermediary component․ The solenoid acts as a heavy-duty switch‚ using a small current from the ignition switch to engage a larger current flow to the starter motor․

Wiring diagrams depict the solenoid’s connections to the battery (positive and negative terminals)‚ the starter motor‚ and the ignition switch․ A common issue involves a faulty solenoid‚ preventing the starter motor from receiving power․ Symptoms include a clicking sound when attempting to start‚ but no engine turnover․

Correct wiring and a functional solenoid are essential for reliable starting․ The diagram highlights the importance of secure connections and appropriate wire gauge to handle the high current demands of the starter motor․ Inspecting these components during troubleshooting is vital for diagnosing starting problems in a 110cc engine․

Ignition System: Coil‚ CDI‚ and Spark Plug

The ignition system is paramount for combustion in a 110cc engine‚ comprising the ignition coil‚ Capacitive Discharge Ignition (CDI) unit‚ and spark plug․ The CDI unit receives a signal from the engine’s sensors and generates a high-voltage pulse sent to the ignition coil․

The coil then amplifies this voltage‚ delivering it to the spark plug‚ creating the spark needed to ignite the air-fuel mixture․ Wiring diagrams illustrate the precise connections between these components‚ often including a kill switch to interrupt the ignition cycle․ A faulty CDI or coil can result in a ‘no spark’ condition․

Understanding the wiring sequence is crucial for troubleshooting․ Diagrams clearly show grounding points and power supply connections․ Proper wiring ensures efficient energy transfer‚ maximizing engine performance and reliability․ Inspecting these connections and components is vital when diagnosing ignition-related issues․

Understanding Wiring Diagram Symbols

Decoding wiring diagram symbols is essential for interpreting 110cc engine schematics․ Familiarize yourself with representations for wires‚ connections‚ grounds‚ and components for accurate understanding․

Common Symbols for Wires and Connections

Interpreting wire and connection symbols is fundamental to understanding any 110cc wiring diagram․ A solid line typically represents a standard wire‚ indicating a simple electrical path․ Dashed or dotted lines often signify signal wires‚ carrying control information rather than primary power․ Wire gauge isn’t usually depicted directly‚ but color-coding is frequently used – a convention to identify specific circuits like power‚ ground‚ or ignition․

Connection symbols illustrate how wires join․ A simple dot indicates a connection or splice‚ where two or more wires are joined together․ A tee connection shows a wire splitting into two‚ distributing power or signals․ More complex symbols may represent connectors‚ terminals‚ or junctions within a wiring harness․ Recognizing these symbols allows you to trace the electrical flow accurately․

Understanding these basic symbols is the first step towards confidently navigating a 110cc engine’s electrical system․ Proper interpretation prevents miswiring and ensures safe‚ reliable operation of your machine․

Identifying Grounding Symbols

Grounding is a critical aspect of 110cc engine electrical systems‚ and diagrams utilize specific symbols to denote it․ The most common grounding symbol resembles a series of progressively smaller lines descending in a stepped fashion – often likened to a staircase or a fan․ This symbol indicates a connection to the chassis or frame of the vehicle‚ providing a return path for electrical current․

Sometimes‚ a simple straight line with a short perpendicular line attached represents a chassis ground․ It’s crucial to correctly identify these symbols‚ as improper grounding can lead to malfunctions‚ electrical shorts‚ or even damage to components․ Multiple ground points are often used to ensure a reliable connection and minimize resistance․

Always verify grounding connections physically during troubleshooting․ A poor ground can mimic other electrical issues‚ making accurate diagnosis challenging․ Recognizing these symbols is vital for safe and effective 110cc wiring work․

Understanding Component Representation

110cc wiring diagrams employ standardized symbols to represent each electrical component․ The battery is typically shown as a series of parallel plates – positive and negative terminals clearly marked․ The ignition coil is often depicted as a looped rectangle‚ signifying its inductive properties․ A CDI unit (Capacitive Discharge Ignition) appears as a rectangular box‚ sometimes with labeled input and output connections․

The starter motor is usually represented by a circular symbol with a gear icon‚ indicating its mechanical function․ Fuses are shown as a rectangle with a zig-zag line inside‚ denoting their protective role․ Bulbs and lights are often simple circles or rectangles‚ representing the illuminated element․

Understanding these representations allows for quick identification of components within the diagram․ Familiarizing yourself with these symbols streamlines the troubleshooting and repair process‚ enabling efficient diagnosis and correction of electrical issues within the 110cc engine system․

Step-by-Step Wiring Instructions

Follow the 110cc wiring diagram closely‚ connecting the battery‚ ignition‚ and starter motor sequentially․ Ensure secure connections for reliable engine operation and safety․

Battery Connection and Grounding

Proper battery connection and grounding are fundamental to a functioning 110cc electrical system․ Begin by securely mounting the battery‚ ensuring it won’t shift during operation․ Connect the positive (+) terminal to the main power wire‚ often leading to the ignition switch and starter solenoid․ Utilize a properly sized fuse inline with the positive connection to protect the system from overcurrents․

Crucially‚ establish a solid ground connection․ The negative (-) battery terminal must be connected to the engine frame‚ providing a reliable return path for the electrical current․ Clean the grounding point on the frame to remove any paint or corrosion‚ ensuring optimal conductivity․ A poor ground is a common cause of electrical issues․ Double-check all connections for tightness and insulation to prevent shorts․ Remember‚ a stable power supply is the foundation for all other electrical components․

Ignition System Wiring

The ignition system wiring is vital for starting and running your 110cc engine․ Typically‚ this involves connecting the CDI (Capacitive Discharge Ignition) unit‚ ignition coil‚ and spark plug․ The CDI receives a signal from the stator or pickup coil‚ triggering the ignition coil to generate a high-voltage spark․

Begin by connecting the CDI unit to the stator/pickup coil‚ ensuring correct polarity as indicated in your wiring diagram․ Then‚ connect the CDI to the ignition coil․ The ignition coil’s output wire connects directly to the spark plug․ A kill switch‚ wired in series between the CDI and the main power supply‚ allows you to shut off the engine․ Verify all connections are secure and insulated․ Incorrect wiring can prevent spark or damage the CDI unit․ Always refer to a specific diagram for your engine model‚ as wiring configurations can vary․

Starter Motor Wiring

Wiring the starter motor requires careful attention to detail; The starter motor typically connects to the battery through a solenoid․ The solenoid acts as a heavy-duty switch‚ activated by the starter button․ Positive battery voltage runs to the solenoid‚ and from there‚ a heavy-gauge cable connects to the starter motor itself․

Ensure the starter relay and solenoid are correctly wired‚ as these components handle high current․ The starter button sends a small current to the solenoid‚ engaging the starter motor․ A ground wire completes the circuit․ Double-check all connections for tightness and proper insulation to prevent shorts․ If the starter doesn’t engage‚ verify the solenoid is receiving power when the starter button is pressed and that the ground connection is secure․ Always consult a diagram specific to your 110cc engine model․

Troubleshooting Common 110cc Wiring Issues

Effective troubleshooting relies on a wiring diagram․ Common problems include no spark‚ a failing starter‚ or shorts․ Careful inspection and testing pinpoint the root cause․

No Spark Troubleshooting

Diagnosing a “no spark” condition in a 110cc engine requires a systematic approach‚ heavily reliant on the wiring diagram․ First‚ verify the battery is fully charged and connections are clean and tight․ A weak battery can significantly impact ignition performance․

Next‚ inspect the ignition coil․ Use a multimeter to check its resistance against the manufacturer’s specifications․ A faulty coil won’t generate sufficient voltage․ Then‚ examine the CDI (Capacitive Discharge Ignition) unit – a crucial component․ Look for any visible damage or loose connections․ Testing the CDI often requires specialized tools․

Crucially‚ check the spark plug itself․ Ensure it’s properly gapped and free from fouling․ A damaged or incorrectly gapped plug won’t ignite the fuel-air mixture․ Finally‚ trace the wiring between the coil‚ CDI‚ and spark plug‚ looking for breaks‚ shorts‚ or corroded connectors․ The wiring diagram is essential for accurately identifying each wire and its function during this process․ Remember safety first – disconnect the battery before working on the ignition system!

Starter Motor Not Engaging

When a 110cc engine’s starter motor fails to engage‚ consult the wiring diagram to pinpoint the issue․ Begin by verifying the battery’s charge and the starter solenoid’s connections – corrosion is a common culprit․ A weak battery or poor connection prevents sufficient power from reaching the starter․

Inspect the starter relay‚ often located near the battery․ Use a multimeter to confirm it’s receiving power and functioning correctly․ A faulty relay won’t send the signal to activate the solenoid․ Next‚ examine the starter solenoid itself․ Listen for a click when the starter button is pressed; silence indicates a potential solenoid failure․

Trace the wiring from the battery‚ through the relay‚ to the solenoid‚ and finally to the starter motor‚ checking for breaks or shorts․ The wiring diagram is vital for identifying each wire’s path․ Lastly‚ ensure the starter motor brushes aren’t worn and the armature spins freely․ Disconnect the battery before any electrical work!

Electrical Shorts and Fuses

Electrical shorts in a 110cc system can quickly drain the battery and potentially damage components․ The wiring diagram is essential for tracing circuits and identifying the location of a short․ Look for damaged insulation‚ exposed wires‚ or connections touching the frame – these are common causes․

Fuses are critical safety devices protecting the electrical system․ If a fuse repeatedly blows‚ it indicates a short circuit or overload on that specific circuit․ Never replace a fuse with a higher amperage rating‚ as this bypasses the safety mechanism and risks further damage․ Locate the fuse box (refer to the diagram) and inspect each fuse․

Use a multimeter to test for continuity across the fuse; no continuity means it’s blown․ Before replacing a blown fuse‚ identify and rectify the underlying short circuit․ Carefully examine the wiring associated with that circuit‚ looking for any signs of damage or improper connections․ Disconnect the battery before investigating shorts!

Resources for 110cc Wiring Diagrams

Numerous online databases‚ manufacturer websites‚ and community forums offer 110cc wiring diagrams․ These resources provide detailed schematics for troubleshooting and repair․

Online Diagram Databases

Several online databases specialize in providing wiring diagrams for various vehicles‚ including those with 110cc engines․ These platforms often require a subscription or one-time payment to access their extensive collections․ However‚ the investment can be worthwhile for frequent users or those tackling complex wiring projects․ Popular options include dedicated motorcycle wiring diagram sites and broader automotive electrical resource hubs․

These databases typically allow users to search by engine type‚ vehicle make and model‚ or specific component․ The diagrams are often interactive‚ allowing you to zoom in on details and trace individual wires․ Many also include accompanying documentation‚ such as troubleshooting guides and component specifications․ Before committing to a subscription‚ check if the database offers a free trial or sample diagrams to ensure it meets your needs․ Remember to verify the diagram’s accuracy against your specific engine configuration․

Furthermore‚ some online forums dedicated to mini-bikes and small engine mechanics curate collections of wiring diagrams submitted by community members․ While these resources are often free‚ the quality and accuracy can vary․ Always cross-reference information from multiple sources before making any wiring changes․

Manufacturer Specific Diagrams

Obtaining wiring diagrams directly from the manufacturer is often the most reliable approach․ These diagrams are specifically tailored to your engine’s model and year‚ ensuring accuracy and minimizing the risk of errors․ Manufacturers typically provide these diagrams in service manuals‚ parts catalogs‚ or through their online support portals․

However‚ accessing these resources may require purchasing the official service manual for your 110cc engine․ While this represents an upfront cost‚ the manual often contains valuable information beyond just wiring diagrams‚ including detailed repair procedures‚ parts lists‚ and troubleshooting guides․ Check the manufacturer’s website or contact their customer service department to inquire about availability and pricing․

Alternatively‚ some manufacturers offer limited wiring diagrams for free download on their websites‚ particularly for common issues․ Dealer networks can also be a valuable source‚ as they often have access to the latest diagrams and can provide expert assistance․ Always prioritize manufacturer-supplied diagrams whenever possible to guarantee compatibility and safety․

Community Forums and Support

Online community forums dedicated to small engine mechanics‚ mini-bikes‚ and dirt bikes are invaluable resources for 110cc wiring diagrams and troubleshooting assistance․ These platforms connect enthusiasts and experienced mechanics who readily share their knowledge and diagrams․

Searching within these forums using specific keywords like “110cc wiring diagram‚” “engine model‚” or “year” often yields relevant results․ Members frequently upload diagrams they’ve created or sourced‚ and are willing to help interpret them․ Be prepared to provide detailed information about your engine to receive accurate guidance․

However‚ exercise caution when using diagrams from unofficial sources․ Verify the information against multiple sources and cross-reference with manufacturer specifications whenever possible․ Remember that community support is often based on shared experience‚ and may not always be entirely accurate․ Active participation and respectful communication are key to benefiting from these communities․

yaheetech bed frame instructions pdf

Yaheetech Bed Frame Instructions PDF: A Comprehensive Guide

Navigating Yaheetech bed frame assembly is simplified with readily available PDF manuals, offering detailed steps and ensuring a smooth, successful setup experience.

Understanding Yaheetech Bed Frame Models

Yaheetech offers a diverse range of bed frame models, each designed with specific features and aesthetics in mind; From classic metal platform beds, like the ZINUS Trisha, to Victorian-style vintage frames (model 634F), and practical options with storage drawers (model 592420), understanding the nuances of each model is crucial for correct assembly.

Variations exist in construction, slat support systems, and the inclusion of headboards or footboards. Some models, such as platform beds, eliminate the need for a box spring, while others may require one.

Identifying the correct model number – often found on the packaging or a product label – is the first step towards accessing the appropriate assembly instructions and PDF manual. This ensures you’re following the correct steps for your specific Yaheetech bed frame.

Identifying Your Specific Model Number

Locating your Yaheetech bed frame’s model number is paramount for accessing the correct assembly PDF. This unique identifier distinguishes your frame from others, ensuring you follow the precise instructions tailored to its design. Typically, the model number is prominently displayed on the original packaging – often a sticker on the cardboard box.

If the packaging is unavailable, check for a label directly affixed to the bed frame itself. Common locations include the headboard, side rails, or underneath the slats; Examples include models like 634F (Victorian) or 592420 (Storage Drawers);

Having this number allows you to quickly find the corresponding assembly manual online, guaranteeing a smooth and accurate setup process. Without it, you risk using incorrect instructions, potentially leading to assembly errors.

Locating the Official PDF Manual

Finding the official Yaheetech bed frame PDF manual is crucial for correct assembly. A reliable source is often directly linked on the retailer’s website where you purchased the bed. Alternatively, a comprehensive resource, prime-spaces.com, provides access to manuals like the one for the Classic Metal Platform Bed Frame.

A direct Google search using “Yaheetech [Your Model Number] assembly manual PDF” will also yield results. Always prioritize official sources to avoid inaccurate or outdated instructions. Be cautious of third-party websites offering manuals; verify their legitimacy.

Ensure the PDF matches your specific model number to guarantee compatibility. Downloading the correct manual streamlines the assembly process and minimizes potential errors.

Common Yaheetech Bed Frame Types

Yaheetech offers a diverse range of bed frames, each with potentially unique assembly requirements. Popular models include platform bed frames, known for their simplicity and slat support, eliminating the need for a box spring. Another common type features integrated storage drawers, adding functionality and space-saving solutions to bedrooms.

Distinctively, Yaheetech also produces Victorian-style bed frames, often characterized by ornate metalwork and a vintage aesthetic. Understanding your specific frame type is vital before consulting the assembly manual. Each style may necessitate different tools and techniques for proper construction.

Referencing the correct manual, based on your bed frame’s style, ensures a secure and aesthetically pleasing final product.

Platform Bed Frames

Yaheetech platform bed frames are celebrated for their straightforward assembly, typically involving side rails, a headboard, a footboard, and wooden slats. The PDF manual will guide you through connecting the side rails to the headboard and footboard, often using bolts and washers.

Crucially, proper slat placement is essential for mattress support; the manual illustrates the correct spacing and alignment. These frames generally don’t require a box spring, simplifying setup and reducing costs. Ensure all bolts are tightened securely to prevent squeaking and maintain stability.

Detailed diagrams within the manual clarify each step, making the assembly process accessible even for beginners.

Bed Frames with Storage Drawers

Yaheetech bed frames featuring storage drawers require a slightly more involved assembly process, as detailed in their PDF manuals. Beyond the standard frame construction, the manual will illustrate the drawer slide installation – a critical step for smooth operation.

Pay close attention to the orientation of the drawer slides, ensuring they align correctly with the frame and drawer boxes. The manual provides clear diagrams for attaching the drawer fronts and handles.

Proper alignment is key to preventing drawer binding; the manual often includes troubleshooting tips for this common issue. Securely fastening all components is vital for the longevity and stability of the storage drawers.

Victorian Style Bed Frames

Yaheetech’s Victorian style bed frames, as outlined in their PDF instructions, often involve more ornate detailing and a greater number of components than simpler designs. The manual will guide you through assembling the headboard and footboard, which typically feature decorative spindles or panels.

Carefully identify each piece, as the instructions will differentiate between left and right side components. Pay close attention to the attachment of any finials or decorative caps, ensuring they are securely fastened.

The manual will detail the proper alignment of the frame to showcase the Victorian aesthetic. It’s crucial to follow the torque specifications for bolts to avoid damaging the delicate frame elements.

Assembly Process: Step-by-Step

The Yaheetech PDF guides users through a clear, sequential assembly, starting with unboxing and parts verification, then progressing to frame construction.

Unboxing and Parts Inventory

Begin the assembly by carefully unboxing all components of your Yaheetech bed frame. The official PDF manual emphasizes a thorough parts inventory before starting. Compare each item received against the detailed parts list included within the manual – this prevents mid-assembly frustration due to missing pieces.

Pay close attention to identifying all screws, bolts, slats, side rails, headboard/footboard pieces, and any storage drawer components (if applicable). The manual often includes diagrams illustrating each part. Document any discrepancies immediately; contacting Yaheetech customer support with a clear list of missing or damaged parts will expedite replacements. Organizing the hardware into labeled containers is highly recommended for a streamlined build process.

Attaching the Side Rails

The Yaheetech bed frame PDF manual details attaching the side rails as a crucial early step. Typically, this involves connecting the rails to the headboard and footboard using bolts and washers, as illustrated in the diagrams. Ensure proper alignment before fully tightening; misaligned rails can compromise the bed’s stability.

Refer to the manual for the correct bolt size and orientation for each connection point. Some models utilize a hook-and-loop system or specific bracket types. Double-check that the rails are securely fastened, but avoid over-tightening, which could damage the frame. A firm, even connection is key for a squeak-free and durable bed structure.

Installing the Slats

The Yaheetech bed frame PDF manual guides users through slat installation, vital for mattress support. Typically, wooden or metal slats are evenly spaced across the frame, resting on designated ledgers or supports. Some models feature pre-attached slats, simplifying this step.

Ensure each slat is securely positioned and, if required, fastened with screws or caps. Proper spacing is crucial to prevent mattress sagging and ensure even weight distribution. The manual will specify the correct slat orientation and any necessary hardware. Consistent spacing contributes to a comfortable and long-lasting sleep surface, enhancing the bed’s overall functionality;

Headboard and Footboard Attachment

The Yaheetech bed frame PDF manual details headboard and footboard attachment, often involving bolting these components to the side rails. Align the headboard and footboard with the pre-drilled holes on the frame, ensuring proper orientation.

Securely fasten using the provided bolts and washers, tightening them firmly but avoiding over-tightening to prevent damage. Some models may utilize a different attachment method, such as sliding the headboard into designated slots. The manual provides specific diagrams and instructions for your model. Correct attachment ensures stability and completes the bed’s aesthetic appearance.

Troubleshooting Common Assembly Issues

PDF manuals offer solutions for missing parts, rail alignment difficulties, and squeaking noises, ensuring a hassle-free Yaheetech bed frame assembly experience.

Missing Parts

Encountering missing components during Yaheetech bed frame assembly is frustrating, but the official PDF manual provides guidance. First, carefully re-inventory all parts against the included parts list within the manual. Confirm quantities and identify the missing item’s specific name or code.

Next, contact Yaheetech’s customer support, referencing your model number and the missing part details. Many manuals include contact information or a link to their support website. Be prepared to provide proof of purchase. The PDF often details how to request replacements, streamlining the process. Avoid attempting assembly with substitute parts, as this could compromise structural integrity and void any warranty; Utilize the manual’s diagrams to accurately describe the missing component.

Difficulty Aligning Rails

Struggling with rail alignment during Yaheetech bed frame assembly is common, but the PDF manual offers solutions. Initially, ensure the frame is on a level surface; uneven flooring exacerbates alignment issues. Loosely attach all connections before fully tightening any bolts – this allows for adjustment.

Refer to the manual’s diagrams, paying close attention to the rail orientation and connector placement. If rails still resist alignment, slightly loosen previously tightened bolts and gently apply pressure to coax them into position. Avoid forcing connections, which can damage the frame. The manual may suggest using a rubber mallet for gentle persuasion. Double-check that all components are correctly oriented before proceeding with full tightening.

Squeaking Noises After Assembly

Addressing squeaking in your assembled Yaheetech bed frame is often straightforward, guided by the detailed PDF manual. Typically, squeaks originate from loose connections. Systematically tighten all bolts and screws, focusing on those connecting the side rails, headboard, and footboard. Don’t overtighten, as this can strip threads.

The manual may recommend using felt pads or rubber shims between the frame and slats to dampen vibrations. Lubricating joints with a silicone-based spray can also reduce friction. Inspect the slats for movement; secure them with additional adhesive if necessary. If squeaking persists, re-check the frame’s levelness and ensure all components are properly seated.

Safety Guidelines During Assembly

Prioritize safety by utilizing recommended tools, understanding weight limits, and employing proper lifting techniques, as detailed in the Yaheetech PDF manual.

Recommended Tools

Successful Yaheetech bed frame assembly hinges on having the correct tools readily available. The official PDF manual frequently suggests a rubber mallet to gently secure components without causing damage, a Phillips head screwdriver for most screw fastenings, and potentially an adjustable wrench for certain bolt adjustments.

A power drill with appropriate bit attachments can significantly expedite the process, but caution is advised to avoid over-tightening. A level is crucial for ensuring the bed frame is stable and doesn’t wobble. Finally, having work gloves can protect your hands during assembly, and a soft cloth will prevent scratching surfaces. Always refer to your specific model’s manual for a complete list, as requirements can vary.

Weight Limits and Distribution

Understanding the weight capacity of your Yaheetech bed frame is paramount for safety and longevity. The official PDF manual will clearly state the maximum weight limit, typically ranging from 300 to 800 pounds, depending on the model and size.

Evenly distributing weight across the bed frame is crucial to prevent stress on specific points. Avoid concentrating weight in one area, and consider using a mattress that provides adequate support. Exceeding the weight limit can compromise the frame’s structural integrity, potentially leading to damage or collapse. Always consult your manual for precise specifications and guidelines.

Proper Lifting Techniques

Assembling a Yaheetech bed frame often requires lifting components, so employing proper techniques is vital to prevent injury. Always bend at your knees, keeping your back straight, and avoid twisting while lifting.

Seek assistance when handling heavier parts like the headboard, footboard, or assembled side rails. Maintain a firm grip and keep the load close to your body. The PDF manual may suggest a two-person lift for certain components. Prioritize safety by wearing appropriate footwear and ensuring a clear workspace. Incorrect lifting can lead to strains or more serious injuries.

Maintenance and Care

Regular upkeep, like tightening bolts and cleaning, extends your Yaheetech bed frame’s lifespan, ensuring stability and preserving its aesthetic appeal over time.

Cleaning Instructions

Maintaining a clean Yaheetech bed frame is crucial for both its appearance and longevity. For metal frames, a simple wipe-down with a damp cloth and mild detergent is generally sufficient. Avoid abrasive cleaners, as these can damage the finish.

For frames with wooden slats or headboards, use a wood-specific cleaner and polish to preserve the wood’s natural beauty. Dust regularly with a soft cloth to prevent buildup. If spills occur, address them immediately to avoid staining.

Pay attention to areas prone to dust accumulation, such as under the bed and around joints. Vacuuming these areas can be effective. Ensure the frame is completely dry after cleaning to prevent rust or mildew. Consistent, gentle cleaning will keep your Yaheetech bed frame looking its best for years to come.

Tightening Bolts and Screws

Regularly inspect and tighten all bolts and screws on your Yaheetech bed frame to ensure stability and prevent unwanted noises. Over time, vibrations and use can cause fasteners to loosen, compromising the frame’s structural integrity.

Use the appropriate tools – typically an Allen wrench or screwdriver – to tighten each fastener securely, but avoid over-tightening, which could strip the threads or damage the frame. Focus on connections between the side rails, headboard, footboard, and slats.

A good practice is to check and tighten fasteners every few months, or whenever you notice any wobbling or squeaking. This proactive maintenance will extend the life of your bed frame and ensure a safe and comfortable sleep.

Preventative Measures for Longevity

To maximize the lifespan of your Yaheetech bed frame, implement a few preventative measures. Avoid placing excessive weight on any single area, distributing it evenly across the frame and slats. Protect the frame from moisture, as prolonged exposure can lead to rust or damage to wooden components.

Periodically check for any signs of wear and tear, addressing issues promptly. Consider using felt pads under the legs to protect your flooring and reduce noise. Gentle cleaning with a damp cloth will remove dust and debris, maintaining the frame’s appearance.

Consistent care and attention will ensure your Yaheetech bed frame remains a sturdy and reliable foundation for years to come.

sandwich bros chicken melts instructions

Sandwich Bros Chicken Melts Instructions: A Comprehensive Guide

Discover how to effortlessly prepare these convenient, flavorful chicken melts using various methods – microwave, air fryer, or oven – for a delicious and quick meal!

Overview of Sandwich Bros Chicken Melts

Sandwich Bros Chicken Melts have rapidly become a popular choice for a fast and satisfying meal, particularly lauded for their convenience and appealing flavor profile. These frozen, ready-to-eat sandwiches feature grilled chicken breast paired with classic American cheese, all nestled within a soft, pliable flatbread pocket.

Costco frequently offers these in convenient 15-pack quantities, making them ideal for individuals or families seeking a quick lunch or snack option. Their ease of preparation is a significant draw; they can be heated using a microwave, air fryer, or conventional oven, catering to diverse preferences and available kitchen appliances.

The core appeal lies in the combination of tender chicken, melted cheese, and the soft texture of the flatbread. While simple, the recipe is designed for maximum enjoyment with minimal effort, offering a comforting and tasty experience. Numerous online resources detail cooking instructions and offer tips for achieving optimal results, from crispy exteriors to perfectly melted cheese.

What are Sandwich Bros Chicken Melts?

Sandwich Bros Chicken Melts are essentially a convenient, pre-made sandwich designed for quick heating and consumption. They consist of 100% white-meat chicken and Wisconsin American cheese, carefully enclosed within a soft flatbread pocket. This construction creates a self-contained, easily portable meal or snack option.

Sold in multi-packs, notably at Costco, these melts are intended to provide a flavorful and satisfying experience with minimal preparation time. They aren’t a complex culinary creation, but rather a streamlined solution for busy individuals or families needing a fast food alternative.

The product aims to deliver the taste of a classic grilled chicken sandwich in a convenient, frozen format. They are designed to be heated and enjoyed directly from the package, offering a hassle-free meal. The brand emphasizes ease of use and consistent quality, making them a reliable choice for a quick bite.

Key Ingredients and Nutritional Information

Sandwich Bros Chicken Melts primarily feature grilled chicken breast – specifically, 100% white-meat chicken – as their core protein source. Complementing the chicken is Wisconsin American cheese, providing a classic, melty component. These key ingredients are encased within a soft flatbread, forming the sandwich’s structure.

While specific nutritional details vary, each melt generally provides a moderate amount of protein from the chicken. Consumers should consult the packaging for precise information regarding calories, fat content, sodium levels, and other nutritional values. It’s important to note that, as a pre-made convenience food, they may contain processed ingredients.

The simplicity of the ingredient list contributes to the quick preparation time. While additions like fresh vegetables or different sauces can enhance the nutritional profile and flavor, the base product focuses on delivering a straightforward, protein-rich snack or light meal option.

Cooking Methods: A Detailed Comparison

Explore the diverse ways to prepare Sandwich Bros Chicken Melts: microwave for speed, air fryer for crispiness, and oven for even heating and optimal texture.

Microwave Instructions: Quick and Convenient

For a remarkably fast and easy preparation, the microwave is your go-to method for Sandwich Bros Chicken Melts. This is ideal when time is of the essence and you crave a quick, satisfying meal. Begin by removing the Chicken Melt from its packaging. Place the frozen sandwich directly onto a microwave-safe plate – no additional preparation is needed!

Microwave on high for approximately 60-90 seconds. Cooking times may vary slightly depending on your microwave’s wattage, so it’s best to start with 60 seconds and add 10-second increments until the cheese is fully melted and the chicken is heated through. Be cautious, as the filling can get very hot.

Once heated, carefully remove the Chicken Melt from the microwave. Allow it to stand for a minute before enjoying, as this allows the melted cheese and filling to settle. While convenient, be aware that microwaving may result in slightly softer bread compared to other cooking methods.

Air Fryer Instructions: Crispy Perfection

Achieve a delightful combination of warm, soft pita bread, crispy chicken, and perfectly melted cheese by utilizing your air fryer! This method offers a superior texture compared to microwaving, delivering a more satisfying experience. Begin by preheating your air fryer to 350°F (175°C) for optimal results – though preheating isn’t always essential.

Place the frozen Sandwich Bros Chicken Melt directly into the air fryer basket. Ensure there’s enough space around the sandwich for proper air circulation. Cook for approximately 6-8 minutes, flipping halfway through to ensure even heating and crisping. Monitor closely during the last few minutes to prevent burning.

Remove the Chicken Melt from the air fryer and let it rest for a minute before enjoying. The air fryer’s circulating heat creates a wonderfully crispy exterior while keeping the inside warm and gooey. This method is a fantastic alternative for a quick yet elevated meal!

Oven Instructions: Even Heating and Texture

For a consistently heated and textured Sandwich Bros Chicken Melt, the oven provides a reliable method. Preheat your oven to 350°F (175°C). While not as rapid as the air fryer or microwave, the oven ensures even cooking throughout the entire sandwich, preventing cold spots.

Place the frozen Chicken Melt directly on a baking sheet – parchment paper isn’t necessary, but can aid in cleanup. Bake for 12-15 minutes, or until the bread is golden brown and the cheese is fully melted and bubbly. Rotating the baking sheet halfway through can promote even browning.

Carefully remove the baking sheet from the oven and let the Chicken Melt rest for a minute or two before serving. This allows the melted cheese to set slightly, preventing a messy experience. The oven method is ideal when preparing multiple Chicken Melts simultaneously!

Step-by-Step Cooking Guides

Follow our detailed instructions for each cooking method – microwave, air fryer, and oven – to achieve perfectly heated and delicious Sandwich Bros Chicken Melts every time!

Microwave Method: Detailed Steps

For a quick and convenient preparation, the microwave is an excellent choice. Begin by removing the frozen Chicken Melt from its packaging. Place the sandwich onto a microwave-safe plate; avoid using paper towels, as they can absorb moisture and affect the texture.

Microwave on high for approximately 60-90 seconds. Cooking time may vary depending on your microwave’s wattage, so it’s best to start with 60 seconds and add 15-second intervals if needed. The goal is to heat the sandwich thoroughly, ensuring the chicken is warm and the cheese is melted and gooey.

Carefully remove the Chicken Melt from the microwave, as it will be hot. Let it stand for a minute before enjoying to allow the heat to distribute evenly. While convenient, be aware that microwaving can sometimes result in slightly softer bread compared to other cooking methods. Enjoy your quickly prepared Sandwich Bros Chicken Melt!

Air Fryer Method: Detailed Steps

Achieve a delightfully crispy exterior and perfectly melted cheese by utilizing the air fryer! Begin by preheating your air fryer to 350°F (175°C) for optimal results. Remove the frozen Chicken Melt from its packaging and place it directly into the air fryer basket, ensuring it’s in a single layer.

Cook for approximately 6-8 minutes, flipping halfway through to ensure even heating and crisping. Monitor closely, as air fryers can vary in cooking speed. You’re looking for a golden-brown exterior and a warm, melted interior. This method delivers a superior texture compared to microwaving, offering a satisfying crunch.

Carefully remove the Chicken Melt from the air fryer basket – it will be hot! Let it cool slightly before enjoying. The air fryer method is a fantastic alternative for those seeking a quick yet texturally pleasing experience. Savor your perfectly air-fried Sandwich Bros Chicken Melt!

Oven Method: Detailed Steps

For evenly heated and delightfully textured Chicken Melts, the oven provides a reliable cooking option. Preheat your oven to 375°F (190°C). Place the frozen Sandwich Bros Chicken Melt directly onto a baking sheet – a parchment-lined sheet simplifies cleanup. Ensure the melt is positioned in a single layer for consistent cooking.

Bake for 10-12 minutes, or until the bread is golden brown and the cheese is fully melted and bubbly. Rotating the baking sheet halfway through can promote even browning. Keep a close watch during the final few minutes to prevent burning. The oven method offers a more gradual heating process, resulting in a consistently warm and satisfying melt.

Carefully remove the baking sheet from the oven and let the Chicken Melt cool slightly before enjoying. This method is ideal when preparing multiple melts simultaneously. Enjoy a perfectly oven-baked Sandwich Bros Chicken Melt!

Tips and Tricks for Optimal Results

Maximize your Chicken Melt experience by considering cheese types, controlling moisture to avoid sogginess, and pairing with complementary sides for enhanced flavor!

Achieving the Perfect Melt: Cheese Considerations

The American cheese included in Sandwich Bros Chicken Melts is specifically chosen for its excellent melting properties, providing that classic, gooey texture consumers enjoy. However, experimenting with different cheese varieties can elevate your melt experience.

For a sharper flavor profile, consider adding a thin slice of cheddar or Monterey Jack alongside the American cheese. Provolone also melts beautifully and offers a mild, slightly tangy taste. If you prefer a bolder taste, a sprinkle of pepper jack can introduce a pleasant kick.

Remember that different cheeses have varying melting points. Pre-shredded cheeses often contain cellulose, which can hinder smooth melting, so freshly grated cheese is generally recommended. Ensure the cheese is evenly distributed within the melt to guarantee consistent, melty goodness in every bite. Don’t overdo it – too much cheese can lead to a messy, overflowing melt!

Preventing Soggy Bread: Moisture Control

A common issue when heating Sandwich Bros Chicken Melts, particularly in the microwave, is achieving a balance between a warm filling and avoiding soggy flatbread. The key lies in moisture control. Avoid prolonged heating times, as this encourages condensation and softens the bread.

When microwaving, consider placing a paper towel underneath the melt to absorb excess moisture. For air frying, ensuring proper airflow around the sandwich helps to crisp the exterior and minimize sogginess. Oven baking, with its lower humidity, generally yields the crispiest results.

If adding fresh vegetables, pat them dry with a paper towel before incorporating them into the melt. Excess moisture from ingredients like tomatoes or spinach can contribute to a soggy texture. Ultimately, monitoring the cooking process and adjusting the time based on your chosen method is crucial for a perfectly textured Chicken Melt.

Enhancing Flavor: Serving Suggestions & Pairings

To elevate your Sandwich Bros Chicken Melt experience, consider complementary side dishes and dipping sauces. For a complete meal, pair these melts with a fresh side salad, offering a crisp contrast to the warm, savory sandwich. Alternatively, a handful of crunchy vegetable sticks – carrots, celery, or cucumber – provides a healthy and satisfying accompaniment.

Dipping sauces can significantly enhance the flavor profile. Ranch dressing is a classic choice, while a spicy buffalo sauce adds a kick. Experiment with honey mustard or a creamy avocado dip for unique flavor combinations.

Beyond sides and dips, consider adding fresh vegetables directly to the melt for added texture and nutrition. Sliced tomatoes, spinach, or avocado complement the chicken and cheese beautifully. Enjoy your customized Chicken Melt with a refreshing beverage like iced tea or lemonade for a truly satisfying meal!

Variations and Customizations

Unleash your creativity by adding fresh veggies, exploring diverse sauce options, and experimenting with different cheese varieties to personalize your Chicken Melt experience!

Adding Fresh Vegetables

Elevate your Sandwich Bros Chicken Melt with the vibrant crunch and nutritional boost of fresh vegetables! Sliced tomatoes introduce a juicy sweetness that complements the savory chicken and melted cheese, creating a delightful textural contrast. Consider adding a handful of fresh spinach for a boost of vitamins and a subtle earthy flavor – it wilts slightly during heating, melding beautifully with the other ingredients.

For a creamy addition, slices of avocado provide healthy fats and a luxurious mouthfeel. Thinly sliced onions, either red or white, offer a pungent bite that cuts through the richness. Bell peppers, whether red, yellow, or orange, contribute a satisfying crispness and a touch of sweetness. Don’t be afraid to experiment with other favorites like lettuce, sprouts, or even pickled vegetables for a tangy twist. Remember to add vegetables before heating to allow them to warm through and integrate with the melt’s flavors.

Sauce Options and Dips

Transform your Sandwich Bros Chicken Melt experience with a diverse array of sauces and dips! For a classic pairing, ranch dressing provides a cool, creamy counterpoint to the warm, savory melt. Honey mustard offers a sweet and tangy kick, enhancing the chicken’s flavor profile. If you enjoy a bit of spice, sriracha mayo or buffalo sauce will deliver a fiery punch.

Explore bolder options like barbecue sauce for a smoky sweetness, or a zesty garlic aioli for an extra layer of savory goodness. Consider a simple marinara sauce for a pizza-inspired twist. For dipping, sour cream or Greek yogurt offer a refreshing coolness, while guacamole adds a creamy, avocado-based delight. Don’t hesitate to create your own signature sauce by mixing and matching your favorite flavors – the possibilities are endless! A side of your preferred dip elevates the entire meal.

Exploring Different Cheese Varieties

While Sandwich Bros Chicken Melts traditionally feature Wisconsin American cheese, experimenting with alternatives can significantly enhance your culinary experience. Monterey Jack offers a mild, buttery flavor and excellent melting properties, creating a wonderfully gooey center. Pepper Jack introduces a subtle spice, adding a pleasant kick to each bite.

For a more robust flavor, consider provolone, known for its slightly sharp and savory notes. Mozzarella provides a classic, stretchy texture, reminiscent of a pizza melt. Cheddar, whether mild, medium, or sharp, delivers a familiar and comforting taste. Havarti, with its creamy texture and delicate flavor, is another excellent option. Don’t be afraid to blend cheeses – a combination of cheddar and Monterey Jack, for example, can create a complex and satisfying melt. Ultimately, the best cheese is the one that suits your personal preference!

cbb instructions

Central Bank of Bahrain (CBB) Instructions: A Comprehensive Overview

Central Bank of Bahrain (CBB) instructions, established September 6, 2006, by the 2006 CBB and Financial Institutions Law, govern Bahrain’s financial sector.

The CBB serves as the sole regulator, impacting banking, finance, and trust companies, while also offering educational resources like the “CBB 101” series.

The Central Bank of Bahrain (CBB), a public corporate entity, stands as the cornerstone of Bahrain’s financial regulation and stability. Established on September 6, 2006, through the enactment of the 2006 CBB and Financial Institutions Law, the CBB represents a significant evolution in the nation’s financial governance.

Its creation consolidated various regulatory bodies, streamlining oversight and fostering a more cohesive approach to managing the financial landscape. The CBB’s primary function is to maintain monetary stability, regulate financial institutions, and promote the sound development of the financial sector within the Kingdom of Bahrain.

As the sole regulator, the CBB’s influence extends across a broad spectrum of financial activities, encompassing banking, finance, and trust companies. Understanding the CBB’s role is crucial for anyone involved in Bahrain’s financial ecosystem, from individual investors to large corporations. The bank also provides educational resources, such as the “CBB 101” series, to enhance understanding of its functions.

Historical Background of the CBB

Prior to September 6, 2006, Bahrain’s financial sector regulation was fragmented, handled by multiple entities with overlapping responsibilities. Recognizing the need for a more unified and efficient system, the government initiated reforms culminating in the establishment of the Central Bank of Bahrain (CBB).

The 2006 CBB and Financial Institutions Law served as the foundational legislation, consolidating regulatory authority under a single, independent body. This marked a pivotal shift from the previous system, aiming to enhance transparency, accountability, and the overall stability of the financial sector.

The creation of the CBB wasn’t merely a structural change; it represented a commitment to aligning Bahrain’s financial regulations with international best practices. This proactive approach was intended to attract foreign investment, foster economic growth, and position Bahrain as a leading financial hub in the region. The CBB’s establishment was a deliberate step towards modernizing and strengthening Bahrain’s financial infrastructure.

Vision, Values, and Role of the CBB

The Central Bank of Bahrain (CBB) envisions a dynamic and stable financial sector that fuels sustainable economic growth within the Kingdom. Core values underpinning this vision include integrity, transparency, and a commitment to maintaining the highest standards of regulatory oversight.

The CBB’s role is multifaceted. Primarily, it functions as the sole regulator of Bahrain’s entire financial sector, encompassing banking, finance, and trust companies. This singular regulatory authority streamlines supervision and ensures consistent application of rules;

Beyond regulation, the CBB actively promotes financial innovation and inclusion. It strives to create a conducive environment for responsible financial practices, safeguarding the interests of consumers and maintaining the integrity of the financial system. The “Explainer Series,” including “CBB Means; Why It Matters,” demonstrates a commitment to public education and understanding of its functions.

Objectives and Functions of the CBB

The Central Bank of Bahrain (CBB) operates with clearly defined objectives centered around maintaining monetary stability and safeguarding the financial system. A primary function is issuing currency and managing the nation’s foreign reserves, ensuring a stable economic environment.

Crucially, the CBB supervises and regulates all financial institutions operating within Bahrain, including banks, finance companies, and trust companies. This oversight extends to enforcing compliance with the 2006 CBB and Financial Institutions Law, particularly Article 68 bis b) 1 concerning customer financial obligations.

Furthermore, the CBB promotes the development of a sound and efficient financial infrastructure. It facilitates lending capabilities, as seen with bank holding company loans, and actively supports economic growth through responsible financial regulation. Educational initiatives, like “CBB 101,” demonstrate a commitment to sector knowledge and best practices;

CBB Law and Regulations

CBB Law, specifically the 2006 legislation, and its associated regulations form the bedrock of Bahrain’s financial sector. Article 68 bis b) 1 defines customer financial obligations.

The 2006 CBB and Financial Institutions Law

The Central Bank of Bahrain (CBB) was formally established on September 6, 2006, through the enactment of the CBB and Financial Institutions Law. This landmark legislation fundamentally reshaped Bahrain’s financial regulatory landscape, consolidating oversight and modernizing financial practices.

Prior to this law, financial regulation was fragmented. The 2006 Law created a unified regulatory framework, granting the CBB comprehensive authority over all financial institutions operating within the Kingdom. This included banks, insurance companies, investment firms, and other related entities.

The law outlines the CBB’s powers concerning licensing, supervision, and enforcement. It details requirements for capital adequacy, risk management, and corporate governance, ensuring the stability and integrity of the Bahraini financial system. Furthermore, it established provisions for consumer protection and the prevention of financial crime.

This legislation remains the cornerstone of financial regulation in Bahrain, continually evolving through supplementary rules and guidance issued by the CBB to address emerging challenges and maintain alignment with international standards.

Article 68 bis b) 1: Customer Financial Obligations

Article 68 bis b) 1 of the Central Bank of Bahrain (CBB) Law defines crucial data related to customer financial responsibilities. Specifically, it encompasses any information and data pertaining to the financial obligations of customers held by members of a credit institution.

This article underscores the CBB’s commitment to transparency and robust data management within the financial sector. It necessitates that financial institutions maintain accurate and readily accessible records of their customers’ financial commitments, including loans, credit lines, and other liabilities.

The intent behind this provision is multifaceted. It supports effective risk assessment by the CBB, facilitates informed supervisory oversight, and aids in the prevention of financial crime, such as money laundering and terrorist financing.

Compliance with Article 68 bis b) 1 is paramount for all financial institutions operating in Bahrain, ensuring they adhere to the CBB’s stringent data reporting requirements and contribute to the overall stability of the financial system.

CBB’s Role as Sole Regulator of Bahrain’s Financial Sector

The Central Bank of Bahrain (CBB) uniquely functions as the sole regulator overseeing Bahrain’s entire financial sector. This comprehensive regulatory authority encompasses a diverse range of industries, including conventional banking, Islamic banking, insurance, and capital markets.

This singular regulatory structure streamlines oversight, promotes consistency in the application of rules, and enhances the efficiency of the supervisory process. It eliminates potential overlaps or conflicts that could arise from multiple regulatory bodies.

The CBB’s role extends beyond simply issuing regulations; it actively supervises financial institutions to ensure compliance and maintain financial stability. This includes conducting on-site inspections, reviewing financial reports, and implementing corrective measures when necessary.

By consolidating regulatory authority, the CBB fosters a robust and resilient financial system in Bahrain, attracting investment and supporting sustainable economic growth. This centralized approach is fundamental to Bahrain’s position as a leading financial hub in the region.

CBB and Financial Institutions

CBB regulates Bahrain’s banking and finance sectors, including trust companies. It supervises institutions like CBB Bancorp, Inc. and Commonwealth Business Bank, ensuring stability.

Banking Regulations and Supervision by the CBB

The Central Bank of Bahrain (CBB) exercises comprehensive regulatory oversight of all banking institutions operating within the Kingdom. This supervision is crucial for maintaining the stability and integrity of Bahrain’s financial system. The CBB’s approach encompasses a range of measures, including licensing, ongoing monitoring, and enforcement actions when necessary.

Banks are subject to stringent capital adequacy requirements, designed to ensure they possess sufficient financial resources to absorb potential losses. The CBB also closely monitors banks’ asset quality, risk management practices, and corporate governance structures. Regular on-site inspections and off-site surveillance are conducted to assess compliance with regulatory standards.

Furthermore, the CBB issues detailed circulars and guidelines covering various aspects of banking operations, such as lending practices, anti-money laundering measures, and consumer protection. These instructions aim to promote sound banking principles and safeguard the interests of depositors and the wider economy. The CBB’s proactive supervisory approach is vital for fostering a resilient and trustworthy banking sector in Bahrain.

Finance and Trust Companies under CBB Regulation

The Central Bank of Bahrain (CBB) extends its regulatory purview to encompass finance and trust companies operating within the Kingdom, ensuring these entities adhere to robust standards. These companies, offering diverse financial services, are subject to specific regulations designed to protect clients and maintain market stability.

CBB instructions mandate stringent licensing requirements, demanding detailed business plans and demonstrating financial soundness before authorization is granted. Ongoing supervision includes regular reporting, on-site inspections, and assessments of risk management frameworks. Particular attention is given to client asset protection and adherence to anti-money laundering (AML) regulations.

The CBB’s regulatory framework for finance and trust companies aims to foster responsible financial practices and prevent systemic risk. “CBB 101: Finance and Trust Companies (Episode 10)” provides educational insights into these regulations. Compliance is paramount, with enforcement actions taken against firms failing to meet the CBB’s expectations, reinforcing a secure financial environment.

CBB Bancorp, Inc. and Commonwealth Business Bank

CBB Bancorp, Inc. functions as the holding company for Commonwealth Business Bank, a financial institution providing a spectrum of commercial banking products and services to both individuals and businesses. This structure places both entities under the regulatory oversight of the Central Bank of Bahrain (CBB), ensuring adherence to Bahrain’s financial regulations.

The CBB’s instructions govern CBB Bancorp, Inc.’s capital adequacy, risk management, and corporate governance practices. Commonwealth Business Bank, as a subsidiary, is directly supervised regarding its lending activities, deposit-taking operations, and overall financial stability. Compliance with CBB regulations is crucial for maintaining operational licenses and public trust.

The relationship between CBB Bancorp, Inc. and Commonwealth Business Bank exemplifies how the CBB’s regulatory framework extends to encompass holding companies and their banking subsidiaries. This oversight aims to safeguard the financial system and protect the interests of depositors and investors within Bahrain’s economic landscape.

Budgeting and Financial Management

CBB instructions incorporate Constraint-Based Budgeting (CBB) and Cost-Based Budgeting, emphasizing accurate, aligned budgets for efficient financial leadership and corporate finance practices.

Constraint-Based Budgeting (CBB) Explained

Constraint-Based Budgeting (CBB) represents a powerful methodology for finance leaders aiming to enhance budgetary accuracy, alignment, and overall efficiency. Unlike traditional budgeting approaches, CBB doesn’t begin with historical data or incremental adjustments. Instead, it identifies key constraints – limitations on resources, capacity, or strategic objectives – that directly impact financial planning.

These constraints, dictated by CBB instructions and the broader regulatory landscape of Bahrain’s financial sector, become the foundation for building the budget. Departments and teams must then justify their budgetary requests based on how they address these identified limitations. This process fosters a more strategic and disciplined approach to resource allocation.

Effectively, CBB shifts the focus from simply requesting funds to demonstrating how those funds will overcome specific obstacles and contribute to achieving organizational goals, aligning financial planning with the CBB’s overarching objectives for the financial sector.

Cost-Based Budgeting (CBB) in Corporate Finance

In the realm of corporate finance, the acronym CBB specifically denotes Cost-Based Budgeting. This method centers on meticulously calculating the costs associated with achieving specific business activities and objectives. Unlike other approaches, it prioritizes a bottom-up analysis, starting with individual cost components and aggregating them to form the overall budget.

While seemingly straightforward, effective implementation requires a deep understanding of all relevant costs – direct materials, labor, overhead, and potentially, compliance costs dictated by CBB instructions and regulations within Bahrain’s financial sector. Accurate cost allocation is crucial for creating a realistic and reliable budget.

Furthermore, CBB, as a budgeting technique, necessitates continuous monitoring and analysis of actual costs against budgeted figures, allowing for timely adjustments and improved financial control. This aligns with the Central Bank of Bahrain’s emphasis on sound financial management practices.

The Importance of Accurate and Aligned Budgets

Accurate and aligned budgets are paramount for financial institutions operating under the purview of the Central Bank of Bahrain (CBB). These budgets aren’t merely financial forecasts; they are critical tools for strategic planning, resource allocation, and performance evaluation, all areas closely monitored by the CBB.

An accurate budget, potentially achieved through methods like Constraint-Based Budgeting (CBB), provides a realistic financial roadmap, enabling informed decision-making and proactive risk management. Alignment ensures that budgetary goals cascade down through the organization, fostering accountability and collaboration.

Furthermore, adherence to CBB regulations necessitates transparent and well-documented budgeting processes. Misaligned or inaccurate budgets can lead to regulatory scrutiny, financial instability, and ultimately, hinder a financial institution’s ability to thrive within Bahrain’s dynamic economic landscape. Therefore, prioritizing budgetary precision is not just best practice, but a regulatory imperative.

CBB Services and Capabilities

CBB expands lending through holding company loans, benefiting banks by allowing borrowed funds to be strategically utilized, bolstering financial strength and capabilities.

Expanding Lending Capabilities through CBB

The Central Bank of Bahrain (CBB) plays a crucial role in facilitating expanded lending capabilities for financial institutions operating within the Kingdom. A key mechanism for achieving this is through the provision of loans to bank holding companies. This strategic approach allows banks to access additional capital, which can then be deployed to support a wider range of lending activities.

When the CBB provides a holding company loan, it effectively injects liquidity into the financial system. This borrowed capital empowers banks to extend credit to businesses and individuals, fostering economic growth and development. The benefits extend beyond simply increasing the volume of loans; it also enables banks to diversify their loan portfolios and reach underserved segments of the market.

Furthermore, this capability allows banks to respond more effectively to evolving market demands and capitalize on emerging opportunities. By leveraging CBB-facilitated loans, financial institutions can strengthen their position in the competitive landscape and contribute to the overall stability and prosperity of Bahrain’s economy.

Bank Holding Company Loans and CBB Benefits

Central Bank of Bahrain (CBB) involvement with bank holding company loans delivers significant benefits to the financial landscape of Bahrain. The CBB’s provision of loans to these holding companies acts as a catalyst for increased financial flexibility and strategic growth within banks.

Specifically, borrowed funds obtained through the CBB can be strategically utilized by banks to bolster capital reserves, fund expansion initiatives, or support crucial operational needs. This access to capital isn’t merely financial; it’s an empowerment tool allowing banks to navigate market fluctuations and pursue opportunities with greater confidence.

Furthermore, these loans contribute to a more robust and resilient financial sector. By strengthening the financial position of bank holding companies, the CBB indirectly safeguards the stability of the banking system as a whole. This proactive approach underscores the CBB’s commitment to fostering a secure and thriving financial environment within Bahrain, benefiting both institutions and the broader economy.

CBB Resources and Education

The CBB provides extensive resources, including the “CBB 101” series focusing on finance and trust companies, and “The Explainer Series” clarifying CBB’s role.

CBB 101: Finance and Trust Companies (Episode 10)

Episode 10 of “CBB 101” delves into the specific regulations governing Finance and Trust Companies operating within the Kingdom of Bahrain, as dictated by the Central Bank of Bahrain (CBB).

This installment clarifies the CBB’s oversight of these institutions, emphasizing adherence to the 2006 CBB and Financial Institutions Law. It details requirements concerning customer financial obligations, as outlined in Article 68 bis b) 1, ensuring data protection and responsible financial practices.

The episode highlights the CBB’s role as the sole regulator, meaning comprehensive compliance is essential for all entities in this sector. Key topics include licensing procedures, capital adequacy, risk management, and anti-money laundering protocols. It’s a crucial resource for understanding the regulatory landscape and maintaining operational integrity within Bahrain’s financial ecosystem.

Furthermore, the episode underscores the importance of staying updated with the latest CBB instructions and guidelines to navigate the evolving financial environment effectively.

The Explainer Series: CBB Means; Why It Matters

This installment of “The Explainer Series” clarifies what CBB signifies – the Central Bank of Bahrain – and details why its instructions are paramount to Bahrain’s financial stability and economic growth.

Established by the 2006 CBB and Financial Institutions Law, the CBB operates as the sole regulator of the nation’s financial sector, encompassing banking, finance, and trust companies. This comprehensive oversight ensures a secure and transparent financial environment.

Understanding CBB instructions is vital because they dictate operational standards, risk management protocols, and customer protection measures. Adherence to regulations like Article 68 bis b) 1, concerning customer financial obligations, is non-negotiable.

The series emphasizes that the CBB’s role isn’t merely regulatory; it’s foundational to fostering investor confidence and driving sustainable economic development within Bahrain. Staying informed about CBB directives is crucial for all stakeholders.

Understanding CBB Acronyms and Definitions

Navigating the world of financial regulation requires deciphering a multitude of acronyms. Primarily, CBB stands for the Central Bank of Bahrain, the governing body established in 2006 by the CBB and Financial Institutions Law.

Beyond the core CBB definition, understanding related terms is crucial. Article 68 bis b) 1 refers to specific customer financial obligation regulations enforced by the CBB. These instructions dictate data handling and reporting requirements for financial institutions.

Furthermore, recognizing terms like “Bancorp” (as in CBB Bancorp, Inc.) signifies a bank holding company subject to CBB oversight. Constraint-Based Budgeting (CBB) in corporate finance is a separate concept, unrelated to the Bahraini central bank.

This clarification aims to demystify the language surrounding CBB instructions, ensuring stakeholders – from banks to trust companies – can accurately interpret and comply with regulatory guidelines, fostering a stable financial ecosystem.

CBB and the Future of Finance in Bahrain

CBB instructions significantly impact Bahrain’s economic growth by regulating the financial sector and navigating its evolving landscape. The CBB ensures stability.

CBB’s Impact on Bahrain’s Economic Growth

The Central Bank of Bahrain (CBB)’s instructions are fundamentally linked to Bahrain’s economic prosperity. Established in 2006, the CBB’s regulatory framework fosters a stable and secure financial environment, attracting both domestic and foreign investment. As the sole regulator of Bahrain’s financial sector, the CBB’s oversight extends to banking, finance, and trust companies, ensuring responsible financial practices.

Effective implementation of CBB instructions promotes confidence in the Bahraini economy, encouraging lending and facilitating business expansion. This, in turn, stimulates job creation and overall economic diversification. The CBB’s commitment to financial stability safeguards against systemic risks, protecting the nation’s economic interests. Furthermore, the CBB’s educational initiatives, like “CBB 101,” enhance financial literacy and contribute to a more informed and resilient economic ecosystem.

By proactively adapting to the evolving financial landscape, the CBB ensures Bahrain remains competitive and a key player in the regional economy. Its instructions are vital for sustained and inclusive economic growth.

Navigating the CBB Regulatory Landscape

Successfully navigating the Central Bank of Bahrain (CBB) regulatory landscape requires a thorough understanding of its instructions, stemming from the 2006 CBB and Financial Institutions Law. As the sole regulator, the CBB’s directives cover a broad spectrum of financial activities, impacting banking, finance, and trust companies operating within Bahrain.

Compliance with CBB instructions, including those related to customer financial obligations (Article 68 bis b) 1), is paramount. Financial institutions must prioritize accurate data management and reporting. Staying abreast of evolving regulations and seeking expert guidance are crucial steps. The CBB provides resources, including the “Explainer Series,” to clarify complex requirements.

Proactive engagement with the CBB and a commitment to transparency foster a constructive relationship. Understanding the CBB’s vision and objectives allows institutions to align their strategies with national financial goals, ensuring sustainable and responsible growth within Bahrain’s dynamic economic environment.

dewenwils outdoor timer instructions

Dewenwils Outdoor Timer Instructions: A Comprehensive Guide

Dewenwils offers diverse electrical solutions‚ including timers‚ remote controls‚ and power strips‚ becoming a trusted name for innovative home and garden automation tools.

Dewenwils outdoor timers represent a convenient and efficient solution for automating your exterior lighting and electrical devices. Designed for reliability and ease of use‚ these timers cater to a wide range of applications‚ from simple landscape lighting control to complex irrigation system automation.

With a growing reputation for quality‚ Dewenwils provides various timer models – digital‚ mechanical‚ and smart WiFi enabled – to suit diverse needs and technical preferences. These timers help conserve energy‚ enhance security‚ and simplify your life by eliminating the need for manual operation of outdoor electrical equipment.

Whether you’re managing holiday decorations‚ controlling pumps‚ or simply ensuring your yard is illuminated at dusk‚ Dewenwils timers offer a versatile and dependable solution. This guide provides comprehensive instructions to help you set up‚ program‚ and troubleshoot your Dewenwils outdoor timer effectively.

Understanding Dewenwils Timer Models

Dewenwils offers a diverse range of outdoor timers‚ each designed with specific features and functionalities. The DT04 Digital Programmable Timer provides precise scheduling with multiple on/off settings‚ ideal for complex lighting arrangements. For simpler needs‚ the MT01 Mechanical Timer offers a straightforward‚ dial-based programming system – no batteries required!

Stepping into the future‚ the WT02 Smart WiFi Timer allows remote control and monitoring via a smartphone app‚ offering ultimate convenience and flexibility. These models vary in voltage compatibility‚ with options for both standard AC and low-voltage (12V) applications‚ like landscape lighting.

Understanding these distinctions is crucial for selecting the right timer for your specific needs. Consider the complexity of your desired schedule‚ your comfort level with technology‚ and the voltage requirements of your connected devices when making your choice.

Key Features of Dewenwils Outdoor Timers

Dewenwils outdoor timers boast several key features enhancing usability and reliability. Waterproof housings (IP65 rating) protect against the elements‚ ensuring consistent performance in all weather conditions. Programmable schedules allow for customized on/off times‚ optimizing energy usage and security. Many models offer multiple programs‚ enabling different settings for weekdays versus weekends‚ or seasonal adjustments.

The digital models provide precise timekeeping and easy programming‚ while mechanical timers offer a simple‚ battery-free operation. Smart WiFi timers add remote control capabilities via smartphone apps. Furthermore‚ low voltage options (12V) cater specifically to landscape lighting systems.

Load capacity is a crucial feature‚ ensuring compatibility with your connected devices. Dewenwils timers are designed for diverse applications‚ from holiday lights to irrigation systems.

Setting Up Your Dewenwils Outdoor Timer

Proper setup is crucial for reliable operation. Ensure a secure power connection and carefully program the desired on/off schedules for automated control of devices.

Initial Setup and Power Connection

Before you begin programming‚ ensure your Dewenwils outdoor timer is correctly set up and receiving power. First‚ locate a suitable outdoor-rated electrical outlet‚ protected from direct weather exposure if possible. Carefully plug the timer into the outlet‚ ensuring a snug and secure fit.

Next‚ connect the appliance or lighting you wish to control into the timer’s receptacle. Double-check that the appliance’s power requirements are compatible with the timer’s specifications – exceeding the load capacity can cause damage or malfunction.

For some models‚ a reset button may be present; pressing this can clear any previous settings. Refer to your specific model’s documentation for details. Finally‚ verify the timer displays power‚ indicated by a lit screen or indicator light‚ confirming a successful power connection before proceeding to programming.

Programming the Timer: Basic On/Off Schedules

To set a basic on/off schedule‚ begin by accessing the programming mode – typically via a “Set” or “Program” button. Use the timer’s buttons (Up‚ Down‚ Hour‚ Minute) to input the desired start time for the ‘on’ period. Confirm this time‚ then program the ‘off’ time in a similar manner.

Many Dewenwils timers allow you to select days of the week for the schedule to repeat. Choose the appropriate days (e.g.‚ Monday-Friday‚ Weekends‚ or individual days). Some models feature a ‘random’ or ‘shuffle’ function for added security.

After setting the times and days‚ save the program. The timer will now automatically turn the connected appliance on and off according to your defined schedule. Always test the schedule to ensure it functions as intended‚ verifying both on and off times.

Advanced Programming: Multiple Schedules & Events

Dewenwils timers often support multiple on/off schedules‚ allowing for varied control throughout the day or week. Access the programming mode and select the option to add a new schedule. Repeat the process of setting on/off times and days‚ as described in basic programming.

Some models permit setting specific events‚ like one-time activations‚ overriding the regular schedule. This is useful for temporary lighting needs. Explore features like countdown timers for automatically turning devices off after a set duration.

For complex setups‚ carefully review the timer’s manual. Utilize all available programming options to maximize control and efficiency. Remember to save each schedule individually and test thoroughly to confirm correct operation.

Specific Dewenwils Timer Models & Instructions

Dewenwils provides a range of timers‚ including digital‚ mechanical‚ and smart WiFi models‚ each with unique features and programming steps for optimal performance.

Dewenwils Digital Programmable Timer ౼ Model DT04

The Dewenwils DT04 is a versatile digital timer ideal for controlling landscape lighting‚ holiday decorations‚ and various electrical devices. This model boasts a user-friendly LCD screen for easy programming of on/off schedules. To begin‚ ensure the timer is properly connected to a power source and the intended appliance.

Programming involves setting the current time‚ then creating individual schedules with specific start times and durations. The DT04 allows for multiple on/off cycles daily and different schedules for each day of the week. Utilize the “Override” function for temporary manual control without disrupting the programmed schedule. Remember to save your settings after each adjustment.

The DT04 features a built-in battery backup to retain settings during power outages. For detailed instructions‚ refer to the included user manual‚ which provides step-by-step guidance and troubleshooting tips. This model offers reliable and precise timing for automated control.

Dewenwils Mechanical Timer ─ Model MT01

The Dewenwils MT01 is a robust mechanical timer‚ offering a simple and reliable solution for controlling outdoor lighting and appliances. Unlike digital models‚ the MT01 utilizes rotating dials to set on/off times. These dials feature segments representing the 24 hours of the day. To program‚ simply press the segments corresponding to the desired on and off times – ensuring the pins are engaged for active periods.

The MT01 is particularly suited for applications where simplicity and durability are paramount. It doesn’t require batteries‚ operating solely on mains power. A key feature is its weatherproof housing‚ making it ideal for outdoor use.

Remember to check the minimum on/off time settings‚ as the mechanical design has limitations. For optimal performance‚ avoid frequent adjustments. The MT01 provides a straightforward‚ dependable timing solution without the complexities of digital programming.

Dewenwils Smart WiFi Timer ౼ Model WT02

The Dewenwils WT02 represents a leap forward in outdoor timer technology‚ offering remote control and scheduling via a dedicated mobile app. This WiFi-enabled timer allows users to manage their connected devices from anywhere with an internet connection. Initial setup requires connecting the WT02 to your home’s 2.4GHz WiFi network – a process guided by the Dewenwils app.

Within the app‚ you can create customized schedules‚ set timers‚ and even monitor energy usage. The WT02 supports multiple schedules and allows for individual control of each connected outlet. Voice control compatibility with Amazon Alexa and Google Assistant adds another layer of convenience.

Firmware updates‚ delivered through the app‚ ensure the WT02 remains secure and benefits from the latest features. Its weatherproof enclosure makes it suitable for outdoor installations‚ providing smart control over landscape lighting and more.

Troubleshooting Common Issues

Addressing problems like power failures‚ time inaccuracies‚ or programming errors is crucial for optimal timer function; solutions involve power checks and schedule resets.

Timer Not Turning On: Power Supply Checks

If your Dewenwils outdoor timer fails to power on‚ begin with a thorough examination of the power supply. First‚ ensure the timer is correctly plugged into a functioning outdoor outlet. Test the outlet itself with another device to confirm it’s receiving power – a simple lamp works well for this.

Next‚ inspect the timer’s power cord for any visible damage‚ such as cuts or fraying. A damaged cord can prevent power from reaching the unit. If using an extension cord‚ verify it’s rated for outdoor use and is also functioning correctly.

Also‚ check the timer’s internal fuse or circuit breaker (if applicable‚ consult your specific model’s manual). A blown fuse will obviously interrupt power. Finally‚ confirm that the connected load (the device the timer is controlling) isn’t drawing excessive power‚ which could overload the timer’s capacity.

Incorrect Time Display: Resetting the Clock

An inaccurate time display on your Dewenwils timer can disrupt programmed schedules. To rectify this‚ locate the “Reset” or “Clock Set” button – its position varies depending on your specific model‚ so consult the manual. Typically‚ pressing and holding this button for several seconds will initiate the time-setting mode.

Use the “Hour” and “Minute” buttons (or similar controls) to adjust the current time. Pay close attention to the AM/PM indicator‚ ensuring the correct time of day is set. Some models may also require you to set the day of the week.

After setting the correct time‚ press the “Confirm” or “Enter” button to save the changes. If the display continues to show the incorrect time‚ consider replacing the internal battery (if applicable) as a low battery can cause timekeeping errors.

Programming Errors: Clearing and Re-entering Schedules

If your Dewenwils timer isn’t functioning as expected due to programming errors‚ clearing the existing schedule and re-entering it is often the most effective solution. Most models feature a “Clear” or “Delete” function‚ usually accessed through the programming menu. Consult your timer’s manual for the precise steps.

Once the schedule is cleared‚ carefully re-enter your desired on/off times and days. Double-check each entry for accuracy‚ paying attention to AM/PM settings and the correct day selections. Utilize the timer’s display to confirm that the programmed schedule matches your intentions.

For complex schedules‚ consider creating a written outline before programming to minimize errors. If issues persist‚ a factory reset (if available) can restore the timer to its original settings‚ allowing you to start fresh.

Safety Precautions & Best Practices

Always ensure proper weatherproofing for outdoor use‚ adhere to electrical safety guidelines‚ and verify load compatibility to prevent damage or hazards with Dewenwils timers.

Weatherproofing and Outdoor Use

Dewenwils outdoor timers are designed for resilience‚ but proper installation is crucial for longevity. Ensure the timer is shielded from direct rain and snow; consider a protective enclosure if necessary.

Inspect the timer’s housing for any cracks or damage before each season. A compromised seal can allow moisture to enter‚ leading to malfunction or electrical hazards.

Avoid submerging the timer in water. While many models boast IP65 waterproofing‚ this rating pertains to splashes and brief exposure‚ not full immersion.

When mounting‚ choose a location away from standing water and excessive humidity. Regularly check connections for corrosion‚ especially in coastal environments. Properly sealed connections are vital for safe and reliable operation throughout the year.

Electrical Safety Guidelines

Always disconnect power at the breaker before installing or servicing a Dewenwils outdoor timer. Never work with electrical components while energized. Verify the timer’s voltage rating matches your power supply – typically 120V AC.

Avoid overloading the timer’s circuit. Check the maximum wattage or amperage specified on the device and ensure your connected appliances stay within those limits. Overloading can cause overheating and fire hazards.

Use appropriately sized wiring for the load. Consult a qualified electrician if you’re unsure about wire gauge requirements. Ensure all connections are secure and properly insulated.

Inspect cords and plugs for damage before each use. Replace any frayed or damaged components immediately. Never use a timer with a damaged cord‚ as this poses a serious shock risk. Prioritize safety above all else.

Load Capacity and Compatibility

Dewenwils outdoor timers have specific load capacities‚ expressed in wattage (W) or amperage (A). Exceeding these limits can damage the timer and connected devices‚ potentially creating a fire hazard. Always check the timer’s specifications before connecting any load.

Compatibility is crucial. Ensure the timer is suitable for the type of load you intend to control – resistive (lights‚ heaters) or inductive (motors‚ pumps). Inductive loads often require a higher surge capacity.

LED lighting is generally compatible‚ but verify the total wattage doesn’t exceed the timer’s rating. For landscape lighting‚ confirm the timer supports low-voltage (12V) systems if applicable.

Avoid connecting multiple high-draw appliances to a single timer. Consider using separate timers for different circuits to distribute the load effectively and maintain safe operation.

Dewenwils Timer Applications

Dewenwils timers excel at automating landscape lighting‚ holiday decorations‚ and irrigation systems‚ offering convenience and energy savings for both home and garden use.

Landscape Lighting Control

Dewenwils outdoor timers provide a seamless solution for automating your landscape lighting‚ enhancing both the beauty and security of your property. Imagine effortlessly controlling spotlights‚ path lights‚ and accent lighting with precise scheduling.

These timers allow you to set specific on/off times‚ creating a welcoming ambiance while deterring potential intruders. You can program lights to turn on at dusk and off at dawn‚ or customize schedules for special events.

Utilizing Dewenwils timers with low voltage landscape lights‚ like the HGSL05A spotlights‚ ensures efficient energy use and extends bulb life. Enjoy the convenience of automated lighting without the hassle of manual operation‚ creating a captivating outdoor environment year-round. The possibilities are endless‚ from subtle illumination to dramatic displays.

Holiday Decorations & Seasonal Lighting

Dewenwils outdoor timers are perfect for automating your holiday and seasonal lighting displays‚ simplifying setup and saving energy. Easily schedule twinkling lights for Christmas‚ festive displays for Halloween‚ or vibrant illuminations for other celebrations.

Forget manually turning lights on and off each day – program your Dewenwils timer to handle it all! Create a magical atmosphere with precisely timed displays‚ enhancing the joy of the season.

These timers work seamlessly with various lighting types‚ ensuring a hassle-free experience. Enjoy the convenience of automated seasonal décor‚ freeing up your time to focus on enjoying the festivities. From subtle glows to elaborate shows‚ Dewenwils timers bring your holiday vision to life‚ effortlessly and efficiently.

Pump and Irrigation System Automation

Dewenwils outdoor timers extend beyond lighting‚ offering robust control for your pump and irrigation systems. Automate watering schedules to maintain a lush lawn and thriving garden‚ even when you’re away.

Precisely schedule pump operation for water features‚ fountains‚ or livestock watering‚ optimizing water usage and reducing waste. Dewenwils timers provide reliable performance‚ ensuring consistent and efficient operation of your systems.

Eliminate the need for manual intervention‚ saving you time and effort. Customize watering durations and frequencies to suit your specific plant needs and local weather conditions. With Dewenwils‚ you can effortlessly manage your irrigation‚ promoting healthy growth and conserving valuable resources. Enjoy a beautiful landscape with minimal effort!

Dewenwils Product Support & Warranty

Dewenwils provides excellent customer service and comprehensive warranty options for peace of mind‚ ensuring satisfaction with their reliable electrical tools and accessories.

Contacting Dewenwils Customer Service

Dewenwils prioritizes customer satisfaction and offers multiple avenues for support regarding your outdoor timer. For immediate assistance‚ you can typically find a “Contact Us” section on their official website‚ dewenwils.com. This section usually provides a dedicated email address for inquiries‚ often support@dewenwils.com‚ where you can detail your issue and receive a personalized response.

Furthermore‚ Dewenwils often includes a customer service phone number for direct communication‚ allowing for real-time troubleshooting. Check their website or product packaging for the most up-to-date contact information. Many users also find helpful support through online marketplaces where Dewenwils products are sold‚ such as Amazon‚ utilizing the seller contact options available there. When contacting support‚ be prepared to provide your timer model number and a clear description of the problem you are experiencing to expedite the resolution process.

Warranty Information and Claim Process

Dewenwils generally offers a warranty on their outdoor timers‚ protecting against manufacturing defects and ensuring product reliability. The standard warranty period typically ranges from one to two years from the date of purchase‚ though it’s crucial to verify the specific terms for your model. To initiate a warranty claim‚ retain your original proof of purchase – a receipt or order confirmation – as this is essential documentation.

Contact Dewenwils customer service (see previous section) and clearly describe the defect. You may be asked to provide photos or videos demonstrating the issue. If the claim is approved‚ Dewenwils will typically offer a replacement product or a refund‚ depending on the nature of the defect and warranty terms. Shipping costs for returns or replacements may be covered under the warranty‚ but confirm this detail during the claim process. Carefully review the full warranty details on the Dewenwils website for complete coverage information.

Finding Additional Resources Online

Dewenwils maintains a comprehensive online presence offering valuable resources for timer users. Their official website (www.dewenwils.com) is the primary hub‚ featuring detailed product specifications‚ downloadable instruction manuals in PDF format‚ and frequently asked questions (FAQs). You can often find model-specific guides and troubleshooting tips there.

YouTube is another excellent source; search “Dewenwils outdoor timer” to access video tutorials demonstrating setup‚ programming‚ and common issue resolutions. Amazon product pages for Dewenwils timers frequently contain customer reviews and Q&A sections offering practical insights. Furthermore‚ online forums dedicated to home automation and gardening often host discussions about Dewenwils products‚ providing a platform to exchange experiences and solutions with other users. Regularly checking these resources ensures you have access to the latest information and support.

dark and lovely hair color instructions

Dark and Lovely Hair Color Instructions: A Comprehensive Guide

Dark and Lovely offers a diverse range of shades, catering to various preferences. This guide details application, maintenance, and troubleshooting, ensuring vibrant, lasting color results for all hair types.

Understanding the Dark and Lovely Color Range

Dark and Lovely’s color range is specifically formulated for the unique needs of textured hair and diverse skin tones, offering a spectrum from deepest blacks to vibrant reds and rich browns. The brand distinguishes itself with both permanent and semi-permanent options, allowing for varying levels of commitment and color intensity.

The permanent collection provides 100% gray coverage and long-lasting color, ideal for those seeking a significant and enduring change. Shades like Jet Black (371), Natural Black (372), and Golden Bronze (379) are popular choices. Conversely, the semi-permanent line delivers vibrant color without the long-term commitment, perfect for experimenting with new looks or enhancing existing shades.

Madison Reed’s radiant cream color ranges from level 2 (deepest black) to level 10 (lightest blonde), showcasing the breadth of possibilities. Dark and Lovely also features fade-resistant formulas, designed to maintain color vibrancy wash after wash. Understanding these distinctions is crucial for selecting the right product to achieve your desired outcome, whether it’s a subtle enhancement or a dramatic transformation.

Dark and Lovely Permanent Hair Color Shades

Dark and Lovely’s permanent hair color line boasts a wide array of shades designed for rich, lasting color and 100% gray coverage. Classic options include Jet Black (371), providing intense darkness, and Natural Black (372), offering a softer, more natural black hue. For warmer tones, Brown Sable (373) delivers a sophisticated brown, while Rich Auburn (374) introduces fiery red undertones.

More adventurous shades like Red Hot Rhythm (376) provide a bold, vibrant statement. Sunkissed Brown offers a lighter, sun-kissed effect, and Golden Bronze (379) delivers warm, radiant highlights. The range extends to include deeper, cooler browns and even violet-infused shades for unique looks.

These permanent colors are formulated to penetrate the hair shaft, ensuring long-lasting results and minimizing fading. The collection caters to diverse preferences, allowing individuals to find a shade that complements their skin tone and personal style. Exploring the full spectrum ensures a perfect match for a transformative and confident coloring experience.

Dark and Lovely Semi-Permanent Hair Color Options

Dark and Lovely’s semi-permanent hair color line provides a commitment-free way to experiment with new shades and enhance natural color. These formulas deposit color onto the hair shaft without requiring developer, resulting in less damage and gradual fading over several washes – typically 6-8 shampoos.

The semi-permanent range includes vibrant options like deep burgundy, plum, and various shades of red, perfect for adding a pop of color. Browns and subtle highlights are also available, allowing for natural-looking enhancements. These colors are ideal for refreshing existing shades or trying out a new look without a long-term commitment.

Semi-permanent colors are particularly beneficial for those with previously colored or damaged hair, as they are gentler than permanent dyes. They offer excellent conditioning properties, leaving hair feeling soft and manageable. The Fade Resistant formula ensures prolonged vibrancy, maximizing the impact of your chosen shade before it gradually washes away, offering flexibility and fun.

Choosing the Right Shade for Your Skin Tone

Selecting a Dark and Lovely hair color that complements your skin tone is crucial for a harmonious and flattering look. Generally, warm skin tones (yellow or golden undertones) pair beautifully with warm hair colors like golden browns, caramel, copper, and rich auburns. These shades enhance the natural warmth of the skin, creating a radiant glow.

Conversely, cool skin tones (pink or blue undertones) are best suited to cool hair colors such as ash browns, platinum blondes, and deep blacks. These shades balance the coolness of the skin, preventing a washed-out appearance. Neutral skin tones have the flexibility to experiment with a wider range of colors, both warm and cool.

Consider your eye color as well. Dark eyes often look stunning with richer, deeper shades, while lighter eyes can be beautifully framed by softer, more subtle tones. Don’t be afraid to consult a color chart or seek advice from a professional stylist to determine the most flattering shade for your unique complexion and desired aesthetic.

Preparing for Hair Coloring: Patch Test & Strand Test

Prior to applying Dark and Lovely hair color, performing a patch test and strand test is absolutely essential. A patch test helps determine if you have any allergic reaction to the dye. Apply a small amount of the mixed color behind your ear or on your inner elbow. Wait 48 hours, observing for any signs of irritation like redness, itching, or swelling. If irritation occurs, do not proceed with coloring.

The strand test assesses how the color will develop on your hair and helps predict the final result. Select a small, inconspicuous section of hair – underneath layers are ideal. Apply the color mixture as directed, processing for the recommended time. Rinse and dry the strand. This reveals the color’s true tone and helps you adjust processing time if needed.

These tests minimize risks and ensure a satisfying coloring experience. Remember to document the results of both tests for future reference. Proper preparation is key to achieving beautiful, healthy-looking color.

Tools and Materials Needed for Application

Successful Dark and Lovely hair coloring requires gathering the right tools and materials beforehand. You’ll need the Dark and Lovely hair color kit itself, including the colorant and developer. Protective gear is crucial: wear gloves (usually included in the kit) to prevent skin staining, and an old towel or cape to shield your clothing.

A non-metallic bowl and applicator brush are essential for mixing and applying the color evenly. Avoid metal, as it can react with the dye. Sectioning clips will help divide your hair for precise application, ensuring complete coverage. A wide-tooth comb is useful for detangling and distributing the color.

Petroleum jelly or a barrier cream should be applied along your hairline and ears to prevent staining. A timer is vital for accurate processing time. Finally, have a damp cloth handy for wiping away any spills. Having everything prepared streamlines the process and minimizes mess.

Step-by-Step Application Instructions for Permanent Color

Begin by performing a patch and strand test, as previously advised. Once ready, section your dry, unwashed hair into four quadrants. In a non-metallic bowl, thoroughly mix the Dark and Lovely permanent hair colorant and developer according to the kit’s instructions.

Starting at the roots, apply the mixture evenly to each section using an applicator brush. Work quickly to ensure consistent coverage. Once the roots are saturated, apply the remaining color to the lengths and ends of your hair.

Massage your hair gently to distribute the color thoroughly. Ensure every strand is coated for uniform results. Once applied, immediately rinse your hands with water to remove any stray dye. Use sectioning clips to keep the quadrants separate during application; Double-check for missed spots, particularly around the hairline and nape of the neck.

Step-by-Step Application Instructions for Semi-Permanent Color

Ensure a strand test is completed before full application. With Dark and Lovely semi-permanent color, begin with clean, dry, and detangled hair. Section your hair into four manageable quadrants for even distribution.

Open the colorant tube and apply directly to each section, starting at the roots. Unlike permanent color, semi-permanent doesn’t require mixing with a developer. Massage the color into your hair, ensuring complete saturation from root to tip.

Use gloved hands to evenly distribute the product, working through each quadrant systematically. Pay close attention to the hairline and edges, ensuring full coverage. Semi-permanent color is designed to deposit color onto the hair shaft, so thorough application is key. Avoid overlapping previously colored sections to prevent color buildup. Once applied, proceed directly to the processing time outlined on the product packaging.

Processing Time and Rinsing

Dark and Lovely semi-permanent color typically requires a processing time of 20-30 minutes, though always refer to the specific instructions on your chosen shade’s packaging. Processing time can be influenced by your hair’s porosity and desired intensity – a longer time generally yields a more vibrant result.

During processing, avoid heat as it can affect the color outcome. Once the processing time is complete, rinse your hair thoroughly with lukewarm water until the water runs clear. Avoid using shampoo at this stage, as it can strip some of the newly deposited color.

Follow up with a color-safe conditioner to help seal the cuticle and lock in moisture. Gently detangle your hair while conditioning. Rinse the conditioner thoroughly. For optimal results, avoid washing your hair for at least 72 hours after coloring, allowing the color to fully set. Pat your hair dry with a soft towel instead of rubbing.

Post-Color Care: Shampooing and Conditioning

Dark and Lovely colored hair requires specialized care to maintain vibrancy and health. Always use a sulfate-free shampoo formulated for color-treated hair. Sulfates can strip the color molecules, leading to fading and dullness. Wash your hair less frequently – 2-3 times a week is often sufficient – to prolong color life.

Invest in a high-quality, color-safe conditioner. These conditioners contain ingredients that help seal the hair cuticle, locking in color and preventing damage. Deep conditioning treatments, used weekly, provide extra moisture and repair, especially important for processed hair.

Consider using a leave-in conditioner with UV protection to shield your hair from sun damage, which can also cause color fading. Avoid harsh styling products containing alcohol, as they can dry out your hair and diminish color intensity. Regular trims help remove split ends and maintain a healthy appearance, enhancing the overall look of your colored hair.

Maintaining Color Vibrancy

To keep your Dark and Lovely hair color looking fresh and vibrant, several strategies are essential. Minimize heat styling – excessive use of blow dryers, curling irons, and straighteners can fade color and damage hair. When heat styling is necessary, always use a heat protectant spray.

Regularly use color-depositing conditioners or glosses to refresh your shade and counteract fading. These products deposit small amounts of color with each use, boosting vibrancy between full color applications. Protect your hair from chlorine, as it can strip color and cause discoloration. Wet your hair with clean water and apply a leave-in conditioner before swimming.

Avoid prolonged sun exposure, as UV rays can fade color. Wear a hat or use a hair product with UV protection when spending time outdoors. Choose hair accessories that won’t cause friction and color loss. Consistent, gentle care is key to maintaining a beautiful, long-lasting color.

Addressing Common Coloring Issues (e.g., uneven color)

Uneven color is a frequent concern when coloring hair at home. If you experience patchiness, it’s often due to inconsistent application or variations in hair porosity. For minor unevenness, a color-balancing gloss can help blend tones and create a more uniform look. Ensure thorough saturation during the next application, sectioning hair carefully and working quickly.

Brassiness, particularly in lighter shades, can occur when underlying warm tones are revealed. Utilize a purple shampoo or conditioner to neutralize these tones and restore cool hues. If your hair feels damaged or brittle after coloring, incorporate deep conditioning treatments into your routine to restore moisture and strength.

Allergic reactions, though rare, are possible. Always perform a patch test before full application. If irritation occurs, discontinue use immediately. For significant coloring mishaps, consulting a professional stylist is recommended to avoid further damage and achieve the desired correction.

Color Correction Techniques

Correcting unwanted hair color requires a strategic approach. For darker shades that are too intense, a clarifying shampoo used several times can gently lift some pigment. However, avoid harsh scrubbing, which can damage hair. If transitioning from a darker to a lighter shade, gradual lightening is crucial to minimize damage; avoid drastic changes in one session.

To neutralize unwanted brassy tones, utilize a toner specifically designed for your hair level. Purple or blue-based toners effectively counteract yellow or orange undertones. For correcting uneven color, consider a technique called “glazing,” applying a semi-permanent color to blend and even out the overall tone.

If you’ve experienced significant color damage, protein treatments can help rebuild the hair’s structure. Always follow color correction with deep conditioning to restore moisture and prevent breakage. When in doubt, seeking professional assistance from a colorist is the safest route to achieve desired results without compromising hair health.

Dark and Lovely Color Chart Overview (Specific Shades)

The Dark and Lovely color chart boasts an extensive selection, ranging from deepest blacks to vibrant reds and browns. Jet Black (371) provides intense, classic darkness, while Natural Black (372) offers a softer, more natural black hue. Brown Sable (373) delivers a rich, warm brown, and Rich Auburn (374) introduces fiery red undertones.

For bolder looks, Red Hot Rhythm (376) provides a striking, vibrant red. Sunkissed Brown offers a lighter, sun-kissed brown shade, ideal for a subtle change. The range extends to include cinnamon and bronze tones, like Brown Cinnamon (391) and Golden Bronze (379), catering to diverse preferences.

The semi-permanent line expands options with shades like Radiant Cherry and Plum, offering temporary color experimentation. Each shade is formulated for optimal color deposit and fade resistance, ensuring long-lasting vibrancy. The chart also indicates color levels, assisting in selecting the appropriate shade for desired results and existing hair color.

Specific Shade Breakdown: Golden Bronze (379)

Dark and Lovely’s Golden Bronze (379) is a popular choice for achieving warm, radiant color. This shade delivers a rich, bronze tone with golden undertones, adding depth and dimension to hair. It’s particularly flattering on medium to dark skin tones, enhancing natural warmth.

Expect noticeable color change, especially on previously untreated hair. Results vary based on starting hair color; lighter bases will yield brighter bronze, while darker hair will achieve a warmer, deeper hue. The shade provides excellent gray coverage, blending seamlessly for a natural look.

Golden Bronze is a permanent color, requiring regular touch-ups to maintain vibrancy. It’s formulated to be fade-resistant, but color longevity depends on hair care practices. Pair with color-safe shampoo and conditioner to prolong the life of your golden bronze shade. This shade is ideal for those seeking a sun-kissed, dimensional look without extreme color shifts.

Where to Buy Dark and Lovely Hair Color Products

Dark and Lovely hair color products are widely accessible, offering convenient purchasing options for everyone. Major retailers like Walmart, Target, and Walgreens consistently stock a comprehensive selection of shades and kits, both in-store and online. For broader variety and potential sales, Amazon is an excellent resource, frequently featuring the complete Dark and Lovely range.

Beauty supply stores, such as Sally Beauty, specialize in hair care and typically carry a full assortment of Dark and Lovely products, alongside expert advice from trained staff. Additionally, the Dark and Lovely official website provides direct purchasing options, often with exclusive promotions and bundles.

Drugstores like CVS and Rite Aid also offer limited selections, ideal for quick restocks. Checking retailer websites for online availability and utilizing store locator tools ensures you find the specific shade you need. Price comparisons across different retailers can help secure the best deal, maximizing value for your hair coloring needs.

bilstein 5100 installation instructions

Bilstein 5100 Installation Instructions: A Comprehensive Guide

This detailed guide offers step-by-step instructions for Bilstein 5100 shock installation, covering everything from preparation to post-installation checks and troubleshooting.

Bilstein 5100 Series shocks are a popular upgrade for Jeep Wrangler JK models (07-18) seeking improved on- and off-road performance. These shocks are specifically designed for vehicles with 2- to 3.5-inch lifts, offering enhanced damping and control. They are a monotube, gas-charged design, providing consistent performance even in demanding conditions.

Installation requires a qualified suspension specialist due to the need for specialized tools and expertise. Always install BILSTEIN shocks as a set for balanced handling. This guide will walk you through the process, but professional installation is highly recommended. Proper installation ensures optimal performance and safety, maximizing the benefits of your new Bilstein 5100 shocks.

Safety Precautions & Required Tools

Prioritize safety during Bilstein 5100 installation! Always wear safety glasses and gloves. Securely support the vehicle using jack stands – never rely solely on a jack. Disconnect the negative battery terminal to prevent electrical issues. Installation demands expertise, so a qualified suspension specialist is crucial.

Essential tools include: 16mm, 18mm (x2) sockets with extensions, socket wrenches (x2), a torque wrench, and a flathead screwdriver. Two jacks are helpful. A chassis hoist is mandatory for safe vehicle lifting and secure support. Ensure the vehicle is firmly attached to the hoist to prevent accidental drops during the process.

Pre-Installation Vehicle Inspection

Before beginning, a thorough vehicle inspection is vital. Examine existing shocks for leaks, damage, or excessive wear. Inspect shock mounts and bushings for deterioration – replace if necessary. Check the condition of the vehicle’s suspension components, including springs, control arms, and ball joints.

Verify proper functionality of the braking system and steering components. Confirm all fasteners are present and not corroded. Note the current ride height for comparison after installation. Document any existing issues to address during or after the shock replacement. A pre-installation assessment ensures a safe and effective upgrade.

Rear Shock Removal Procedure

Begin by safely lifting the vehicle and securing it with jack stands. Locate the rear shocks and carefully disconnect the lower shock mounts, typically using a 16mm or 18mm socket. Next, address the upper shock mounts, often found bolted to the vehicle’s frame.

Be cautious when removing the upper mounts, as the shocks may be under compression. Once the mounts are detached, carefully remove the old shocks. Remember the green strap on new Bilstein 5100s – do not remove it before installation! Discard the old hardware, as new hardware is usually included with the Bilstein shocks.

Disconnecting the Existing Shocks

Start with the lower shock mounts, utilizing an 18mm socket and extension to access the bolts. Penetrating oil can be helpful if encountering corrosion. Once loosened, fully remove the bolts and carefully detach the shock from the axle.

Next, move to the upper shock mounts, typically secured with 16mm or 18mm fasteners. Support the vehicle’s weight during disconnection to prevent unexpected movement. Ensure all connections are fully released before attempting to remove the entire shock assembly. Remember safety glasses are crucial during this process!

Removing the Old Hardware

After disconnecting the shocks, thoroughly inspect and remove all old hardware – including bolts, nuts, washers, and any retaining clips. Pay close attention to the condition of the hardware; corrosion can make removal difficult.

Consider replacing the old hardware with new components to ensure a secure and reliable installation. Clean the mounting surfaces on the vehicle frame and axle to remove any rust or debris. This will provide a clean base for the new Bilstein 5100 shocks and hardware. Proper preparation is key to a successful installation!

Bilstein 5100 Rear Shock Installation

Begin the installation by carefully positioning the new Bilstein 5100 rear shocks into the mounting locations. Align the shock eyelets with the corresponding brackets on the vehicle frame and axle. Ensure the shock orientation is correct, referencing any diagrams or instructions provided with the shocks.

Install the new hardware, loosely tightening the bolts and nuts initially. This allows for some adjustment during the installation process. Double-check the alignment of the shocks before fully tightening the hardware to the manufacturer’s specified torque settings. Remember to use appropriate socket sizes (16mm, 18mm) and extensions for accessibility.

Installing the New Shocks

Carefully maneuver the Bilstein 5100 shocks into position, aligning the lower shock mount with the axle and the upper mount with the vehicle’s frame. A second person can be incredibly helpful during this stage to assist with alignment and support the shock’s weight.

Begin threading the provided hardware – bolts and nuts – through the shock mounts. Initially, tighten these fasteners by hand to ensure proper alignment. Avoid fully tightening at this stage, as slight adjustments may be needed. Remember the cautionary tale: do not remove the green strap holding the new shock semi-closed before installation!

Torquing Specifications for Rear Shocks

Precise torque is crucial for safe and effective shock performance. Refer to your vehicle’s service manual for the exact specifications, but generally, rear shock mounting bolts require tightening to around 75-85 ft-lbs. Always use a calibrated torque wrench to achieve accurate results.

Double-check all fasteners after the initial tightening. It’s recommended to cycle through the bolts a few times, gradually increasing the torque in small increments. This ensures even pressure distribution and prevents potential damage to the shock mounts or hardware. Verify these specifications again post-installation after a short test drive.

Front Shock Removal Procedure

Begin by safely lifting the front of the vehicle and securing it with jack stands. Loosen the lug nuts on the front wheels before lifting for easier removal later. The front shock removal requires addressing both upper and lower mounting points. Start with the upper mounts, which can be challenging due to shaft rotation.

Disconnect the brake lines and ABS sensors carefully, ensuring they aren’t stretched or damaged. Proceed to the lower shock mounts, typically bolted to the control arm. Penetrating oil is highly recommended for stubborn bolts. Remember to support the lower control arm to prevent unexpected dropping when the shocks are detached.

Loosening and Removing the Upper Shock Mounts

The primary challenge with upper shock mounts is preventing the shock shaft from rotating while loosening the nut. Unlike previous shocks with a square mount, Bilstein 5100s lack this feature. Employ a specialized tool, or carefully use a wrench and a helper to hold the shaft steady.

Alternatively, an impact wrench can sometimes overcome the initial resistance. Once loosened, fully remove the nut, washer, and any associated hardware. Be prepared for the shock to drop slightly once free. Inspect the upper shock mount for any corrosion or damage before proceeding to the lower mount removal.

Disconnecting the Lower Shock Mounts

With the upper mounts removed, support the axle to alleviate tension on the lower shock mounts. Utilize a socket wrench, typically 16mm or 18mm depending on the vehicle, and an extension for easier access. Carefully loosen and remove the lower shock mount bolts. These bolts can be quite tight and may require penetrating oil if corroded.

Once the bolts are removed, gently maneuver the shock downwards, disconnecting it from the lower mount. Take note of any shims or spacers present, as these will need to be reinstalled with the new Bilstein 5100 shocks. Ensure the brake line and other components are clear during removal.

Bilstein 5100 Front Shock Installation

Begin by carefully positioning the new Bilstein 5100 shock into the lower mount, ensuring all spacers and shims are correctly placed as noted during disassembly. Next, guide the shock shaft upwards into the shock tower. Addressing the shaft rotation issue is crucial; use a specialized tool or a second wrench to prevent the shaft from spinning while tightening the upper mount nut.

Proper alignment is key for smooth operation and longevity. Ensure the shock is fully seated before proceeding. Tighten the upper shock mounts to the manufacturer’s specified torque, utilizing a torque wrench for accuracy. Double-check all connections for security.

Addressing the Shaft Rotation Issue

The Bilstein 5100 shocks lack a flat spot on the shaft, presenting a challenge during front installation. As you tighten the upper shock mount nut, the entire shock shaft will rotate, preventing proper tightening. To counteract this, a specialized shock shaft holding tool is highly recommended.

Alternatively, a second wrench can be carefully applied to the shock body near the lower mount to stabilize it. This prevents rotation while the upper nut is secured. Without addressing this issue, you risk undertightening the nut, leading to premature failure or compromised handling. Proper stabilization is paramount for a secure installation.

Tightening the Upper Shock Mounts – Techniques & Tools

Securing the upper shock mounts requires precision and the correct tools. A torque wrench is absolutely essential to achieve the manufacturer’s specified torque, preventing damage or failure. Utilize a socket wrench in conjunction with the torque wrench for optimal leverage. Ensure the shock shaft is held firmly to prevent rotation during tightening, as previously discussed.

Apply steady, even pressure while tightening; avoid jerking motions. Double-check the torque specification in the Bilstein documentation for your specific vehicle model. Proper tightening is crucial for maintaining suspension performance and vehicle safety. Incorrect torque can lead to premature wear or even component breakage.

Ride Height Adjustment Considerations

Bilstein 5100 shocks often allow for ride height adjustment, particularly when paired with lift kits. Understanding your desired lift height is crucial before installation. Consider the impact of increased ride height on vehicle handling, center of gravity, and driveline angles. Adjustments are typically made using shock spacers or by utilizing the shock’s multi-setting capabilities.

Always consult the lift kit manufacturer’s recommendations for appropriate shock settings. Incorrect adjustments can lead to a compromised ride quality or even suspension damage. Remember to re-torque all suspension components after any ride height adjustments. Professional alignment is highly recommended following any suspension modifications.

Shock Boot Orientation & Installation

Proper shock boot installation is vital for protecting the shock shaft from debris and extending its lifespan. Ensure the boots are oriented correctly, with the wider opening facing the lower shock mount. Carefully slide the boot over the shock shaft, avoiding twisting or pinching. Lubricate the shaft with silicone grease to facilitate smooth movement within the boot.

Inspect the boots for any damage before installation. Secure the boots using the provided retaining clips or straps, ensuring a snug fit. Avoid over-tightening, which can restrict shock travel. Regularly inspect the boots for wear and tear, replacing them as needed to maintain optimal shock performance.

Post-Installation Checks & Torque Verification

After installing the Bilstein 5100 shocks, thorough checks are crucial for safety and performance; Begin by visually inspecting all connections, ensuring all hardware is present and properly seated. Next, carefully torque all bolts and nuts to the manufacturer’s specifications using a calibrated torque wrench – critical for preventing loosening.

Cycle the suspension several times, listening for any unusual noises. Check for any interference between the shocks, boots, or other suspension components. Finally, perform a test drive, paying attention to handling and ride quality. Re-torque all fasteners after the initial test drive.

Troubleshooting Common Installation Problems

During Bilstein 5100 installation, encountering stuck bolts or nuts is common; penetrating oil and patience are key. If a bolt refuses to budge, applying heat (carefully!) can help. Shock shaft binding can occur, especially during front shock installation; ensure proper alignment during compression.

Addressing this often involves loosening surrounding hardware and gently manipulating the shock body. Remember, forcing components can cause damage. If issues persist, consult a qualified mechanic. Always double-check that all parts are correctly oriented before applying significant force.

Dealing with Stuck Bolts & Nuts

Stuck bolts and nuts are frequent challenges during Bilstein 5100 installation. Begin by applying a generous amount of penetrating oil, allowing it ample time to soak. Utilize a six-point socket to minimize rounding the bolt head. If resistance remains, consider using a breaker bar for increased leverage.

Heat, applied cautiously with a torch, can also aid in loosening corroded fasteners. Avoid excessive force, as this can strip threads or break bolts. For severely stuck nuts, a nut splitter might be necessary. Remember safety glasses and gloves are essential during this process.

Addressing Shock Shaft Binding

Shock shaft binding indicates a misalignment or obstruction preventing smooth shock travel. Inspect the shock mounts and bushings for proper seating and any signs of damage. Ensure the shock isn’t contacting any surrounding components like the frame or brake lines.

Carefully cycle the suspension through its full range of motion, observing for points of contact. If binding persists, loosen the shock mounts slightly and re-align the shock. Avoid forcing the suspension, as this can damage the shock or vehicle. Proper installation and torque specifications are crucial to prevent binding.

Importance of Professional Installation

Bilstein explicitly recommends professional installation for all its products, including the 5100 series. Suspension work demands specialized tools and in-depth knowledge of vehicle mechanics. Incorrect installation can compromise vehicle handling, safety, and shock absorber performance.

A qualified suspension specialist understands torque specifications, alignment procedures, and potential complications. They can accurately diagnose existing suspension issues and ensure the new shocks are properly integrated. Attempting this installation without expertise risks damaging components or creating unsafe driving conditions. Prioritize safety and vehicle integrity by seeking professional assistance.

Recommended Post-Installation Alignment

Following Bilstein 5100 shock installation, a comprehensive wheel alignment is absolutely crucial. Changing suspension components, even seemingly minor adjustments, can significantly alter vehicle alignment angles. Misalignment leads to uneven tire wear, compromised handling, and reduced fuel efficiency.

A professional alignment ensures the vehicle tracks straight, minimizes tire wear, and optimizes steering response. Specifically, check camber, caster, and toe angles. Ensure the alignment technician is aware of the recent shock replacement. Investing in an alignment protects your tire investment and maintains safe, predictable vehicle behavior on the road.

BILSTEIN Product Specific Warnings

BILSTEIN strongly advises that all installations are performed by a qualified suspension specialist possessing the necessary tools and expertise. Improper installation can compromise vehicle safety and shock absorber performance, potentially leading to damage or injury. Always install BILSTEIN shock absorbers as a complete set – replacing them individually can negatively impact handling and stability.

Furthermore, always utilize a chassis hoist during installation, ensuring the vehicle is securely supported to prevent accidental drops. Never work under a vehicle supported only by a jack. Carefully review all included documentation and torque specifications before beginning the installation process.

Using a Chassis Hoist for Safe Installation

Prioritizing safety is paramount when installing Bilstein 5100 shocks. Always employ a robust chassis hoist to elevate the vehicle, providing ample working space and ensuring stability. Crucially, verify the vehicle is securely attached to the hoist, utilizing appropriate safety chains or supports. Never rely solely on a floor jack for extended periods; it’s inherently unstable.

Before commencing work, double-check the hoist’s load capacity exceeds the vehicle’s weight. Ensure the lifting points are correctly positioned to avoid damaging the vehicle’s frame or undercarriage. Regularly inspect the hoist for wear and tear, and adhere to the manufacturer’s safety guidelines.

Bilstein 5100 Series Shock Overview (07-18 Jeep Wrangler JK)

The Bilstein 5100 series shocks are a popular upgrade for 2007-2018 Jeep Wrangler JKs, designed to enhance off-road performance and ride quality. Specifically engineered for 2-3.5 inch lifts, these shocks offer improved damping and control. They feature a monotube construction for consistent performance, even under demanding conditions.

Installation typically requires basic hand tools, including sockets (16mm, 18mm), a torque wrench, and potentially a jack. These shocks are often paired with other suspension modifications, like leveling kits or lift kits. Proper installation is crucial for optimal performance and safety, often best left to a qualified technician.

Socket and Wrench Sizes Required

For a successful Bilstein 5100 installation, having the correct tools is paramount. Specifically, you’ll need a socket wrench set, including 16mm and two 18mm sockets, along with socket extensions to reach difficult bolts. A torque wrench is essential for tightening hardware to the manufacturer’s specifications, ensuring safety and preventing damage.

Additionally, a flathead screwdriver may be needed for minor adjustments or removing clips. While not strictly required, having two jacks can simplify the process, providing extra support and lift. Remember to consult the installation guide for precise torque values and any specialized tools recommended for your specific vehicle model.