frozen cauliflower pizza cooking instructions

Frozen Cauliflower Pizza Cooking Instructions: A Comprehensive Guide

Discover the secrets to perfectly cooked frozen cauliflower pizza! This guide covers oven and air fryer methods‚ ensuring a crispy crust and delicious results every time.

Frozen cauliflower pizza has rapidly gained popularity as a healthier and gluten-free alternative to traditional pizza. It caters to diverse dietary needs without sacrificing flavor or convenience. These pizzas utilize a crust crafted from cauliflower‚ offering a lower-carbohydrate and calorie option.

Cooking frozen cauliflower pizza requires a slightly different approach than conventional pizzas‚ primarily due to the unique texture of the crust. Mastering the optimal cooking method – whether oven baking or air frying – is key to achieving a satisfyingly crispy base. This guide will provide detailed instructions and helpful tips to ensure your frozen cauliflower pizza turns out perfectly every time‚ delivering a delightful and guilt-free pizza experience.

Understanding Cauliflower Pizza Crust

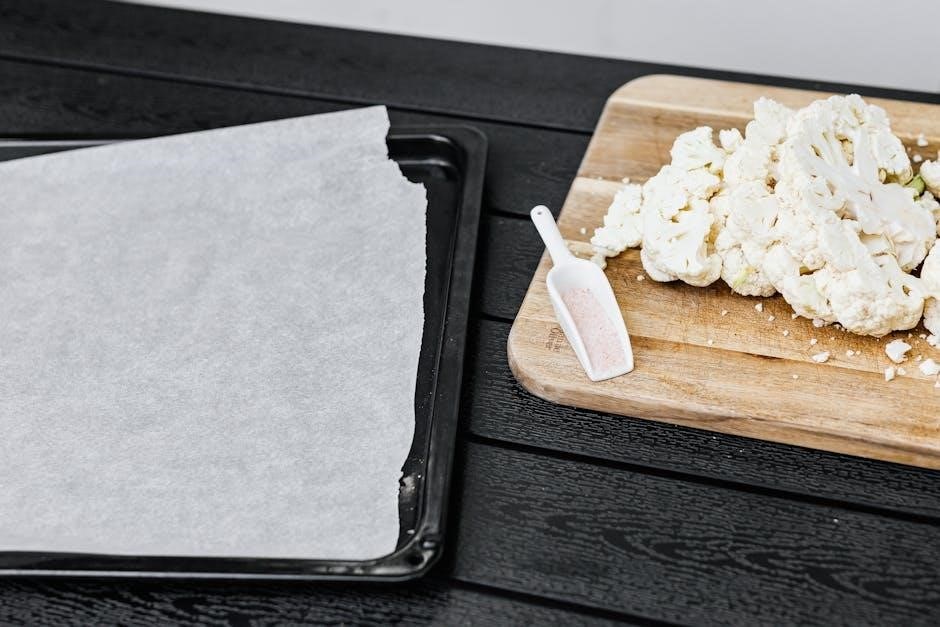
Cauliflower pizza crust differs significantly from traditional dough-based crusts. It’s created by processing cauliflower into rice-like pieces‚ then combining it with ingredients like cheese‚ eggs‚ and seasonings. This mixture is pressed and baked to form a surprisingly sturdy base.

However‚ its delicate nature means it requires careful handling and specific cooking techniques. Unlike wheat-based crusts‚ cauliflower crust doesn’t develop gluten‚ resulting in a softer texture. This is why achieving crispness is often a challenge. Understanding this fundamental difference is crucial for successful cooking; pre-baking and higher temperatures are often necessary to prevent a soggy outcome and enjoy a flavorful‚ healthy pizza.

Popular Brands of Frozen Cauliflower Pizza

The market offers a growing selection of frozen cauliflower pizzas‚ catering to various tastes. Costco stands out with its popular varieties like Roasted Vegetable‚ Margherita Four Cheese‚ and a classic Four Cheese Cauliflower Pizza – known for their value and flavor. Beyond Costco‚ several other brands are widely available.

These include options from Trader Joe’s‚ offering unique flavor combinations‚ and brands like Cali’flour Foods‚ specializing exclusively in cauliflower-based products. Other readily found brands provide convenient options for a quick and healthier pizza night. Each brand may have slightly different cooking instructions‚ so always check the packaging!

Costco Cauliflower Pizza Varieties

Costco consistently impresses with its range of frozen cauliflower pizzas‚ providing both quality and affordability. Currently‚ popular choices include the Roasted Vegetable Pizza‚ a vibrant medley of flavors‚ and the classic Margherita Four Cheese Pizza‚ offering a traditional taste. The Four Cheese Cauliflower Pizza remains a steadfast favorite among customers.

These pizzas are often praised for their generous toppings and surprisingly satisfying crust. Costco frequently rotates its offerings‚ so you might discover limited-edition varieties as well. Checking your local Costco’s inventory is recommended to see what’s currently available. They are a convenient and tasty option for a quick meal!

Other Widely Available Brands

Beyond Costco‚ several other brands offer frozen cauliflower pizza‚ catering to diverse dietary needs and preferences. Many grocery stores stock options from brands specializing in gluten-free or health-conscious foods. These include varieties with different cheese blends‚ vegetable combinations‚ and even meat toppings.

Exploring these brands allows for greater choice and accessibility. Look for options that clearly state their ingredients and cooking instructions. Some brands focus on creating a particularly crispy crust‚ while others prioritize flavor profiles. Reading reviews can help you determine which brand best suits your taste and cooking style‚ ensuring a satisfying pizza experience.

Cooking Methods for Frozen Cauliflower Pizza

Frozen cauliflower pizza offers convenient cooking options‚ primarily utilizing either a conventional oven or an air fryer. Each method yields slightly different results‚ impacting crust crispness and overall cooking time. Oven baking provides a more traditional approach‚ allowing for even heat distribution‚ while air frying excels at creating a remarkably crispy crust in a shorter timeframe.

Understanding the nuances of each method is key to achieving optimal results. Factors like preheating‚ temperature settings‚ and cooking duration all play crucial roles. We’ll explore detailed instructions for both techniques‚ offering tips to ensure your frozen cauliflower pizza is perfectly cooked and delightfully satisfying.

Oven Baking Instructions

Baking a frozen cauliflower pizza in the oven is a straightforward process‚ delivering consistently good results. Begin by preheating your oven to a temperature between 400°F and 425°F – this ensures even cooking and a crispy crust. The optimal baking temperature often depends on the specific brand‚ so checking the packaging is recommended.

Recommended baking time generally falls between 12 to 18 minutes. However‚ monitor the pizza closely‚ as cooking times can vary. Placing the pizza directly on the oven rack promotes better airflow and crisping; For enhanced results‚ consider utilizing a pizza stone or baking steel‚ which retain heat effectively and contribute to a superior crust texture.

Preheating the Oven

Proper oven preheating is absolutely crucial for achieving a perfectly cooked frozen cauliflower pizza. Allow your oven to fully reach the desired temperature – typically between 400°F and 425°F – before placing the pizza inside. This ensures even heat distribution‚ preventing a soggy crust and guaranteeing thorough cooking.

A fully preheated oven helps to quickly crisp the cauliflower crust‚ mimicking the results of a traditional pizza oven. Resist the urge to open the oven door frequently during preheating‚ as this can cause temperature fluctuations. Consistent heat is key! Give the oven at least 15-20 minutes to stabilize at the set temperature for optimal baking.

Optimal Baking Temperature

Determining the ideal baking temperature is vital for frozen cauliflower pizza success. Most manufacturers recommend a range of 400°F to 425°F (204°C to 218°C). However‚ 425°F generally yields the best results – a crispy crust and fully melted toppings. Lower temperatures may lead to a soft‚ undercooked crust‚ while excessively high heat could burn the crust before the toppings are heated through.

Experimentation within this range can help you find your sweet spot‚ depending on your oven and the specific brand of pizza. A higher temperature promotes quicker cooking and enhanced crispness. Consistent monitoring is still important‚ even at the optimal temperature‚ to prevent over-browning.

Recommended Baking Time

Generally‚ a frozen cauliflower pizza requires between 12 to 18 minutes of baking time in a conventional oven. This timeframe‚ however‚ is a guideline and can fluctuate based on the pizza’s brand‚ crust thickness‚ and your oven’s calibration. Starting with 12 minutes is advisable‚ then checking for doneness.

Air fryer cooking significantly reduces this time‚ typically ranging from 6 to 8 minutes‚ though some brands may need up to 15 minutes. Always refer to the packaging instructions for the manufacturer’s specific recommendations. Regular checks during the final few minutes are crucial to prevent burning and ensure a perfectly cooked pizza.

Air Fryer Cooking Instructions

Utilizing an air fryer offers a remarkably quick and convenient method for preparing frozen cauliflower pizza. This appliance excels at achieving a delightfully crispy crust in a fraction of the time compared to conventional ovens. Preheating is often unnecessary with modern air fryers‚ but consult your model’s manual.

Typically‚ cooking times range from 10 to 15 minutes‚ contingent upon the brand and crust thickness. For optimal results‚ arrange the pizza in a single layer within the air fryer basket‚ ensuring adequate air circulation; Regular monitoring during the final minutes is recommended to prevent overcooking and achieve your desired level of crispness.

Air Fryer Temperature Settings

Achieving the ideal temperature is crucial when air frying frozen cauliflower pizza for a perfectly crisp crust. Generally‚ a temperature range of 375°F to 400°F (190°C to 200°C) yields excellent results. However‚ some sources recommend 400°F (200°C) for optimal crisping‚ particularly for thicker crusts.

It’s always best practice to consult the specific instructions provided on the pizza’s packaging‚ as recommendations can vary between brands. Starting at 380°F (193°C) allows for a balance between thorough cooking and preventing the crust from burning. Adjust the temperature slightly based on your air fryer model and desired level of crispness.

Air Fryer Cooking Duration

Typically‚ air frying a frozen cauliflower pizza takes between 6 to 15 minutes‚ but this is heavily dependent on the brand‚ crust thickness‚ and your air fryer’s power. Initial cooking times often range from 8 to 12 minutes‚ but checking for doneness is vital.

For a truly crispy crust‚ consider starting with 8 minutes‚ then adding 1-2 minute increments until the cheese is melted and bubbly‚ and the crust is golden brown. Monitoring closely prevents burning. Some pizzas may require up to 15 minutes for complete cooking‚ especially those with thicker crusts or numerous toppings. Always refer to package directions!

Tips for Crispy Air Fryer Crust

Achieving a crispy crust in the air fryer requires a few key techniques. Firstly‚ avoid overcrowding the basket; cook pizzas in batches for optimal air circulation. Secondly‚ lightly spray the crust with olive oil before cooking – this promotes browning and crispness.

Consider flipping the pizza halfway through the cooking process for even heating. If your air fryer has a dedicated “pizza” setting‚ utilize it! Finally‚ preheating the air fryer is crucial for consistent results. Don’t be afraid to add an extra minute or two to the cooking time if needed to reach your desired level of crispiness.

Achieving a Crispy Crust

The biggest challenge with cauliflower pizza is often achieving a truly crispy crust. Oven temperature is paramount; consistently maintaining 400-425°F is vital for proper cooking and texture. Pre-baking the crust for a few minutes before adding toppings can also significantly improve crispness by removing excess moisture.

Investing in a pizza stone or baking steel is highly recommended. These materials retain heat exceptionally well‚ creating a hot surface that crisps the bottom of the crust beautifully. Ensure the stone or steel is preheated with the oven for at least 30 minutes before baking. Proper heat distribution is key to avoiding a soggy center and a burnt edge.

Importance of Oven Temperature

Maintaining the correct oven temperature is absolutely crucial when cooking frozen cauliflower pizza. Lower temperatures result in a soft‚ soggy crust‚ while excessively high heat can burn the toppings before the crust fully cooks. Most manufacturers recommend a range of 400°F to 425°F for optimal results.

Consistent heat ensures even cooking throughout the pizza‚ preventing a raw center and an overcooked exterior. Preheating the oven thoroughly is equally important; allow at least 20-30 minutes for it to reach the desired temperature. Using an oven thermometer can verify accuracy‚ as oven dials aren’t always precise. A well-heated oven is the foundation for a crispy‚ delicious cauliflower pizza.

Pre-Baking Techniques

To truly elevate your frozen cauliflower pizza‚ consider employing pre-baking techniques. This involves briefly baking the crust before adding toppings. Pre-baking for 5-7 minutes at 375°F helps to firm up the crust‚ minimizing sogginess later on. Ensure the crust is evenly heated during this initial stage.

Another helpful trick is to lightly brush the crust with olive oil before pre-baking; this adds flavor and promotes crisping. Alternatively‚ placing the frozen pizza directly on the oven rack (instead of a baking sheet) can improve airflow and crust texture. These simple steps create a sturdier base for your toppings‚ guaranteeing a more satisfying pizza experience.

Using a Pizza Stone or Baking Steel

For an exceptionally crispy cauliflower pizza crust‚ utilizing a pizza stone or baking steel is highly recommended. These materials retain heat incredibly well‚ creating a hot surface that mimics a professional pizza oven. Preheat the stone or steel in the oven for at least 30-60 minutes at the highest possible temperature – typically 500-550°F.

Carefully slide the frozen pizza directly onto the preheated surface. The intense heat will quickly cook the crust‚ resulting in a delightfully crunchy texture. Remember to use a pizza peel to safely transfer the pizza. Baking with a stone or steel significantly improves the overall quality and texture of your frozen cauliflower pizza.

Checking for Doneness

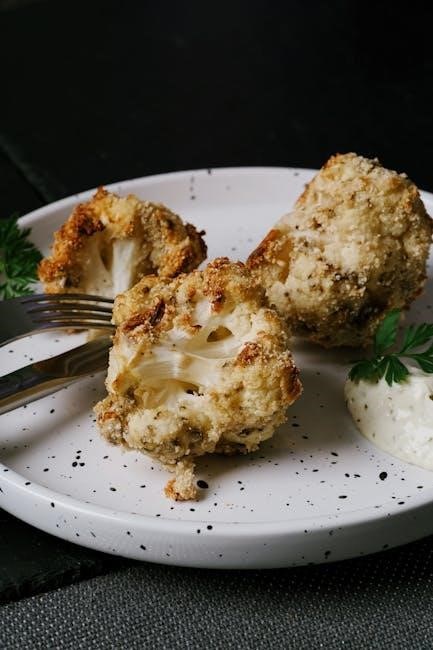
Determining when your frozen cauliflower pizza is perfectly cooked involves observing visual cues and‚ optionally‚ checking the crust’s temperature. Look for a golden-brown and slightly crispy crust – this is a primary indicator of doneness. The cheese should be fully melted and bubbly‚ with some areas potentially browned.

If you desire a more precise check‚ use an instant-read thermometer. Insert it into the center of the crust; a temperature of around 200-210°F suggests it’s ready; Remember that cooking times can vary‚ so these are guidelines. Always prioritize a fully cooked crust and melted cheese for a safe and enjoyable pizza experience.

Visual Cues for a Cooked Pizza

Successfully gauging the doneness of your frozen cauliflower pizza relies heavily on visual inspection. A fully cooked pizza will exhibit a golden-brown crust‚ indicating sufficient heat penetration and crisping. Observe the cheese; it should be completely melted‚ bubbly‚ and potentially have some browned spots for enhanced flavor.

The toppings should also appear heated through and slightly caramelized. If the crust is pale or the cheese isn’t fully melted‚ it requires additional cooking time. Pay close attention to the edges of the crust – they should be firm and slightly lifted. These visual indicators provide a reliable assessment of your pizza’s readiness.

Checking the Crust Temperature

For ultimate accuracy‚ verifying the crust’s internal temperature ensures a thoroughly cooked pizza. Using an instant-read thermometer‚ carefully insert the probe into the center of the crust‚ avoiding toppings. A temperature of 165°F (74°C) signifies that the pizza has reached a safe and desirable level of doneness.

This method is particularly useful for thicker crusts or when visual cues are ambiguous. Remember that cauliflower crusts may not firm up as much as traditional dough‚ so temperature is a reliable indicator. Always exercise caution when using a thermometer in a hot oven or air fryer. Confirming the temperature guarantees a perfectly baked pizza.

Topping Considerations

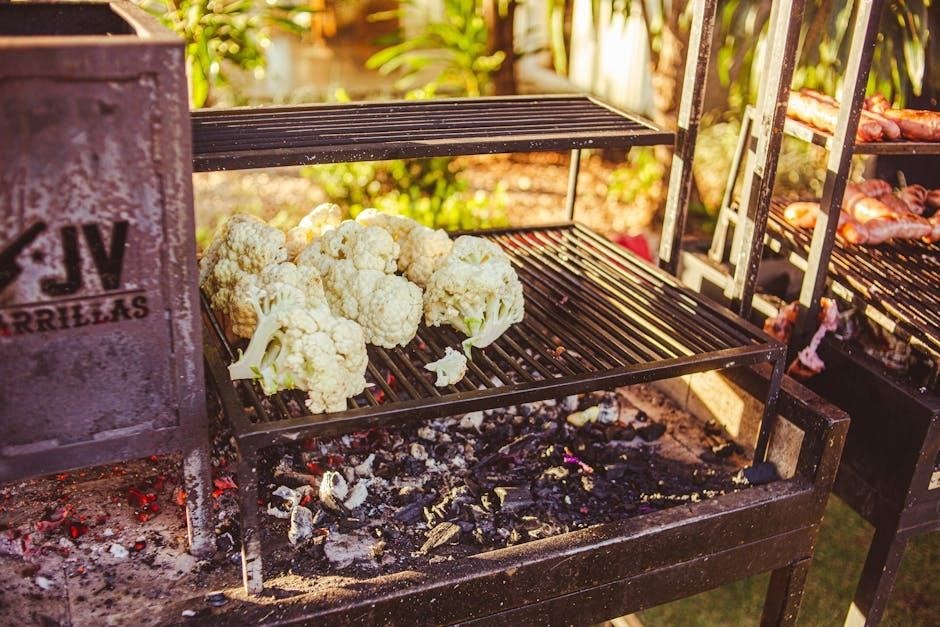
Selecting the right toppings is crucial for a delightful cauliflower pizza experience. Lighter toppings‚ such as roasted vegetables‚ fresh herbs‚ and lean proteins‚ work best to prevent a soggy crust. Avoid overloading the pizza‚ as excessive moisture can compromise the crust’s integrity.

Pre-cooking vegetables with high water content‚ like mushrooms or spinach‚ helps reduce excess moisture. Similarly‚ draining ingredients like olives or pineapple thoroughly is recommended. Cheese should be added in moderation; a light to medium layer ensures optimal melting without creating a soggy base. Experiment with flavors‚ but prioritize dryness for a crispy result!

Best Toppings for Cauliflower Pizza

For optimal flavor and texture‚ consider these toppings! Roasted vegetables like bell peppers‚ zucchini‚ and onions pair wonderfully with the mild cauliflower crust. Lean proteins such as grilled chicken‚ turkey pepperoni‚ or Italian sausage add a satisfying heartiness. Fresh herbs like basil‚ oregano‚ and rosemary elevate the taste profile.

Cheese options include mozzarella‚ parmesan‚ and a sprinkle of feta. Experiment with pesto‚ sun-dried tomatoes‚ or artichoke hearts for a Mediterranean twist. Remember to balance flavors and avoid overly wet ingredients. A light hand with sauce is also key to preventing sogginess – a thin layer is sufficient!

Avoiding Soggy Toppings

Soggy toppings are a common pitfall with cauliflower pizza! To combat this‚ pre-cook vegetables with high water content‚ like mushrooms or spinach‚ to release excess moisture. Pat fresh ingredients dry with paper towels before adding them to the pizza. Use a light hand with tomato sauce; too much will saturate the crust.

Consider using a thicker‚ more robust sauce to prevent it from soaking in. Avoid piling on too many toppings‚ as this can weigh down the crust and create steam. Finally‚ a sprinkle of parmesan cheese under the toppings can act as a moisture barrier‚ helping to maintain a crispy base. These simple steps ensure a delightful‚ non-soggy pizza experience!

Freezing and Storage

Proper freezing and storage are key to maintaining quality. For homemade cauliflower crust‚ cool completely before wrapping tightly in plastic wrap‚ then foil‚ or placing in a freezer-safe bag. It can be stored for up to 2-3 months. When freezing leftover cooked pizza‚ cut into portions and wrap individually to prevent sticking.

Regarding store-bought frozen cauliflower pizza‚ adhere to the “best by” date. Once opened‚ leftover cooked pizza should be refrigerated in an airtight container for up to 3-4 days. Reheating in the oven or air fryer is recommended to restore crispness‚ avoiding the microwave which can lead to sogginess. Enjoy your pizza at its best!

Freezing Homemade Cauliflower Pizza Crust

To successfully freeze your homemade cauliflower pizza crust‚ ensure it’s fully cooled after baking. This prevents ice crystal formation and maintains texture. Wrap the crust tightly in several layers – first with plastic wrap‚ ensuring no air pockets remain‚ then with a layer of aluminum foil. Alternatively‚ use a freezer-safe bag‚ squeezing out excess air before sealing.

Properly wrapped‚ the crust can be stored in the freezer for up to two to three months. When ready to use‚ thaw completely in the refrigerator before adding toppings and baking. Freezing uncooked crust is also possible‚ following the same wrapping procedure‚ but may require a slightly longer baking time. Enjoy future pizza nights!

Storing Leftover Frozen Cauliflower Pizza

Proper storage is key to enjoying leftover frozen cauliflower pizza. Allow the pizza to cool completely before storing it. Place individual slices in airtight containers or wrap them tightly in plastic wrap‚ then foil. Refrigerate immediately to maintain freshness and prevent bacterial growth.

Leftover pizza is best consumed within 3-4 days. For longer storage‚ consider freezing. Wrap slices individually as described above and store in a freezer-safe bag for up to a month. Reheat in the oven or air fryer for optimal crispness‚ avoiding the microwave which can make the crust soggy. Enjoy a second serving!

Troubleshooting Common Issues

Encountering problems with your frozen cauliflower pizza? A soggy crust is a frequent complaint. Ensure the oven temperature is high enough – 425°F is often ideal – and consider pre-baking the crust for a few minutes before adding toppings. Using a pizza stone or baking steel also helps.

Unevenly cooked pizza can be fixed by rotating the pizza halfway through the cooking time. If the toppings are burning before the crust is crisp‚ lower the oven temperature slightly or cover the toppings loosely with foil. Remember to always check for doneness using visual cues and a temperature check. Don’t be afraid to experiment!

Soggy Crust Solutions

A soggy crust is the most common issue with frozen cauliflower pizza. To combat this‚ pre-baking the crust for 5-7 minutes before adding toppings is crucial. This helps to remove excess moisture. Ensure your oven reaches 425°F and consider using a pizza stone or baking steel for direct heat transfer.

Avoid overloading the pizza with wet toppings like fresh tomatoes or too much sauce. Pat down any moist ingredients with a paper towel before adding them. Increasing the oven temperature slightly can also help‚ but watch carefully to prevent burning. Proper air circulation is key – don’t overcrowd the oven!

Unevenly Cooked Pizza Fixes

If your frozen cauliflower pizza cooks unevenly‚ rotating it halfway through baking is essential. This ensures all parts receive equal heat exposure. Check the oven’s temperature accuracy with an oven thermometer; fluctuations can cause inconsistencies. For air fryers‚ ensure the pizza isn’t touching the sides‚ allowing for proper air circulation.

If certain areas remain pale‚ briefly broil the pizza (watching closely!) to add color and crispness. Consider partially cooking the pizza‚ adding toppings‚ then returning it to the oven for a final bake. Ensure the pizza is placed in the center of the oven rack for even heating distribution.

rhode gear bike rack instructions

Rhode Gear Bike Rack Instructions: A Comprehensive Guide (Updated 02/16/2026)

Rhode Gear bike racks provide a secure transport solution for cyclists, and this guide details proper installation and usage for a safe journey.

Rhode Gear has established itself as a prominent manufacturer of bicycle racks, renowned for delivering both convenience and security in transporting your bikes. These racks are engineered for versatility and durability, offering reliable solutions for various vehicle types and cycling needs. Whether you’re planning a weekend getaway or a cross-country adventure, a Rhode Gear rack ensures your bicycles arrive safely at your destination.

Understanding the importance of a properly installed and maintained bike rack is crucial. A secure attachment prevents damage to your vehicle and, more importantly, safeguards your bicycles during travel. This comprehensive guide will walk you through each step, from selecting the right model to performing routine maintenance, ensuring a smooth and worry-free biking experience.

Understanding Different Rhode Gear Models

Rhode Gear offers a diverse range of bike racks tailored to different vehicles and cycling preferences. The Rhode Gear Shuttle is a popular trunk-mounted option, favored for its ease of installation and compatibility with many sedans and hatchbacks. It’s ideal for casual cyclists and families seeking a straightforward transport solution.

Conversely, the Rhode Gear Highway Hitch rack is designed for vehicles equipped with a hitch receiver. This model provides enhanced stability and can often carry more bikes, making it suitable for serious cyclists or those traveling with multiple riders. Understanding these key differences – mounting style, capacity, and vehicle compatibility – is essential when choosing the right Rhode Gear rack for your needs.

Rhode Gear Shuttle Bike Rack: Overview

The Rhode Gear Shuttle is a trunk-mounted bike rack known for its user-friendly design and broad vehicle compatibility. It securely holds bicycles using adjustable straps and padded clamps, protecting your bike’s finish during transport. This model typically accommodates two or three bikes, making it a great choice for small families or couples.

Installation involves strapping the rack to your vehicle’s trunk lid and securing it with additional straps that go inside the car for added stability. The Shuttle’s design prioritizes ease of use, allowing for relatively quick attachment and removal. It’s a cost-effective and convenient option for cyclists seeking a reliable bike transport solution.

Rhode Gear Highway Hitch Bike Rack: Overview

The Rhode Gear Highway Hitch bike rack is designed for vehicles equipped with a 2-inch hitch receiver, offering a robust and stable platform for transporting bicycles. Unlike trunk-mounted racks, the Highway Hitch doesn’t contact the vehicle’s paint, minimizing the risk of scratches or damage. It typically accommodates two bikes and features a tilt-away design for easy access to the rear cargo area.

Installation is straightforward, involving sliding the rack into the hitch receiver and securing it with a pin and clip. The Highway Hitch often includes integrated anti-wobble features and adjustable bike cradles to ensure a secure and comfortable ride for your bicycles. It’s a durable and convenient option for frequent bike transport.

Installation Instructions

Proper installation is crucial for safety; these steps detail how to securely attach your Rhode Gear rack to your vehicle, preventing damage or accidents.

Preparing Your Vehicle for Rack Installation

Before installing your Rhode Gear bike rack, thorough vehicle preparation is essential for a secure and damage-free fit. Begin by carefully reading your vehicle’s owner’s manual to identify any specific warnings or limitations regarding trunk-mounted or hitch-mounted accessories.

Clean the trunk lid or hitch receiver area to remove any dirt, debris, or existing residue. This ensures optimal contact between the rack and your vehicle. Inspect the trunk lid for any pre-existing damage, documenting it with photos to avoid disputes later.

For hitch-mounted racks, verify the hitch receiver is clean and the correct size for your Rhode Gear model. Ensure the hitch is securely fastened to the vehicle’s frame. For trunk-mounted racks, confirm the straps will not interfere with taillights, license plates, or any vehicle sensors.

Attaching the Rhode Gear Shuttle Rack to Your Trunk

Begin by positioning the Rhode Gear Shuttle Rack centrally on your vehicle’s trunk. Extend the support arms and adjust them to align with the contours of your trunk lid and bumper. Secure the upper straps, tightening them evenly to distribute the pressure.

Next, fasten the lower straps, ensuring they wrap around the trunk’s underside and connect firmly to the rack’s attachment points. Tighten these straps incrementally, alternating between sides to maintain balanced tension.

Crucially, avoid over-tightening, which could damage your vehicle’s paint. Once secured, firmly test the rack’s stability by applying downward and lateral pressure. A properly installed rack should exhibit minimal movement.

Securing the Rhode Gear Highway Hitch Rack to Your Hitch

Start by sliding the Rhode Gear Highway Hitch Rack’s shank into your vehicle’s hitch receiver. Ensure it’s fully inserted and aligned with the hitch opening. Next, insert the locking pin through the shank and hitch receiver, securing it with the included clip or retaining device.

Verify the connection is solid by attempting to move the rack – it should not wobble or shift. Tighten the adjustment knob or bolt on the hitch rack to eliminate any play between the shank and receiver.

Finally, double-check that the locking pin and retaining device are securely fastened before loading any bikes. A secure connection to the hitch is paramount for safe transport.

Adjusting Strap Placement for a Secure Fit

Proper strap placement is crucial for a stable and secure fit of your Rhode Gear bike rack. Begin by positioning the straps to avoid contact with any sensitive vehicle paint or trim. Run the straps around the vehicle’s trunk, door openings, or hatch, ensuring they are evenly distributed.

Tighten the straps gradually, alternating between sides to maintain balanced tension. Avoid over-tightening, which could potentially damage your vehicle’s finish. The straps should be snug enough to prevent the rack from shifting during travel, but not so tight that they cause stress.

Regularly check strap tension, especially after initial installation and during longer trips, to ensure continued security.

Loading Your Bikes

Securely loading your bikes onto the Rhode Gear rack requires understanding weight limits, proper positioning, and utilizing straps and clamps effectively.

Bike Compatibility and Weight Limits

Rhode Gear bike racks accommodate a wide range of bicycle types, but understanding compatibility is crucial for safe transport. Most models support various frame styles, including mountain, road, and hybrid bikes. However, bikes with step-through frames or fenders may require additional securing measures or adapters.

Weight limits are paramount; exceeding them compromises stability and safety. The Rhode Gear Shuttle typically handles bikes up to 35 pounds each, while the Highway Hitch rack often supports up to 50 pounds per bike. Always check your specific rack’s documentation for precise weight capacity. Distribute weight evenly across the rack to maintain vehicle balance and prevent strain on the mounting system. Prioritize safety by adhering to these guidelines.

Proper Bike Positioning on the Rack

Optimal bike positioning on your Rhode Gear rack is vital for stability and preventing damage. Generally, heavier bikes should be placed closer to the vehicle’s center to minimize sway. Alternate the direction of bike frames – one facing forward, the next backward – to balance weight distribution effectively;

Ensure the bike frames are securely seated within the designated cradles or clamps. Avoid overcrowding; leave sufficient space between bikes to prevent contact during transit. Pay attention to handlebar and pedal placement, ensuring they don’t interfere with the vehicle or other bikes. Correct positioning minimizes stress on the rack and maximizes safety during your travels.

Securing Bikes with Straps and Clamps

Properly securing your bikes with straps and clamps is paramount for safe transport. Begin by threading the straps through the bike frames and around the rack’s support arms, ensuring a snug fit. Avoid cinching straps too tightly, which could damage the frame; a firm, but not constricting, hold is ideal.

For racks utilizing clamps, verify they firmly grip the bike’s frame tubes. Double-check that all straps and clamps are securely fastened before commencing your journey. Regularly inspect these securing mechanisms during travel, especially after hitting bumps, to maintain a reliable hold.

Preventing Bike-to-Bike Contact

Avoiding contact between bicycles during transport is crucial to prevent scratches and damage. Utilize foam padding or dedicated bike protectors around contact points like handlebars and frames. Strategically position bikes on the rack, maximizing space and minimizing potential collisions.

If using a multi-bike rack, consider alternating handlebar directions to further reduce friction. Secure each bike independently with straps, preventing lateral movement that could lead to rubbing. Regularly check for any shifting during your trip and readjust as needed. Prioritizing separation safeguards your bikes’ finish and structural integrity.

Safety Precautions

Prioritize safety with pre-trip checks, moderate speeds, avoiding rack overload, and consistent strap tension monitoring throughout your travels for secure biking.

Pre-Trip Inspection Checklist

Before each journey with your Rhode Gear bike rack, a thorough inspection is crucial for a safe and enjoyable ride. Begin by verifying the rack’s overall stability and ensuring it’s firmly attached to your vehicle – whether trunk-mounted or hitch-secured.

Next, meticulously examine all straps for any signs of fraying, wear, or damage. Confirm that buckles are functioning correctly and can securely tighten. Inspect the clamps that hold your bikes, ensuring they grip firmly without causing damage to the frames.

Check that all hardware, including bolts and screws, are tightened to the manufacturer’s specifications. Finally, visually confirm that your bikes are properly positioned and secured, with no risk of contact between them or the vehicle. A quick, comprehensive checklist prevents potential roadside issues!

Recommended Driving Speed with a Bike Rack

Maintaining a safe driving speed when transporting bikes with your Rhode Gear rack is paramount for stability and control. While legal speed limits apply, it’s generally recommended to reduce your speed by 5-10 mph, especially on highways or winding roads.

This reduction accounts for the altered vehicle dynamics caused by the added weight and wind resistance. Avoid sudden acceleration, braking, and sharp turns, as these maneuvers can destabilize the rack and potentially lead to an accident.

Regularly check your rearview mirror to monitor the rack’s position and ensure everything remains secure during your trip. Prioritize smooth, predictable driving habits for a worry-free biking adventure!

Avoiding Overloading the Rack

Overloading your Rhode Gear bike rack compromises safety and can cause significant damage to both the rack and your vehicle. Always adhere to the manufacturer’s specified weight capacity, typically found in the rack’s documentation or on a label affixed to the unit.

This capacity considers the combined weight of all bikes and the rack itself. Exceeding this limit can strain the mounting hardware, leading to instability and potential failure.

Distribute the weight evenly across the rack, placing heavier bikes closer to the vehicle’s center. Regularly inspect the rack for any signs of stress or deformation, and never attempt to carry more bikes than the rack is designed for.

Checking Strap Tension During Travel

Maintaining proper strap tension is crucial for bike security throughout your journey with a Rhode Gear bike rack. Straps can loosen due to vibrations and road conditions, potentially allowing bikes to shift or detach.

Plan to stop and inspect strap tension every 50-100 miles, or after any significant changes in road surface. Ensure all straps remain snug and secure around bike frames and the rack’s mounting points.

Retighten any straps that have become loose. Avoid overtightening, as this could damage bike frames or the straps themselves. Consistent checks minimize risk and guarantee a safe, worry-free travel experience.

Maintenance and Care

Regular maintenance extends the life of your Rhode Gear bike rack; cleaning, inspection, and timely replacement of worn parts are essential.

Cleaning Your Rhode Gear Bike Rack

Consistent cleaning is vital for maintaining your Rhode Gear bike rack’s longevity and performance. After each trip, or at least monthly with frequent use, inspect the rack for dirt, grime, and road debris. Use a mild soap and water solution – avoid harsh chemicals or abrasive cleaners that could damage the finish or components.

A soft cloth or sponge works best for wiping down the frame and straps. Pay close attention to areas where straps make contact, as these can accumulate dirt. Rinse thoroughly with clean water and allow the rack to air dry completely before storing. Inspect the hardware during cleaning, looking for any signs of rust or corrosion. Addressing these issues promptly will prevent further damage and ensure continued safe operation.

Storing Your Bike Rack When Not in Use

Proper storage significantly extends the life of your Rhode Gear bike rack. When not in use, choose a dry, sheltered location away from direct sunlight and extreme temperatures. A garage, shed, or even a covered patio are suitable options. Avoid storing the rack outdoors, as prolonged exposure to the elements can cause rust and deterioration of straps and plastic components.

Before storing, ensure the rack is completely dry to prevent mildew growth. Loosen the straps slightly to relieve tension and prevent cracking. If possible, hang the rack to avoid placing weight on the straps. Regularly check the storage area for pests that might damage the rack. Careful storage ensures your rack remains ready for your next cycling adventure.

Inspecting Straps and Hardware for Wear

Regular inspection of your Rhode Gear bike rack’s straps and hardware is crucial for safety. Before each use, meticulously examine all straps for fraying, tears, or signs of weakening. Pay close attention to areas that experience the most stress, such as buckle contact points. Check the metal hardware – bolts, nuts, and pins – for rust, corrosion, or loosening.

Ensure all bolts are tightened to the manufacturer’s specifications. If you notice any damage or wear, replace the affected parts immediately. Don’t compromise safety by continuing to use damaged components. Proactive inspection and timely replacement of worn parts will maintain the rack’s reliability and protect your valuable bikes during transport.

Replacing Worn Parts

When inspection reveals worn or damaged components on your Rhode Gear bike rack, prompt replacement is essential. Rhode Gear typically offers replacement straps, buckles, and hardware kits. Consult the manufacturer’s website or contact customer support to identify the correct parts for your specific model.

When replacing straps, ensure the new ones have the same weight capacity and dimensions as the originals. For hardware, use only genuine Rhode Gear replacements to maintain compatibility and structural integrity. Follow the installation instructions carefully, ensuring all bolts are tightened to the correct torque specifications. Prioritize quality replacements to guarantee continued safety and reliability during bike transport;

Troubleshooting Common Issues

Rhode Gear bike rack problems like wobbling, strap difficulties, or bike slippage can occur; this section offers solutions for a secure ride.

Rack Wobbling During Travel

Rack wobbling is a common concern, often stemming from improper initial installation or loosening during the journey. First, re-check all attachment points – ensure the straps are tightly secured to your vehicle’s trunk or the hitch receiver. Verify the anti-wobble screws (if your model has them) are firmly tightened.

If wobbling persists, consider the weight distribution of your bikes. Evenly distribute the load across the rack to maintain balance. Inspect the hitch receiver itself; a loose hitch can amplify wobbling. For hitch-mounted racks, a hitch stabilizer is a worthwhile investment. Finally, reduce your driving speed, as excessive speed exacerbates any existing instability. Consistent monitoring throughout your trip is crucial.

Difficulty Securing Straps

Strap securing issues often arise from insufficient strap length, incorrect threading, or worn strap buckles. Ensure you’re utilizing the correct strap path as illustrated in the installation guide. If straps are too short, explore purchasing longer replacement straps specifically designed for bike racks.

Inspect the buckles for damage or stiffness; lubricating them with silicone spray can improve functionality. When tightening, pull firmly and evenly to distribute tension. Avoid over-tightening, which can damage the straps or your vehicle’s finish. If straps continue to slip, double-check that the contact points are clean and dry. Regularly inspect straps for fraying or wear, replacing them promptly if needed.

Bike Slipping on the Rack

Bike slippage is frequently caused by inadequate frame contact or insufficient strap/clamp tension. Verify that the bike frame is correctly positioned within the cradles and that the contact points are clean. Ensure the straps or clamps are tightened securely, but avoid over-tightening, which could damage the bike frame.

Consider using bike frame protectors to enhance grip and prevent scratching. For bikes with unusual frame shapes, additional padding might be necessary. Regularly check strap tension during your trip, as vibrations can cause loosening. If slippage persists, double-check the rack’s compatibility with your bike’s frame geometry.

Compatibility Issues with Vehicle Models

Rhode Gear bike racks, while versatile, may encounter compatibility issues with certain vehicle models due to trunk or hatch designs. Some vehicles with steeply sloped rear windows or large spoilers may prevent a secure fit for trunk-mounted racks. Always consult Rhode Gear’s compatibility chart before purchasing, or test-fit the rack if possible.

For hitch-mounted racks, ensure your vehicle has a compatible hitch receiver. Verify the hitch class can handle the combined weight of the rack and bikes. If issues arise, consider a hitch adapter or explore alternative rack styles. Prioritize safety and avoid forcing a fit that compromises stability.

Rhode Gear Bike Rack Accessories

Rhode Gear offers accessories like extra straps, frame protectors, and hitch adapters to enhance your rack’s functionality and protect your bikes and vehicle.

Additional Strap Options

Rhode Gear understands that one size doesn’t fit all when it comes to securing your bicycles. While your rack includes standard straps, exploring additional options can significantly improve security and accommodate diverse bike frame shapes. Consider purchasing ratchet straps for enhanced tightening and a more secure hold, especially for heavier bikes or rough terrain.

Bungee cords, though less robust, can be useful for lighter loads or as secondary restraints. Look for straps with durable buckles and weather-resistant materials to withstand various conditions. Always ensure any additional straps are compatible with your rack’s attachment points and meet the weight capacity requirements. Properly fitted straps minimize movement and prevent damage during transport, contributing to a safer and more enjoyable cycling experience.

Bike Frame Protectors

Protecting your bicycle’s finish is crucial when using a bike rack. Constant contact with metal or plastic rack components can lead to scratches and paint chips. Rhode Gear recommends utilizing bike frame protectors to mitigate this risk. These protectors, often made of soft, padded materials like neoprene or microfiber, create a barrier between the frame and the rack.

They are easily applied and come in various sizes and styles to fit different frame shapes. Consider protectors for the top tube, down tube, and any areas prone to contact. Investing in frame protectors is a small price to pay for preserving your bike’s aesthetic appeal and resale value, ensuring years of worry-free transport.

Hitch Adapters

Rhode Gear Highway Hitch racks require a compatible hitch receiver on your vehicle; However, not all hitches are created equal. If your vehicle’s hitch differs from the standard 1.25” or 2” receiver size, a hitch adapter may be necessary. These adapters allow you to utilize a Rhode Gear rack with a non-standard hitch.

Adapters are available to convert between different sizes, ensuring a secure and stable connection. Always verify the adapter’s weight capacity matches the combined weight of the rack and your bicycles. Prioritize quality adapters from reputable brands to guarantee safety and prevent wobbling during travel. Proper adapter selection is vital for a secure and enjoyable biking experience.

size guide for boxing gloves

Navigating boxing glove sizes can be tricky, as selecting the correct pair is crucial for safety and performance.
Understanding size charts and considering your weight, hand circumference, and training type are essential steps.

Why Proper Glove Size Matters

Selecting the appropriate boxing glove size isn’t merely about comfort; it’s fundamentally linked to injury prevention and maximizing training effectiveness. Gloves that are too small constrict your hands, hindering proper fist formation and increasing the risk of fractures or sprains during impact. Conversely, oversized gloves diminish dexterity and can compromise your punching power, making it harder to maintain technique and control.

Properly sized gloves provide essential padding, safeguarding your hands, wrists, and the bones within. This is particularly vital during sparring, where repeated blows demand robust protection. Furthermore, the right size ensures optimal weight distribution, contributing to better balance and reducing fatigue. A well-fitted glove allows for a secure grip, enhancing your confidence and control throughout your training session. Ignoring proper sizing can lead to long-term hand and wrist issues, potentially sidelining you from the sport.

Understanding Boxing Glove Weight (oz)

Boxing glove weight, measured in ounces (oz), doesn’t directly correlate to physical weight, but rather the amount of padding within the glove. Lower ounce gloves (6-8oz) are typically used by youth or for light bag work, offering minimal padding and emphasizing speed. As weight increases, so does the padding, providing greater protection for both the wearer and their sparring partner.

Common weights range from 10oz to 16oz. 10-12oz gloves are suitable for beginners and lighter individuals focusing on bag training. 14oz gloves are a versatile choice for intermediate boxers and general sparring. 16oz gloves are generally recommended for heavier individuals and competitive sparring, maximizing safety. It’s crucial to remember that competition rules often dictate specific glove weights, and choosing the right weight is a balance between protection, power, and adherence to regulations.

Measuring Your Hand for Boxing Gloves

Accurate hand measurement is vital for a secure and comfortable fit. Use a flexible tape measure to determine your hand circumference around the palm and knuckles.

How to Measure Hand Circumference

Measuring your hand circumference accurately is the foundation of finding the right boxing glove size. You’ll need a flexible measuring tape – the kind used for sewing is ideal. Begin by extending your hand fully, with your palm facing upwards. Wrap the tape measure around the widest part of your hand, directly across your knuckles.

Ensure the tape is snug but not overly tight; you want a comfortable measurement, not one that constricts your hand. Avoid holding your breath while measuring, as this can slightly alter the circumference. Record the measurement in inches or centimeters, depending on the sizing chart you’re using.

It’s helpful to have someone assist you with this process to ensure accuracy. Double-check the measurement to confirm it’s correct before referencing it against a boxing glove size chart. Remember, a precise measurement is key to selecting gloves that offer both protection and optimal performance during training or competition.

Converting Measurements to Glove Size

Converting your hand circumference to the appropriate boxing glove size requires referencing a reliable sizing chart. These charts typically correlate hand measurements with glove weights expressed in ounces (oz). Generally, smaller hand circumferences – around 5-6 inches (12.7-15.2 cm) – correspond to 6-8oz gloves, often suitable for youth or light bag work.

Medium hand sizes, approximately 6-7 inches (15.2-17.8 cm), usually align with 10-12oz gloves, ideal for beginners and intermediate training. Larger hands, measuring 7 inches (17.8 cm) or more, often require 14oz or larger gloves for adequate protection.

However, remember these are general guidelines. Body weight also plays a role; heavier individuals may benefit from heavier gloves even with smaller hands. Always consult specific brand size charts, as sizing can vary. Prioritize a snug, comfortable fit that allows for full hand mobility without being overly restrictive.

Boxing Glove Sizing Charts by Weight Class

Weight class significantly influences glove size selection, ensuring appropriate protection and training effectiveness. Charts categorize recommendations based on body weight for optimal fit and safety.

Sizing for Beginners (Under 100 lbs / 45 kg)

For individuals weighing under 100 lbs (45 kg), selecting the right boxing glove size is paramount for developing proper technique and preventing injuries. Generally, youth or smaller-sized gloves are recommended. A 6-8oz glove is often ideal for this weight class, particularly for younger beginners or those just starting their boxing journey.

These lighter gloves allow for easier hand movement and control, facilitating the learning process. It’s crucial to prioritize comfort and a snug, yet not overly tight, fit. Remember that a proper fit ensures adequate wrist support and minimizes the risk of strain. Consider gloves specifically designed for bag work and light sparring, focusing on ample padding for protection.

When measuring, a hand circumference of up to 5-6 inches typically corresponds to these smaller glove sizes. Always consult brand-specific sizing charts, as variations can occur. Prioritizing a secure fit and appropriate weight will build a solid foundation for future training.

Sizing for Intermediate (101-150 lbs / 46-68 kg)

Intermediate boxers, weighing between 101-150 lbs (46-68 kg), typically require gloves in the 10-12oz range. This weight class represents a significant step up in training intensity, demanding gloves that offer a balance of protection and maneuverability. A 10oz glove is suitable for lighter bag work and pad sessions, while 12oz provides enhanced cushioning for more rigorous training and light sparring.

Hand circumference plays a vital role; a measurement of 6-7 inches generally aligns with these sizes. It’s essential to consider the type of training. For consistent bag work, a slightly lighter glove might be preferred, whereas sparring necessitates the added protection of a 12oz option.

Always refer to specific brand sizing charts, as fits can vary. A secure, comfortable fit is crucial, allowing for full range of motion without compromising wrist support. Prioritize gloves with quality padding and construction for optimal performance and injury prevention.

Sizing for Advanced (151-175 lbs / 69-80 kg+)

Advanced boxers, exceeding 151 lbs (69 kg) and up to 175 lbs (80 kg+), generally benefit from 14oz boxing gloves. This weight class demands maximum protection due to increased power and training intensity. While some may opt for 16oz gloves, 14oz strikes a balance between safety and maintaining sufficient hand speed and control.

Hand size is critical; individuals with larger hands or those exceeding a 7-inch circumference should lean towards the 16oz option. The focus shifts towards sparring and competitive training, requiring robust padding to minimize impact and prevent injuries.

Brand-specific sizing charts are invaluable, as glove fits differ. Ensure a snug, yet comfortable fit, allowing for proper fist closure without constriction. Prioritize gloves with excellent wrist support and durable construction to withstand the demands of advanced training regimens.

Glove Size Recommendations by Training Type

Selecting gloves depends on your training focus. Bag work often uses lighter weights, while sparring requires heavier padding for safety. Competition gloves adhere to specific regulations.

Bag Gloves Sizing

Bag gloves are designed for heavy bag work and focus mitt drills, prioritizing hand and wrist support alongside impactful power transfer. Generally, lighter-weight bag gloves are preferred to enhance hand speed and endurance during prolonged sessions. For individuals weighing up to 100 lbs (45 kg), a 6-8 oz glove is often recommended, particularly for youth boxers.

Those between 101-150 lbs (46-68 kg) typically find a comfortable and protective fit with 10-12 oz gloves. As weight increases to 151-175 lbs (69-80 kg+), a 14 oz or even 16 oz glove may be necessary to provide adequate cushioning and support. Some charts suggest up to 8oz for individuals up to 130lbs (60kg), and 8.75oz for those up to 154lbs (71kg).

Remember, these are guidelines; individual preferences and hand size play a role. Always prioritize a snug, secure fit that allows for full range of motion without feeling restrictive. Proper padding is crucial to minimize the risk of injury during intense bag work.

Sparring Gloves Sizing

Sparring gloves prioritize safety for both partners, demanding more substantial padding than bag gloves. The goal is to distribute impact and minimize the risk of cuts, bruises, and concussions. Generally, a heavier glove weight is recommended for sparring, typically 16oz for most adults. This increased padding provides crucial protection during live combat simulations.

However, weight class considerations apply. Individuals under 150 lbs (68 kg) may be permitted to use 14oz gloves, while those over 175 lbs (80 kg) might require 18oz or even 20oz gloves, depending on gym or competition rules. It’s vital to check with your coach or governing body for specific requirements.

A snug, secure fit is still essential, but sparring gloves often feel bulkier due to the extra padding. Ensure your hand isn’t swimming inside the glove, but also that movement isn’t overly restricted. Rival suggests sizing similarly to trainers, but with potentially more weight.

Competition Gloves Sizing

Competition boxing gloves are highly regulated, with specific weight requirements dictated by boxing organizations and weight classes. Typically, professional boxers use 10oz gloves, but this is strictly for those competing below 147 lbs (66.7 kg). As weight classes increase, glove weight also increases to ensure fighter safety and a level playing field.

For example, fighters between 147 lbs and 160 lbs (66.7 – 72.6 kg) generally use 12oz gloves, while those above 160 lbs may be required to wear 14oz or even 16oz gloves. These regulations are in place to mitigate the impact of punches and reduce the risk of serious injury.

Unlike training gloves, competition gloves often have a more streamlined design and less padding, prioritizing feel and precision. A precise fit is paramount, allowing for optimal hand control and punch delivery. Always confirm the specific glove weight required by the sanctioning body for your competition.

Specific Brand Size Charts

Brand sizing varies, so consulting specific charts—like Rival or Bronx Endurance—is vital. These charts correlate hand circumference with recommended glove sizes for a perfect fit.

Rival Boxing Gloves Size Chart

Rival Boxing offers a comprehensive sizing guide to ensure optimal protection and performance. Their gloves are known for their quality and fit, making accurate sizing particularly important. Generally, Rival sparring gloves are sized similarly to training gloves, but may have slightly increased padding, potentially influencing the preferred size.

For individuals weighing under 100 lbs (45 kg), a 6-8oz glove is typically recommended. Those between 101-150 lbs (46-68 kg) should consider a 10-12oz glove. Heavier individuals, weighing 151-175 lbs (69-80 kg+), generally benefit from a 14-16oz glove. However, Rival emphasizes considering hand size alongside weight.

To determine your ideal size, measure your hand circumference. Rival’s chart often provides measurements in centimeters. A hand circumference up to 20cm corresponds to a smaller size, while larger hands (up to 25cm) require larger gloves. Remember, a snug but comfortable fit is crucial for maximizing protection and control during training or sparring. Always refer to the official Rival Boxing website for the most up-to-date and detailed sizing information.

Bronx Endurance Boxing Gloves Size Chart

Bronx Endurance provides detailed sizing recommendations to help boxers find the perfect fit for their gloves. Their sizing charts consider both weight and hand circumference, ensuring optimal comfort and protection. For bag gloves, Bronx Endurance suggests a size range based on body weight, offering options from S to L.

Individuals weighing 100-130 lbs (45-60 kg) with a hand size up to 20cm should opt for a size S (maximum 8oz). Those between 135-154 lbs (60-71 kg) and a hand size up to 22cm should choose size M (maximum 8.75oz). For boxers weighing 160-190 lbs (75-85 kg) with a hand size up to 25cm, size L (maximum 9.75oz) is recommended.

It’s crucial to measure hand circumference around the palm and knuckles for an accurate fit. Bronx Endurance emphasizes that these are guidelines, and individual preferences may vary. A properly fitted glove should feel snug but not restrictive, allowing for full range of motion and impact absorption. Always consult the official Bronx Endurance website for the most current sizing chart and detailed product specifications.

Youth Boxing Glove Sizing

Selecting youth boxing gloves requires considering age and weight; typically, 6-8oz gloves suit younger, lighter boxers, while 10-12oz are for older teens.

Age-Based Sizing Guidelines

Determining the appropriate boxing glove size based on age is a helpful starting point, especially for young athletes. Generally, children aged 8-12, often weighing under 85 lbs (39 kg), typically benefit from 8oz gloves. These lighter gloves aid in developing proper technique without overwhelming their hands.

As boxers progress to the teenage years (13-15), and their weight increases – generally between 85-130 lbs (39-59 kg) – a move to 10oz or 12oz gloves is recommended. This provides increased protection during training and sparring. For older teens (16+), approaching adult weights, 12oz to 14oz gloves become suitable, mirroring adult sizing considerations.

However, age is merely a guideline. Individual growth rates and body weight variations are significant. It’s crucial to combine age-based recommendations with weight-based assessments and, most importantly, a proper hand measurement to ensure a secure and comfortable fit. Prioritizing safety and proper technique development is paramount when selecting gloves for young boxers.

Weight-Based Sizing for Youth

Weight is a primary factor when selecting boxing gloves for young athletes. For youth boxers weighing under 60 lbs (27 kg), a 6oz to 8oz glove is generally recommended, providing sufficient protection without hindering movement. As weight increases to between 60-80 lbs (27-36 kg), transitioning to 8oz or 10oz gloves offers enhanced padding.

Boxers weighing 80-100 lbs (36-45 kg) should consider 10oz to 12oz gloves, striking a balance between protection and maneuverability. For youth athletes exceeding 100 lbs (45 kg), 12oz or even 14oz gloves may be necessary, depending on their training intensity and sparring frequency.

It’s important to remember these are guidelines. A child’s build and experience level should also be considered. A heavier child with limited experience might benefit from a slightly larger glove for increased safety. Always prioritize a snug, comfortable fit, allowing for full hand articulation.

Additional Considerations

Hand shape and padding density significantly impact fit. A wider hand may require a broader glove, while extra padding influences the overall size needed for optimal protection.

Hand Shape and Glove Fit

Understanding your hand’s unique shape is paramount when selecting boxing gloves. Not all hands are created equal; some are broader across the knuckles, while others are more slender. A glove that fits perfectly for one person might feel constricting or loose on another, even with the same measurements.

Consider the palm circumference alongside hand length. A wider palm generally necessitates a glove with a wider opening. Pay attention to how the glove feels around your knuckles – they should be comfortably protected without feeling overly compressed.

Check for adequate wrist support. The glove should extend sufficiently down the wrist to provide stability and prevent injuries. A snug, but not tight, fit is ideal. You should be able to make a fist comfortably without any pinching or restriction. Always prioritize comfort and security when assessing the glove fit, as this directly impacts your performance and safety during training or competition.

Glove Padding and its Impact on Size

The amount of padding within a boxing glove significantly influences its overall size and feel. Gloves designed for bag work typically have less padding, resulting in a more compact fit and enhanced feel for precision. Conversely, sparring gloves prioritize protection and feature substantially more padding, leading to a bulkier size.

Increased padding doesn’t necessarily mean you need a larger glove size, but it does affect the internal space. A heavily padded glove might feel snugger than a lighter padded glove of the same nominal size.

Consider the type of padding – foam density and layering impact both protection and size. Higher-density foam offers superior impact absorption but can add to the glove’s overall bulk. When trying on gloves, assess how the padding distributes impact and whether it allows for a natural fist formation. Prioritize adequate protection without sacrificing mobility or control.

wizard comic price guide

Wizard Comic Price Guide: A Comprehensive Overview (Updated February 16, 2026)

Wizard’s price guides, fondly remembered by collectors, offered over 150,000 comic book values and 2,000 photos, though pricing often felt inconsistent and arbitrary to many readers.

Wizard’s comic price guide, a staple for collectors during the 1990s boom, aimed to provide a comprehensive valuation resource for the burgeoning comic book market. Published within Wizard magazine and as standalone guides, it attempted to catalogue the values of thousands of comics, becoming a key reference point for both buyers and sellers. While beloved for its extensive listings and colorful presentation, the guide was often criticized for its fluctuating and sometimes questionable pricing.

Despite these criticisms, it undeniably shaped a generation of collectors and influenced how comics were perceived as investments.

The History of Wizard Magazine and its Price Guide

Wizard magazine launched in 1991, quickly becoming a dominant voice in comic book news and commentary. Recognizing the growing market, Wizard introduced its price guide to assist collectors navigating the increasingly complex world of comic values. Early iterations included the “Official Comic Book Pocket Price Guide 1 & 2” and an annual magazine format.

The price guide evolved alongside the market, attempting to capture the rapid fluctuations of the 1990s. Wizard also covered indie comics and comic strip history, broadening its appeal beyond mainstream superhero titles.

The Significance of Wizard’s Price Guide in the 1990s Comic Boom

Wizard’s price guide became incredibly influential during the 1990s comic boom, a period of speculative collecting. The “Hot List” fueled demand, driving up prices for perceived key issues and variants. While often criticized for inconsistency, the guide provided a centralized, albeit flawed, valuation system.

It shaped market perceptions, impacting sales and influencing collector behavior. The Shamus family’s ownership of comic shops created potential conflicts of interest, as they benefited from the price fluctuations Wizard reported.

Understanding the Wizard Price Guide Methodology

Wizard determined values using reported sales, shop feedback, and its own assessments, but the methodology lacked transparency and often resulted in fluctuating, questionable pricing.

How Wizard Determined Comic Book Values

Wizard’s valuation process was a blend of reported sales from comic shops, input from the Shamus family’s own stores, and internal editorial decisions. They aimed to reflect the “real world” market, but often faced criticism for inconsistency. The guide didn’t reveal a precise formula, leading to speculation about subjective influences. While acknowledging declining book values, the pricing seemed prone to arbitrary changes, sometimes without clear justification. This opaque system, combined with the Shamus family’s vested interest, fueled concerns about potential manipulation for profit, impacting collector trust.

The Role of Shamus Family and Comic Shops

The Shamus family, owners of Wizard Magazine, also operated a network of comic book shops. This dual role sparked controversy, as critics alleged the price guide was influenced to benefit their retail business. Wizard relied on reported sales data from comic shops, potentially giving the Shamus family’s stores undue weight in determining values. Some believe pricing adjustments favored titles they stocked, creating a self-serving system. While Wizard claimed to represent the broader market, the family’s direct involvement raised questions about objectivity and fairness within the comic book valuation landscape.

Criticisms of the Wizard Price Guide: Inconsistent Pricing

A major criticism of Wizard’s price guide centered on its frequently inconsistent pricing. Values appeared to fluctuate “for no reason at all,” frustrating collectors attempting to assess their holdings. Books could see significant price swings between editions without clear justification; This unpredictability undermined trust in the guide’s accuracy. While Wizard acknowledged declining values for some titles, the overall system lacked transparency. Many felt the guide prioritized creating buzz over providing reliable, data-driven valuations, leading to skepticism among serious collectors.

Key Features of the Wizard Comic Price Guide

The guide prominently featured the “Hot List,” variant coverage, and uniquely included indie comics alongside a historical look at comic strips, setting it apart.

The “Hot List” and its Impact

Wizard’s “Hot List” was a highly anticipated section, ranking comics based on perceived investment potential and collector demand. While subjective, it significantly impacted the 1990s comic boom, driving up prices for listed titles. The list fueled speculation, as collectors aggressively sought out books deemed “hot,” hoping for quick profits. However, the fluctuating nature of the list, with prices changing seemingly at random, also contributed to market instability. It became a self-fulfilling prophecy, where inclusion on the list made a book valuable, regardless of inherent artistic or narrative merit.

Variant Coverage in the Price Guide

Wizard dedicated significant space to covering comic book variants, particularly the explosion of chromium covers in the 1990s. The price guide meticulously listed different variant editions, often assigning distinct values based on rarity and perceived desirability. This coverage further fueled the variant craze, encouraging publishers to release increasingly numerous and elaborate special editions. Collectors relied on Wizard to navigate the complex world of variants, attempting to identify and acquire the most valuable copies. The guide’s detailed listings, though sometimes inaccurate, were essential for variant hunters.

Inclusion of Indie Comics and Comic Strip History

Wizard distinguished itself by broadening its scope beyond mainstream superhero comics, notably including coverage of independent and alternative titles. Being associated with Fantagraphics, a publisher known for indie work, influenced this approach. The price guide also uniquely featured articles and value listings pertaining to the history of comic strips, a rarely explored area in other price guides. This broadened appeal attracted a diverse readership, showcasing Wizard’s commitment to the wider world of sequential art and offering a unique perspective within the hobby.

Wizard Price Guide Editions and Formats

Wizard released guides in various formats, including pocket guides (versions 1 & 2) and annual magazine editions, offering collectors accessible and comprehensive pricing information.

Wizard: Official Comic Book Pocket Price Guide 1

Wizard: Official Comic Book Pocket Price Guide 1, a key early offering, aimed to provide collectors with a portable and readily available resource for comic book valuations. This guide featured multiple variants, adding to its collectibility today. It represented Wizard’s initial foray into dedicated pricing, attempting to catalogue a significant portion of the market. While considered foundational, it’s important to remember that the valuations within were subject to the inconsistencies that would become a hallmark of the Wizard price guides. It’s now a nostalgic piece for many collectors, representing a specific era of comic book enthusiasm.

Wizard: Official Comic Book Pocket Price Guide 2

Wizard: Official Comic Book Pocket Price Guide 2 followed its predecessor, continuing the effort to compile and present comic book values in a compact format. Building upon the foundation of the first guide, it likely included updated pricing and potentially expanded coverage of titles. Like the initial edition, it’s now sought after by collectors for its historical significance and as a snapshot of the comic book market during its publication. Finding copies today often involves searching used bookstores, flea markets, or online marketplaces like eBay, reflecting its status as a vintage collectible.

Wizard Comic Book Price Guide Annual Magazine

Wizard Comic Book Price Guide Annual Magazine represented a more substantial offering than the pocket guides, published as a trade paperback. This annual edition aimed to provide a comprehensive overview of the comic book market, boasting over 150,000 values and over 2,000 full-color photos. Available through retailers like Mile High Comics, it served as a yearly update for collectors. Often presented in partial color and partial black and white, it carried a cover price of $12.95 and included features like the Classic Superstars Collectors Value Guide & Checklist.

Factors Affecting Comic Book Values (as covered by Wizard)

Wizard emphasized grade, condition, rarity, print runs, and key issue significance—especially first appearances—as crucial determinants of a comic book’s value in the marketplace.

Grade and Condition

Wizard’s price guide heavily relied on a comic book’s grade and condition to establish value, mirroring industry standards of the time. A pristine, “Mint” condition copy commanded significantly higher prices than one with wear and tear. The guide implicitly acknowledged the grading scale, though it didn’t always provide detailed explanations. Factors like spine stress, corner creases, page quality, and overall cleanliness were all considered.

However, the subjective nature of grading often led to discrepancies, as interpretations varied between shops and collectors. Wizard would often list price ranges based on condition, recognizing this inherent variability, but inconsistencies remained a frequent criticism.

Rarity and Print Run

Wizard’s price guide recognized that a comic’s scarcity directly impacted its value, with lower print runs generally equating to higher prices. Variant covers, especially those with limited distribution, were often highly sought after and reflected in the guide’s listings. Key issues, like first appearances, experienced increased value due to collector demand and limited availability.

However, accurately determining print runs proved challenging, leading to occasional miscalculations in the guide. Wizard attempted to account for this by noting relative rarity, but precise numbers were often elusive, contributing to pricing inconsistencies.

Key Issues and First Appearances

Wizard’s price guide heavily emphasized the importance of “key issues” – comics containing significant events like first appearances or character deaths – as drivers of value. First appearances of popular characters, particularly within the 1990s boom, commanded premium prices. Wizard highlighted these issues, often showcasing their potential appreciation.

The guide’s coverage of Spider-Man comics exemplified this focus, with early appearances receiving substantial attention. However, the subjective nature of “key” status and fluctuating market trends sometimes led to overvaluation or underestimation of specific issues within the guide.

Comparing Wizard’s Price Guide to Modern Valuation Tools

Today, online databases like Mile High Comics, eBay sold listings, and professional grading services (CGC, PGX) offer dynamic, real-time comic valuations, contrasting with Wizard’s static pricing.

Online Comic Book Databases (e.g., Mile High Comics)

Modern online comic book databases, such as Mile High Comics, represent a significant shift from the Wizard Price Guide’s methodology. These platforms aggregate sales data, providing a constantly updated view of market values based on actual transactions. Unlike Wizard’s periodically revised estimates, databases offer a more fluid and responsive pricing system.

Mile High Comics, for example, lists both current and historical sales data, allowing collectors to track price trends. This transparency was largely absent in Wizard’s era, where pricing could feel subjective. These databases also often include detailed grading information and high-resolution images, aiding in accurate assessment, a feature unavailable in the print guides.

eBay Sold Listings

eBay’s “Sold Listings” feature provides a real-time, crowdsourced valuation tool that directly contrasts with the static pricing of Wizard’s guides. Collectors can search for completed auctions to see precisely what specific comics have actually sold for, factoring in grade and condition. This data-driven approach offers a level of accuracy Wizard struggled to achieve, given its reliance on retailer input and internal estimations.

Unlike the generalized price ranges in Wizard, eBay reveals the nuances of the market. Variations in cover, printing errors, and even seller reputation can all influence the final sale price, offering a far more granular understanding of comic book value than was previously available.

Professional Grading Services (CGC, PGX)

Professional grading services like CGC and PGX revolutionized comic book valuation, offering an objectivity Wizard’s price guide lacked. These companies assess a comic’s condition using a standardized scale, encapsulating it in a protective holder, and assigning a grade that significantly impacts its market value.

Prior to these services, condition was largely subjective, leading to discrepancies between Wizard’s estimates and what collectors were willing to pay. CGC and PGX provide a universally recognized standard, creating a more transparent and reliable pricing system, effectively surpassing the limitations of Wizard’s methodology.

Notable Price Guide Errors and Discrepancies

Wizard’s guide frequently displayed overvaluation of certain titles, alongside underestimation of key issues, and unpredictable fluctuations in pricing, frustrating many dedicated comic book enthusiasts.

Overvaluation of Certain Titles

Wizard’s price guide often inflated the values of speculative titles, particularly those from the 1990s comic boom, creating a distorted market perception. This was partially attributed to the Shamus family’s ownership of comic shops, potentially benefiting from increased sales driven by the inflated prices. Many common variant covers, hyped by the “Hot List,” were listed at prices far exceeding actual market value, leading to disappointment for sellers and unrealistic expectations for buyers. To be fair, Wizard did acknowledge declining values, but the initial overestimation remained a significant issue.

Underestimation of Key Issues

Despite overvaluing many speculative books, Wizard’s price guide frequently underestimated the long-term value of genuinely significant key issues and first appearances; This discrepancy created opportunities for savvy collectors who recognized the guide’s flaws. Certain early appearances of popular characters, or comics with historical importance, were listed at surprisingly low prices, failing to reflect their growing demand. This inconsistency highlighted a weakness in the guide’s methodology, demonstrating a tendency to prioritize short-term trends over enduring collectibility and historical significance.

Fluctuations and Changes in Pricing

A consistent criticism of Wizard’s price guide centered on seemingly random fluctuations in listed values. Prices could change dramatically from one edition to the next, often with no clear explanation or justification. As one commenter noted, prices “changed for no reason at all.” This instability eroded trust among collectors, who found it difficult to rely on the guide for accurate valuations. These unpredictable shifts were likely influenced by the Shamus family’s comic shop interests, creating a perception of manipulation and prioritizing profit over objective assessment.

Where to Find Old Wizard Price Guides Today

Vintage guides surface at Half Price Books, flea markets (for as little as 25 cents!), and online marketplaces like eBay and Amazon, offering nostalgic value.

Half Price Books and Used Bookstores

Half Price Books stores frequently stock older Wizard magazines and price guides, offering a convenient and affordable way to acquire them. Recent finds indicate copies can be purchased for around $1 each, making them accessible to collectors and those seeking a nostalgic trip.

Used bookstores, while potentially less consistent in their stock, can also yield results. The availability varies greatly depending on location and inventory turnover, but diligent searching may uncover hidden gems. These locations often provide a more curated browsing experience compared to larger chains, potentially leading to the discovery of rarer editions or related comic collecting resources.

Flea Markets and Comic Conventions

Flea markets represent a treasure trove for bargain hunters seeking vintage Wizard price guides, often available for as little as 25 cents per copy. However, condition can vary significantly, requiring careful inspection before purchase.

Comic conventions offer a more focused environment, with dedicated vendors specializing in back issues and collectibles. While prices may be higher than flea markets, the selection is typically broader, and the guides are more likely to be in better condition. Conventions also provide an opportunity to network with other collectors and potentially trade for desired issues.

Online Marketplaces (eBay, Amazon)

eBay and Amazon serve as extensive online repositories for Wizard price guides, offering a wide range of editions and conditions. Prices fluctuate based on rarity, condition, and demand, requiring diligent comparison shopping.

Auction formats on eBay can yield bargains, while Amazon’s fixed-price listings provide convenience. Shipping costs should be factored into the overall expense. Thoroughly review seller ratings and descriptions before committing to a purchase, paying close attention to photos detailing the guide’s condition. Expect to find varying prices depending on the year and edition.

The Legacy of Wizard Magazine and its Price Guide

Wizard profoundly impacted comic book collecting, though print magazine readership declined with the rise of digital information and readily available online valuation tools.

Influence on Comic Book Collecting

Wizard magazine, and crucially its price guide, significantly shaped 1990s comic book collecting habits. The “Hot List” created speculative fervor, driving demand – and prices – for certain issues. While the guide’s valuations were often questioned for inconsistency, it provided a centralized resource for collectors, fostering a sense of community and shared knowledge.

The magazine’s coverage extended beyond superheroes, including indie comics and comic strip history, broadening collectors’ horizons. Interviews, previews, and fan art further engaged enthusiasts, making Wizard a cultural touchstone for a generation of comic book fans.

The Decline of Print Comic Magazines

Wizard magazine’s decline mirrored broader shifts in media consumption. The rise of the internet offered instant access to comic book information – pricing, news, and community forums – rendering print magazines less essential. The convenience of online databases like Mile High Comics and eBay’s sold listings supplanted the need for a yearly price guide update.

Furthermore, the speculative bubble of the 1990s burst, diminishing interest in purely price-focused content. While fondly remembered for its articles and interviews, Wizard couldn’t compete with the immediacy and accessibility of digital platforms.

The Shift to Digital Comic Book Information

Wizard’s influence waned as digital platforms revolutionized comic book information access. What once required a purchased magazine – the “Hot List,” price guides, and publisher previews – became readily available with a simple online search. Collectors embraced the speed and convenience of checking values on eBay or utilizing comprehensive databases.

The shift also fostered online communities, replacing fan art sections and letter columns with interactive forums. This digital transformation meant information was constantly updated, unlike the annual release cycle of Wizard, ultimately diminishing its relevance.

Specific Price Guide Content Examples

Wizard extensively covered 1990s chromium variants and Spider-Man comics, alongside the “Classic Superstars Collectors Value Guide,” offering detailed listings and vibrant photography.

Coverage of Spider-Man Comics

Wizard magazine consistently dedicated significant coverage to Spider-Man comics, reflecting the character’s immense popularity with collectors. Price guides featured detailed valuations for key issues, including first appearances and landmark storylines. Beyond pricing, Wizard often included behind-the-scenes content, like photos from the first Spider-Man movie, appealing to fans beyond just investors. The guides tracked variant covers, adding complexity to valuations. Articles explored Spider-Man’s history and impact on the industry, making it a recurring and prominent feature within the publication. This comprehensive approach cemented Spider-Man’s place as a cornerstone of Wizard’s content.

Focus on 1990s Chromium Variants

Wizard magazine’s price guide heavily emphasized 1990s chromium variant comics, a period defined by speculative collecting and shiny covers; These variants, often with limited print runs, were frequently overvalued in the guide, fueled by the comic boom. Wizard dedicated substantial space to listing and pricing these issues, contributing to the hype surrounding them. The guides showcased full-color photos of these visually striking comics, further enticing collectors. However, this focus also drew criticism, as the inflated prices often didn’t reflect actual market values, leading to discrepancies and eventual price corrections.

Inclusion of Classic Superstars Collectors Value Guide

Wizard magazine occasionally incorporated content from the “Classic Superstars Collectors Value Guide,” providing additional pricing information for golden and silver age comics. This inclusion broadened the scope of the price guide beyond the 1990s focus, appealing to a wider range of collectors. The guide was available as a free download in .rtf, PDF, or text formats. While helpful, the integration wasn’t always consistent, and the valuations sometimes differed from Wizard’s primary pricing. It demonstrated an attempt to cater to seasoned collectors alongside the newer, speculator-driven market.

The Cover Price of Wizard Guides

Wizard guides typically cost $12.95, with price variations depending on the specific edition released. Vintage copies now hold value for collectors and enthusiasts.

Typical Cover Price: $12.95

Throughout the publication run of Wizard’s price guides, the standard cover price remained consistently at $12.95. This price point applied to the core annual editions and the pocket price guides, making them accessible to a wide range of comic book enthusiasts. While special editions or those with added features might have seen slight variations, $12.95 was the dominant cost for most collectors seeking the latest valuations. This relatively affordable price contributed to the widespread popularity and circulation of Wizard’s guides during the 1990s comic boom and beyond, establishing them as a staple resource for the hobby.

Price Variations Based on Edition

While the $12.95 cover price was typical, variations existed across different Wizard price guide editions. The “Official Comic Book Pocket Price Guide 1” and “2” likely maintained the standard price, but the annual magazine format, being more substantial, sometimes commanded a slightly higher cost. Special editions, potentially featuring exclusive content or variant covers, could also see price increases. Furthermore, later printings or revised editions might have reflected minor adjustments due to production costs or market conditions, though significant deviations from the base price were uncommon.

The Value of Vintage Guides Today

Today, older Wizard price guides hold nostalgic value for collectors, often found for as little as $1 at Half Price Books or 25 cents at flea markets. However, their monetary worth extends beyond face value. Guides featuring early Spider-Man movie behind-the-scenes content or 1990s chromium variant coverage are particularly sought after. Condition significantly impacts price; pristine copies command higher sums. While not reliable for current valuations, they offer a fascinating snapshot of the 90s comic boom and collector sentiment, making them desirable artifacts.

tenant estoppel certificate pdf

Tenant Estoppel Certificate PDF: A Comprehensive Guide

Tenant Estoppel Certificates, often delivered as a PDF, confirm lease terms during property sales or refinancing, verifying rents, deposits, and lease compliance for buyers or lenders․

What is a Tenant Estoppel Certificate?

A Tenant Estoppel Certificate is a legally binding document utilized primarily during commercial property transactions – specifically, when a property is being sold or refinanced․ It’s a crucial tool for prospective buyers or lenders to verify the key terms of existing leases with tenants․ Essentially, it’s a statement signed by the tenant confirming the details of their lease agreement, such as the commencement date, rental amount, security deposit, and any existing amendments or modifications․

This certificate serves as evidence of the tenant’s understanding and agreement with the lease terms as of a specific date․ It prevents tenants from later making contradictory claims about the lease, providing assurance to the new property owner or lender․ The PDF format is commonly used for distribution and secure record-keeping, ensuring all parties have a clear and consistent understanding of the lease terms․

Purpose of a Tenant Estoppel Certificate

The primary purpose of a Tenant Estoppel Certificate is to establish a reliable record of the lease agreement’s terms, protecting the interests of all parties involved in a property transaction․ For potential buyers, it confirms the income stream from the property and identifies any potential liabilities․ Lenders rely on it to assess the property’s value and the stability of its rental income․

Delivered often as a secure PDF, the certificate minimizes the risk of disputes arising from conflicting recollections of the lease terms․ It prevents tenants from asserting claims inconsistent with what they’ve certified․ By obtaining this document, buyers and lenders gain confidence in the accuracy of the financial information related to the property, facilitating a smoother and more transparent transaction․ It’s a vital due diligence step, reducing potential risks and ensuring a sound investment․

When is a Tenant Estoppel Certificate Required?

A Tenant Estoppel Certificate, frequently provided in PDF format, is typically required during the sale of a commercial property or when the property owner seeks to refinance an existing mortgage․ These situations necessitate verifying the lease terms with the tenant to assure potential buyers or lenders of the property’s financial stability․

Escrow officers or the owner’s broker usually request the certificate as a contingency of the sale or refinance․ It’s crucial when a property is tenant-occupied, as it confirms rental rates, security deposits, and lease expiration dates․ Obtaining these certificates for each “Material Commercial Lease” is standard practice, ensuring a clear understanding of the property’s income and obligations before finalizing the transaction․ It’s a key component of due diligence․

Key Components of a Tenant Estoppel Certificate

PDF Estoppel Certificates detail crucial lease information: demised premises, lease dates, rent amounts, security deposits, and any applicable guaranty details, confirming tenant occupancy․

Demised Premises Description

The Demised Premises Description within a Tenant Estoppel Certificate PDF is a critical component, requiring precise detail․ It must accurately identify the exact space leased by the tenant, avoiding ambiguity․ This typically includes the building address, suite number, and square footage, as stated in the original lease agreement․

A clear description is vital for potential buyers or lenders to understand the property’s layout and the tenant’s specific occupancy․ Incorrect or vague descriptions can lead to disputes and complications during property transactions․ The PDF format ensures this description is preserved as originally stated, preventing alterations․ It’s essential the tenant verifies this information for accuracy, as it forms a legally binding representation of the leased space․ This section confirms the physical location and size of the tenant’s area within the property․

Lease Date and Term

The Lease Date and Term section of a Tenant Estoppel Certificate PDF establishes the foundational timeline of the tenancy․ It explicitly states the original commencement date of the lease agreement, providing a clear starting point․ Crucially, it also details the lease’s expiration date, or if it’s a continuing lease, specifies any renewal options and their associated terms․

Accurate dates are paramount for determining the remaining lease term, which significantly impacts property value and financing options․ This information, solidified within the PDF, prevents discrepancies and ensures all parties have a consistent understanding of the lease’s duration․ Tenant verification of these dates is essential․ Any amendments or extensions to the original lease term must also be clearly noted, providing a complete and legally sound record of the tenancy’s timeframe․

Current Rent Amount

The Current Rent Amount section within a Tenant Estoppel Certificate PDF is a critical component, directly impacting property valuation and investment decisions․ This section demands precise detailing of the monthly rent currently being paid under the lease agreement․ It must specify whether the amount is gross or net, and clearly outline any additional rental charges, such as common area maintenance (CAM) fees or property taxes passed through to the tenant․

Confirmation from the tenant regarding the accuracy of this figure is vital․ Discrepancies can lead to significant financial implications during a property sale or refinancing․ The PDF format ensures a permanent, verifiable record of the rental income, providing confidence to potential buyers or lenders․ Any rent increases scheduled during the lease term should also be documented․

Security Deposit Details

The Security Deposit Details section of a Tenant Estoppel Certificate PDF is crucial for clarifying financial obligations and preventing disputes during property transactions․ This section requires a clear statement of the original security deposit amount provided by the tenant․ It must also specify how the deposit is being held – for example, in a separate escrow account or by the landlord directly․

Furthermore, the certificate should detail any deductions made from the security deposit, outlining the reasons for those deductions (e․g․, property damage, unpaid rent)․ A confirmation from the tenant regarding the accuracy of the remaining deposit balance is essential․ The PDF format provides a secure and auditable record of these details, protecting both the landlord and the tenant’s interests, especially during sales or refinancing․

Guaranty Information (If Applicable)

The Guaranty Information section within a Tenant Estoppel Certificate PDF becomes vital when a lease is supported by a personal or corporate guarantee․ This portion of the certificate confirms the existence of the guaranty, identifying the guarantor’s full legal name and contact information․ It should clearly state the original terms of the guaranty, including the scope of the guarantor’s obligations and any limitations․

Crucially, the certificate must ascertain whether the guaranty remains in full force and effect, or if it has been modified, released, or terminated․ The guarantor’s acknowledgement and signature on the PDF provides verification of this information․ Accurate details regarding the guaranty are essential for potential buyers or lenders to assess the overall risk associated with the property and lease agreement․

The Process of Obtaining a Tenant Estoppel Certificate

Typically, landlords request certificates from tenants, who then review and complete the PDF form, which is subsequently verified and executed by the landlord․

Requesting the Certificate from the Tenant

Landlords or their representatives, such as property managers or escrow officers, initiate the process by formally requesting the Tenant Estoppel Certificate, often delivered as a PDF document․ This request should be clear and concise, outlining the purpose of the certificate – typically related to a property sale or refinancing․

The request should include a copy of the standard Estoppel Certificate form, readily available online or through legal resources like Westlaw Practical Law․ It’s crucial to provide tenants with sufficient time to complete the form accurately․ A reasonable timeframe, often 10-15 business days, allows for thorough review of lease details․

The request should also clearly state the deadline for return and the consequences of non-response, as stipulated in the lease agreement․ Utilizing a PDF format facilitates easy distribution and return, and allows for digital signatures, streamlining the process․ A polite and professional tone encourages tenant cooperation․

Tenant Review and Completion

Upon receiving the Tenant Estoppel Certificate, typically in PDF format, the tenant must meticulously review all pre-filled information for accuracy․ This includes verifying the property address (Demised Premises), the original lease date and term, and crucially, the current rent amount and any outstanding balances․

Tenants should also confirm the details of their security deposit, including the amount and any conditions attached to its return․ If a guaranty exists, its terms must be carefully reviewed and acknowledged․ Any discrepancies or inaccuracies should be promptly corrected on the form before signing․

Completing and returning the signed PDF within the specified timeframe is vital․ Failure to respond can have legal implications, potentially impacting the property sale or refinancing process․ Tenants should retain a copy of the completed certificate for their records․

Landlord Verification and Execution

After the tenant returns the completed Tenant Estoppel Certificate PDF, the landlord (or their representative) must thoroughly verify the information provided against their own records․ This crucial step ensures the certificate accurately reflects the lease agreement and avoids potential disputes․

Any discrepancies identified between the tenant’s responses and the landlord’s documentation should be addressed and resolved promptly, potentially requiring further communication with the tenant․ Once the landlord confirms the accuracy of the certificate, they proceed with execution – formally signing the PDF document․

The landlord’s signature signifies their agreement with the stated lease terms․ A properly executed form provides a legally binding confirmation, essential for property sales, refinancing, and establishing clear lease terms․

Legal Considerations and Implications

Tenant Estoppel Certificates are legally binding, and inaccurate information can lead to liability; they significantly impact property transactions like sales and refinancing․

Binding Nature of the Certificate

Tenant Estoppel Certificates carry significant legal weight, functioning as a formal, signed statement confirming the terms of a lease agreement․ Once executed by both the tenant and landlord, the certificate becomes a legally binding document․ This means that both parties are held to the representations made within the certificate, and subsequent disputes challenging those representations can be difficult to pursue․

Essentially, the tenant is “estopped” – prevented – from later asserting terms different from those certified․ This binding nature is crucial for potential buyers or lenders relying on the certificate’s accuracy during property transactions․ It provides a level of assurance regarding the lease’s validity and the tenant’s obligations, minimizing risk and facilitating smoother deals․ The certificate’s strength lies in its ability to solidify the lease terms as a matter of record․

Potential Liability for Incorrect Information

Providing inaccurate information on a Tenant Estoppel Certificate, whether intentional or unintentional, can lead to significant legal and financial liabilities․ If a tenant knowingly provides false details regarding rent, security deposits, or lease terms, they could be held responsible for damages incurred by a relying party – such as a purchaser or lender․

Similarly, landlords who certify incorrect information face potential liability․ A buyer or lender acting on a flawed certificate could pursue legal action to recover losses resulting from the misrepresentation․ This could include diminished property value or loan defaults․ Therefore, meticulous review and verification of all details before signing is paramount․ Due diligence and accurate completion are essential to mitigate these risks for both tenants and landlords․

Impact on Property Sales and Refinancing

Tenant Estoppel Certificates, frequently delivered in PDF format, are crucial components of property sales and refinancing transactions․ Lenders and prospective buyers rely on these certificates to verify the financial health and stability of the property’s income stream․ A completed certificate confirms lease terms, outstanding rent, and security deposit balances, providing assurance regarding the property’s value and potential returns․

Delays in obtaining a signed certificate can significantly hinder or even derail a transaction․ Discrepancies revealed by the certificate may necessitate lease amendments or price adjustments․ A clean and accurate certificate streamlines the due diligence process, fostering confidence and facilitating a smoother closing․ Ultimately, a properly executed PDF Estoppel Certificate is vital for successful property transfers․

PDF Format and Accessibility

PDFs offer secure, standardized Tenant Estoppel Certificate delivery, enabling digital signatures and preserving formatting; accessibility features ensure usability for all recipients․

Benefits of Using a PDF Format

Employing the PDF format for Tenant Estoppel Certificates provides several distinct advantages․ Primarily, PDFs ensure consistent formatting across various devices and operating systems, preventing unwanted alterations to the document’s layout during transmission․ This consistency is crucial for legal documents where precise wording is paramount․

Furthermore, PDFs offer robust security features, including password protection and digital signature capabilities, safeguarding sensitive lease information․ The ability to digitally sign a Tenant Estoppel Certificate streamlines the process, eliminating the need for physical signatures and postal delivery․ This accelerates turnaround times and reduces administrative burdens․

PDFs are also widely compatible and easily shareable, making them a convenient choice for all parties involved – landlords, tenants, buyers, and lenders․ They maintain the integrity of the document, ensuring that the information remains unaltered and verifiable throughout the transaction process, which is vital during property sales or refinancing․

Ensuring PDF Accessibility

While PDFs offer numerous benefits, ensuring accessibility is crucial for inclusivity and legal compliance․ An accessible Tenant Estoppel Certificate PDF allows individuals with disabilities, utilizing assistive technologies like screen readers, to easily understand and interact with the document’s content․

This involves tagging the PDF with semantic information, defining headings, paragraphs, and other structural elements․ Alternative text should be provided for all images, enabling screen readers to convey visual information․ Proper color contrast is also essential for users with visual impairments․

Creating an accessible PDF isn’t merely about compliance; it’s about equitable access to information․ Utilizing PDF creation tools with accessibility features, and conducting thorough accessibility checks, guarantees that all tenants and stakeholders can fully participate in the property transaction process, regardless of their abilities․

Digital Signatures and PDF Security

Employing digital signatures within a Tenant Estoppel Certificate PDF significantly enhances security and streamlines the completion process․ Digital signatures verify the signer’s identity and ensure the document hasn’t been altered after signing, providing a robust audit trail․

PDF security features, such as password protection and encryption, further safeguard sensitive lease information contained within the certificate․ These measures prevent unauthorized access and modification, protecting both the landlord and tenant’s interests․

Utilizing reputable PDF signing platforms ensures compliance with legal standards for electronic signatures․ This creates a legally binding document, eliminating the need for physical signatures and mailings, accelerating the transaction, and bolstering the overall integrity of the estoppel certificate process․

Common Mistakes to Avoid

PDF Estoppel Certificates often suffer from incomplete data, incorrect figures, or missing signatures, causing delays and potential legal issues during property transactions․

Incomplete Information

PDF Tenant Estoppel Certificates are frequently returned with missing details, creating significant complications․ Crucial sections, such as the precise demised premises description or current rent amount, are often left blank․ This incompleteness forces repeated follow-ups, delaying property sales or refinancing processes․

Furthermore, omitting details regarding security deposits, outstanding obligations, or the existence of any amendments to the original lease agreement renders the certificate unreliable․ A certificate lacking comprehensive information fails to provide the necessary assurance to potential buyers or lenders․

Landlords and tenants must meticulously review the PDF form, ensuring all fields are accurately and completely filled before execution to avoid these frustrating and costly delays․ Thoroughness is paramount for a valid and effective estoppel certificate․

Incorrect Dates or Amounts

Errors in dates or financial figures within a PDF Tenant Estoppel Certificate can trigger substantial issues․ Incorrect lease commencement or expiration dates can misrepresent the tenant’s remaining lease term, impacting property valuation․ Similarly, inaccurate rent amounts, whether current or historical, directly affect income calculations crucial for sales or refinancing․

Discrepancies regarding security deposit amounts, or the misreporting of outstanding rent, can lead to legal disputes and financial losses․ Even seemingly minor numerical errors can raise red flags for lenders and buyers, potentially halting transactions․

Careful verification against the original lease agreement is essential before signing the PDF․ Both landlords and tenants should double-check all dates and amounts to ensure accuracy and avoid costly complications․

Failure to Obtain All Necessary Signatures

A PDF Tenant Estoppel Certificate is legally ineffective without the proper signatures․ Typically, this requires the authorized representative of the tenant and, sometimes, the landlord․ Missing signatures render the document incomplete and unreliable, defeating its purpose of confirming lease terms for potential buyers or lenders․

If a lease includes a guaranty, the guarantor’s signature may also be required, adding another layer of complexity; Ensuring all parties with a vested interest in the lease sign the PDF certificate is paramount․

Unsigned certificates can delay or even jeopardize property transactions․ Thorough follow-up with all required signatories is crucial to obtain a fully executed and legally binding document․

a canticle for leibowitz pdf

A Canticle for Leibowitz: A Comprehensive Guide

Discover access to “A Canticle for Leibowitz” in PDF format‚ alongside resources like scholarly articles and translations‚ enhancing your exploration of Miller’s classic․

Walter M․ Miller Jr․’s A Canticle for Leibowitz‚ published in 1960‚ stands as a cornerstone of post-apocalyptic science fiction․ The novel intricately explores themes of faith‚ knowledge‚ and the cyclical nature of history following a devastating nuclear holocaust․ Finding a readily available PDF version allows readers convenient access to this profound work․

The story unfolds across centuries‚ following the monks of the Albertian Order of Leibowitz as they painstakingly preserve remnants of pre-war knowledge․ Resources online‚ including downloadable PDF files‚ facilitate deeper engagement with Miller’s complex narrative and enduring philosophical questions․ Its enduring relevance continues to captivate audiences today․

II․ Historical Context of “A Canticle for Leibowitz”

Published during the height of the Cold War‚ A Canticle for Leibowitz deeply reflects the anxieties surrounding nuclear annihilation․ Miller’s work served as a stark warning against unchecked technological advancement and the potential for self-destruction․ Accessing a PDF copy allows modern readers to understand the novel’s original impact․

The era’s pervasive fear of global conflict heavily influenced the narrative’s themes of societal collapse and rebirth․ The availability of the novel as a PDF ensures its continued accessibility for study and reflection․ Miller’s prescient vision resonates even today‚ prompting contemplation about humanity’s future․

III․ The Three-Part Structure of the Novel

“A Canticle for Leibowitz” unfolds in three distinct parts: Fiat Lux‚ Fiat Historia‚ and Fiat Voluntas Tua‚ each separated by centuries․ This structure mirrors the cyclical nature of history‚ a central theme․ Studying the novel via a readily available PDF version facilitates close analysis of these sections․

The PDF format allows for easy comparison of the differing societal landscapes presented in each part․ From the “Dark Ages” revival to the brink of another catastrophe‚ the narrative’s progression is powerfully illustrated․ Understanding this tripartite structure is crucial to grasping Miller’s complex message․

III․1․ Fiat Lux: The Dark Ages Revival

Fiat Lux‚ meaning “Let there be light‚” depicts a post-apocalyptic Dark Age where knowledge is scarce․ The Albertian Order of Leibowitz painstakingly preserves fragmented “memorabilia” from the past․ Accessing a PDF copy of the novel allows focused study of this initial section‚ highlighting the arduous task of rediscovering lost technology․

The PDF format enables detailed examination of the societal regression and the Church’s role as a repository of learning․ It showcases the slow‚ painstaking process of rebuilding civilization‚ emphasizing the fragility of knowledge․ This section sets the stage for the novel’s broader themes‚ readily available for analysis․

III․2․ Fiat Historia: The Scholastic Era

Fiat Historia‚ “Let there be history‚” portrays a renewed scholastic period‚ mirroring the medieval era․ Utilizing a PDF version of “A Canticle for Leibowitz” facilitates close reading of the Order’s intellectual revival and the rediscovery of scientific principles․ This section demonstrates a cyclical pattern of knowledge acquisition and loss․

The PDF allows for easy referencing of historical parallels and the re-emergence of political intrigue․ It highlights the dangers of misinterpreting the past and the potential for repeating historical errors․ Scholarly analysis‚ aided by digital access‚ reveals the complexities of this era and its foreshadowing of future conflicts․

III․3․ Fiat Voluntas Tua: The Dawn of a New Age

Fiat Voluntas Tua‚ “Let Your will be done‚” depicts humanity’s final‚ potentially self-destructive leap towards technological advancement․ Accessing a PDF copy of “A Canticle for Leibowitz” is crucial for understanding the ethical dilemmas presented․ This section showcases the culmination of the novel’s cyclical themes․

The PDF format enables detailed examination of the characters’ motivations and the consequences of unchecked ambition․ It reveals the tragic irony of humanity’s pursuit of knowledge‚ ultimately leading to another cataclysm․ Digital access supports comparative analysis with historical events and contemporary concerns about nuclear warfare․

IV․ Key Characters and Their Significance

Exploring “A Canticle for Leibowitz” through a PDF version allows for focused character analysis․ Brother Francis‚ Abbot Jeremias‚ and Hexam embody the novel’s central themes of preservation‚ scholarship‚ and reluctant genius․ The PDF format facilitates close reading of their dialogues and actions‚ revealing their complex motivations․

Understanding these characters requires careful attention to Miller’s narrative․ A digital copy aids in tracking their development across the three sections․ Examining their interactions within the PDF highlights the cyclical nature of history and the enduring human struggle between faith and reason․ Their significance is amplified through detailed textual study․

IV․1․ Brother Francis: The Preservationist

Utilizing a “A Canticle for Leibowitz” PDF enhances understanding of Brother Francis’s pivotal role․ He represents the initial spark of knowledge preservation after the Flame Deluge․ The PDF allows for easy referencing of passages detailing his meticulous copying of the Memorabilia‚ safeguarding fragments of the past․

Francis’s dedication‚ accessible through the digital text‚ embodies the novel’s core theme․ A searchable PDF reveals his unwavering commitment despite societal apathy․ His character highlights the importance of even small acts of preservation․ Studying his actions within the PDF demonstrates the cyclical nature of rediscovery and the enduring power of knowledge․

IV․2․ Abbot Jeremias: The Scholar and Diplomat

Accessing a “A Canticle for Leibowitz” PDF illuminates Abbot Jeremias’ complex character․ The PDF facilitates close reading of his diplomatic efforts during a period of rising tensions․ Jeremias embodies the intellectual and political challenges faced by the Church․ His attempts to navigate power struggles are vividly portrayed within the text․

The PDF allows for detailed analysis of his scholarly pursuits and his understanding of the Memorabilia’s significance․ Jeremias’s internal conflicts‚ readily apparent in the digital format‚ showcase his struggle between faith and reason․ Studying his role via the PDF reveals his tragic fate and the novel’s commentary on human ambition․

IV․3․ Hexam: The Reluctant Genius

Downloading a “A Canticle for Leibowitz” PDF provides crucial context for understanding Hexam‚ the brilliant but tormented scientist․ The PDF format enables focused study of his internal struggles and his pivotal role in the novel’s climax․ Hexam’s genius is presented alongside his moral reservations about technological advancement‚ a theme powerfully conveyed in the text․

Accessing the PDF allows readers to trace his development from a skeptical observer to a key figure in the potential for renewed destruction․ His reluctance‚ highlighted within the PDF’s pages‚ underscores the novel’s cautionary message․ Analyzing his character through the PDF reveals the tragic consequences of unchecked scientific ambition․

V․ Major Themes Explored in the Novel

Accessing a “A Canticle for Leibowitz” PDF facilitates a deeper understanding of its core themes․ The cyclical nature of history‚ a central concept‚ is readily examined through the novel’s three sections within the PDF․ The preservation of knowledge by the Church‚ another key theme‚ is vividly illustrated and easily referenced when studying the PDF version․

Furthermore‚ the PDF allows for focused analysis of the dangers inherent in unchecked technological advancement‚ a recurring warning throughout the narrative․ Studying the text in PDF format enables readers to trace these themes across generations‚ highlighting Miller’s profound commentary on humanity’s self-destructive tendencies․

V․1․ The Cyclical Nature of History

Utilizing a “A Canticle for Leibowitz” PDF provides an ideal platform to dissect the novel’s prominent theme: the cyclical nature of history․ The PDF format allows for easy cross-referencing between the Dark Ages revival (Fiat Lux)‚ the Scholastic Era (Fiat Historia)‚ and the dawn of a new age (Fiat Voluntas Tua)․

Readers can readily observe how humanity repeatedly falls into patterns of destruction and rediscovery when studying the PDF․ The PDF’s search function aids in tracing recurring motifs and parallels‚ reinforcing Miller’s message about the inevitability of repeating past mistakes․ This accessibility enhances comprehension of the novel’s core philosophical argument․

V․2․ The Role of the Church in Preserving Knowledge

Accessing “A Canticle for Leibowitz” as a PDF facilitates a focused examination of the Church’s crucial role in safeguarding knowledge after the Flame Deluge․ The PDF format enables detailed study of the monastic order’s dedication to preserving “memorabilia” – fragments of pre-war technology and learning․

Through the PDF‚ one can trace how the Church‚ despite facing societal upheaval and skepticism‚ diligently copies and protects these relics․ The PDF’s portability allows for convenient annotation and analysis of passages highlighting the monks’ unwavering commitment․ This underscores Miller’s complex portrayal of faith as a vital force in cultural continuity․

V․3․ The Dangers of Technological Advancement

Downloading “A Canticle for Leibowitz” as a PDF allows for a concentrated study of Miller’s cautionary tale regarding unchecked technological progress․ The PDF format supports close reading of how humanity repeatedly cycles through periods of innovation and self-destruction․

The PDF’s searchability aids in identifying passages detailing the devastating consequences of the initial atomic wars‚ fueled by scientific ambition․ Through the PDF‚ readers can analyze how the rediscovery of technology ultimately leads to a similar fate‚ emphasizing the novel’s cyclical view of history․ This underscores the inherent risks of prioritizing advancement without ethical considerations․

VI․ Symbolism and Allegory

Accessing “A Canticle for Leibowitz” in PDF format facilitates a deeper understanding of its rich symbolism and allegorical layers․ The PDF allows for focused examination of the Memorabilia‚ representing fragmented knowledge salvaged from a lost civilization․

The PDF’s portability enables convenient annotation while exploring the atomic wars as a potent symbol of humanity’s self-destructive tendencies․ Furthermore‚ the star map within the PDF embodies the enduring human quest for knowledge‚ even amidst cycles of devastation․ Studying the PDF reveals how these symbols intertwine to convey Miller’s profound message about faith‚ reason‚ and the fate of civilization․

VI․1․ The Memorabilia and Their Importance

Utilizing a “A Canticle for Leibowitz” PDF version allows for close study of the Memorabilia – fragmented remnants of pre-Deluge knowledge․ The PDF format enables detailed examination of these salvaged blueprints‚ shopping lists‚ and technical drawings‚ highlighting their paradoxical value․

The PDF’s search function aids in tracing the Memorabilia’s journey through the Abbey‚ revealing how they become objects of reverence and misinterpretation․ Accessing the text via PDF underscores their symbolic weight as humanity’s tenuous link to its past․ The PDF facilitates understanding how these seemingly mundane items drive the narrative and embody the novel’s central themes․

VI․2․ The Atomic Wars as a Symbol of Human Destruction

Examining “A Canticle for Leibowitz” through a PDF copy powerfully illustrates the Atomic Wars as a recurring symbol of humanity’s self-destructive tendencies․ The PDF format allows for focused analysis of passages detailing the “Flame Deluge‚” emphasizing its cyclical nature․

A digital PDF version facilitates tracing the consequences of technological hubris‚ as depicted in the novel․ The PDF’s accessibility aids in understanding how Miller portrays the wars not as a singular event‚ but as an inevitable outcome of human flaws․ Studying the text via PDF reinforces the novel’s cautionary message about unchecked progress and the fragility of civilization․

VI․3․ The Star Map and the Quest for Knowledge

Analyzing “A Canticle for Leibowitz” via a readily available PDF reveals the star map as a potent symbol of humanity’s enduring quest for knowledge‚ even after catastrophic loss․ The PDF format allows close examination of how the map represents a longing for understanding beyond earthly concerns․

Accessing the novel as a PDF highlights the cyclical nature of this pursuit; knowledge is lost‚ rediscovered‚ and potentially misused․ The PDF’s searchability aids in tracing the map’s significance across generations of monks․ Studying the text in PDF form underscores Miller’s exploration of whether humanity is destined to repeat its mistakes despite its intellectual aspirations․

VII․ “A Canticle for Leibowitz” PDF Availability and Sources

Locating a “A Canticle for Leibowitz” PDF requires careful navigation․ While direct links are often transient‚ searches reveal mentions of downloadable files‚ though legality should always be verified․ Resources like online libraries and academic databases may offer legitimate access to the PDF version․

The internet provides references to “Walter M․ Miller Jr․ ⎯ A Canticle for Leibowitz․pdf” as a downloadable file․ However‚ caution is advised regarding source reliability․ Exploring university websites and digital archives is recommended for secure PDF access․ Remember to respect copyright laws when obtaining and using the PDF․

VIII․ Russian Translations and Publications

Translations impact accessibility; “Gimn Leibovitsu (A Canticle for Leibowitz)” published by AST in Moscow (2017) offers a Russian-language edition․ While not a PDF directly‚ knowing about translations broadens research avenues․ Scholarly articles concerning the novel‚ published in Russian‚ often reference the text and can be found through academic databases․

These Russian resources‚ though not providing a direct PDF download of the original English text‚ are valuable for comparative analysis․ Searching Russian digital libraries might reveal digitized versions of the AST publication‚ potentially available as a PDF․ Understanding the translation context enriches the study of Miller’s work․

VIII․1․ Gimn Leibovitsu (A Canticle for Leibowitz) ⎯ AST Publishing

AST Publishing in Moscow released “Gimn Leibovitsu (A Canticle for Leibowitz)” in 2017‚ a 350-page Russian translation․ While a direct PDF download from AST isn’t readily available through their official website‚ searching online booksellers within Russia may yield digital copies‚ potentially in PDF format․

However‚ availability fluctuates․ Investigating Russian digital library archives is another avenue for locating a digitized version․ This translation provides access for Russian-speaking readers‚ though it doesn’t substitute the original English text․ Finding a legitimate PDF requires careful source verification to avoid copyright infringement․

VIII․2․ Scholarly Articles on the Novel in Russian

Russian academic databases contain analyses of “A Canticle for Leibowitz‚” though finding full-text PDFs freely available can be challenging․ Prokopev A․ Iu․’s work on the era of religious schism‚ cited alongside mentions of the novel‚ suggests critical engagement with its themes․

Хомутникова ЕА’s 2019 article‚ cited seven times‚ likely offers insights‚ but access may require institutional subscriptions or interlibrary loan․ Searching platforms like eLIBRARY․RU‚ a prominent Russian scientific library‚ is crucial․ While direct PDF downloads aren’t guaranteed‚ abstracts and citation information are valuable for research․

IX․ DeepL Translation and Linguistic Analysis

DeepL‚ launched in 2017‚ excels in nuanced translation‚ potentially aiding comprehension of Russian scholarly articles concerning “A Canticle for Leibowitz․” While not directly related to finding a PDF‚ it bridges linguistic gaps․ Its integration with platforms like YouTube and LinkedIn demonstrates its accessibility․

Analyzing translated excerpts can reveal subtle interpretations of the novel’s themes․ DeepL’s AI-driven approach‚ focusing on grammar and context‚ offers superior results compared to older tools․ This is particularly useful when researching Russian critiques or analyses‚ even if the original PDF remains inaccessible․

X․ Connections to Other Works of Science Fiction

While searching for a “A Canticle for Leibowitz” PDF‚ consider its thematic resonances with other dystopian and post-apocalyptic science fiction․ The novel’s cyclical view of history echoes in works like Olaf Stapledon’s Star Maker‚ exploring vast timescales and societal collapse․

Its focus on preserving knowledge during a dark age parallels themes in Ray Bradbury’s Fahrenheit 451․ Both novels highlight the fragility of civilization and the importance of intellectual freedom․ Finding the PDF allows deeper comparative analysis‚ revealing Miller’s unique contribution to the genre’s exploration of human resilience․

XI․ Critical Reception and Literary Awards

Accessing a “A Canticle for Leibowitz” PDF facilitates study of its acclaimed reception․ The novel won the Hugo Award in 1960‚ recognizing its significant contribution to science fiction; Critics lauded Miller’s complex narrative structure and profound philosophical themes․

Early reviews praised the work’s blend of historical fiction‚ religious allegory‚ and scientific speculation․ The PDF format allows researchers to easily analyze critical essays and scholarly articles discussing the novel’s enduring impact․ Its exploration of faith‚ reason‚ and the dangers of unchecked technological advancement continues to resonate with readers and critics alike․

XII․ The Novel’s Influence on Modern Literature

Downloading a “A Canticle for Leibowitz” PDF unlocks insights into its lasting literary legacy․ Miller’s work profoundly influenced subsequent science fiction authors‚ inspiring explorations of post-apocalyptic themes and the cyclical nature of history․

The novel’s unique blend of genres—science fiction‚ historical fiction‚ and religious allegory—became a template for many later works․ Accessing the text in PDF form aids comparative analysis with authors influenced by Miller․ Its impact extends beyond science fiction‚ resonating with writers tackling themes of knowledge preservation and humanity’s self-destructive tendencies․

XIII․ Exploring the Philosophical Underpinnings

Accessing a “A Canticle for Leibowitz” PDF facilitates a deeper dive into its complex philosophical themes․ The novel grapples with questions of faith‚ reason‚ and the inherent contradictions within human progress․ Miller’s work challenges readers to contemplate the role of knowledge and its potential for both salvation and destruction․

The PDF allows for close textual analysis‚ revealing the nuanced arguments concerning the cyclical nature of history and the dangers of unchecked technological advancement․ Examining the text illuminates Miller’s exploration of free will versus determinism‚ and the enduring search for meaning in a chaotic universe․

XIV․ The Depiction of Religious Orders

Utilizing a “A Canticle for Leibowitz” PDF provides a focused lens on Miller’s portrayal of religious orders‚ specifically the Benedictine monks of the Albertian Order of Leibowitz․ The novel doesn’t offer a simplistic endorsement of faith‚ but rather a complex examination of its role in preserving knowledge through dark ages․

The PDF format enables detailed study of how the Order functions as a repository of pre-Deluge learning‚ highlighting both its dedication to scholarship and its internal struggles with dogma and power․ Miller subtly critiques institutional religion while acknowledging its vital function in safeguarding civilization’s remnants․

XV․ Scientific Accuracy and Speculation

Accessing a “A Canticle for Leibowitz” PDF facilitates a close reading of Miller’s blend of scientific accuracy and speculative extrapolation․ The novel‚ while fictional‚ grounds its post-apocalyptic world in plausible scientific concepts regarding nuclear fallout‚ genetic mutation‚ and the challenges of rebuilding technology․

The PDF allows for focused analysis of how Miller portrays the rediscovery of scientific principles‚ often through trial and error‚ mirroring historical scientific progress․ His speculation on future weaponry and space travel‚ though dated now‚ reflects Cold War anxieties and a fascination with the potential—and peril—of scientific advancement;

XVI․ The Role of Humor and Satire

Downloading a “A Canticle for Leibowitz” PDF reveals Miller’s subtle yet pervasive use of humor and satire․ Despite the bleak backdrop of post-apocalyptic devastation and cyclical history‚ the novel is punctuated with ironic observations about human nature‚ religious institutions‚ and the scientific community․

The PDF format enables careful examination of dialogues and narrative asides that expose the foibles of characters and the absurdity of their situations․ Miller satirizes bureaucratic inefficiencies‚ scholarly pedantry‚ and the tendency to repeat past mistakes‚ offering a darkly comedic commentary on the human condition․

XVII․ Analyzing the Narrative Style

Accessing “A Canticle for Leibowitz” as a PDF facilitates a detailed analysis of Walter M․ Miller Jr․’s distinctive narrative style․ The novel employs a fragmented‚ episodic structure‚ mirroring the broken remnants of civilization it depicts․ This style‚ readily observable within the PDF’s pages‚ shifts between different time periods and perspectives‚ creating a sense of historical depth and cyclical recurrence․

Miller’s prose blends archaic language‚ reminiscent of medieval chronicles‚ with modern scientific terminology‚ highlighting the interplay between faith and reason․ The PDF allows for close reading of these stylistic choices‚ revealing how they contribute to the novel’s thematic complexity and enduring power․

XVIII․ The Impact of the Cold War on the Novel

Examining “A Canticle for Leibowitz” as a PDF reveals the profound influence of the Cold War anxieties on its themes․ Written during the height of nuclear tension‚ the novel serves as a stark warning against the dangers of unchecked technological advancement and ideological conflict․ The atomic devastation depicted within the PDF’s narrative directly reflects the fears of mutually assured destruction prevalent during that era․

The novel’s exploration of societal collapse and the struggle to rebuild resonates with Cold War concerns about global annihilation․ Accessing the PDF allows readers to trace these parallels‚ understanding the novel as a powerful commentary on the political and existential threats of its time․

XIX․ Finding and Downloading the PDF Version

Locating a “A Canticle for Leibowitz” PDF requires careful navigation of online resources․ Several websites offer digital copies‚ though verifying legality and source reliability is crucial․ Search terms like “Walter M․ Miller Jr․ – A Canticle for Leibowitz․pdf” yield results‚ but caution is advised against dubious download links․

Reputable online libraries and academic databases sometimes provide access to the PDF for educational purposes․ Always prioritize legitimate sources to avoid malware or copyright infringement; Downloading the PDF unlocks convenient access to this literary masterpiece‚ enabling in-depth study and analysis․

XX․ Further Research and Scholarly Resources

Expanding your understanding of “A Canticle for Leibowitz” necessitates exploring scholarly resources․ Databases like JSTOR and Project MUSE host critical analyses and academic papers examining the novel’s themes and historical context․ Russian publications‚ such as Prokopev A․ Iu․’s work on religious upheaval‚ offer unique perspectives‚ even if requiring translation․

Searching for articles related to “Gimn Leibovitsu” (the Russian title) can reveal valuable insights․ Examining Leibowitz R․’s writings on music and innovation provides a broader intellectual landscape․ Utilizing these resources alongside the PDF version deepens appreciation for Miller’s complex work․

XXI․ Conclusion: The Enduring Legacy of “A Canticle for Leibowitz”

Ultimately‚ “A Canticle for Leibowitz” remains a profoundly relevant work‚ prompting reflection on cycles of destruction and the preservation of knowledge․ Its enduring power lies in its exploration of faith‚ science‚ and humanity’s self-destructive tendencies․ Accessing the novel in PDF format facilitates wider study and appreciation․

The availability of translations‚ like the Russian “Gimn Leibovitsu‚” demonstrates its global resonance․ Continued scholarly engagement‚ aided by digital resources‚ ensures Miller’s masterpiece will continue to challenge and inspire readers for generations to come‚ solidifying its place in science fiction canon․

lord of the rings the return of the king pdf

The Lord of the Rings: The Return of the King PDF ─ A Comprehensive Guide

Embark on a literary journey with a digital copy! Explore accessible formats, including PDF versions, of Tolkien’s epic conclusion, readily available for download and study․

Understanding the Significance of the PDF Format

The PDF format offers unparalleled accessibility and preservation for complex works like J․R․R․ Tolkien’s The Return of the King․ Unlike other digital formats, PDFs maintain consistent formatting across various devices and operating systems, ensuring the reader experiences the text as intended․ This is crucial for a novel rich in appendices, maps, and detailed prose․

Furthermore, PDFs are easily shareable and printable, facilitating both personal study and academic discussion․ The format’s ability to embed fonts and images guarantees visual fidelity, preserving the original aesthetic of published editions․ Scanned PDFs, while potentially lower quality, democratize access to the text, while digitally created PDFs offer enhanced searchability and potential for interactive features like annotations․

Ultimately, the PDF format serves as a robust and versatile medium for experiencing this cornerstone of fantasy literature․

Availability of “The Return of the King” as a PDF

Numerous sources offer “The Return of the King” in PDF format, ranging from legitimate online bookstores to file-sharing platforms․ Websites like Scribd host user-uploaded versions, often including scanned copies or text-based conversions․ Free PDFs are frequently found through online searches, though their legality can be questionable․

Digital retailers may sell official PDF editions, providing a high-quality, legally compliant reading experience․ Archive․org sometimes features digitized versions of older editions․ However, availability fluctuates, and the quality of free PDFs varies significantly, with some containing errors or incomplete text․

Readers should exercise caution and verify the source before downloading, prioritizing legal and reputable options whenever possible to support authors and publishers․

Legality and Sources for PDF Downloads

Downloading PDFs of “The Return of the King” from unofficial sources often infringes copyright law․ While many sites offer free downloads, these are frequently unauthorized reproductions․ Legally obtaining the PDF involves purchasing it from authorized digital retailers or subscribing to services offering access to copyrighted material․

Reputable sources include official ebook stores and platforms with licensing agreements․ Be wary of websites promising free downloads that seem too good to be true, as they may contain malware or violate copyright․

Respecting intellectual property rights is crucial; supporting authors and publishers ensures continued creation of literary works․ Always verify the legitimacy of a source before downloading to avoid legal repercussions and ensure a safe digital experience․

Content Overview: The Return of the King

Discover the climactic finale! Frodo’s perilous quest nears completion, facing ultimate evil, while Aragorn’s destiny unfolds in a battle for Middle-earth’s fate․

The Core Narrative of the Third Book

“The Return of the King” relentlessly focuses on the culmination of the quest to destroy the One Ring․ Frodo and Sam, guided by the treacherous Gollum, navigate the harrowing landscapes of Mordor, inching closer to Mount Doom․ Simultaneously, Aragorn embraces his lineage, rallying the forces of good to distract Sauron’s attention, allowing Frodo a chance at success․

The narrative interweaves these two critical storylines – the internal struggle against the Ring’s corrupting influence and the large-scale war for Middle-earth’s survival․ Key moments include the siege of Minas Tirith, the Battle of the Pelennor Fields, and the desperate final push towards the Crack of Doom․ Tolkien masterfully builds tension, exploring themes of courage, sacrifice, and the enduring power of hope against overwhelming darkness․ The PDF format allows for detailed study of these interwoven plots․

Key Characters and Their Arcs

“The Return of the King” showcases profound character development․ Frodo’s arc reaches its agonizing peak as the Ring’s burden nearly consumes him, testing his resilience and moral fortitude․ Samwise Gamgee embodies unwavering loyalty, becoming Frodo’s essential support․ Aragorn fully accepts his destiny, transforming from a ranger into a king, inspiring hope and leading armies․

Gollum’s internal conflict – his desire for the Ring versus fleeting moments of his former self – adds tragic complexity․ Characters like Gandalf and Éowyn also experience significant growth, confronting their fears and fulfilling their roles in the final battle․ A PDF version facilitates close analysis of dialogue and internal monologues, revealing the nuances of each character’s journey and transformation throughout the epic conclusion․

The One Ring and its Power

The One Ring represents absolute power and corruption, central to the narrative’s conflict․ Tolkien meticulously details its insidious influence, subtly warping the minds and desires of those who possess or even glimpse it․ The PDF format allows for focused study of passages describing the Ring’s effects on characters like Boromir, Gollum, and ultimately, Frodo․

Its ability to extend life, grant invisibility, and amplify existing traits comes at a terrible cost – enslavement to Sauron’s will․ Examining the poetic verses concerning the Ring within a PDF enhances understanding of its history and the dark magic woven into its creation․ The digital text facilitates tracing the Ring’s journey and its impact on Middle-earth’s fate․

Exploring Different PDF Versions

Discover varied PDF options, from official releases to fan-scanned copies, and enhanced versions featuring annotations and helpful study guides for deeper analysis․

Official PDF Releases (if any)

Determining the existence of an officially sanctioned PDF release of “The Return of the King” directly from the Tolkien Estate or authorized publishers proves challenging․ Currently, a legally available, digitally formatted PDF version sold through official channels is not widely publicized or easily accessible․

Most PDF versions circulating online are derived from scanned copies of physical books, or conversions from other ebook formats․ While publishers frequently offer ebooks in formats like EPUB or MOBI, a dedicated, high-quality PDF release mirroring a definitive edition remains elusive․ Readers seeking a legitimate digital copy are advised to explore authorized ebook retailers, acknowledging that a direct PDF download from official sources is unlikely at this time․

Fan-Made and Scanned PDF Versions

Numerous fan-created and scanned PDF versions of “The Return of the King” are readily available online through platforms like Scribd and various file-sharing websites․ These versions typically originate from physical copies of the book, digitally scanned and converted into the PDF format․

However, it’s crucial to acknowledge that these are often unofficial and may vary significantly in quality․ Scans can exhibit imperfections, including skewed pages, poor resolution, and OCR errors impacting readability․ While offering convenient access, users should be aware of potential copyright concerns and the ethical implications of downloading unauthorized copies․ These versions, though popular, lack the polish and legal standing of official releases․

PDFs with Annotations and Study Guides

Beyond simple digital reproductions, some PDF versions of “The Return of the King” incorporate annotations and supplementary study guides․ These enhanced editions cater to academic readers and enthusiasts seeking deeper engagement with Tolkien’s work․ Annotations may include character analyses, thematic explorations, and explanations of complex lore elements․

Study guides often feature chapter summaries, discussion questions, and critical essays, facilitating a more structured reading experience․ While officially sanctioned versions are rare, dedicated fans frequently create and share these resources online․ These PDFs can significantly enrich understanding, but verifying the accuracy and source of annotations is vital, as interpretations can vary․

Technical Aspects of the PDF

Examine file sizes, quality, and device compatibility when selecting a PDF․ Ensure accessibility features and optimal viewing with appropriate PDF reader software․

File Size and Quality Considerations

When considering a PDF version of “The Return of the King,” file size directly impacts download speed and storage space․ Larger files, often resulting from high-resolution scans, preserve intricate details of the original text and illustrations, offering a superior reading experience․

However, excessively large files can be cumbersome, especially on devices with limited storage․ Conversely, smaller PDFs may sacrifice image clarity for convenience․ Scanned PDFs, in particular, can vary significantly in quality depending on the scanning resolution and post-processing techniques employed․

Look for PDFs that strike a balance between file size and visual fidelity․ Optical Character Recognition (OCR) enhances readability and allows for text searching, but can sometimes introduce errors․ Prioritize PDFs with clear text and legible images for optimal enjoyment of Tolkien’s masterpiece․

Compatibility with Different Devices

PDF files generally boast excellent cross-platform compatibility, making “The Return of the King” accessible on a wide range of devices․ Smartphones, tablets, laptops, and desktop computers – all can readily open and display PDF documents with appropriate reader software․

However, older devices or those with limited processing power might experience slower rendering times with large, image-heavy PDFs․ Ensure your device has a current PDF reader installed, such as Adobe Acrobat Reader, Foxit Reader, or built-in viewers on most operating systems․

Accessibility features, like text resizing and screen reader support, vary between PDF readers․ Consider your individual needs when selecting a reader․ Cloud storage services also allow for convenient access to your PDF copy across multiple devices, enhancing portability and convenience․

PDF Readers and Accessibility Features

Numerous PDF readers are available, each offering varying features․ Adobe Acrobat Reader remains the industry standard, providing robust viewing and annotation tools․ Alternatives like Foxit Reader and Sumatra PDF offer lighter-weight options with essential functionalities․

Accessibility is crucial for all readers․ Modern PDF readers support screen readers, enabling visually impaired users to experience the text․ Features like adjustable font sizes, color contrast options, and text-to-speech functionality enhance readability․

Reflowable text, allowing the text to adapt to different screen sizes, is a valuable accessibility feature․ Some readers also permit tagging PDF elements for improved screen reader navigation․ When choosing a reader, prioritize those that meet your specific accessibility requirements for an optimal reading experience․

The Historical Context of the Work

Delve into Tolkien’s world, shaped by personal experiences and linguistic passion, culminating in a literary masterpiece published in 1955, now accessible as a PDF․

J․R․R․ Tolkien’s Inspiration

J․R․R․ Tolkien, a renowned philologist and Oxford professor, drew deeply from his academic background and personal experiences when crafting The Lord of the Rings․ His profound knowledge of mythology, particularly Norse and Finnish legends, heavily influenced the world-building and narrative structure․ The devastation of World War I, in which Tolkien served, profoundly impacted his themes of good versus evil, loss, and the corrupting influence of power․

Furthermore, his love for languages – he invented several, including Quenya and Sindarin – shaped the very essence of Middle-earth․ The creation of these languages wasn’t merely a stylistic choice; it was fundamental to the cultures and histories of his fictional races․ The accessibility of The Return of the King as a PDF allows modern readers to explore these intricate layers of inspiration, studying the text alongside critical analyses of Tolkien’s life and influences․

The Publication History of “The Return of the King”

“The Return of the King,” the concluding volume of The Lord of the Rings, was first published in October 1955 by George Allen & Unwin․ It followed the earlier releases of The Fellowship of the Ring (1954) and The Two Towers (1954)․ Initial reception was mixed, but the novel quickly gained a dedicated following, fueled by word-of-mouth and critical acclaim․

Subsequent editions and translations solidified its place as a cornerstone of fantasy literature․ The advent of digital formats, including the PDF, has broadened access to Tolkien’s work, allowing readers to engage with the text in new ways․ Early PDF versions often originated from scanned copies, while later releases may offer enhanced readability and searchability․ The enduring popularity ensures continued availability in this convenient format;

The Impact of the Novel on Fantasy Literature

“The Return of the King” profoundly reshaped the fantasy genre, establishing tropes and conventions still prevalent today․ Tolkien’s meticulous world-building, complex characters, and epic scope set a new standard for immersive storytelling․ The novel’s themes of good versus evil, sacrifice, and the corrupting influence of power continue to resonate with readers and inspire countless authors․

The widespread availability of the work in PDF format has further amplified its influence, allowing new generations to discover Tolkien’s masterpiece․ Digital access democratizes literature, fostering a broader appreciation for the novel’s artistry․ Its impact extends beyond literature, influencing film, gaming, and other creative mediums, cementing its legacy as a foundational work of modern fantasy․

Analyzing Key Themes in “The Return of the King”

Delve into profound themes like power, friendship, and sacrifice within the PDF text, revealing Tolkien’s masterful exploration of morality and courage․

Good vs․ Evil and the Nature of Power

The struggle between good and evil forms the core of “The Return of the King,” powerfully illustrated within the PDF’s pages․ Tolkien meticulously examines how power corrupts, exemplified by the One Ring’s insidious influence․

Reading the PDF allows close analysis of characters like Boromir, succumbing to temptation, and Sauron, embodying absolute dominion․ The narrative demonstrates that even noble intentions can be twisted by the allure of control․

Furthermore, the text highlights the strength found not in dominating power, but in resisting it – Frodo and Sam’s humble journey showcases this․ The PDF format facilitates detailed study of these contrasting forces, revealing Tolkien’s nuanced perspective on morality and the dangers of unchecked ambition․

Friendship, Loyalty, and Sacrifice

The “Return of the King” PDF profoundly showcases the enduring power of fellowship amidst overwhelming darkness․ Tolkien emphasizes that the quest’s success hinges not on individual heroism, but on unwavering loyalty and selfless sacrifice․

Through the digital text, readers can meticulously trace the bond between Frodo and Sam, a cornerstone of the narrative․ Sam’s steadfast devotion, even when Frodo falters, exemplifies true friendship․

Moreover, the PDF allows for detailed examination of other sacrifices – Aragorn’s claim to kingship, the Fellowship’s collective struggle – illustrating that overcoming evil demands personal cost․ Analyzing these themes within the PDF format deepens appreciation for Tolkien’s exploration of human connection and courage․

Hope and Despair in the Face of Darkness

The “Return of the King” PDF masterfully portrays the constant tension between hope and despair as Mordor’s shadow lengthens․ Readers can analyze how Tolkien depicts characters grappling with seemingly insurmountable odds, yet clinging to a fragile belief in eventual victory․

Examining the text digitally allows for close reading of passages detailing the despair felt by those facing Sauron’s power, contrasted with moments of resilience and courage․ The PDF format facilitates tracing the subtle shifts in morale throughout the narrative․

Ultimately, Tolkien suggests that even in the darkest times, a flicker of hope – embodied by characters like Aragorn and the unwavering Sam – can ignite the strength needed to confront evil․ The PDF enhances understanding of this central theme․

The Connection to the Amazon Series

Compare the PDF’s source material to “The Rings of Power,” noting differences and similarities, enriching your understanding of Tolkien’s expansive world․

“The Rings of Power” and its Relationship to the Original Trilogy

Amazon’s “The Rings of Power” serves as a prequel, set thousands of years before the events detailed in “The Return of the King” PDF․ While the series draws inspiration from Tolkien’s appendices and broader lore, it isn’t a direct adaptation of the core narrative found within the book itself․

Readers utilizing a PDF version of “The Return of the King” can appreciate the foundational elements – the history of the Rings, the nature of Sauron, and the struggles against darkness – that the series attempts to expand upon․ However, significant creative liberties have been taken, leading to divergences in plot and characterization․

Understanding the original trilogy, particularly the context established in “The Return of the King,” provides a crucial framework for analyzing the Amazon series and discerning its faithfulness to Tolkien’s vision․ The PDF offers a direct connection to that original intent․

Differences and Similarities Between the Book and the Show

Comparing “The Rings of Power” to the source material, accessible through a “The Return of the King” PDF, reveals notable differences․ The show expands upon characters and storylines only briefly mentioned in Tolkien’s writings, while the PDF presents a focused narrative centered on Frodo and Sam’s quest․

Similarities lie in the overarching themes: the corrupting influence of power, the importance of fellowship, and the fight against overwhelming evil․ Both mediums explore the creation and significance of the Rings, though the show’s timeline and character motivations often diverge․

A PDF version allows readers to directly compare the show’s interpretations with Tolkien’s original prose, highlighting creative choices and adaptations․ The series aims to capture the spirit of Middle-earth, but inevitably alters details for dramatic effect․

How the PDF can Enhance Understanding of the Source Material

Accessing “The Return of the King” as a PDF unlocks a deeper engagement with Tolkien’s masterpiece․ Digital formats facilitate easy searching for specific passages, characters, or themes, aiding detailed analysis․ Annotations and highlighting within the PDF allow for personalized study and note-taking, fostering a more active reading experience․

Furthermore, a PDF enables convenient cross-referencing with other materials, such as maps, character guides, or scholarly articles․ This is particularly useful when exploring the complex lore and intricate details of Middle-earth․

Compared to physical copies, a PDF offers portability and accessibility, allowing readers to delve into the story anytime, anywhere․ It’s an invaluable tool for students, researchers, and devoted fans alike․

hound of the baskerville pdf

The Hound of the Baskervilles PDF: A Comprehensive Guide

This guide explores accessing Arthur Conan Doyle’s classic detective novel in PDF format, detailing legitimate download sources and understanding the digital file itself.

Discover where to find free, legal PDFs, compatible readers, and the story’s enduring legacy, all within this comprehensive resource.

The Hound of the Baskervilles, a cornerstone of detective fiction, first captivated audiences as a serialized story between 1901 and 1902. Penned by the masterful Sir Arthur Conan Doyle, this thrilling tale introduces readers to the desolate Dartmoor and the chilling legend of a demonic hound that has plagued the Baskerville family for generations.

The narrative unfolds as Sherlock Holmes and his steadfast companion, Dr. Watson, are summoned to investigate the mysterious death of Sir Charles Baskerville. Rumors swirl of a supernatural curse, but Holmes, ever the rationalist, seeks a logical explanation. The story masterfully blends suspense, gothic atmosphere, and intricate deduction, establishing itself as one of the most celebrated works in the Sherlock Holmes canon.

Finding the novel in PDF format allows for convenient access to this literary masterpiece, enabling readers to delve into the mystery anytime, anywhere.

Historical Context of Publication (1901-1902)

Published serially in The Strand Magazine from 1901 to 1902, The Hound of the Baskervilles emerged during a period of significant societal shifts and anxieties. The Victorian era was drawing to a close, and a sense of uncertainty about the future permeated British society. This era saw a surge in popularity of gothic literature and sensationalism, themes Doyle expertly incorporates.

The novel’s publication coincided with advancements in forensic science, subtly influencing Holmes’s investigative methods. Doyle’s creation of Holmes himself reflected a fascination with deductive reasoning and scientific observation. The availability of the story in affordable periodicals, and now as a readily downloadable PDF, broadened its reach to a wider audience, cementing its place in popular culture.

Synopsis of The Hound of the Baskervilles

The narrative unfolds as Sherlock Holmes and Dr. Watson investigate the mysterious death of Sir Charles Baskerville. A centuries-old legend haunts the Baskerville family – a demonic hound relentlessly pursues its heirs across the desolate Dartmoor. Sir Henry Baskerville, the last heir, arrives from Canada, becoming the target of this terrifying curse.

Holmes, employing his renowned deductive skills, attempts to protect Sir Henry while unraveling the truth behind the legend. The investigation leads them through the eerie landscape of the moors, filled with secrets and suspicious characters, notably Stapleton. The downloadable PDF allows readers to immerse themselves in this thrilling tale of suspense, folklore, and rational deduction.

Finding and Downloading the PDF

Locating a free PDF of The Hound of the Baskervilles requires exploring legitimate online sources like Project Gutenberg, Google Books, and Archive.org.

Legitimate Sources for Free PDF Downloads

Securing a free PDF copy of The Hound of the Baskervilles ethically means utilizing resources offering public domain works. Several reputable platforms provide access to this classic novel without infringing on copyright. Project Gutenberg stands out as a prime example, offering meticulously proofread digital texts, including Doyle’s masterpiece, available for download in various formats, including PDF.

Google Books also presents a viable option, often hosting digitized versions of older books. Archive.org, the Internet Archive, is another treasure trove, preserving a vast collection of scanned books and documents, with The Hound of the Baskervilles frequently available for borrowing or download. Always verify the source’s legitimacy to avoid malware or copyright violations. These platforms ensure a safe and legal reading experience.

Project Gutenberg and The Hound of the Baskervilles

Project Gutenberg is a cornerstone for accessing free ebooks, and The Hound of the Baskervilles is prominently featured within its extensive library. Founded in 1971, the project aims to digitize and archive cultural works, making them freely available worldwide. Downloading the PDF from Project Gutenberg ensures a clean, carefully proofread version of the novel, free from errors often found in less reputable sources.

The website offers multiple download options, catering to various devices and preferences. Users can easily navigate the site and locate the book through a simple search. Furthermore, Project Gutenberg’s commitment to legal compliance guarantees a safe and ethical download experience, respecting copyright laws while promoting literary access.

Google Books and Digital Copies

Google Books provides access to a digitized version of The Hound of the Baskervilles, offering both preview and full-view options depending on copyright restrictions. Many editions are available, including those scanned as part of Google’s library digitization project. Users can often download a PDF copy directly, or view the book online within their web browser.

The platform’s search functionality allows for easy discovery, and integration with Google Drive enables convenient storage and offline access. However, it’s crucial to verify the legality of downloading a PDF, ensuring it’s either in the public domain or offered with appropriate permissions. Google Books remains a valuable resource for accessing classic literature digitally.

Archive.org Access to the PDF

Internet Archive’s Archive.org is a treasure trove for digitized books, including multiple editions of The Hound of the Baskervilles available in PDF format. The site offers various versions, often scanned from older publications, providing a glimpse into the novel’s publishing history. Users can download these PDFs for free, contributing to the Archive’s mission of universal access to knowledge.

Borrowing options are also available, allowing temporary access without direct download. Archive.org’s collection is particularly valuable for finding editions not readily available elsewhere. However, it’s essential to respect copyright and usage guidelines when utilizing these digital resources. The platform is a fantastic resource for literary enthusiasts.

Understanding the PDF Format

PDFs ensure consistent formatting across devices, making The Hound of the Baskervilles accessible on any platform. File size varies based on image quality and length.

PDF Compatibility and Devices

PDF (Portable Document Format) files offer broad compatibility, ensuring The Hound of the Baskervilles can be enjoyed across a wide range of devices. Smartphones, tablets (like iPads), computers running Windows or macOS, and e-readers such as Kindles all readily support PDF viewing.

However, older e-readers might display formatting inconsistencies. Generally, modern devices handle PDFs seamlessly, preserving the original layout and fonts. PDFs are platform-independent, meaning the same file will appear consistently regardless of the operating system. This makes sharing and archiving the novel convenient. Consider device screen size; larger screens enhance the reading experience, especially with detailed illustrations or complex formatting.

PDF Reader Software Options

Numerous software options are available for opening and reading The Hound of the Baskervilles in PDF format. Adobe Acrobat Reader is the industry standard, offering comprehensive features and reliable performance – it’s a free download. Alternatives include Foxit Reader, known for its speed and lightweight design, and SumatraPDF, a minimalist option ideal for quick viewing.

Many web browsers (Chrome, Firefox, Edge) have built-in PDF viewers, eliminating the need for separate software. Mobile devices typically have pre-installed PDF readers. Consider features like annotation tools, search functionality, and zoom capabilities when choosing a reader. Experiment to find the software that best suits your reading preferences and device.

File Size and Download Speed Considerations

The file size of The Hound of the Baskervilles PDF can vary depending on the source and image quality. Generally, a text-only version will be relatively small, typically under 1MB, ensuring a quick download even on slower connections. However, PDFs including illustrations or enhanced formatting may be larger, potentially exceeding 5MB or more.

Download speed is influenced by your internet connection and the server hosting the file. Consider using a wired connection for faster speeds. Large files may take several minutes to download on slower connections. Ensure a stable internet connection to avoid interruptions during the download process. Check the file size before initiating the download.

Key Characters and Their Roles

Explore the central figures – Sherlock Holmes, Dr. Watson, Sir Henry Baskerville, and Stapleton – and understand their pivotal roles in unraveling the mystery.

Sherlock Holmes: The Detective

Sherlock Holmes, the brilliant and eccentric consulting detective, is the driving force behind the investigation in The Hound of the Baskervilles. His unparalleled powers of observation, deduction, and forensic science are central to solving the mystery surrounding Sir Charles Baskerville’s death.

Throughout the novel, Holmes meticulously gathers clues, analyzes footprints (notably those of a gigantic hound!), and employs disguises to uncover the truth hidden within the eerie landscape of Dartmoor. He represents the power of rational thought in the face of superstition and legend.

His initial reluctance to immediately travel to Baskerville Hall, coupled with his reliance on Dr. Watson’s detailed reports, highlights his strategic approach. Holmes prefers to observe from a distance, piecing together the puzzle before confronting the perpetrator.

Dr. Watson: The Narrator and Companion

Dr. John Watson serves as both the narrator and loyal companion to Sherlock Holmes in The Hound of the Baskervilles. Through his first-person perspective, readers experience the unfolding mystery alongside him, receiving detailed descriptions of the Dartmoor setting and the peculiar characters encountered.

Watson’s role extends beyond mere observation; he actively participates in the investigation, gathering information, interviewing witnesses, and providing a grounded, relatable counterpoint to Holmes’s often-abstract deductions. His skepticism and occasional bewilderment mirror the reader’s own reactions.

The novel’s suspense is heightened by Watson’s diligent reporting, conveying a sense of unease and foreboding as he explores the desolate moors and unravels the Baskerville family’s dark history.

Sir Henry Baskerville: The Heir

Sir Henry Baskerville, the last scion of an ancient family, arrives from Canada to claim his inheritance – Baskerville Hall. He’s a robust, straightforward man, initially skeptical of the terrifying legend surrounding his family and the moor. However, he quickly finds himself embroiled in a web of mystery and danger.

His arrival triggers a series of unsettling events, including threatening letters and the discovery of footprints resembling those of a monstrous hound. Sir Henry’s courage is tested as he attempts to establish himself at the hall, becoming a target for an unseen enemy.

He relies heavily on Sherlock Holmes and Dr. Watson for protection, representing the vulnerability of innocence facing a sinister threat.

Stapleton: The Antagonist

Stapleton, a seemingly harmless entomologist residing on Dartmoor, is revealed as the cunning and ruthless villain behind the terror at Baskerville Hall. He’s a man of intellect and scientific knowledge, using his expertise to manipulate events and conceal his true identity and motives.

His fascination with the Baskerville family stems from a desire to claim the estate and fortune for himself, exploiting the legend of the hound to eliminate rivals and intimidate Sir Henry. He breeds and utilizes a large, phosphorescent hound, enhanced with chemicals, to create the illusion of a supernatural beast.

Stapleton’s calculated demeanor and deceptive nature make him a formidable adversary, embodying the cold rationality of evil.

Themes Explored in the Novel

The novel masterfully blends supernatural suspense with rational deduction, exploring the power of folklore, the conflict between good and evil, and the weight of ancestral legacies.

Supernatural vs. Rational Explanation

A central tension within The Hound of the Baskervilles lies in the conflict between belief in the supernatural and the application of rational, scientific deduction. The legend of the demonic hound, steeped in centuries of folklore, initially presents a terrifying, seemingly inexplicable force.

However, Sherlock Holmes consistently seeks logical explanations, dismissing the ghostly aspects as products of fear and misinterpretation. He meticulously gathers evidence, analyzing footprints and observing behaviors to uncover the truth behind the Baskerville curse.

Doyle skillfully portrays how easily superstition can cloud judgment, while championing the power of observation and reason to dispel illusions and reveal the concrete reality of the crime. The novel ultimately demonstrates that even the most frightening legends often have earthly origins.

The Power of Legend and Folklore

The enduring legend of the Hound of the Baskervilles profoundly shapes the narrative and the characters’ perceptions. This centuries-old tale, detailing a spectral canine and a family curse, instills fear and dread within the local community and even impacts Sir Henry Baskerville’s initial reactions.

Doyle masterfully demonstrates how folklore can exert a powerful psychological influence, creating an atmosphere of suspense and vulnerability. The legend isn’t merely a backdrop; it actively contributes to the unfolding events, influencing behavior and obscuring the truth.

The novel explores how such stories, passed down through generations, can become self-fulfilling prophecies, fueled by suggestion and the human tendency to seek patterns, even where none exist.

Good vs. Evil

At its core, The Hound of the Baskervilles presents a compelling struggle between good and evil, embodied by the contrasting figures of Sherlock Holmes and Stapleton. Holmes, representing reason, intellect, and justice, relentlessly pursues the truth, while Stapleton embodies cunning, deception, and a ruthless ambition.

The novel doesn’t portray evil as overtly monstrous, but rather as insidious and cleverly disguised. Stapleton’s seemingly respectable facade masks a dark intent, highlighting the danger of hidden malice.

The desolate Dartmoor setting further emphasizes this conflict, symbolizing the wild, untamed aspects of human nature and the potential for darkness to thrive in isolation.

Analyzing the Setting: Dartmoor

Dartmoor’s bleak and isolated landscape is integral to the narrative, creating a palpable atmosphere of mystery and dread, enhancing the novel’s gothic elements.

The Significance of the Moors

Dartmoor’s expansive and desolate moors aren’t merely a backdrop; they are a character in themselves, profoundly influencing the plot and psychological state of those within the story. The remote, wild terrain embodies the ancient legend of the Hound, fostering an environment ripe with superstition and fear.

The challenging landscape – treacherous bogs, granite tors, and dense fog – creates a sense of isolation and vulnerability, amplifying the mystery surrounding Sir Charles Baskerville’s death. This unforgiving environment mirrors the internal struggles of the characters, and the moors become symbolic of the hidden dangers and secrets lurking within the Baskerville family history.

The very nature of the moors, with its vastness and ambiguity, allows for the possibility of both rational explanations and supernatural occurrences, fueling the central conflict of the novel.

Atmosphere and Gothic Elements

“The Hound of the Baskervilles” masterfully employs Gothic elements to cultivate a chilling atmosphere of suspense and dread. The decaying Baskerville Hall, shrouded in mist and steeped in family history, immediately establishes a sense of foreboding. This setting, combined with the local folklore surrounding the demonic hound, creates a palpable tension throughout the narrative.

Doyle utilizes descriptions of the desolate Dartmoor landscape – the fog, the eerie silence, and the vast emptiness – to heighten the psychological impact on the characters and the reader. The novel’s atmosphere is further enhanced by the recurring motif of darkness and shadows, symbolizing the hidden dangers and secrets that permeate the story.

These Gothic conventions contribute significantly to the novel’s enduring appeal, immersing readers in a world where the line between reality and superstition blurs.

Dartmoor’s Influence on the Plot

Dartmoor isn’t merely a backdrop; it’s integral to the unfolding mystery in “The Hound of the Baskervilles.” The treacherous terrain – the bogs, tors, and expansive moorland – actively hinders investigation and provides ample opportunities for concealment. Stapleton exploits this landscape, using its natural features to mislead and orchestrate his villainous plan.

The remoteness of the area isolates Baskerville Hall, amplifying the sense of vulnerability and dread. Local legends and superstitions, deeply rooted in Dartmoor’s history, fuel the fear surrounding the hound, influencing the perceptions of the characters and the investigation itself.

Ultimately, the plot is inextricably linked to the physical and psychological impact of Dartmoor, making it a crucial element in unraveling the truth.

The Hound Itself: Myth and Reality

Explore the terrifying legend of the Baskerville hound and its shocking revelation within the novel’s narrative. Uncover the truth behind the monstrous creature!

The Legend of the Baskerville Hound

The chilling legend surrounding the Baskerville family centers on a spectral, demonic hound that has haunted Dartmoor for generations. Sir Richard Baskerville, a ruthless ancestor, is said to have met his demise at the jaws of this monstrous creature, and the legend dictates that the hound relentlessly pursues the heirs of the Baskerville line.

This terrifying tale is deeply ingrained in local folklore, instilling fear and dread within the community. The story details a massive, glowing-eyed hound, a supernatural being embodying evil and vengeance. Sir Charles Baskerville’s recent, mysterious death reignites the legend, fueling speculation that the hound has returned to claim another victim. The PDF versions of the novel vividly portray this atmosphere of dread and superstition, emphasizing the power of the legend itself.

The True Nature of the Hound

Contrary to the supernatural beliefs surrounding it, the “Hound of the Baskervilles” is ultimately revealed to be a cleverly disguised, real-world threat. Stapleton, the antagonist, utilizes a large, ferocious dog, painted with phosphorescent paint, to create the illusion of a demonic hound. This deception is meticulously planned to exploit the existing legend and frighten Sir Henry Baskerville, clearing the path for Stapleton to claim the Baskerville estate.

The PDF versions of the novel allow readers to follow Holmes’s deductive reasoning as he unravels the truth behind the legend. The hound, while terrifying in appearance, is a product of human manipulation, highlighting the power of rational explanation over superstition. The story emphasizes that even the most frightening phenomena can have logical origins.

Symbolism of the Hound

The Hound itself transcends a mere plot device, functioning as a potent symbol within the narrative. It represents the weight of the past, the destructive power of ancestral guilt, and the enduring influence of folklore. The legend embodies the primal fears lurking within the human psyche, amplified by the desolate landscape of Dartmoor.

PDF copies of the novel allow for close textual analysis, revealing how Doyle masterfully employs the hound as a metaphor for hidden dangers and inherited burdens. The creature also symbolizes the untamed, chaotic forces of nature, contrasting with Holmes’s rational, ordered approach. Ultimately, the hound’s symbolism underscores the novel’s central theme: the triumph of reason over irrationality.

Critical Reception and Legacy

The novel garnered immediate praise, solidifying Sherlock Holmes’s popularity and becoming a cornerstone of detective fiction. PDF accessibility ensures its continued readership and scholarly analysis today.

Initial Reviews and Public Response

Upon its 1901-1902 serialisation, The Hound of the Baskervilles was met with widespread acclaim and fervent public interest. Contemporary reviews lauded Arthur Conan Doyle’s masterful storytelling, atmospheric setting, and the compelling mystery surrounding the Baskerville family curse. Readers were captivated by the blend of suspense, gothic elements, and Sherlock Holmes’s brilliant deductive reasoning.

The novel’s popularity quickly extended beyond its initial publication in The Strand Magazine, driving demand for its eventual book release. The story resonated deeply with the Victorian and Edwardian public, fascinated by tales of the supernatural and the exploration of good versus evil. PDF versions today allow modern readers to experience the same thrill and intrigue that captivated audiences over a century ago, preserving its enduring appeal.

The Hound of the Baskervilles’ Place in the Sherlock Holmes Canon

Widely considered a pinnacle of the Sherlock Holmes series, The Hound of the Baskervilles stands apart for its atmospheric setting and suspenseful narrative. Unlike many Holmes stories set in London, this adventure unfolds on the desolate Dartmoor, creating a uniquely gothic and chilling atmosphere. PDF accessibility ensures this iconic tale remains readily available to enthusiasts.

The novel is frequently cited as a prime example of Doyle’s skill in blending mystery with psychological depth. It’s often recommended as a starting point for new readers, showcasing Holmes’s deductive prowess and Watson’s invaluable narration. Its enduring popularity solidifies its position as a cornerstone of the Holmes canon, easily enjoyed through convenient digital PDF formats.

Adaptations in Film, Television, and Stage

The Hound of the Baskervilles has inspired numerous adaptations across various media, demonstrating its lasting cultural impact. From early silent films to modern television series and theatrical productions, the story continues to captivate audiences. Accessing the PDF allows for direct comparison with these interpretations.

Notable adaptations include several BBC productions, a 1939 film starring Basil Rathbone, and a 1959 Hammer Horror version. These adaptations often emphasize different aspects of the novel – the mystery, the horror, or the character dynamics. Digital PDF copies facilitate scholarly analysis of the source material alongside its diverse adaptations, enriching the viewing or reading experience;

110cc wiring diagram instructions

Understanding a 110cc wiring diagram is crucial for successful engine projects․ These schematics illustrate electrical connections‚ aiding installation‚ troubleshooting‚ and ensuring optimal performance of your vehicle․

What is a 110cc Engine?

A 110cc engine refers to an internal combustion engine with a displacement of approximately 110 cubic centimeters․ These engines are commonly found powering smaller vehicles like mini-bikes‚ pit bikes‚ go-karts‚ and some lightweight motorcycles or ATVs․ Their compact size and relatively simple design make them popular choices for recreational use and entry-level motorized projects;

The “cc” measurement signifies the total volume displaced by all the pistons within the engine’s cylinders as they move․ A 110cc engine typically features a single cylinder‚ though variations exist․ Understanding the engine’s basic components – including the cylinder‚ piston‚ crankshaft‚ and valve train – is helpful when approaching its electrical system․

Because of their widespread use in DIY projects‚ readily available parts‚ and relatively straightforward mechanics‚ 110cc engines often require electrical system modifications or repairs․ This is where a detailed wiring diagram becomes absolutely essential for correct and safe operation․

Importance of a Wiring Diagram

A wiring diagram is fundamentally important when working with a 110cc engine’s electrical system․ It serves as a detailed roadmap‚ illustrating how each component – battery‚ ignition coil‚ starter motor‚ and more – connects and interacts․ Attempting to wire a 110cc engine without a diagram significantly increases the risk of errors‚ potentially leading to malfunctions‚ damage to components‚ or even safety hazards․

Correct wiring ensures the engine starts reliably‚ the ignition system functions properly‚ and all electrical accessories operate as intended․ A diagram simplifies troubleshooting; when issues arise‚ it allows you to systematically trace circuits and identify faulty connections or components․

Whether you’re assembling a new engine‚ repairing existing wiring‚ or modifying the electrical system‚ a clear and accurate diagram is indispensable․ It’s the difference between a frustrating‚ potentially dangerous experience and a smooth‚ successful project‚ guaranteeing a reliable and properly functioning machine․

Scope of this Guide

This guide provides a comprehensive overview of 110cc engine wiring‚ designed for both beginners and experienced mechanics․ We will delve into the core components of the electrical system‚ including the battery‚ starter‚ ignition system (coil‚ CDI‚ spark plug)‚ and associated wiring․ A key focus will be understanding and interpreting wiring diagram symbols‚ enabling accurate circuit tracing and troubleshooting․

We’ll offer step-by-step instructions for connecting the battery‚ wiring the ignition system‚ and installing the starter motor․ Furthermore‚ this resource addresses common wiring issues‚ such as no spark conditions‚ starter motor failures‚ and electrical shorts‚ providing practical troubleshooting techniques․

Finally‚ we’ll direct you to valuable resources for finding 110cc wiring diagrams‚ including online databases‚ manufacturer-specific schematics‚ and supportive community forums․ This guide aims to empower you with the knowledge and skills to confidently tackle any 110cc wiring project․

Core Components of a 110cc Electrical System

Essential components include the battery‚ starter motor‚ ignition system (CDI‚ coil‚ spark plug)‚ and control elements‚ all interconnected as shown in the wiring diagram․

Battery: Function and Specifications

The battery serves as the electrical heart of a 110cc system‚ providing the initial power to start the engine and sustaining the electrical components when the engine isn’t running․ Typically‚ a 110cc engine utilizes a 12-volt battery‚ though specifications can vary based on the specific model and application – whether it’s a mini-bike‚ dirt bike‚ or ATV․

Common battery types include sealed lead-acid (SLA) or lithium-ion options․ SLA batteries are generally more affordable but heavier‚ while lithium-ion batteries offer a lighter weight and increased lifespan‚ albeit at a higher cost․ Amp-hour (Ah) ratings typically range from 7Ah to 9Ah‚ indicating the battery’s capacity to deliver current over time․

Proper battery maintenance‚ including keeping terminals clean and ensuring a full charge‚ is vital for reliable performance․ The wiring diagram clearly illustrates the battery’s connection to the starter solenoid‚ ignition system‚ and other electrical components‚ emphasizing the importance of correct polarity during installation to prevent damage․

Starter Motor and Solenoid

The starter motor is responsible for cranking the 110cc engine‚ initiating the combustion process․ It receives power from the battery through the starter solenoid‚ a crucial intermediary component․ The solenoid acts as a heavy-duty switch‚ using a small current from the ignition switch to engage a larger current flow to the starter motor․

Wiring diagrams depict the solenoid’s connections to the battery (positive and negative terminals)‚ the starter motor‚ and the ignition switch․ A common issue involves a faulty solenoid‚ preventing the starter motor from receiving power․ Symptoms include a clicking sound when attempting to start‚ but no engine turnover․

Correct wiring and a functional solenoid are essential for reliable starting․ The diagram highlights the importance of secure connections and appropriate wire gauge to handle the high current demands of the starter motor․ Inspecting these components during troubleshooting is vital for diagnosing starting problems in a 110cc engine․

Ignition System: Coil‚ CDI‚ and Spark Plug

The ignition system is paramount for combustion in a 110cc engine‚ comprising the ignition coil‚ Capacitive Discharge Ignition (CDI) unit‚ and spark plug․ The CDI unit receives a signal from the engine’s sensors and generates a high-voltage pulse sent to the ignition coil․

The coil then amplifies this voltage‚ delivering it to the spark plug‚ creating the spark needed to ignite the air-fuel mixture․ Wiring diagrams illustrate the precise connections between these components‚ often including a kill switch to interrupt the ignition cycle․ A faulty CDI or coil can result in a ‘no spark’ condition․

Understanding the wiring sequence is crucial for troubleshooting․ Diagrams clearly show grounding points and power supply connections․ Proper wiring ensures efficient energy transfer‚ maximizing engine performance and reliability․ Inspecting these connections and components is vital when diagnosing ignition-related issues․

Understanding Wiring Diagram Symbols

Decoding wiring diagram symbols is essential for interpreting 110cc engine schematics․ Familiarize yourself with representations for wires‚ connections‚ grounds‚ and components for accurate understanding․

Common Symbols for Wires and Connections

Interpreting wire and connection symbols is fundamental to understanding any 110cc wiring diagram․ A solid line typically represents a standard wire‚ indicating a simple electrical path․ Dashed or dotted lines often signify signal wires‚ carrying control information rather than primary power․ Wire gauge isn’t usually depicted directly‚ but color-coding is frequently used – a convention to identify specific circuits like power‚ ground‚ or ignition․

Connection symbols illustrate how wires join․ A simple dot indicates a connection or splice‚ where two or more wires are joined together․ A tee connection shows a wire splitting into two‚ distributing power or signals․ More complex symbols may represent connectors‚ terminals‚ or junctions within a wiring harness․ Recognizing these symbols allows you to trace the electrical flow accurately․

Understanding these basic symbols is the first step towards confidently navigating a 110cc engine’s electrical system․ Proper interpretation prevents miswiring and ensures safe‚ reliable operation of your machine․

Identifying Grounding Symbols

Grounding is a critical aspect of 110cc engine electrical systems‚ and diagrams utilize specific symbols to denote it․ The most common grounding symbol resembles a series of progressively smaller lines descending in a stepped fashion – often likened to a staircase or a fan․ This symbol indicates a connection to the chassis or frame of the vehicle‚ providing a return path for electrical current․

Sometimes‚ a simple straight line with a short perpendicular line attached represents a chassis ground․ It’s crucial to correctly identify these symbols‚ as improper grounding can lead to malfunctions‚ electrical shorts‚ or even damage to components․ Multiple ground points are often used to ensure a reliable connection and minimize resistance․

Always verify grounding connections physically during troubleshooting․ A poor ground can mimic other electrical issues‚ making accurate diagnosis challenging․ Recognizing these symbols is vital for safe and effective 110cc wiring work․

Understanding Component Representation

110cc wiring diagrams employ standardized symbols to represent each electrical component․ The battery is typically shown as a series of parallel plates – positive and negative terminals clearly marked․ The ignition coil is often depicted as a looped rectangle‚ signifying its inductive properties․ A CDI unit (Capacitive Discharge Ignition) appears as a rectangular box‚ sometimes with labeled input and output connections․

The starter motor is usually represented by a circular symbol with a gear icon‚ indicating its mechanical function․ Fuses are shown as a rectangle with a zig-zag line inside‚ denoting their protective role․ Bulbs and lights are often simple circles or rectangles‚ representing the illuminated element․

Understanding these representations allows for quick identification of components within the diagram․ Familiarizing yourself with these symbols streamlines the troubleshooting and repair process‚ enabling efficient diagnosis and correction of electrical issues within the 110cc engine system․

Step-by-Step Wiring Instructions

Follow the 110cc wiring diagram closely‚ connecting the battery‚ ignition‚ and starter motor sequentially․ Ensure secure connections for reliable engine operation and safety․

Battery Connection and Grounding

Proper battery connection and grounding are fundamental to a functioning 110cc electrical system․ Begin by securely mounting the battery‚ ensuring it won’t shift during operation․ Connect the positive (+) terminal to the main power wire‚ often leading to the ignition switch and starter solenoid․ Utilize a properly sized fuse inline with the positive connection to protect the system from overcurrents․

Crucially‚ establish a solid ground connection․ The negative (-) battery terminal must be connected to the engine frame‚ providing a reliable return path for the electrical current․ Clean the grounding point on the frame to remove any paint or corrosion‚ ensuring optimal conductivity․ A poor ground is a common cause of electrical issues․ Double-check all connections for tightness and insulation to prevent shorts․ Remember‚ a stable power supply is the foundation for all other electrical components․

Ignition System Wiring

The ignition system wiring is vital for starting and running your 110cc engine․ Typically‚ this involves connecting the CDI (Capacitive Discharge Ignition) unit‚ ignition coil‚ and spark plug․ The CDI receives a signal from the stator or pickup coil‚ triggering the ignition coil to generate a high-voltage spark․

Begin by connecting the CDI unit to the stator/pickup coil‚ ensuring correct polarity as indicated in your wiring diagram․ Then‚ connect the CDI to the ignition coil․ The ignition coil’s output wire connects directly to the spark plug․ A kill switch‚ wired in series between the CDI and the main power supply‚ allows you to shut off the engine․ Verify all connections are secure and insulated․ Incorrect wiring can prevent spark or damage the CDI unit․ Always refer to a specific diagram for your engine model‚ as wiring configurations can vary․

Starter Motor Wiring

Wiring the starter motor requires careful attention to detail; The starter motor typically connects to the battery through a solenoid․ The solenoid acts as a heavy-duty switch‚ activated by the starter button․ Positive battery voltage runs to the solenoid‚ and from there‚ a heavy-gauge cable connects to the starter motor itself․

Ensure the starter relay and solenoid are correctly wired‚ as these components handle high current․ The starter button sends a small current to the solenoid‚ engaging the starter motor․ A ground wire completes the circuit․ Double-check all connections for tightness and proper insulation to prevent shorts․ If the starter doesn’t engage‚ verify the solenoid is receiving power when the starter button is pressed and that the ground connection is secure․ Always consult a diagram specific to your 110cc engine model․

Troubleshooting Common 110cc Wiring Issues

Effective troubleshooting relies on a wiring diagram․ Common problems include no spark‚ a failing starter‚ or shorts․ Careful inspection and testing pinpoint the root cause․

No Spark Troubleshooting

Diagnosing a “no spark” condition in a 110cc engine requires a systematic approach‚ heavily reliant on the wiring diagram․ First‚ verify the battery is fully charged and connections are clean and tight․ A weak battery can significantly impact ignition performance․

Next‚ inspect the ignition coil․ Use a multimeter to check its resistance against the manufacturer’s specifications․ A faulty coil won’t generate sufficient voltage․ Then‚ examine the CDI (Capacitive Discharge Ignition) unit – a crucial component․ Look for any visible damage or loose connections․ Testing the CDI often requires specialized tools․

Crucially‚ check the spark plug itself․ Ensure it’s properly gapped and free from fouling․ A damaged or incorrectly gapped plug won’t ignite the fuel-air mixture․ Finally‚ trace the wiring between the coil‚ CDI‚ and spark plug‚ looking for breaks‚ shorts‚ or corroded connectors․ The wiring diagram is essential for accurately identifying each wire and its function during this process․ Remember safety first – disconnect the battery before working on the ignition system!

Starter Motor Not Engaging

When a 110cc engine’s starter motor fails to engage‚ consult the wiring diagram to pinpoint the issue․ Begin by verifying the battery’s charge and the starter solenoid’s connections – corrosion is a common culprit․ A weak battery or poor connection prevents sufficient power from reaching the starter․

Inspect the starter relay‚ often located near the battery․ Use a multimeter to confirm it’s receiving power and functioning correctly․ A faulty relay won’t send the signal to activate the solenoid․ Next‚ examine the starter solenoid itself․ Listen for a click when the starter button is pressed; silence indicates a potential solenoid failure․

Trace the wiring from the battery‚ through the relay‚ to the solenoid‚ and finally to the starter motor‚ checking for breaks or shorts․ The wiring diagram is vital for identifying each wire’s path․ Lastly‚ ensure the starter motor brushes aren’t worn and the armature spins freely․ Disconnect the battery before any electrical work!

Electrical Shorts and Fuses

Electrical shorts in a 110cc system can quickly drain the battery and potentially damage components․ The wiring diagram is essential for tracing circuits and identifying the location of a short․ Look for damaged insulation‚ exposed wires‚ or connections touching the frame – these are common causes․

Fuses are critical safety devices protecting the electrical system․ If a fuse repeatedly blows‚ it indicates a short circuit or overload on that specific circuit․ Never replace a fuse with a higher amperage rating‚ as this bypasses the safety mechanism and risks further damage․ Locate the fuse box (refer to the diagram) and inspect each fuse․

Use a multimeter to test for continuity across the fuse; no continuity means it’s blown․ Before replacing a blown fuse‚ identify and rectify the underlying short circuit․ Carefully examine the wiring associated with that circuit‚ looking for any signs of damage or improper connections․ Disconnect the battery before investigating shorts!

Resources for 110cc Wiring Diagrams

Numerous online databases‚ manufacturer websites‚ and community forums offer 110cc wiring diagrams․ These resources provide detailed schematics for troubleshooting and repair․

Online Diagram Databases

Several online databases specialize in providing wiring diagrams for various vehicles‚ including those with 110cc engines․ These platforms often require a subscription or one-time payment to access their extensive collections․ However‚ the investment can be worthwhile for frequent users or those tackling complex wiring projects․ Popular options include dedicated motorcycle wiring diagram sites and broader automotive electrical resource hubs․

These databases typically allow users to search by engine type‚ vehicle make and model‚ or specific component․ The diagrams are often interactive‚ allowing you to zoom in on details and trace individual wires․ Many also include accompanying documentation‚ such as troubleshooting guides and component specifications․ Before committing to a subscription‚ check if the database offers a free trial or sample diagrams to ensure it meets your needs․ Remember to verify the diagram’s accuracy against your specific engine configuration․

Furthermore‚ some online forums dedicated to mini-bikes and small engine mechanics curate collections of wiring diagrams submitted by community members․ While these resources are often free‚ the quality and accuracy can vary․ Always cross-reference information from multiple sources before making any wiring changes․

Manufacturer Specific Diagrams

Obtaining wiring diagrams directly from the manufacturer is often the most reliable approach․ These diagrams are specifically tailored to your engine’s model and year‚ ensuring accuracy and minimizing the risk of errors․ Manufacturers typically provide these diagrams in service manuals‚ parts catalogs‚ or through their online support portals․

However‚ accessing these resources may require purchasing the official service manual for your 110cc engine․ While this represents an upfront cost‚ the manual often contains valuable information beyond just wiring diagrams‚ including detailed repair procedures‚ parts lists‚ and troubleshooting guides․ Check the manufacturer’s website or contact their customer service department to inquire about availability and pricing․

Alternatively‚ some manufacturers offer limited wiring diagrams for free download on their websites‚ particularly for common issues․ Dealer networks can also be a valuable source‚ as they often have access to the latest diagrams and can provide expert assistance․ Always prioritize manufacturer-supplied diagrams whenever possible to guarantee compatibility and safety․

Community Forums and Support

Online community forums dedicated to small engine mechanics‚ mini-bikes‚ and dirt bikes are invaluable resources for 110cc wiring diagrams and troubleshooting assistance․ These platforms connect enthusiasts and experienced mechanics who readily share their knowledge and diagrams․

Searching within these forums using specific keywords like “110cc wiring diagram‚” “engine model‚” or “year” often yields relevant results․ Members frequently upload diagrams they’ve created or sourced‚ and are willing to help interpret them․ Be prepared to provide detailed information about your engine to receive accurate guidance․

However‚ exercise caution when using diagrams from unofficial sources․ Verify the information against multiple sources and cross-reference with manufacturer specifications whenever possible․ Remember that community support is often based on shared experience‚ and may not always be entirely accurate․ Active participation and respectful communication are key to benefiting from these communities․

manual handling risk assessment example

Manual handling risk assessments are crucial for workplace safety‚ aligning with regulations like MHOR 1992 and AS45001:2018.
These assessments systematically identify and mitigate hazards associated with lifting‚ carrying‚ and repetitive movements‚ ensuring employee wellbeing.

Purpose of the Assessment

The primary purpose of a manual handling risk assessment is to proactively protect employees from musculoskeletal disorders (MSDs) arising from hazardous manual tasks. This assessment isn’t merely a compliance exercise‚ dictated by regulations like the Manual Handling Operations Regulations 1992 (MHOR)‚ but a fundamental commitment to worker health and safety.

Specifically‚ the assessment aims to identify tasks that present a risk‚ evaluate the level of that risk considering factors like load weight and posture‚ and then implement appropriate control measures. These measures‚ guided by the hierarchy of control‚ prioritize eliminating risks where possible‚ followed by reducing them through engineering or organizational changes.

A well-conducted assessment provides a documented record of identified hazards‚ the risks they pose‚ and the controls in place‚ facilitating continuous improvement and demonstrating due diligence. Ultimately‚ it strives to create a safer working environment‚ minimizing the incidence of work-related injuries and promoting employee wellbeing.

Legal Requirements (MHOR 1992)

The Manual Handling Operations Regulations 1992 (MHOR) place a clear legal duty on employers to manage the risks of manual handling in the workplace. Regulation 4(1) of MHOR establishes a hierarchy of measures to control these risks‚ prioritizing elimination of hazardous tasks whenever reasonably practicable.

Employers are legally obligated to assess manual handling risks‚ taking into account factors like load weight‚ frequency‚ posture‚ and individual capabilities. This assessment must be documented‚ and the findings communicated to employees. Furthermore‚ MHOR requires employers to provide information‚ instruction‚ and training to ensure employees can handle loads safely.

Failure to comply with MHOR can result in enforcement action by the Health and Safety Executive (HSE)‚ including improvement notices or prosecution. A robust manual handling risk assessment process is‚ therefore‚ not only best practice but a legal necessity for protecting employees and avoiding potential penalties.

Scope of this Example Assessment

This example manual handling risk assessment is designed to be a broadly applicable template‚ adaptable to various workplace scenarios. It focuses on identifying hazards associated with common manual handling tasks‚ such as lifting‚ lowering‚ carrying‚ pushing‚ and pulling of loads. The assessment considers factors outlined in MHOR 1992 and aligns with AS45001:2018 standards.

The scope encompasses a detailed task description‚ including load characteristics (weight‚ dimensions)‚ frequency of handling‚ carrying distances‚ and observed postures. It also includes an evaluation of existing control measures and proposes additional controls based on the hierarchy of control. This assessment is intended to be a living document‚ regularly reviewed and updated.

Specifically‚ it aims to identify those at risk from manual handling injuries and to provide a clear record of the assessment findings. While comprehensive‚ it’s crucial to remember that this is an example; each workplace requires a tailored assessment reflecting its unique operations and risks.

Identifying Manual Handling Activities

Identifying tasks involving lifting‚ carrying‚ and repetitive movements is the first step. This includes documenting operations‚ load details‚ and potential hazards for a thorough risk assessment.

Defining Manual Handling

Manual handling‚ as defined by the Manual Handling Operations Regulations 1992 (MHOR)‚ encompasses any transporting or supporting of a load by hand or bodily force. This extends beyond simply lifting and lowering; it includes activities like carrying‚ pushing‚ pulling‚ twisting‚ bending‚ and even holding items;

Crucially‚ it considers the risk of injury‚ not just the weight or awkwardness of the load. A seemingly light box can pose a significant risk if lifted repeatedly or in a poor posture. The assessment process must therefore consider the entire task‚ from start to finish.

This definition is broad‚ covering a wide range of workplace activities. Recognizing this breadth is essential for a comprehensive risk assessment. It’s not limited to warehouse environments; manual handling can occur in offices‚ healthcare settings‚ and construction sites‚ among others. Accurate identification of these activities is the foundation of effective risk management.

Common Tasks Requiring Assessment

Numerous workplace tasks routinely necessitate a manual handling risk assessment. These include lifting and lowering boxes‚ bags‚ or other materials – a staple in warehousing and retail. Manually transferring patients in healthcare settings presents high risks due to the vulnerability of those involved and often awkward postures.

Construction sites frequently require assessments for tasks like carrying building materials‚ digging‚ and moving heavy tools. Office environments aren’t exempt; repetitive paper handling‚ moving equipment‚ and even prolonged static postures can contribute to musculoskeletal disorders.

Other common examples encompass loading and unloading vehicles‚ stacking shelves‚ assembling products‚ and waste disposal. Any task involving the physical exertion of moving or supporting a load should be scrutinized. A proactive approach to identifying these tasks is vital for preventing injuries and ensuring a safe working environment.

Site/Location of Task Documentation

Maintaining readily accessible documentation is paramount for effective manual handling risk management. Records of completed assessments‚ including detailed task descriptions and identified control measures‚ should be stored both electronically and in a physical format.

A central location‚ such as a designated safety folder within a shared network drive‚ ensures all relevant personnel can easily access the information. Hard copies should be kept in a clearly labelled file‚ ideally near the task location itself – for example‚ in a supervisor’s office or on a notice board within the department.

The documentation must clearly list those at risk‚ detailing specific roles and individuals potentially exposed to hazards. Regular audits should verify the documentation’s completeness and accessibility. This systematic approach supports ongoing monitoring and continuous improvement of manual handling safety protocols.

Assessing the Risks: Hazard Identification

Hazard identification involves evaluating load weight‚ carrying distances‚ postures‚ frequency‚ and repetitive movements. These factors‚ alongside workplace conditions‚ determine potential manual handling risks.

Load Weight & Dimensions

Assessing load weight and dimensions is fundamental to manual handling risk assessments. Heavier loads inherently pose a greater risk of injury‚ particularly to the back. The assessment must detail the actual weight of the item being handled‚ not just an estimate. Consider awkward shapes and sizes; bulky or unwieldy loads disrupt balance and increase strain;

Dimensions impact grip and maneuverability; Large items may obstruct vision‚ increasing the risk of collisions or trips. Irregularly shaped loads can be difficult to hold securely‚ leading to drops or muscle strains. Documentation should include precise weight measurements and detailed descriptions of the load’s dimensions.

Furthermore‚ consider whether the load’s center of gravity is offset‚ requiring additional effort to control. The assessment should also note if the load is unstable or likely to shift during handling. Accurate documentation of these factors is vital for effective risk control.

Frequency and Duration of Lifting

Evaluating lifting frequency and duration is critical in a manual handling risk assessment. Frequent lifting‚ even of relatively light loads‚ can lead to cumulative strain and musculoskeletal disorders. The assessment must quantify how often lifting occurs over a specific period – per hour‚ per shift‚ or per day. Consider both routine and occasional lifting tasks.

Prolonged lifting or carrying‚ even if infrequent‚ significantly increases risk. Sustained muscle exertion leads to fatigue‚ reducing control and increasing the likelihood of injury. Document the duration of each lifting activity and any periods of sustained carrying.

Assess whether there are sufficient rest breaks to allow for muscle recovery. A high frequency combined with long duration demands immediate attention and control measures. Detailed records of these factors are essential for prioritizing risk reduction strategies and protecting worker health.

Carrying Distance

Assessing carrying distance is a vital component of a thorough manual handling risk assessment. Longer carrying distances significantly increase the physical demands on workers‚ elevating the risk of fatigue and injury. The assessment should accurately measure the distance loads are carried‚ considering both horizontal and vertical travel.

Evaluate whether the carrying path is clear of obstructions‚ uneven surfaces‚ or other hazards that could contribute to slips‚ trips‚ or falls. Consider if the load obstructs the carrier’s vision‚ further increasing risk. Frequent or prolonged carrying over extended distances demands careful scrutiny.

Document any changes in elevation during carrying‚ as ascending or descending stairs adds substantial strain. Control measures should focus on minimizing carrying distances whenever possible‚ utilizing mechanical aids‚ or redesigning tasks to reduce the physical burden on employees.

Posture During Lifting/Carrying

Evaluating posture during lifting and carrying is paramount in a manual handling risk assessment. Poor posture dramatically increases the strain on the musculoskeletal system‚ heightening injury risk. Assess whether workers are bending‚ twisting‚ or reaching while handling loads – these positions are particularly hazardous.

Observe if the load is held close to the body‚ maintaining a stable center of gravity. A load held away from the body significantly increases stress on the back and shoulders. Note any awkward postures adopted due to space constraints or load characteristics.

Consider the height from which loads are lifted and to which they are placed. Lifting from floor level or above shoulder height presents greater challenges. Control measures should prioritize maintaining neutral postures‚ providing adequate space‚ and utilizing lifting aids to minimize awkward movements.

Repetitive Movements

Repetitive movements are a significant risk factor in manual handling assessments‚ often leading to upper limb disorders (ULDs) and musculoskeletal injuries. Evaluate tasks involving repeated lifting‚ lowering‚ carrying‚ twisting‚ or reaching motions. Consider the frequency and duration of these movements – higher repetition and longer durations increase risk.

Assess the speed of movements; faster‚ forceful repetitions are more likely to cause strain. Observe if movements are combined with awkward postures or forceful exertions‚ compounding the risk. Look for tasks lacking sufficient recovery time between repetitions.

Control measures should focus on reducing repetition through job rotation‚ task variation‚ or automation. Implementing rest breaks and promoting proper technique can also mitigate risks. Ergonomic assessments can identify opportunities to redesign tasks and minimize repetitive strain.

Risk Evaluation & Control Measures

Risk evaluation involves reviewing existing controls and applying the MHOR 1992 hierarchy – elimination‚ reduction via engineering/organisational changes – to minimize identified manual handling hazards.

Existing Control Measures Review

Before implementing new controls‚ a thorough review of existing measures is paramount. This involves documenting what is currently in place to manage manual handling risks within the specific task or location. Consider if current procedures‚ such as provided equipment‚ training programs‚ or work rotation schedules‚ are effectively reducing risk exposure.

Assess the adequacy of these existing controls. Are they consistently followed by all personnel? Is the equipment well-maintained and fit for purpose? Are employees adequately trained on proper lifting techniques and the use of available aids? Document any gaps or deficiencies identified during this review process.

This review should also encompass an examination of incident reports and near-miss occurrences related to manual handling. Analyzing these events can reveal recurring issues or weaknesses in existing controls‚ providing valuable insights for improvement. The findings of this review will inform the selection and implementation of appropriate additional control measures‚ prioritizing those higher up the hierarchy of control.

Hierarchy of Control (MHOR 1992)

The Manual Handling Operations Regulations 1992 (MHOR) establish a clear hierarchy of control measures to minimize risks. Elimination – removing the hazardous task entirely – is the most effective‚ though often challenging. If elimination isn’t feasible‚ reduction becomes the focus.

Engineering controls involve modifying the workplace or equipment. Examples include using mechanical aids like hoists or trolleys‚ adjusting workstation heights‚ or redesigning layouts to reduce carrying distances. These aim to change the task itself‚ lessening the physical demands.

Organizational controls focus on how work is done. This includes implementing safe systems of work‚ providing adequate training‚ rotating tasks to reduce repetition‚ and ensuring sufficient rest breaks. These controls rely on changing employee behavior and work practices. Personal Protective Equipment (PPE)‚ while sometimes used‚ is considered the least effective control and should only be implemented as a last resort‚ alongside other measures.

Elimination of Hazardous Tasks

Elimination represents the most effective strategy within the MHOR 1992 hierarchy of controls‚ aiming to completely remove manual handling risks. This involves fundamentally altering processes to avoid the need for lifting‚ carrying‚ or repetitive movements altogether. Consider if the task is truly necessary; can it be avoided entirely?

Practical examples include redesigning a workflow to deliver materials directly to the point of use‚ negating the need for manual transport. Automation‚ such as utilizing conveyors or robotic systems‚ can replace physically demanding tasks. Rethinking packaging – switching to smaller‚ lighter units – can also eliminate high-risk lifts.

Successfully eliminating a task requires a thorough review of existing procedures and a willingness to embrace innovative solutions. While often the most challenging option to implement‚ the long-term benefits – reduced injury risk and improved employee wellbeing – are substantial. Prioritizing elimination demonstrates a proactive commitment to safety.

Reduction of Risk – Engineering Controls

Engineering controls focus on modifying the workplace or equipment to reduce manual handling risks‚ falling second in the MHOR 1992 hierarchy. These are physical changes that minimize exposure to hazards‚ rather than relying on worker behavior. Examples include installing adjustable work platforms to reduce reaching and bending‚ or providing mechanical aids like hoists‚ trolleys‚ and pallet trucks.

Consider implementing lifting tables to bring loads to a safer working height‚ minimizing strain on the back. Redesigning layouts to shorten carrying distances is another effective engineering control. Utilizing height-adjustable workstations allows employees to adapt the environment to their individual needs‚ promoting better posture.

These controls require investment but offer a reliable and sustainable solution. Regular maintenance of equipment is crucial to ensure continued effectiveness. Engineering controls should be implemented after exploring elimination options‚ creating a safer and more efficient work environment.

Reduction of Risk – Organisational Controls

Organisational controls‚ the third tier in the MHOR 1992 hierarchy‚ involve changes to work practices and procedures to minimize manual handling risks. These focus on how tasks are performed‚ rather than altering the physical environment or equipment. Implementing a robust rotation system can reduce repetitive strain injuries by varying tasks throughout the day.

Providing comprehensive training on safe lifting techniques‚ proper posture‚ and the use of available aids is paramount. Clear Standard Operating Procedures (SOPs) detailing safe manual handling practices for each task are essential. Encouraging early reporting of discomfort or pain allows for prompt intervention and prevents escalation of issues.

Optimizing workload distribution and minimizing unnecessary carrying distances also fall under organizational controls. Regular breaks and promoting a culture of safety awareness are vital components. These controls rely on employee participation and commitment to safe work practices.

Documentation & Review

Detailed records of assessment findings‚ including identified risks and control measures‚ are essential. Regular reviews – at least annually‚ or after changes – ensure continued effectiveness and compliance.

Recording Assessment Findings

Comprehensive documentation is paramount for a robust manual handling risk assessment. The assessment record should meticulously detail the specific tasks analyzed‚ including a clear description of the operations covered – load weights‚ lifting frequencies‚ and carry distances. Visual aids‚ such as diagrams or photographs‚ significantly enhance understanding and clarity.

Crucially‚ the record must outline all existing control measures currently in place. This includes any equipment used‚ training provided‚ or procedural changes implemented to minimize risk. Furthermore‚ the assessment should clearly identify the specific hazards associated with each task‚ detailing the potential for harm.

The risk level – often categorized as low‚ medium‚ or high – must be explicitly stated for each identified hazard. Finally‚ the proposed control measures‚ designed to reduce or eliminate the risks‚ should be thoroughly documented‚ along with assigned responsibilities and timelines for implementation. This detailed record serves as a vital reference point for ongoing monitoring and review.

Identifying Those at Risk

Accurate identification of individuals potentially exposed to manual handling risks is a critical step. This extends beyond those directly performing lifting or carrying tasks. Consider employees involved in assisting with loads‚ supervising operations‚ or even those working in proximity to manual handling activities.

The assessment should specifically list job roles or departments where manual handling is prevalent. It’s vital to include temporary staff‚ contractors‚ and new employees undergoing training‚ as they may lack experience and be more vulnerable.

Particular attention should be given to individuals with pre-existing health conditions‚ such as musculoskeletal disorders or pregnancy‚ as these factors can increase their susceptibility to injury. Documenting the number of employees at risk‚ and their specific roles‚ provides a clear understanding of the scope of potential harm and informs the prioritization of control measures. This detailed list ensures targeted interventions and effective risk management.

Review Date & Process

Regular review of the manual handling risk assessment is paramount‚ ensuring its continued relevance and effectiveness. A formal review should be conducted at least annually‚ or more frequently if significant changes occur – such as alterations to tasks‚ equipment‚ or the work environment;

The review process should involve consultation with employees who perform the assessed tasks‚ gathering their feedback on the practicality and effectiveness of existing control measures. Documented changes‚ including updates to hazard identification‚ risk evaluation‚ and control strategies‚ are essential.

The assessment should also be reviewed following any incidents or near misses involving manual handling‚ to identify potential weaknesses in the current controls. A clear record of review dates‚ participants‚ and any resulting actions must be maintained‚ demonstrating a proactive approach to risk management and a commitment to employee safety. This iterative process ensures ongoing improvement.

AS45001:2018 Alignment

Alignment with AS45001:2018‚ the Australian Standard for occupational health and safety management systems‚ demonstrates a commitment to best practice. This standard emphasizes a risk-based approach‚ requiring organizations to proactively identify hazards‚ assess risks‚ and implement controls.

A comprehensive manual handling risk assessment‚ as outlined in this document‚ directly supports AS45001:2018 requirements. Specifically‚ it contributes to fulfilling obligations related to hazard identification (clause 6.1.2.1)‚ risk assessment (clause 6.1.2.2)‚ and control of risks (clause 8.1.3).

Documentation of the assessment process‚ including findings and control measures‚ provides evidence of compliance. Furthermore‚ the regular review process ensures continuous improvement‚ a key principle of AS45001:2018. Utilizing a template broadly aligned with this standard streamlines the process and demonstrates a robust safety management system.