What are “Dibujos para Imprimir y Colorear PDF”?
“Dibujos para Imprimir y Colorear PDF” refers to printable coloring pages available in PDF format, offering diverse themes like animals, cartoons, and landscapes for creative enjoyment.
These free resources, easily downloadable, provide accessible artistic outlets for children and adults alike, fostering imagination and relaxation through coloring.
Many websites and search engines offer a vast collection of these PDF files, catering to various interests and skill levels, making coloring convenient and fun.
Definition and Basic Concept
“Dibujos para Imprimir y Colorear PDF”, translating to “Drawings to Print and Color PDF,” fundamentally represents digital images designed for coloring, distributed in the universally accessible Portable Document Format (PDF).
These aren’t simply images; they are pre-designed outlines, often featuring popular characters, animals, landscapes, or intricate patterns, intended to be printed onto paper and then filled with color using various mediums like crayons, colored pencils, or markers.
The core concept revolves around providing a readily available, free, and engaging creative activity. The PDF format ensures consistent appearance across different devices and operating systems, simplifying the printing process. They cater to all ages, offering simple designs for toddlers and complex patterns for adults.
Essentially, they are a digital gateway to a classic, hands-on artistic experience.
Popularity and Benefits of Coloring Pages
The enduring popularity of “Dibujos para Imprimir y Colorear PDF” stems from their accessibility and multifaceted benefits. Offering a screen-free activity, they provide a welcome break from digital devices, fostering mindful engagement.
Coloring is widely recognized for its therapeutic qualities, reducing stress and anxiety through focused concentration. Beyond relaxation, these pages actively develop fine motor skills, hand-eye coordination, and creativity in children.
The free availability of countless designs online fuels their widespread use. They’re a cost-effective entertainment option, easily customized and enjoyed by individuals of all ages. Adult coloring pages, in particular, have surged in popularity, offering complex designs for artistic expression and stress relief.

Where to Find Free Printable Coloring Pages in PDF Format
Numerous websites, like Magicoloriage and ColorearM.com, offer a vast selection of “Dibujos para Imprimir y Colorear PDF” for free download and printing.
Utilizing search engines with specific themes also quickly locates diverse PDF coloring pages for all ages and interests.
Top Websites Offering Free “Dibujos para Imprimir y Colorear PDF”
Several online platforms specialize in providing a rich assortment of free “Dibujos para Imprimir y Colorear PDF”. ColorearM.com stands out with its extensive library, catering to all ages and offering designs ranging from animals to complex mandalas.
Magicoloriage is another excellent resource, particularly known for its beautiful landscape and nature-themed coloring pages, readily available for download and printing. Canva also provides a selection, integrating coloring pages within its broader design tools.
Additionally, websites dedicated to children’s activities frequently host collections of printable coloring sheets in PDF format, ensuring a constant stream of fresh content. These sites often categorize pages by theme, simplifying the search process.
Utilizing Search Engines for Specific Themes
To pinpoint specific “Dibujos para Imprimir y Colorear PDF” themes, employing targeted search terms within search engines proves highly effective. Instead of a broad search, try phrases like “free dinosaur coloring pages PDF” or “printable cartoon characters PDF”.
Adding “PDF” to your query ensures results prioritize downloadable files, streamlining the process. Utilizing image search can also visually preview options before downloading. Experiment with variations – “coloring sheets”, “coloring pictures”, and specific character names.
Refining searches with keywords like “easy”, “complex”, or “for kids” further narrows results, delivering precisely the coloring pages you desire.

Common Themes in Printable Coloring Pages
“Dibujos para Imprimir y Colorear PDF” frequently feature popular themes like adorable animals, beloved cartoon characters, serene landscapes, and festive holiday-related designs.
These diverse options cater to all ages and interests, providing endless creative possibilities for coloring enthusiasts.
Animal Coloring Pages
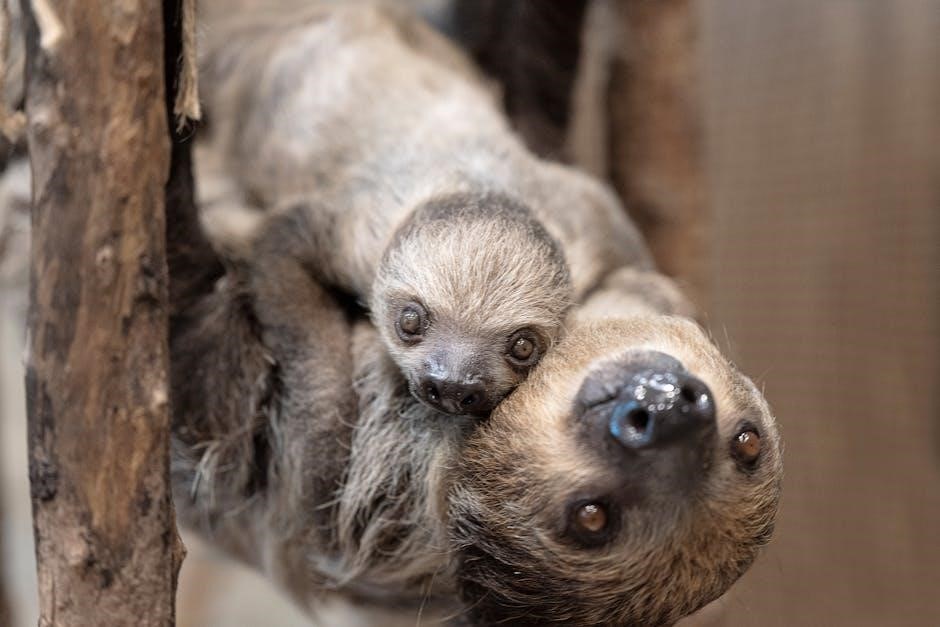
Animal coloring pages are a consistently popular choice within the world of “Dibujos para Imprimir y Colorear PDF”. They encompass a vast range of creatures, from familiar domestic pets like cats and dogs to exotic wildlife such as lions, elephants, and giraffes.
These pages often depict animals in their natural habitats or engaging in playful activities, sparking imagination and offering educational opportunities. Many free PDF resources specialize in animal themes, providing detailed illustrations for intricate coloring or simpler designs for younger children.
Dinosaurs are also a frequently requested animal category, appealing to a broad age group. The variety ensures there’s an animal coloring page to suit every preference and skill level.
Cartoon Character Coloring Pages
Cartoon character coloring pages represent a significant portion of available “Dibujos para Imprimir y Colorear PDF” options, consistently attracting children and fans of all ages. These pages feature beloved figures from popular animated series and movies, offering a vibrant and recognizable coloring experience.
From classic characters to contemporary favorites, the selection is extensive. Many websites dedicate sections to specific cartoon franchises, providing numerous free PDF downloads. These pages often showcase characters in dynamic poses or iconic scenes, enhancing the fun.
The appeal lies in the familiarity and joy associated with these animated personalities.
Landscape and Nature Coloring Pages
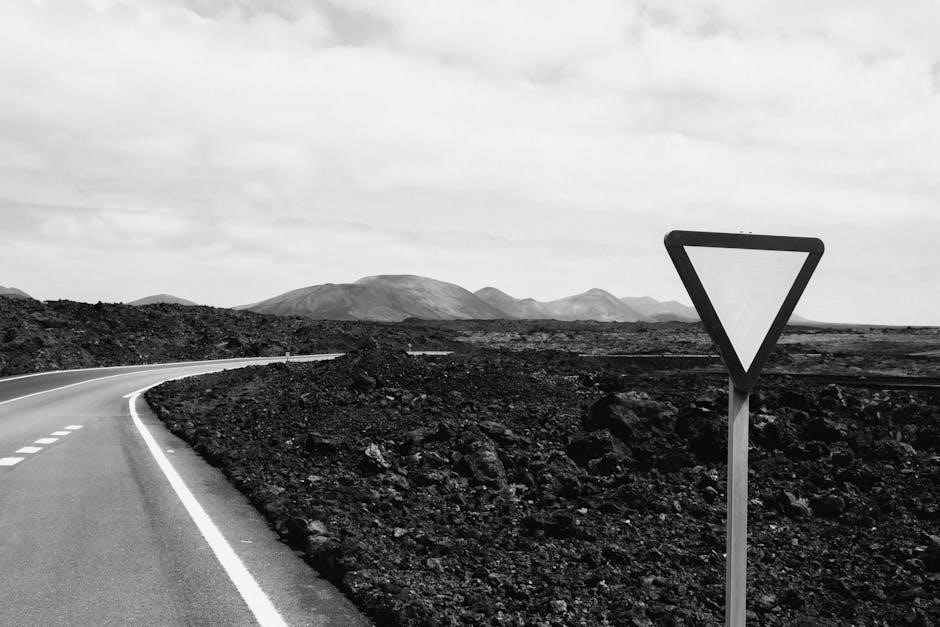
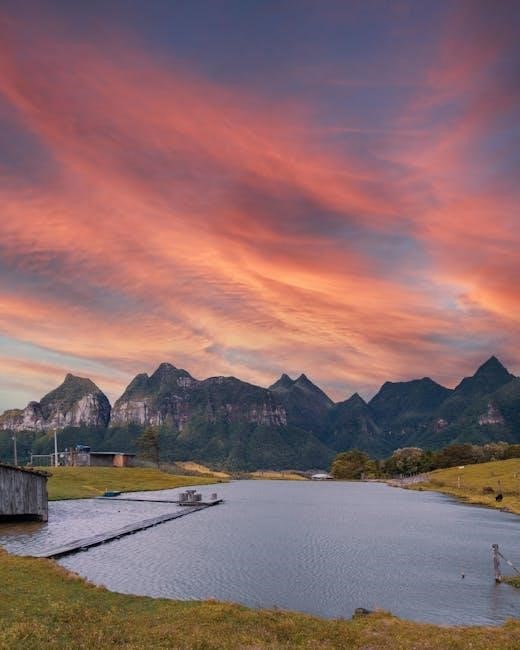
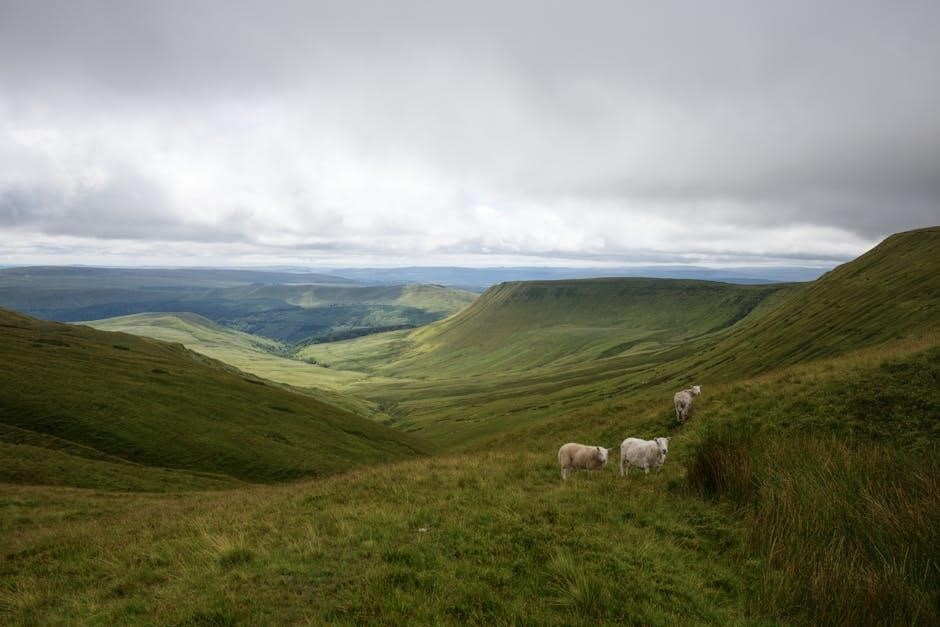
Landscape and nature coloring pages, readily available as “Dibujos para Imprimir y Colorear PDF”, offer a calming and aesthetically pleasing coloring experience. These designs frequently depict serene scenes like forests, mountains, beaches, and gardens, inviting creativity and relaxation.
Websites like Magicoloriage specialize in these themes, providing a diverse collection of printable PDF files. Coloring these scenes encourages an appreciation for the natural world and allows for experimentation with various color palettes to capture different moods and atmospheres.
They are perfect for mindful coloring and artistic expression.
Holiday and Seasonal Coloring Pages
Holiday and seasonal coloring pages, easily found as “Dibujos para Imprimir y Colorear PDF”, bring festive cheer to coloring activities throughout the year. These designs celebrate occasions like Christmas, Halloween, Easter, and Thanksgiving, offering themed illustrations for joyful expression.
Numerous websites provide free downloadable PDF files featuring seasonal imagery – pumpkins for autumn, snowflakes for winter, and flowers for spring. Coloring these pages is a delightful way to embrace the spirit of each holiday and create personalized decorations.
They are perfect for family fun and seasonal crafts!
Types of Coloring Pages Available
“Dibujos para Imprimir y Colorear PDF” encompass diverse options, including coloring by number, intricate mandalas, and simple designs tailored for toddlers’ developing skills.
These free resources cater to all ages and preferences, offering varied levels of complexity and artistic expression.
Coloring Pages by Number (Dibujos para Colorear por Número)
Coloring Pages by Number (Dibujos para Colorear por Número) represent a popular variation within the realm of printable coloring pages. These PDF resources feature images divided into sections, each assigned a specific number corresponding to a color.
This method simplifies the coloring process, making it accessible for younger children or those seeking a more guided artistic experience; It’s a fantastic way to introduce color recognition and number association in a fun and engaging manner.
Numerous websites offer a wide array of free coloring by number pages, ranging from simple designs for beginners to more complex illustrations for older children and adults. They provide a structured yet creative outlet, fostering patience and attention to detail.
Mandalas for Coloring
Mandalas for Coloring are a captivating category within printable coloring pages, readily available in PDF format. Originating from spiritual traditions, mandalas are geometric designs symbolizing the universe, often featuring intricate patterns and radial symmetry.
Coloring mandalas is a meditative and relaxing activity, promoting mindfulness and reducing stress. The repetitive nature of coloring the detailed patterns can be incredibly therapeutic for both adults and children.
A vast collection of free mandala coloring pages can be found online, varying in complexity from simple designs for beginners to elaborate patterns for experienced colorists. They offer a unique and beautiful artistic outlet.
Simple Coloring Pages for Toddlers
Simple Coloring Pages for Toddlers, often found as PDF downloads, are designed with large, clear outlines and uncomplicated shapes, perfect for little hands and developing fine motor skills.
These pages typically feature familiar objects like animals, fruits, and basic shapes, encouraging early learning and color recognition. The focus is on fun and exploration, rather than intricate detail.
Numerous websites offer free printable options specifically tailored for toddlers, ensuring age-appropriate designs. Coloring these pages helps build confidence and creativity in young children, fostering a love for art.

Software and Tools for Coloring Pages
Software like Canva provides pre-designed PDF coloring pages, while PDF editors allow customization of downloaded dibujos para imprimir y colorear, enhancing creativity.
Canva and its Coloring Page Resources
Canva emerges as a powerful and user-friendly platform offering a vast library of dibujos para imprimir y colorear. Its intuitive interface allows users to easily search, select, and customize coloring pages to suit their preferences.
The platform boasts a diverse range of themes, including animals, mandalas, landscapes, and cartoon characters, all readily available in PDF format. Users can modify colors, add text, and even create unique designs from scratch.
Canva’s resources are particularly valuable for educators and parents seeking engaging activities for children. The availability of free templates and elements makes it an accessible option for all, fostering creativity and artistic expression.
Furthermore, Canva simplifies the process of downloading and printing these coloring pages, ensuring high-quality results for a delightful coloring experience.
PDF Editors for Customization
While many dibujos para imprimir y colorear PDF files are ready to use, PDF editors offer opportunities for personalization. These tools allow users to modify existing coloring pages, adding unique elements or adjusting designs to individual preferences.
With a PDF editor, you can insert text, shapes, or even images into the coloring page before printing. This is particularly useful for creating personalized gifts or educational materials. Some editors also allow for color adjustments and the addition of digital signatures.
Popular options range from free online editors to more robust, paid software, catering to varying levels of editing needs. Utilizing these tools unlocks a new level of creativity with free printable coloring pages.

Printing Considerations for “Dibujos para Imprimir y Colorear PDF”
Optimal printing of dibujos para imprimir y colorear PDF requires quality paper and adjusted printer settings for vibrant, clear images and enjoyable coloring.
Paper Quality and Printer Settings
Selecting the right paper significantly impacts the coloring experience. For basic coloring, standard printer paper is sufficient, but heavier weight paper—like cardstock—prevents bleed-through from markers or watercolors.
Printer settings are equally crucial. Choosing a ‘photo’ or ‘high-quality’ print setting enhances image clarity and color vibrancy. Experiment with different paper types within your printer settings for optimal results.
Consider a ‘borderless’ printing option to maximize the printable area. Adjusting the print scale can also be helpful, ensuring the image fits the paper correctly. Always perform a test print before committing to a large batch to verify color accuracy and image size.
Optimizing PDF Files for Printing
PDF file size can affect print quality and speed. Large files may take longer to print and consume more ink. Compressing the PDF—using online tools or Adobe Acrobat—can reduce its size without significant quality loss.
Ensure the PDF is print-ready by checking for proper color settings (CMYK is ideal for printing). Flattening layers within the PDF can also improve print consistency.
Before printing, preview the document to confirm that all elements are visible and correctly positioned. If the image appears pixelated, consider increasing the resolution within the PDF editor before printing.

The Educational Value of Coloring
Coloring pages enhance fine motor skills, creativity, and color recognition in children. “Dibujos para Imprimir y Colorear PDF” provides accessible learning through artistic expression.
These printable resources stimulate imagination and cognitive development, offering a fun and educational activity for all ages.
Developing Fine Motor Skills
“Dibujos para Imprimir y Colorear PDF” significantly contribute to the development of fine motor skills, particularly in young children. The act of holding a crayon or colored pencil and staying within the lines requires precise hand-eye coordination and control.
These coloring activities strengthen the small muscles in the hands and fingers, preparing them for more complex tasks like writing and drawing. Repeated practice with these printable pages improves dexterity and control, fostering a foundation for future academic and artistic endeavors.
The focused concentration needed for coloring also aids in developing patience and attention to detail, further enhancing these crucial motor skills.
Enhancing Creativity and Imagination
“Dibujos para Imprimir y Colorear PDF” serve as powerful catalysts for enhancing creativity and imagination. While the outlines provide a starting point, children are free to explore their artistic vision through color choices and unique interpretations.
This freedom encourages self-expression and allows them to create worlds and stories within the confines of the page. Coloring isn’t simply about filling spaces; it’s about bringing images to life with personal flair and imagination.
Even adults can benefit, using coloring as a mindful activity to unlock creative potential and reduce stress, fostering innovative thinking.
Color Recognition and Learning
“Dibujos para Imprimir y Colorear PDF” are invaluable tools for early childhood education, particularly in color recognition and learning. As children select colors to fill various shapes and images, they reinforce their understanding of different hues and shades.
This process aids in vocabulary development as they learn to name and identify colors. Furthermore, coloring pages often depict familiar objects and animals, connecting colors to real-world concepts.
The act of coloring also subtly introduces basic concepts like categorization and pattern recognition, laying a foundation for future learning.
Trends in Coloring Pages
“Dibujos para Imprimir y Colorear PDF” now feature complex designs for adults, alongside interactive digital options, blending traditional art with modern technology for enhanced engagement.
Adult Coloring Books and Complex Designs
Adult coloring books, often available as “Dibujos para Imprimir y Colorear PDF” downloads, have surged in popularity as a stress-relieving activity. These aren’t the simple designs of childhood; they boast intricate patterns, mandalas, and detailed illustrations.
The appeal lies in the meditative focus required, allowing individuals to disconnect from daily stressors. PDF format makes accessing these complex designs convenient, offering a wide variety of themes – from floral arrangements and geometric shapes to fantastical scenes and architectural wonders.
This trend demonstrates a growing recognition of coloring’s therapeutic benefits, extending beyond a children’s pastime to a sophisticated hobby for adults seeking relaxation and creative expression.
Interactive Coloring Pages
Interactive coloring pages, increasingly found as “Dibujos para Imprimir y Colorear PDF” options, represent a modern evolution of traditional coloring. These go beyond static images, incorporating elements like hidden objects, puzzles, or even augmented reality features.
Some PDFs link to online resources, offering digital coloring experiences or tutorials. Others encourage users to add their own creative elements, transforming coloring into a more engaging and personalized activity.
This innovative approach caters to a desire for dynamic and stimulating content, blending the tactile joy of coloring with the interactive possibilities of digital technology, appealing to both children and adults.

Downloading and Saving Coloring Pages
Downloading “Dibujos para Imprimir y Colorear PDF” requires caution; prioritize reputable websites and scan files for safety. Organize saved PDFs into folders for easy access!
Safe Downloading Practices
When downloading “Dibujos para Imprimir y Colorear PDF” files, prioritizing online safety is crucial. Always opt for well-known and trusted websites to minimize the risk of encountering malware or viruses. Before downloading, briefly research the site’s reputation and read user reviews if available.
It’s also wise to utilize a reputable antivirus program and ensure it’s up-to-date before initiating any download. After downloading, scan the PDF file with your antivirus software as an extra precaution. Avoid clicking on suspicious links or advertisements on websites offering free coloring pages.
Be mindful of file extensions; legitimate coloring pages will be in PDF format. Finally, exercise caution when prompted to install additional software during the download process, as this could be bundled with unwanted programs.
Organizing Your Coloring Page Collection
Managing a growing collection of “Dibujos para Imprimir y Colorear PDF” files requires a simple organizational system. Create dedicated folders on your computer, categorized by theme – animals, cartoons, holidays, or complexity level. Consistent naming conventions, like “Animal_Lion_PDF,” will aid quick retrieval.
Consider using cloud storage services like Google Drive or Dropbox for accessibility across devices and as a backup. Regularly delete duplicates to conserve storage space. For physical copies, utilize binders with sheet protectors or dedicated coloring page portfolios.
Tagging PDF files with keywords can also streamline searching. A well-organized collection enhances the enjoyment and usability of your printable coloring pages.