Tyvek Installation Guide: A Comprehensive Overview (Updated 04/09/2026)
This guide details Tyvek WRB installation, covering everything from sheathing prep to flashing, seams, and climate-specific guidelines for optimal building protection.
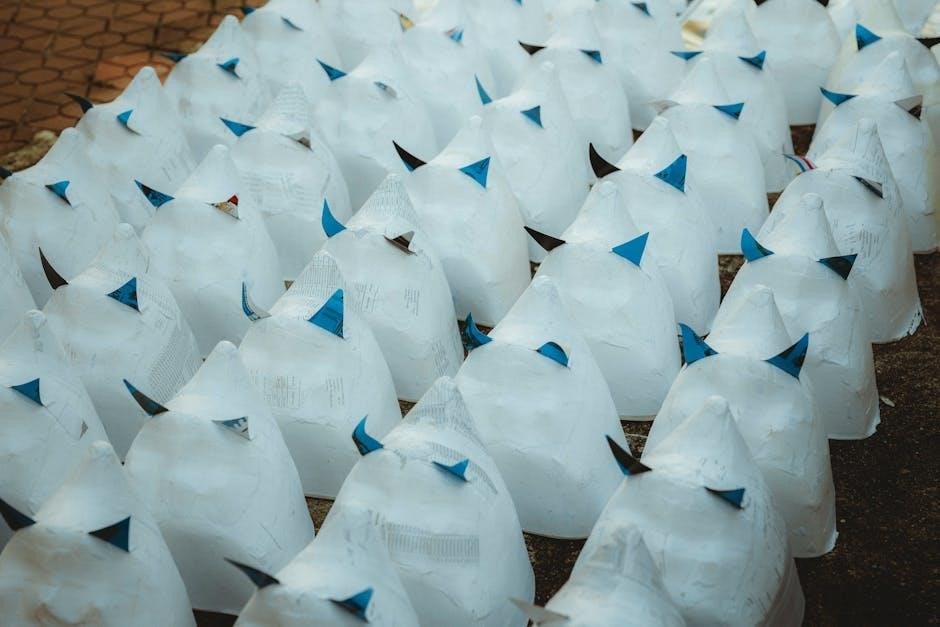
Tyvek water-resistive barriers represent a crucial element in modern building envelope design, offering superior protection against water intrusion and air infiltration. These high-performance materials, manufactured by DuPont, are engineered to shield structures while allowing water vapor to escape, preventing moisture buildup within wall assemblies. Proper installation is paramount to realizing these benefits, and this guide provides comprehensive instructions for both residential and commercial applications.
Tyvek HomeWrap, along with other Tyvek products like ThermaWrap and Flex Wrap, are designed for new construction and renovations. They contribute significantly to energy efficiency and indoor air quality, creating a more comfortable and durable building environment. Understanding the nuances of Tyvek installation, including seam sealing and flashing integration, is key to a successful and long-lasting result.
Understanding Tyvek HomeWrap Benefits
Tyvek HomeWrap offers a multitude of advantages beyond simple water resistance, significantly enhancing building performance. Its breathable membrane allows water vapor to escape, preventing rot, mold, and structural damage caused by trapped moisture. This breathability is crucial for maintaining a healthy indoor environment and optimizing energy efficiency by allowing wall cavities to dry.
Furthermore, Tyvek acts as an excellent air barrier, reducing drafts and energy loss. This contributes to lower heating and cooling costs and increased comfort for occupants. The material’s durability ensures long-term protection against the elements, resisting tears and punctures during installation and throughout the building’s lifespan. Choosing Tyvek is an investment in a resilient and sustainable structure.
Tools and Materials Required for Tyvek Installation
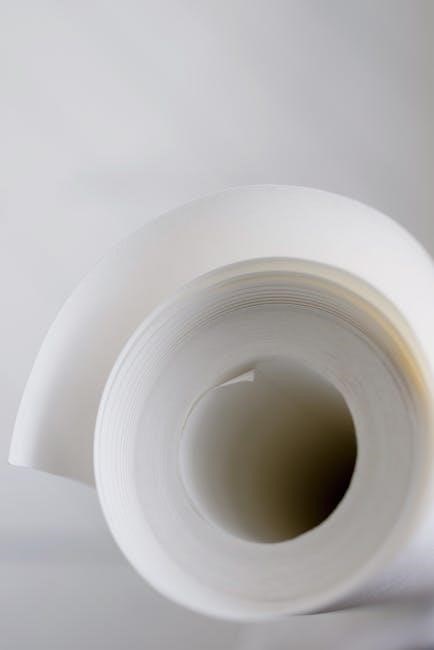
Successful Tyvek HomeWrap installation demands specific tools and materials for a secure and effective barrier. Essential tools include a utility knife with sharp blades for precise cutting, a measuring tape for accurate material sizing, and a staple gun specifically designed for building wrap – a heavy-duty staple gun is recommended. A chalk line ensures straight, consistent seams.
Beyond the tools, you’ll need Tyvek HomeWrap itself, along with Tyvek Flex Wrap for windows and doors, and appropriate seam tape. DuPont Flashing Systems products are highly recommended for optimal integration. Don’t forget staples, and potentially, a caulk gun for sealing penetrations. Safety glasses and gloves are crucial for personal protection during the installation process.
Preparing the Sheathing for Tyvek Application
Proper sheathing preparation is paramount for successful Tyvek installation, ensuring optimal adhesion and performance. Begin by ensuring the sheathing is structurally sound, dry, and free of protruding nails or staples. Any sharp edges should be addressed to prevent tearing of the Tyvek. A smooth surface is ideal, but minor imperfections are generally acceptable.
Remove any debris, dirt, or loose materials from the sheathing surface. While Tyvek can be applied to most common sheathing types, addressing any issues beforehand maximizes its effectiveness. Ensure all building penetrations are temporarily sealed to prevent air and moisture infiltration during installation. This preparatory step sets the stage for a weather-tight building envelope.
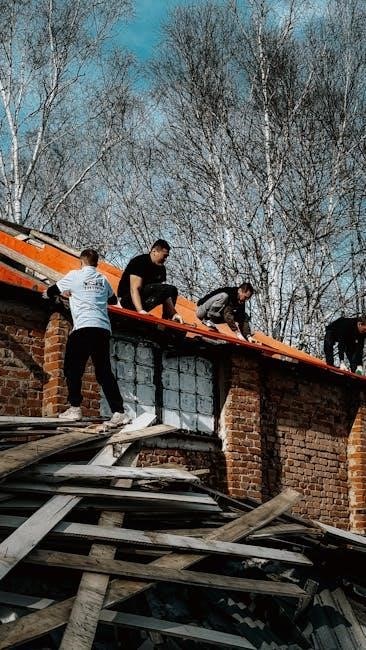
Tyvek Installation on Walls: Step-by-Step
Begin at a corner and unroll the Tyvek HomeWrap vertically, aligning it with the bottom edge of the structure. Overlap subsequent rolls by a minimum of 6 inches, and ideally 12 inches, ensuring a shingle-like effect to direct water downwards. Secure the Tyvek temporarily with staples every 6-12 inches, maintaining tension for a smooth, wrinkle-free application.
Continue applying the Tyvek across the wall surface, overlapping seams consistently. Pay close attention to corners and around openings, preparing them for flashing integration. Once the wall is fully covered, proceed to sealing seams and penetrations with Tyvek tape, creating a continuous air and water-resistive barrier. Proper tension is key throughout the process.
Vertical Seaming Techniques for Tyvek
Achieving robust vertical seams is crucial for a weather-tight building envelope. Tyvek HomeWrap requires a minimum 6-inch overlap, but 12 inches is recommended for enhanced performance, especially in demanding climates. Ensure the upper layer overlaps the lower layer, mimicking shingles to effectively channel water away from the structure.
Secure the overlapped seam using Tyvek tape, applying it firmly along the entire length of the overlap. Proper adhesion is vital; clean the surface before applying the tape. Consistent, complete coverage with the tape creates a continuous barrier against air and water infiltration. Avoid stretching the tape excessively during application to prevent future failures.
Overlap Requirements (6-12 inches)
Maintaining proper overlap is fundamental to Tyvek’s performance as a water-resistive barrier. A minimum 6-inch overlap is mandated for all seams, both vertical and horizontal, ensuring sufficient material coverage to prevent water penetration. However, DuPont strongly recommends a 12-inch overlap, particularly in regions prone to high winds or heavy rainfall, for superior protection.
This increased overlap provides a greater margin of safety, compensating for potential installation inconsistencies or material compression. When overlapping, always ensure the upper layer of Tyvek HomeWrap completely covers the lower layer, directing water downwards and away from the building’s structure. Consistent adherence to these overlap guidelines is essential for warranty validity.
Installing Tyvek Around Windows and Doors
Proper installation around windows and doors is crucial for a watertight building envelope. It’s recommended to install windows and doors after applying Tyvek HomeWrap to the structure. Utilize Tyvek Flex Wrap to seamlessly integrate these openings with the water-resistive barrier. Extend the Flex Wrap 2-3 inches onto the surrounding wood sheathing, ensuring a secure adhesion and overlap.
This extension creates a continuous barrier, preventing water intrusion around the frames. Consider employing DuPont Flashing Systems for enhanced protection, particularly in vulnerable areas. Remember to carefully prepare openings, ensuring smooth surfaces for optimal Flex Wrap application. Accurate measurements and precise cuts are vital for a professional and effective seal.
Preparing Openings with Tyvek Flex Wrap
Tyvek Flex Wrap is essential for creating a reliable seal around window and door openings. Begin by ensuring the rough opening is free of obstructions and debris. Carefully apply the Flex Wrap, extending it 2-3 inches onto the surrounding sheathing – both sides and the top of the frame. This overlap is critical for maintaining the continuity of the water-resistive barrier.
Smooth out any wrinkles or bubbles in the Flex Wrap to ensure a tight, secure fit. Proper adhesion is paramount; use appropriate techniques to guarantee a strong bond with the sheathing. Consider utilizing DuPont Flashing Systems for a more comprehensive approach to weatherproofing. Precise application of Flex Wrap minimizes the risk of water penetration and maximizes the effectiveness of the Tyvek system.
Flashing Integration with Tyvek

Proper flashing integration is paramount for a watertight building envelope when using Tyvek. Flashing directs water away from vulnerable areas like windows and doors. Install windows and doors after applying the Tyvek HomeWrap, simplifying the sealing process. Utilize compatible DuPont Flashing Systems products for seamless integration, ensuring a continuous barrier against moisture intrusion.
Overlap the flashing with the Tyvek WRB, adhering to manufacturer’s specifications. Pay close attention to detail around all penetrations and transitions. Effective flashing prevents water from accumulating behind the siding, protecting the structural integrity of the building. Correct installation, combined with Tyvek, delivers superior weather resistance and long-term durability.
Extending Tyvek onto Bump-Out Frames (2-3 inches)
When encountering bump-out frames, proper Tyvek extension is crucial for maintaining a continuous water-resistive barrier. Extend the Tyvek HomeWrap 2-3 inches onto the wood sheathing surrounding the bump-out. This overlap ensures water cannot penetrate behind the frame and into the wall assembly.
Continue the Tyvek application along the top edge of the bump-out frame, creating a seamless transition. Consider utilizing wider DuPont Flashing Systems products for enhanced integration and a more robust seal. This technique minimizes the risk of moisture damage and contributes to a more durable and energy-efficient building envelope. Careful attention to detail during this step is essential for long-term performance.
Tyvek Installation for Open Stud Construction
Installing Tyvek on open stud construction requires a slightly modified approach to ensure complete weather protection. DuPont provides specific guidelines for this application, emphasizing the need for a continuous barrier even with increased framing exposure. It’s vital to consult the latest DuPont Installation Instructions for open stud applications.
Properly secure the Tyvek, ensuring it fully covers the studs and any sheathing present. Pay close attention to overlaps and seams, utilizing Tyvek tape to create a watertight seal. For optimal performance, DuPont Insulated Batten CT is recommended to provide additional thermal break and support for the Tyvek membrane. This method is particularly effective in low-wind and low-water exposure climates.
Tyvek ThermaWrap R5.0 Installation Considerations
Tyvek ThermaWrap R5.0 offers enhanced thermal performance alongside water resistance, but requires careful installation. Overlap is crucial; ensure a 1-2 inch overlap with DuPont Insulated Batten CT at the top, creating a continuous thermal break. This detail minimizes thermal bridging and maximizes energy efficiency.
When installing over standard lumber (typically 2 inches thick), maintain proper alignment and secure the ThermaWrap firmly. Pay attention to seams and penetrations, sealing them meticulously with Tyvek tape to prevent air and water infiltration. Refer to DuPont’s specific installation guidelines for detailed instructions and best practices. Proper installation guarantees the R5.0 thermal value is achieved and maintained.
Overlap with DuPont Insulated Batten CT (1-2 inches)
Integrating DuPont Insulated Batten CT with Tyvek ThermaWrap R5.0 demands precise overlap to maintain thermal performance and prevent moisture issues. A 1-2 inch overlap at the top of the batten is essential, ensuring the Tyvek extends over the batten’s surface. This creates a continuous plane of insulation and weather protection, minimizing thermal bridging.
Secure the Tyvek firmly over the batten, using appropriate fasteners and ensuring a tight seal. Properly sealed seams are vital, utilizing Tyvek tape to prevent air and water infiltration. Refer to DuPont’s detailed installation instructions for specific guidance on batten integration, maximizing the benefits of both products for a high-performance building envelope.
Tyvek WRB Installation Over Window/Door Rough Openings
Installing Tyvek Water-Resistive Barrier (WRB) directly over window and door rough openings streamlines the process and enhances weather protection. Begin by unrolling the Tyvek roll aligned at the structure’s bottom corner, continuing directly over these openings. This method eliminates the need for separate pieces and minimizes potential seam locations.
Ensure the WRB extends beyond the rough opening’s edges, providing ample material for flashing integration. Maintain consistent overlap throughout the installation, adhering to the recommended 6-12 inch guidelines for vertical seams. This creates a continuous barrier, preventing water intrusion and air leakage. Refer to DuPont’s guidelines for detailed instructions and best practices.
Sealing Seams and Penetrations
Achieving a truly weather-tight building envelope necessitates meticulous sealing of all Tyvek seams and penetrations. While Tyvek HomeWrap is water-resistive, proper sealing prevents potential water intrusion and maintains air barrier performance. Utilize Tyvek’s recommended tapes – specifically designed for adhesion to Tyvek – to ensure a durable and reliable seal.
Focus on all overlaps, including vertical seams (6-12 inches) and around windows, doors, and any protrusions. Carefully seal around penetrations like pipes, vents, and electrical boxes. Proper sealing isn’t merely about applying tape; it’s about ensuring complete coverage and adhesion. Refer to DuPont’s installation guidelines for detailed instructions and approved sealing methods.
Tyvek Installation Guidelines for Different Climates
Tyvek’s performance is optimized by adapting installation techniques to specific climate conditions. In low-wind and low-water exposure climates, standard overlap requirements (6-12 inches) generally suffice, but attention to detail remains crucial. However, in regions with high winds or heavy rainfall, increased attention to seam sealing and flashing integration is paramount.
Consider local building codes and weather patterns when determining the appropriate installation approach. DuPont provides specific recommendations for various climate zones, outlining best practices for maximizing Tyvek’s protective capabilities. Proper installation ensures the building envelope effectively manages moisture and air infiltration, regardless of the environmental challenges.
Low-Wind and Low-Water Exposure Climates
For structures in areas experiencing minimal wind-driven rain and low wind speeds, Tyvek installation can often follow standard guidelines. While meticulousness is always recommended, the need for extensive sealing and overlapping is somewhat reduced. Standard 6-12 inch vertical overlaps are typically sufficient to create a weather-resistant barrier.
However, proper flashing around windows and doors remains critical, even in these milder climates. Ensure all seams and penetrations are adequately sealed to prevent potential moisture intrusion. DuPont’s guidelines still emphasize the importance of a continuous WRB, even where exposure is lower, to maintain long-term building performance and durability.
Code Requirements and Warranty Information
Tyvek WRB installations must adhere to local building codes, which may dictate specific requirements for water-resistive barriers. Always consult with local authorities to ensure compliance before commencing any work. DuPont provides comprehensive documentation outlining code compliance information for various regions and applications.
Proper installation is crucial for maintaining Tyvek’s warranty. Failure to follow DuPont’s installation instructions, including correct overlapping and sealing techniques, may void the warranty. Detailed warranty information, including coverage duration and limitations, is available on the DuPont website and in product literature. Keep records of installation for warranty claims.
Tyvek Installation in Multi-Family and Commercial Buildings
Installing Tyvek in larger structures like multi-family dwellings and commercial buildings requires careful planning and adherence to best practices. DuPont offers specialized flashing systems designed for complex building geometries and increased weather exposure. Proper integration of these systems is vital for long-term performance.
Particular attention should be paid to areas below balconies and around protrusions, ensuring complete water exclusion. Detailed guidelines are available for Tyvek WRB installation below balconies, emphasizing proper overlapping and sealing. Consult DuPont’s resources for installation examples and user bulletins specific to commercial applications, ensuring a robust and code-compliant weather barrier.
DuPont Flashing Systems Integration
Effective water management relies heavily on seamlessly integrating DuPont Flashing Systems with Tyvek water-resistive barriers. These systems are engineered to direct water away from critical building components, preventing intrusion and potential damage. Utilizing wider flashing products offers enhanced integration around windows and doors, simplifying the sealing process and improving performance.
Proper detailing around openings is paramount; follow DuPont’s guidelines for precise flashing installation. Consider the specific climate and exposure conditions when selecting flashing components. Refer to the latest installation instructions to ensure compatibility and optimal system performance, creating a durable and weather-tight building envelope.
Tyvek WRB Installation Below Balconies
Installing Tyvek WRB effectively below balconies requires careful attention to detail to prevent water intrusion. Begin by adhering to the applicable DuPont Installation Instructions for WRB application. Start the lower course(s) of Tyvek WRB installation specifically below the balcony structure, ensuring proper overlap.
This underlapping technique directs water outward, away from the building’s interior. Pay close attention to sealing any penetrations or transitions where the WRB meets the balcony support structure. Proper lapping and sealing are crucial for maintaining a continuous water-resistive barrier, safeguarding the building from potential moisture damage and ensuring long-term durability.
Common Tyvek Installation Mistakes to Avoid
Several common errors can compromise Tyvek’s performance. Failing to properly lap seams – aiming for the recommended 6-12 inch overlap – is a frequent issue, creating pathways for water. Insufficient sealing around penetrations like windows, doors, and pipes also allows moisture ingress. Neglecting to extend Tyvek onto bump-out frames by the specified 2-3 inches weakens the barrier.
Incorrect flashing integration, or skipping flashing altogether, is a critical mistake. Improper tensioning during installation can lead to wrinkles and gaps. Always follow DuPont’s guidelines and prioritize a continuous, well-sealed membrane for optimal water and air resistance, maximizing the benefits of the Tyvek system.