internalized homophobia a guide to overcoming shame and self-hatred

Understanding Internalized Homophobia

Internalized homophobia stems from absorbing negative societal attitudes, leading to self-directed shame, guilt, and a struggle for self-acceptance within oneself.

What is Internalization?

Internalization, at its core, signifies the process of absorbing external beliefs and attitudes, making them an intrinsic part of one’s own worldview. This can occur with positive or negative influences; however, concerning internalized homophobia, it represents the adoption of societal stigma surrounding same-sex attraction.

Essentially, individuals internalize negative messages, believing queerness is inherently wrong, sinful, or inferior. This isn’t a conscious choice, but rather a subconscious assimilation of prevailing cultural norms. The prefix “inter-” highlights this ‘within’ aspect, signifying a turning inward of external prejudice. It’s about making external judgements a personal truth, impacting self-perception and emotional wellbeing profoundly.

The Core of Internalized Homophobia

The core of internalized homophobia lies in the deeply held belief that being LGBTQ+ is inherently bad or wrong. This manifests as self-hatred, shame, and guilt regarding one’s sexual orientation or gender identity. It’s a conflict between one’s authentic self and the negative messages absorbed from society, family, or religious institutions.

This internal conflict can lead to a diminished sense of self-worth, feelings of loneliness and isolation, and a struggle to accept oneself fully. Individuals may attempt to suppress their identity, fearing rejection or discrimination. Ultimately, it’s about internalizing external prejudice, turning it inward, and damaging one’s psychological and emotional wellbeing.

Origins and Contributing Factors

Internalized homophobia develops from societal stigma, family rejection, religious condemnation, and negative media portrayals, all contributing to harmful internalized beliefs.

Societal Stigma and its Impact

Societal stigma surrounding LGBTQ+ identities profoundly shapes the development of internalized homophobia. Historically, and even presently, pervasive negative attitudes and discriminatory practices create an environment where individuals internalize these biases against themselves. This manifests as believing queerness is inherently wrong, sinful, or inferior.

The constant exposure to prejudiced messaging – whether explicit or subtle – leads individuals to adopt these harmful beliefs as their own. This internalization isn’t a conscious choice, but rather a defense mechanism developed to cope with external rejection and discrimination. Consequently, individuals may experience shame, guilt, and self-hatred, impacting their self-worth and overall wellbeing. The impact extends to mental health, increasing vulnerability to depression and anxiety, and hindering authentic self-expression.

Family Rejection and its Long-Term Effects

Family rejection is a particularly damaging contributor to internalized homophobia, creating deep emotional wounds that can last a lifetime. When individuals are not accepted by their families – or actively condemned – for their sexual orientation, it sends a powerful message of unworthiness. This rejection often occurs during formative years, profoundly impacting self-esteem and identity development.

The absence of familial support can lead to feelings of isolation, loneliness, and a sense of being fundamentally flawed. Internalizing this rejection results in self-hatred and difficulty forming healthy relationships. Long-term effects include increased risk of depression, anxiety, and substance abuse as coping mechanisms. Healing from family rejection requires acknowledging the pain, seeking support, and building a chosen family that offers unconditional acceptance.

Religious Condemnation and Internal Conflict

Religious condemnation of homosexuality can create profound internal conflict for individuals raised in faith-based environments. When deeply held religious beliefs clash with one’s sexual orientation, it often results in intense shame, guilt, and self-loathing. This internal struggle stems from the belief that being LGBTQ+ is inherently sinful or morally wrong, leading to a fractured sense of self.

Individuals may attempt to suppress their true feelings, engage in self-denial, or seek harmful “conversion therapies” in an effort to reconcile their faith and identity. This internal battle can significantly contribute to internalized homophobia, fostering low self-esteem and increasing the risk of mental health challenges. Finding a path towards self-acceptance often involves re-evaluating religious interpretations or finding affirming faith communities.

Media Representation and Negative Stereotypes

Historically, media representation of LGBTQ+ individuals has been limited and often relied on harmful stereotypes. These portrayals frequently depict queer people as comedic relief, villains, or tragic figures, reinforcing negative societal perceptions. Constant exposure to such biased representations can lead individuals to internalize these stereotypes, believing them to be true reflections of themselves or their community.

This internalization fuels self-doubt, shame, and a sense of otherness. The lack of positive and diverse representation makes it difficult for LGBTQ+ individuals to see themselves reflected in mainstream culture, hindering self-acceptance. Challenging these stereotypes through diverse media and advocating for authentic representation are crucial steps in dismantling internalized homophobia and fostering a more inclusive society.

Manifestations of Internalized Homophobia

Visible signs include self-hatred, shame regarding orientation, suppressing one’s true identity, difficulty with relationships, and a heightened risk of mental health challenges.

Self-Hatred and Negative Self-Talk

Self-hatred is a core component, manifesting as relentless negative self-talk and a deeply ingrained belief in one’s own inferiority due to sexual orientation. This internal critic often echoes societal stigmas, reinforcing feelings of worthlessness and shame. Individuals may engage in self-deprecating behaviors or struggle with accepting compliments, constantly minimizing their value.

This internal conflict arises from internalizing external messages that equate queerness with something wrong or sinful. Consequently, individuals may direct anger and frustration inwards, leading to emotional distress and a diminished sense of self-worth. Recognizing and challenging these negative thought patterns is crucial for beginning the journey towards self-acceptance and healing.

Shame and Guilt Regarding Sexual Orientation

Shame and guilt are pervasive emotions linked to internalized homophobia, often stemming from religious condemnation or societal disapproval of same-sex attraction. Individuals may feel ashamed of their feelings, leading to secrecy and isolation. This isn’t guilt for wrongdoing, but a misplaced sense of responsibility for simply being who they are.

This internalized negativity can manifest as feelings of being “broken” or “defective,” fostering a deep sense of self-loathing. The belief that their orientation is inherently wrong can lead to constant self-monitoring and anxiety about exposure. Overcoming this requires dismantling harmful beliefs and embracing self-compassion, recognizing that sexual orientation is a natural variation of human experience.

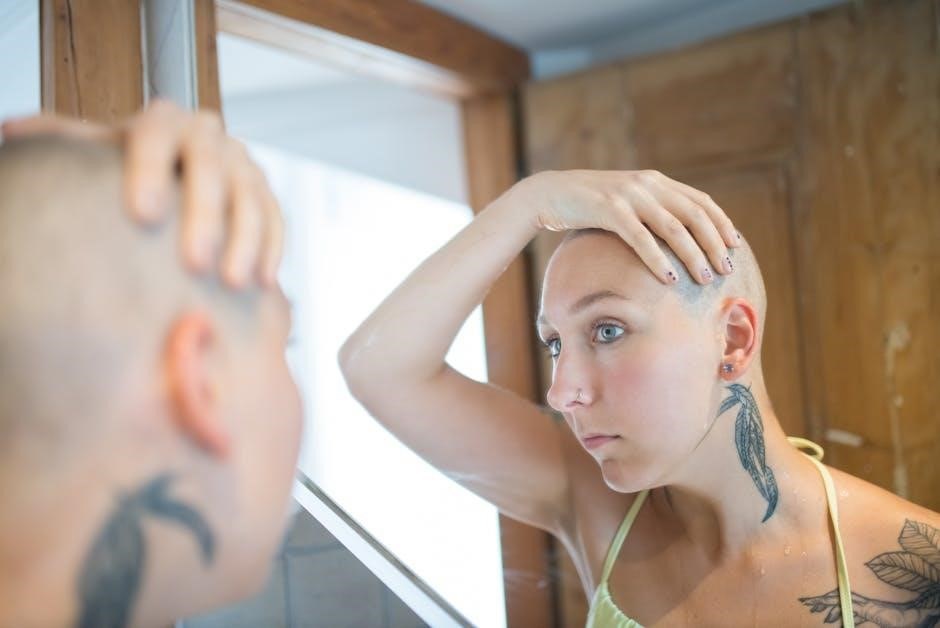
Suppression of Identity and Authenticity

Suppression of identity is a common consequence of internalized homophobia, driven by a fear of rejection or discrimination. Individuals may hide their sexual orientation from family, friends, and colleagues, creating a disconnect between their inner selves and outward presentation. This constant masking can be emotionally exhausting and detrimental to mental wellbeing.

Authenticity is sacrificed for perceived safety, leading to feelings of loneliness and inauthenticity. The inability to fully express oneself hinders the development of genuine connections and a strong sense of self. Reclaiming one’s identity involves a gradual process of self-acceptance and courageously living openly, fostering self-respect and genuine relationships.

Difficulty Forming Healthy Relationships

Internalized homophobia significantly impacts relationship dynamics, fostering distrust and hindering genuine connection. Individuals struggling with self-acceptance may project negative beliefs onto potential partners, creating cycles of insecurity and sabotage. Fear of vulnerability and rejection can lead to emotional distance and difficulty establishing intimacy.

Furthermore, shame surrounding one’s identity can prevent individuals from seeking fulfilling relationships, or lead them to settle for unhealthy dynamics. Building healthy relationships requires self-compassion, open communication, and a willingness to challenge negative self-perceptions. Prioritizing self-love is crucial for attracting and maintaining reciprocal, supportive partnerships.

Increased Risk of Mental Health Issues

Internalized homophobia is strongly linked to a heightened risk of mental health challenges, including depression, anxiety, and feelings of isolation. The constant internal conflict and self-criticism erode self-esteem and contribute to a negative self-image. This can manifest as persistent sadness, hopelessness, and difficulty experiencing joy.

Moreover, individuals may turn to maladaptive coping mechanisms, such as substance abuse, to numb the emotional pain. The stress of concealing one’s true identity and navigating a heteronormative world further exacerbates these vulnerabilities. Seeking professional support is vital for addressing these issues and fostering emotional wellbeing.

The Impact on Mental and Physical Wellbeing

Internalized homophobia profoundly affects both mental and physical health, contributing to depression, anxiety, low self-worth, and potentially harmful coping strategies.

Depression and Anxiety

Internalized homophobia frequently manifests as depression and anxiety, deeply impacting an individual’s emotional state and overall quality of life. The constant internal conflict arising from negative self-perception and societal stigma can lead to persistent feelings of sadness, hopelessness, and worthlessness.

Anxiety often accompanies these feelings, presenting as excessive worry, fear, and social withdrawal. Individuals may experience panic attacks or develop generalized anxiety disorder as a result of suppressing their true selves and fearing judgment or rejection. This creates a vicious cycle, where shame fuels anxiety, and anxiety reinforces negative self-beliefs.

These mental health challenges aren’t simply feelings; they are serious conditions requiring attention and support, often necessitating professional intervention to navigate and overcome.

Substance Abuse as a Coping Mechanism

Internalized homophobia can tragically lead individuals to seek solace in substance abuse as a maladaptive coping mechanism. Facing intense emotional pain – stemming from self-hatred, shame, and societal rejection – many turn to drugs or alcohol to temporarily numb their feelings and escape the internal turmoil.

This isn’t a choice driven by pleasure, but rather a desperate attempt to self-medicate and alleviate the psychological distress. Substance use provides a fleeting sense of relief, masking the underlying issues but ultimately exacerbating them. It creates a dangerous cycle of dependence, hindering genuine healing and self-acceptance.

Recognizing this pattern is crucial, as addressing the root cause – internalized homophobia – is essential for breaking free from substance abuse and fostering lasting wellbeing.

Low Self-Esteem and Self-Worth

Internalized homophobia profoundly erodes self-esteem and self-worth, fostering a deeply negative self-image. Constant self-criticism, fueled by societal stigma and internalised prejudice, leads individuals to believe they are inherently flawed or unworthy of love and acceptance.

This manifests as persistent feelings of inadequacy, shame, and guilt, impacting all aspects of life. Individuals may struggle with self-compassion, constantly comparing themselves to others and focusing on perceived shortcomings. The belief that their sexual orientation is “wrong” becomes deeply ingrained, diminishing their sense of value.

Rebuilding self-esteem requires challenging these negative beliefs and cultivating self-acceptance, recognizing inherent worth regardless of sexual orientation.

Strategies for Overcoming Internalized Homophobia

Overcoming internalized homophobia involves self-acceptance, seeking support, challenging negative beliefs, and building a strong network of affirming relationships for healing.

Self-Acceptance and Affirmation

Cultivating self-acceptance is paramount in dismantling internalized homophobia. This journey begins with recognizing that your sexual orientation is a natural variation of human experience, not something inherently wrong or shameful. Actively challenge the negative self-talk and beliefs you’ve internalized, replacing them with affirmations of your worth and validity.

Practice self-compassion; treat yourself with the same kindness and understanding you would offer a friend. Engage in activities that bring you joy and reinforce your sense of self. Affirmations aren’t simply positive statements, but a conscious effort to rewrite the internal narrative shaped by societal stigma.

Remember, self-acceptance isn’t a destination, but an ongoing process. It requires patience, self-awareness, and a commitment to honoring your authentic self, free from the constraints of internalized negativity.

Seeking Support from LGBTQ+ Communities

Connecting with LGBTQ+ communities offers a powerful antidote to the isolation often fueled by internalized homophobia. These spaces provide a sense of belonging, validation, and shared experience, fostering an environment where you can explore your identity without fear of judgment.

Finding peers who understand your struggles can be incredibly healing. Support groups, both online and in-person, offer a safe platform to share your feelings, learn coping strategies, and witness the journeys of others.

Actively participating in LGBTQ+ events and organizations can further strengthen your connection to the community and reinforce your self-worth. Remember, you are not alone, and there is strength in collective support and shared identity.

Therapy and Counseling

Therapy provides a safe and confidential space to explore the roots of internalized homophobia and develop healthy coping mechanisms. A qualified therapist, ideally one specializing in LGBTQ+ issues, can help you unpack negative beliefs and challenge self-destructive patterns of thought.

Cognitive Behavioral Therapy (CBT) is often effective in identifying and restructuring harmful thought processes. Therapy can also assist in processing past experiences of discrimination or rejection that contribute to internalized shame.

Furthermore, a therapist can guide you through self-acceptance and affirmation exercises, empowering you to embrace your identity fully. Seeking professional help is a sign of strength, not weakness, and a crucial step towards healing.

Challenging Negative Beliefs

Identifying and actively disputing internalized negative beliefs is paramount to overcoming shame. Begin by recognizing the critical inner voice and questioning its validity – where did these beliefs originate? Are they based on facts or societal prejudice?

Replace self-deprecating thoughts with affirmations of self-worth and acceptance. Practice reframing negative statements into positive ones. For example, “I am unworthy of love” becomes “I deserve love and happiness, just like anyone else.”

This process requires consistent effort and self-compassion. Remember that challenging deeply ingrained beliefs takes time, but it’s a vital step towards liberation and self-acceptance.

Building a Strong Support System

Cultivating a network of affirming and supportive relationships is crucial when confronting internalized homophobia. Surround yourself with individuals who celebrate your authenticity and offer unconditional positive regard. This could include friends, family members, or members of the LGBTQ+ community.

Sharing your experiences with trusted allies can provide validation and reduce feelings of isolation. Actively seek out connections with people who understand your struggles and can offer encouragement.

Remember, you don’t have to navigate this journey alone. A strong support system provides a safe space to process emotions, challenge negative beliefs, and foster self-acceptance.

Resources and Support Networks

Numerous organizations and online communities offer vital support, including LGBTQ+ centers, mental health professionals, and forums for shared experiences and guidance.

LGBTQ+ Centers and Organizations

Local LGBTQ+ centers serve as invaluable hubs, providing a safe and affirming space for individuals to explore their identities and connect with others. These centers frequently offer support groups specifically addressing internalized homophobia, facilitating peer-to-peer connection and shared healing experiences.

National organizations, such as The Trevor Project and GLAAD, offer crisis intervention, educational resources, and advocacy efforts that combat societal stigma. They provide online and phone support, empowering individuals to challenge negative self-perceptions. Many organizations also host workshops and training sessions focused on self-acceptance and building resilience.

Finding these resources is often as simple as an online search for “LGBTQ+ center near me” or visiting the websites of national advocacy groups. These networks are crucial for fostering a sense of belonging and providing access to professional support.

Online Forums and Communities

Online platforms offer a unique avenue for individuals grappling with internalized homophobia to connect anonymously and share experiences. Forums and communities dedicated to LGBTQ+ wellbeing provide a sense of validation and reduce feelings of isolation, fostering a supportive environment.

These spaces allow individuals to explore their emotions, ask questions, and receive encouragement from peers who understand their struggles. Caution is advised; prioritize platforms with strong moderation to ensure safety and prevent harmful interactions.

Resources like Reddit’s r/lgbt and various Facebook groups can be beneficial, but remember online advice isn’t a substitute for professional help. They are best used as supplemental support alongside therapy or counseling.

Mental Health Professionals Specializing in LGBTQ+ Issues

Seeking therapy with a professional experienced in LGBTQ+ issues is crucial for addressing internalized homophobia. These therapists understand the unique challenges faced by individuals navigating their sexual orientation and gender identity, offering a safe and non-judgmental space for exploration.

They can help identify the root causes of self-hatred and shame, challenge negative beliefs, and develop coping mechanisms. Look for therapists utilizing affirmative therapy, which validates LGBTQ+ experiences and promotes self-acceptance.

Resources like the American Psychological Association (APA) and Psychology Today offer directories to find qualified professionals in your area. Prioritize finding a therapist with whom you feel comfortable and trust.

trolling motor wiring guide

Trolling Motor Wiring Guide: A Comprehensive Overview (02/16/2026)

This comprehensive guide, dated February 16, 2026, details trolling motor wiring, covering installation, diagrams (like ULN2803A circuits), and maintenance for optimal performance.

Successfully wiring a trolling motor demands understanding its electrical system, encompassing voltage, components, and safety protocols. This guide navigates the process, from initial setup with tie bar kits (referenced on page 9) to interpreting wiring diagrams – including those for Minn Kota TRAXXIS 55 models. Proper connection, detailed in user manuals, ensures reliable operation and extends motor life through maintenance like oil changes.

Understanding Trolling Motor Voltage Systems

Trolling motors commonly operate on either 12-volt or 24-volt systems, impacting power and runtime. A 24-volt system, created by connecting batteries in series, delivers increased thrust and efficiency, crucial for larger boats or challenging conditions. Careful battery selection is paramount, ensuring compatibility with the motor’s requirements for sustained performance during extended trolling sessions.

12-Volt vs. 24-Volt Systems

The choice between 12V and 24V systems hinges on boat size and intended use. 12-volt systems are suitable for smaller boats and calmer waters, offering simplicity. However, 24-volt systems, providing double the voltage, deliver significantly more power and longer runtimes, ideal for larger vessels and demanding conditions, necessitating proper battery connections in series.

Battery Selection for Trolling Motors

Selecting the right batteries is crucial for trolling motor performance. Deep-cycle marine batteries are essential, designed for sustained discharge. Consider Amp-hour (Ah) ratings – higher Ah means longer runtimes. Battery type (lead-acid, AGM, lithium) impacts weight, cost, and maintenance. Match battery voltage to your motor (12V or 24V) and ensure sufficient capacity for your typical fishing trips.

Essential Wiring Components

Proper wiring demands quality components for safety and reliability. Wiring harnesses and connectors ensure secure connections, resisting corrosion. Fuse holders and circuit breakers protect against overloads, preventing damage to the motor and battery. Marine-grade wiring is vital, designed to withstand the harsh boat environment. Don’t skimp on these essentials for a dependable system.

Wiring Harnesses and Connectors

Marine-grade wiring harnesses simplify installation and offer superior protection. Look for tinned copper wire to resist corrosion. Heat-shrink connectors provide a watertight seal, crucial in a boat environment. Properly crimped connections are essential; avoid loose connections. Quality connectors minimize resistance, maximizing power transfer to the trolling motor for efficient operation.

Fuse Holders and Circuit Breakers

Essential safety components, fuse holders and circuit breakers protect your trolling motor and boat’s electrical system. Install them as close to the battery as possible. Choose amperage ratings appropriate for the motor’s draw. Circuit breakers offer resettable protection, while fuses require replacement after a fault. Regular inspection ensures continued functionality.

Step-by-Step Wiring Instructions

Proper wiring is crucial for safe and efficient operation. Begin by disconnecting the battery. For 24-volt systems, connect batteries in series – positive to negative. Then, securely connect the wiring harness to the battery terminals, ensuring correct polarity. Double-check all connections before reconnecting the battery and testing the motor.

Connecting Batteries in Series (24-Volt Systems)

To achieve 24-volts, connect batteries in series. Begin by positioning the batteries closely. Connect a cable from the positive (+) terminal of the first battery to the negative (-) terminal of the second battery. The remaining negative terminal and positive terminal become your system’s output for connecting to the motor.

Wiring the Trolling Motor to the Battery

After connecting batteries (or using a single 12V), attach the trolling motor’s wiring. Connect the positive (+) wire from the battery setup to the positive wire of the motor. Similarly, connect the negative (-) wires. Ensure secure connections, utilizing appropriate connectors and, crucially, a fuse holder close to the battery’s positive terminal.

Decoding Trolling Motor Wiring Diagrams

Understanding wiring schemas is vital for correct installation and troubleshooting. Diagrams utilize symbols representing components like batteries, motors, fuses, and connectors. Familiarize yourself with these symbols – often found on page 9 of the user manual – to accurately interpret the wiring layout. Proper interpretation ensures safe and efficient motor operation.

Reading and Interpreting Wiring Schemas

Effectively reading schemas requires recognizing component representations and tracing connections. Begin by identifying the power source (battery) and motor. Follow the lines indicating wire paths, noting any inline components like fuse holders or circuit breakers. Schemas, often multilingual (English, French, Italian, German), provide a visual roadmap for successful wiring.

Common Wiring Diagram Symbols

Understanding symbols is key to decoding wiring diagrams. Relays, crucial in ULN2803A circuits, are represented distinctly. Battery symbols indicate polarity (+/-). Wire junctions signify connection points. Fuses are shown as breaks in the line with a specific symbol. Recognizing these allows for accurate tracing of electrical paths and troubleshooting potential issues.

Specific Motor Wiring Examples

Detailed wiring procedures vary by motor model. The Minn Kota TRAXXIS 55 requires specific connector arrangements. Diagrams illustrate proper battery connections for 12V and 24V systems. Understanding these examples, alongside the general ULN2803A circuit schema, is vital for successful installation and ensuring correct functionality of your trolling motor.

Minn Kota TRAXXIS 55 Wiring

The Minn Kota TRAXXIS 55 installation demands careful attention to connector placement and secure fastening. Resources detail key installation steps for a proper boat motor mount. Correct wiring ensures optimal performance and longevity. Refer to the provided diagrams and documentation for specific TRAXXIS 55 wiring configurations and safety guidelines;

General Trolling Motor Wiring Diagram (ULN2803A Circuit)

Utilizing the ULN2803A integrated circuit, this diagram illustrates propeller motor control via relays. The schematic details pin connections for efficient operation. Understanding this circuit is crucial for custom installations or troubleshooting. Proper implementation ensures reliable power distribution and motor functionality, maximizing trolling performance and battery life.

Troubleshooting Common Wiring Issues

Addressing wiring problems is vital for consistent trolling motor operation. Common issues include a complete lack of power, often due to loose connections or blown fuses, and intermittent running, signaling potential wiring faults. Careful inspection of connections, fuses, and the wiring harness is key to diagnosing and resolving these frustrating problems quickly and safely.

No Power to the Motor

If your trolling motor receives no power, begin with the simplest checks. Verify battery charge and secure connections at both the battery terminals and the motor itself. Inspect the fuse holder for blown fuses – replacement is crucial. Examine the wiring harness for any visible damage or loose connections, ensuring a complete circuit.

Motor Runs Intermittently

An intermittently running trolling motor often indicates a loose connection or wiring issue. Carefully inspect all wiring connections, from the battery to the motor, wiggling wires to check for temporary power loss. Check for corroded terminals and replace if necessary. A failing circuit breaker or a partially blown fuse can also cause this symptom.

Safety Precautions During Wiring

Always disconnect the batteries before commencing any wiring work to prevent accidental shorts and electrical shock. Ensure proper wire insulation and protection against abrasion and environmental factors. Use appropriately sized wiring for the current draw of the motor. Securely mount components and protect connections from water intrusion for safe operation.

Disconnecting Batteries Before Wiring

Prior to initiating any wiring procedures, completely disconnect both the positive and negative terminals from all batteries. This crucial step eliminates the risk of short circuits, accidental motor activation, and potential electrical shocks during the installation process. Verify disconnection with a voltage tester before proceeding.

Proper Wire Insulation and Protection

Employ marine-grade wiring with robust insulation to withstand the harsh boating environment. Securely route wires away from sharp edges, moving parts, and potential heat sources. Utilize conduit or protective sleeving where necessary, and ensure all connections are watertight to prevent corrosion and maintain reliable performance over time.

Tie Bar Kit and Wiring Considerations

The tie bar kit isn’t sold separately and is crucial for connecting the motor; wiring diagrams are located on page 9. Proper integration requires careful attention to detail. Refer to page 9 for battery connection instructions and pages 10 for motor adjustments and tiller control specifics, ensuring safe and effective operation.

Understanding Tie Bar Kit Integration

The tie bar kit, essential for motor connection, is not available as a standalone purchase. Its integration is vital for steering functionality. Consult the wiring diagram on page 9 for correct installation. Proper connection ensures synchronized motor movement, enhancing control and maneuverability during operation on the water.

Wiring Diagram Location (p.9 Reference)

Crucially, the detailed wiring diagram is located on page 9 of the user manual. This schema, available in multiple languages (English, French, Italian, German, Spanish), illustrates the electrical connections for proper installation. Refer to it when connecting batteries and the motor, ensuring correct polarity and secure connections for safe operation.

Adjusting and Controlling the Motor

Once wired correctly, understanding motor adjustments is key. Page 10 of the manual details how to utilize adjusting features for precise control. This includes mastering speed and directional control via the tiller, allowing for nuanced maneuvering. Proper adjustment maximizes efficiency and responsiveness during operation, enhancing the overall boating experience.

Using Adjusting Features (p.10 Reference)

Referencing page 10, the user manual outlines crucial adjustment procedures. These features allow for fine-tuning of the trolling motor’s performance, optimizing it for various fishing conditions and boat types. Mastering these adjustments ensures precise boat positioning and control, contributing to a more successful and enjoyable angling experience on the water.

Controlling Speed and Direction with the Tiller (p.10 Reference)

Page 10 of the manual details tiller operation for precise control. The tiller manages both speed and steering, enabling nuanced adjustments for accurate positioning. Understanding its functionality is key to effective trolling, allowing anglers to maintain a consistent speed and direction while presenting lures or baits effectively in various conditions.

Maintenance and Long-Term Care

Regular maintenance extends your trolling motor’s lifespan and ensures reliable performance. For prolonged trolling sessions, the manual recommends more frequent motor oil changes – a crucial step often overlooked. Consistent care, including inspecting wiring for corrosion and ensuring secure connections, prevents issues and maximizes the motor’s longevity on the water.

Replacing Motor Oil for Extended Trolling

When engaging in extended trolling, frequent motor oil replacement is vital for optimal performance. The user manual emphasizes this preventative measure, as prolonged use increases wear and tear. Regularly changing the oil ensures smooth operation, reduces friction, and prevents internal damage, ultimately extending the trolling motor’s service life.

Drum Motor Installation Wiring

The Drum Motor Installation Manual provides crucial details for successful electrical connections. It outlines a step-by-step process, ensuring proper wiring for installation and ongoing maintenance. Following these instructions carefully guarantees safe and efficient operation of the drum motor, maximizing its performance and longevity on your vessel.

Electrical Connection Instructions

Detailed electrical connection instructions are paramount for drum motor installation. The manual emphasizes a secure wiring setup, referencing wiring diagrams and schematics (available in multiple languages). Proper connection ensures optimal power delivery and prevents potential electrical hazards, contributing to the motor’s reliable and long-lasting performance on the water.

User Manual Overview

This user manual serves as a complete guide for your 12-24V trolling motor wiring diagram. It’s designed to familiarize you with all features, the installation process, and crucial wiring details. The manual provides a pathway to maximizing your product’s potential, ensuring a smooth and successful boating experience with clear instructions.

Navigating the 12-24V Trolling Motor Wiring Diagram Guide

Effectively utilizing the 12-24V wiring diagram is key to a successful installation. This guide details essential components, connection points, and troubleshooting steps. Refer to page 9 for battery connections and wiring diagrams, and page 10 for motor adjustments and tiller control information, ensuring a safe and efficient setup.

Additional Resources and Support

For further assistance beyond this guide, consult the full 87-page document (3MB) detailing drum motor installation, electrical connections, and maintenance. User manuals, like the one for the 24-Volt system, provide comprehensive overviews. Explore Minn Kota TRAXXIS 55 resources for specific motor installation steps and secure mounting procedures.

elvis tv guide worth

Elvis TV Guides have become surprisingly collectible items, fueled by the King’s enduring popularity and nostalgic appeal.
These publications, particularly those from the late 1990s, often fetch between $1 to $4 per issue,
depending on condition and specific cover features, making them accessible treasures for fans and collectors alike.

The Enduring Appeal of Elvis Presley

Elvis Presley’s cultural impact remains remarkably strong decades after his passing, driving continued interest in all things related to the King of Rock and Roll. This sustained fascination directly translates into a robust market for Elvis memorabilia, including seemingly commonplace items like TV Guides. His music, style, and persona continue to resonate with new generations, ensuring a consistent demand from collectors.

The appeal isn’t solely based on his musical achievements; Elvis represents a pivotal moment in cultural history. He broke barriers and redefined popular music, becoming a symbol of rebellion and youthful energy. Consequently, any artifact associated with him – even a 1990s TV Guide – becomes a tangible connection to that era and the legend himself. This enduring legacy is a primary driver of the value placed on these publications.

Furthermore, the nostalgic element plays a significant role. For many, TV Guides represent a simpler time, and seeing Elvis featured on the cover evokes fond memories, increasing their desirability.

Why Elvis TV Guides are Sought After

Elvis TV Guides are particularly sought after due to a confluence of factors beyond the general collectibility of vintage magazines. The late 1990s saw a resurgence of interest in Elvis, and these TV Guide covers capitalized on that renewed enthusiasm. Specific issues, like the February 17-23, 1990 edition, are prized for featuring Elvis during a period when his image wasn’t as ubiquitously available as it is today.

The 2001 Collector’s Edition, boasting a special effects cover, adds another layer of appeal for collectors seeking unique and visually striking pieces. Moreover, some issues included rare promotional items, such as a collector’s CD with a previously unreleased Elvis recording, significantly boosting their value.

These TV Guides offer an affordable entry point into Elvis collecting, appealing to both casual fans and serious enthusiasts. They represent a tangible piece of pop culture history, bridging the gap between television and music.

Identifying Valuable Elvis TV Guides

Valuable Elvis TV Guides are pinpointed by specific dates – notably February 17-23, 1990, and the 2001 Collector’s Edition – and their pristine condition.

Key Dates and Issues to Look For

Determining valuable Elvis TV Guides centers around a few key publication dates. The issue from February 17-23, 1990, consistently appears as a sought-after edition among collectors, representing a peak in Elvis memorabilia interest. Beyond this, the 2001 Collector’s Edition, distinguished by its unique special effects cover, commands attention and often a higher price point.

However, it’s not solely about the date. Any TV Guide featuring Elvis, particularly those from the late 1990s, can hold value, though generally within the $1 to $4 range per issue. Keep an eye out for editions with unique features, such as those including a collector’s CD with a never-before-released Elvis recording, as these significantly increase desirability. Remember, rarity and condition are paramount when assessing worth.

The February 17-23, 1990 Issue: A Notable Example

The February 17-23, 1990 TV Guide stands out as a particularly noteworthy issue for Elvis collectors. This edition consistently generates interest and often achieves higher sale prices compared to other Elvis-featured publications. While a general estimate for late 1990s Elvis TV Guides falls within the $1 to $4 range, the 1990 issue frequently trends towards the higher end of that spectrum, depending heavily on its condition.

Its collectibility stems from a confluence of factors, including the timing – released relatively soon after Elvis’s passing – and the perceived cultural significance of the cover. Collectors actively seek this specific issue, driving up demand and, consequently, its value. Assessing its worth requires careful examination for wear and tear, as pristine copies command a premium.

The 2001 Collectors Edition with Special Effects Cover

The 2001 TV Guide Collectors Edition, boasting a unique special effects cover, represents a significant piece for Elvis Presley enthusiasts. This edition distinguishes itself from standard issues due to its innovative cover design, immediately elevating its desirability among collectors. While typical late 1990s Elvis TV Guides generally sell for $1 to $4, the 2001 edition often surpasses this valuation.

The special effects cover, a novelty for its time, contributes substantially to its collectibility. Its rarity and unique presentation make it a standout item. Collectors are willing to pay a premium for well-preserved copies, making condition paramount in determining its market value. This edition is a prime example of how innovative features can dramatically impact a TV Guide’s worth.

Factors Affecting Value

Condition, rarity, and extras significantly impact an Elvis TV Guide’s worth. Pristine copies command higher prices, as do issues with inserts or accompanying CDs, boosting collectibility.

Condition of the TV Guide

The physical state of the TV Guide is paramount when determining its value. A magazine graded as “mint” or “near mint” – exhibiting no creases, tears, or wear – will naturally command a significantly higher price than one in poor condition. Even minor imperfections, such as small corner folds or slight yellowing of the pages, can detract from the value.

Collectors meticulously assess each issue, looking for any signs of damage. Issues that have been stored improperly, exposed to sunlight, or handled carelessly will be worth considerably less. Uncirculated copies, still in their original packaging if possible, are highly prized. Conversely, copies with significant damage, like missing pages or extensive writing, will have minimal value, often only appealing to those seeking a reading copy rather than a collectible item. Therefore, careful preservation is key to maximizing the potential worth of your Elvis TV Guide.

Rarity of the Issue

The scarcity of a particular TV Guide issue dramatically influences its value. While many Elvis-covered issues circulated, certain editions were printed in smaller quantities or have become harder to find over time. The February 17-23, 1990 issue, featuring Elvis, is a frequently discussed example, but its value is dependent on condition.

The 2001 Collector’s Edition with the special effects cover also holds appeal due to its unique presentation. Issues with special inserts, like the CD featuring a never-before-released Elvis recording, are particularly rare and sought after by dedicated collectors. Limited print runs or regional variations can also contribute to an issue’s rarity, driving up its price in the collector’s market. Essentially, the fewer copies available, the more valuable the TV Guide becomes.

Presence of Special Inserts or CDs

The inclusion of special inserts or accompanying CDs significantly boosts the value of Elvis TV Guides. A prime example is the TV Guide featuring Elvis with a never-before-released recording on CD; these editions command a premium price among collectors. These bonus items weren’t standard, making issues containing them considerably rarer.

Beyond CDs, any promotional materials, coupons, or unique inserts related to Elvis further enhance collectibility. The presence of these extras confirms the issue’s authenticity and adds to its appeal. Collectors actively seek out complete packages, and even the condition of the insert itself impacts the overall worth. A TV Guide with all original components intact is far more valuable than one missing its special features.

Current Market Value (as of 02/16/2026)

As of today, late 1990s Elvis TV Guides typically sell for $1 to $4, while special editions, like the 2001 collector’s issue, are valued higher.

Typical Price Range for Late 1990s Issues

Generally, Elvis TV Guides published in the late 1990s represent the most accessible entry point for collectors, offering a relatively affordable way to own a piece of Elvis memorabilia. Current market analysis, as of February 16, 2026, indicates a consistent price range of $1 to $4 per issue. However, this valuation is heavily influenced by the magazine’s overall condition.

Issues in pristine, unread condition – free from creases, tears, or yellowing – naturally command prices at the higher end of this spectrum. Conversely, copies exhibiting significant wear and tear will likely sell for closer to the $1 mark. The specific Elvis cover featured can also subtly impact value, though the difference is usually minimal within this timeframe. It’s important to note that these are averages, and occasional outliers may appear on auction sites.

Factors like regional demand and seller discretion also play a role in final sale prices.

Value of Specific Elvis-Featured Issues

Certain Elvis TV Guide issues consistently outperform others in the collector’s market. The February 17-23, 1990 issue, featuring Elvis on the cover, is particularly sought after, though its price generally remains within the $2-$4 range depending on condition. However, the 2001 Collector’s Edition with its unique special effects cover commands a higher premium.

This edition, due to its novelty and limited production run, frequently sells for upwards of $20, and potentially more for exceptionally well-preserved copies. Furthermore, issues including a collector’s CD, such as the one featuring a never-before-released Elvis recording, can significantly increase in value, sometimes reaching $30 or higher.

The “TV Guide ⎯ Elvis Puzzler” book, filled with Elvis-themed puzzles, also holds value for dedicated fans, though its price is more variable.

The “TV Guide ⎯ Elvis Puzzler” Book Value

The “TV Guide ⎯ Elvis Puzzler” book, a compilation of Elvis-themed trivia, crosswords, and puzzles, presents a unique collectible within the broader Elvis TV Guide universe. Its value is somewhat less defined than the magazine issues themselves, fluctuating based on condition, edition, and demand from dedicated Elvis enthusiasts.

Currently, as of February 16, 2026, the book typically sells within a range of $10 to $25. Pristine, unopened copies, or those with minimal wear, naturally command higher prices. The appeal lies in its offering of hours of entertainment for fans, combining their love for Elvis with engaging puzzle challenges.

While not reaching the heights of the 2001 Collector’s Edition, the “Puzzler” book remains a desirable item, particularly for those seeking a different type of Elvis memorabilia.

Where to Find Information on Value

Determining Elvis TV Guide values requires checking eBay, Amazon, and dedicated collector forums for recent sales and expert opinions on pricing.

Online Auction Sites (eBay)

eBay serves as a dynamic marketplace for Elvis TV Guides, offering a real-time snapshot of current market values. Completed listings are invaluable; filtering searches to show “Sold Items” reveals what buyers are actually paying.

Currently (as of February 16, 2026), listings show the February 17-23, 1990 issue generally selling between $2.50 and $3.50, depending on condition.
The 2001 Collector’s Edition with the special effects cover commands higher prices, often ranging from $8 to $15, especially if accompanied by the included CD.

Pay close attention to seller feedback and detailed descriptions, including photos, to assess the TV Guide’s condition accurately.
Remember to factor in shipping costs when comparing prices.
Searching variations like “Elvis Presley TV Guide” and specific date ranges will yield the most relevant results.

Online Marketplaces (Amazon)

Amazon presents a more curated, though often less competitive, landscape for acquiring Elvis TV Guides. While eBay boasts a wider selection, Amazon can offer fixed-price options and potential Prime shipping benefits. Currently, listings for the 2001 Collector’s Edition with the special effects cover are available, typically priced around $20.00, plus shipping.

However, availability fluctuates significantly. Standard issues from the late 1990s are less frequently found directly on Amazon, often appearing through third-party sellers. It’s crucial to verify the seller’s rating and return policy before purchasing.

Comparing prices between Amazon and eBay is recommended. Amazon’s “Collectible” section may occasionally feature rare Elvis TV Guides, but diligent searching is required. Be mindful of potential price markups compared to auction-style platforms.

Collector Forums and Communities

Online collector forums and dedicated communities represent invaluable resources for assessing Elvis TV Guide values and uncovering hidden gems. These platforms host discussions where enthusiasts share recent sales data, condition assessments, and insights into rare variations. Participating in these forums allows you to gauge current market trends beyond listed prices on auction sites.

Experienced collectors often provide expert opinions on specific issues, helping determine if a TV Guide possesses unique characteristics that increase its worth. Forums can also reveal information about potential fakes or reproductions.

Dedicated Facebook groups and specialized websites focused on TV Guide collecting are excellent starting points. Networking with fellow collectors can lead to private sales and access to exclusive information unavailable elsewhere, enhancing your understanding of the Elvis TV Guide market.

Preserving Your Elvis TV Guide Collection

Proper storage in acid-free materials, careful handling, and protection from light and humidity are crucial to maintain—and potentially increase—the value of your Elvis TV Guides.

Proper Storage Techniques

Maintaining the condition of your Elvis TV Guides is paramount for preserving their value. Begin by utilizing acid-free backing boards and polypropylene sleeves; these materials prevent yellowing and deterioration. Store the magazines flat, never stacked haphazardly, to avoid creases and spine damage.

Ideal storage locations are cool, dry, and dark, away from direct sunlight and fluctuating temperatures. Basements and attics are generally unsuitable due to humidity and potential for pests. Consider archival boxes specifically designed for paper collectibles.

Avoid using rubber bands or paper clips, as they can cause permanent impressions. Gentle handling is key – always hold the magazine by the cover or edges to minimize fingerprints and wear. Proper storage is a long-term investment in your collection’s worth.

Handling and Display Considerations

When handling your Elvis TV Guides, remember that even gentle touch can contribute to wear over time. Always ensure your hands are clean and dry before picking up an issue. Avoid excessive bending or folding, as creases significantly diminish value. If displaying your collection, opt for UV-protective cases or frames to shield against fading.

Direct sunlight is a major enemy of vintage paper, so avoid prolonged exposure. Consider using museum-quality lighting if showcasing them in a room. For frequent viewing, digital reproductions can minimize handling of the originals.

Careful handling and thoughtful display are crucial for maintaining the aesthetic appeal and, consequently, the monetary worth of your Elvis TV Guide collection. Prioritize preservation alongside presentation.

Protecting Against Damage

Protecting your Elvis TV Guides from environmental factors is paramount to preserving their value. Humidity and temperature fluctuations can cause paper to become brittle or attract mold. Store them in a cool, dry place with consistent conditions. Acid-free backing boards and Mylar sleeves offer a crucial barrier against deterioration.

Avoid stacking issues directly on top of each other, as this can lead to pressure damage and cover scuffs. Instead, store them flat or upright in archival-quality boxes. Be mindful of pests like silverfish, which feed on paper; regular inspection of your storage area is recommended.

Proactive protection safeguards your investment and ensures these pieces of Elvis history remain enjoyable for years to come, maintaining their collectible worth.

cataclysm blood dk guide

Cataclysm Blood DK Guide ⏤ An Overview (Updated 02/16/2026)

This guide details the Blood Death Knight’s transition to a dedicated tanking specialization in Cataclysm, offering insights into maximizing survivability and threat․

Cataclysm dramatically reshaped the Death Knight class, most notably with the introduction of a dedicated tanking tree – Blood․ Previously, DKs attempted to hybridize tanking and damage, but this update fully commits to a robust, self-healing playstyle․ This guide explores the nuances of Blood DK tanking, focusing on maximizing rune efficiency and utilizing powerful cooldowns․

Expect a shift in priorities, emphasizing health, stamina, and critical strike for self-healing, alongside understanding new abilities and talent choices․

The Shift to a Dedicated Tanking Tree

Prior to Cataclysm, Death Knights struggled with a fragmented identity, attempting to balance damage and tanking across all three talent trees․ Ghostcrawler’s decision to create a dedicated Blood tree fundamentally altered this․ This specialization focuses entirely on survivability, self-healing, and threat generation, allowing for a streamlined and effective tanking experience․

This change allows Blood DKs to excel as dedicated tanks, moving away from the hybrid approach of previous expansions and embracing a unique playstyle․

Core Stats and Stat Priority

Optimizing stats is crucial for Blood DK tanking; health, defense, strength, stamina, and critical strike all contribute to survivability and effective threat․

Health – The Primary Stat

Health is undeniably the most important stat for a Blood Death Knight tank in Cataclysm․ It directly impacts your survivability, providing a larger buffer against incoming damage․ More health translates to more effective use of self-healing from abilities like Death Strike, allowing you to sustain through prolonged encounters․ Prioritize increasing your total health pool whenever possible, as it forms the foundation of your defensive capabilities․ Stacking health mitigates damage and extends your longevity in challenging raid content, making it paramount for consistent tanking performance․

Defense – Mitigation Cap and Importance

Defense skill is crucial, but reaching the mitigation cap is key for Blood Death Knights in Cataclysm․ This cap, around 415 defense, minimizes physical damage taken from bosses․ Beyond this point, diminishing returns apply, making other stats more valuable․ Prioritize defense until capped, then shift focus to stats like Strength and Stamina․ Maintaining a high defense value significantly reduces incoming damage, lessening the burden on self-healing and improving overall survivability during intense encounters․

Strength – A Secondary Stat

Strength serves as a valuable secondary stat for Blood Death Knights in Cataclysm, directly increasing attack power․ Higher attack power boosts the effectiveness of abilities like Heart Strike, enhancing threat generation․ While not as vital as Health or reaching the defense cap, Strength contributes to overall damage output and indirectly aids survivability through improved threat․ Prioritize it after core defensive stats are adequately addressed, optimizing both mitigation and control․

Stamina – Survivability and Health Pool

Stamina is paramount for Blood Death Knights, directly influencing the size of their health pool in Cataclysm․ A larger health pool provides a greater buffer against incoming damage, increasing survivability during prolonged encounters․ It synergizes exceptionally well with Death Strike’s self-healing mechanic, allowing for sustained tanking․ Prioritize Stamina alongside Health, ensuring a robust foundation for absorbing damage and maintaining control of the battlefield․

Critical Strike – Self-Healing Synergy

Critical Strike is a crucial secondary stat for Blood Death Knights in Cataclysm, dramatically enhancing self-healing capabilities․ Death Strike, the primary healing tool, benefits immensely from increased critical strike chance․ Each critical Death Strike provides a substantial heal, bolstering survivability․ While not a primary stat, optimizing Critical Strike alongside Stamina and Health creates a resilient and self-sufficient tanking profile․

Glyphs for Blood DK in Cataclysm

Glyphs significantly impact a Blood DK’s performance; strategically choosing Major and Minor Glyphs optimizes core abilities like Bone Shield and Death Strike․

Major Glyphs

Major Glyphs offer substantial enhancements to key Blood Death Knight abilities, fundamentally altering their effectiveness․ Glyph of Bone Shield extends its duration, crucial for consistent damage reduction․ Glyph of Dancing Rune Weapon boosts its threat generation, vital for tanking multiple enemies․

Glyph of Vampiric Blood amplifies the self-healing component, bolstering survivability during prolonged encounters․ Carefully selecting these Major Glyphs is paramount for maximizing a Blood DK’s tanking potential and adapting to diverse combat scenarios, ensuring optimal performance․

Glyph of Bone Shield

Glyph of Bone Shield significantly extends the duration of the Bone Shield effect, a cornerstone of Blood Death Knight survivability․ This extended uptime translates directly into more consistent damage reduction, allowing for greater resilience against incoming attacks․ Maintaining Bone Shield is crucial, and this glyph streamlines that process․

By increasing the shield’s longevity, the glyph reduces rune dependency and enhances overall mitigation, making it a top priority for any serious Blood DK tank in Cataclysm․

Glyph of Dancing Rune Weapon

The Glyph of Dancing Rune Weapon enhances the threat generation of this vital ability, ensuring consistent aggro control, particularly during multi-target encounters․ It’s a crucial glyph for maintaining control of multiple enemies, preventing them from switching targets and overwhelming the raid․

Improved threat is paramount for tanking success, and this glyph directly addresses that need, making Dancing Rune Weapon an even more reliable tool in a Blood DK’s arsenal․

Glyph of Vampiric Blood

The Glyph of Vampiric Blood significantly reduces the cooldown of this essential defensive ability, allowing for more frequent use of its substantial damage reduction․ This increased availability translates directly into heightened survivability during periods of intense incoming damage․

Reducing the cooldown is critical, as Vampiric Blood is a cornerstone of a Blood DK’s defensive strategy, enabling them to weather powerful attacks and maintain control․

Minor Glyphs

Minor glyphs offer quality-of-life improvements and slight enhancements to Blood DK abilities, without drastically altering core gameplay․ Glyph of Death Strike reduces its rune cost, improving rune management․ Glyph of Heart Strike increases threat generated, aiding in tanking․

Glyph of Rune Tap provides a small health return upon activation, boosting self-sustain․ These glyphs are generally prioritized after major glyphs are secured․

Glyph of Death Strike

Glyph of Death Strike is a valuable minor glyph for Blood Death Knights, directly impacting rune management during prolonged encounters․ This glyph reduces the rune cost of Death Strike by one, allowing for more frequent usage of this crucial self-healing and damage-dealing ability․

Improved rune efficiency translates to sustained tanking, especially during periods of high damage intake, making it a consistently useful choice․

Glyph of Heart Strike

Glyph of Heart Strike offers a minor, yet impactful, enhancement to threat generation for Blood Death Knights․ This glyph increases the initial threat generated by Heart Strike by 10%, aiding in quickly establishing and maintaining aggro on target enemies․

While not a massive change, consistent threat is vital, making this glyph a solid choice, particularly during progression or when tanking multiple mobs․

Glyph of Rune Tap

Glyph of Rune Tap provides a quality-of-life improvement for Blood Death Knights, reducing the cooldown of Rune Tap by 5 seconds․ This allows for more frequent rune regeneration, enhancing resource management and overall sustain during prolonged encounters․

Though seemingly small, the increased availability of Rune Tap contributes to smoother gameplay and consistent access to vital abilities․

Blood DK Abilities and Their Usage

Blood Death Knights utilize a unique toolkit centered around self-healing through damage dealt, employing abilities like Death Strike and Heart Strike effectively․

Core Tanking Abilities

Death Strike is paramount, functioning as the primary healing source by converting damage into substantial self-healing, crucial for sustained survival․ Heart Strike generates significant threat while delivering moderate damage, essential for maintaining aggro on enemies․ Bone Shield provides a critical layer of damage reduction, alongside efficient rune management, bolstering defensive capabilities․ Mastering these abilities is fundamental to successful Blood DK tanking, enabling resilience and control in challenging encounters․

Death Strike – The Primary Healing Tool

Death Strike is the cornerstone of Blood DK self-sustain, converting a portion of damage dealt into significant healing received․ Its effectiveness scales with damage output, incentivizing maximizing attack power and critical strike chance․ Proper timing is crucial; utilizing Death Strike proactively during incoming damage minimizes health loss․ Mastering this ability is vital for enduring prolonged encounters and mitigating burst damage, ensuring consistent survivability․

Heart Strike – Threat Generation and Damage

Heart Strike serves as a primary threat tool for Blood Death Knights, delivering moderate damage while applying a significant threat increase to the target․ It’s a rune-spending ability, crucial for maintaining Bone Shield uptime and managing rune regeneration․ Effective use involves weaving Heart Strike between other abilities to consistently build threat and contribute to overall damage output, ensuring tank control․

Bone Shield – Damage Reduction and Rune Management

Bone Shield is fundamental to Blood Death Knight survivability, providing a substantial damage reduction effect․ Applying Bone Shield consumes a rune, but crucially, it also empowers subsequent Death Strikes, enhancing self-healing․ Maintaining Bone Shield uptime is paramount, demanding efficient rune management and prioritization․ This ability forms the core of the Blood DK’s defensive strategy․

Defensive Cooldowns

Blood Death Knights possess powerful defensive cooldowns for mitigating significant damage․ Vampiric Blood offers a large damage reduction, while Anti-Magic Shell absorbs magical attacks․ Icebound Fortitude reduces physical damage taken, providing crucial protection during intense encounters․ Strategic use of these cooldowns is essential for surviving challenging raid mechanics and maintaining consistent tanking performance․

Vampiric Blood – Significant Damage Reduction

Vampiric Blood is a cornerstone defensive cooldown for Blood Death Knights, granting a substantial reduction to all incoming damage․ Activating this ability is crucial during periods of high damage, such as boss abilities or tank busters․ Proper timing maximizes its effectiveness, ensuring survivability․ It’s a key component of mitigating predictable and unpredictable damage spikes․

Anti-Magic Shell – Magic Damage Mitigation

Anti-Magic Shell provides crucial protection against magical damage, absorbing a significant amount of incoming spell damage․ Strategic use is vital, anticipating and mitigating large magical attacks․ Proper timing prevents overwhelming damage, enhancing survivability in encounters with heavy magical components․ Understanding encounter timings and spell casts is key to maximizing its protective benefits for the Blood DK․

Icebound Fortitude – Physical Damage Reduction

Icebound Fortitude is a powerful defensive cooldown, granting substantial physical damage reduction for a limited duration․ Utilize it proactively during periods of intense physical attack, such as boss slams or cleave phases․ Effective timing minimizes incoming damage, bolstering survivability against physical-heavy encounters․ Combining it with other defensive abilities creates a strong mitigation window for the Blood DK․

Utility and Rune-Based Abilities

Blood Death Knights leverage rune power for impactful utility․ Dancing Rune Weapon amplifies threat and damage output, crucial for maintaining control․ Rune Tap efficiently regenerates runes, ensuring consistent access to core abilities like Death Strike and Heart Strike․ Mastering rune management is paramount; optimizing these abilities enhances both survivability and overall effectiveness in various combat scenarios․

Dancing Rune Weapon – Threat and Damage Amplification

Dancing Rune Weapon (DRW) is a cornerstone ability for Blood DKs, summoning spectral runes that significantly boost threat generation․ It also amplifies overall damage dealt, aiding in faster encounter progression․ Proper timing of DRW is vital, aligning it with periods of high damage or threat needs․ Maximizing DRW uptime is key to optimizing a Blood DK’s performance․

Rune Tap – Rune Regeneration

Rune Tap is a crucial utility ability for Blood Death Knights, allowing for the conversion of Runic Power into Rune energy․ This is exceptionally valuable for maintaining resource availability, especially during periods of low Runic Power generation or when needing immediate access to rune-based abilities․ Effective Rune Tap usage prevents resource starvation, ensuring consistent tanking capabilities․

Talent Builds for Different Content

Explore specialized talent builds tailored for various content, including general purpose tanking, self-healing focused setups, and adaptable hybrid configurations for encounters․

5/0/16 Build – General Purpose Tanking

This build prioritizes a balanced approach to tanking, focusing on consistent threat generation, reliable self-healing, and effective mitigation․ The 5 points in the Blood tree enhance core tanking abilities like Death Strike and Bone Shield․

Investing heavily into the Blood tree (16 points) maximizes survivability through talents improving damage reduction and health sustain․ This setup excels in diverse raid encounters and five-man dungeons, offering adaptability without sacrificing core defensive capabilities․ It’s a solid foundation for learning the Blood DK playstyle․

0/5/16 Build – Focus on Self-Healing

This specialization emphasizes maximizing the Blood Death Knight’s inherent self-healing capabilities, leaning into talents within the Blood tree and a small investment in the Frost tree․ The five points in Frost primarily support rune regeneration, fueling more frequent Death Strikes․

Sixteen points in Blood amplify healing received and the effectiveness of self-healing mechanics․ This build thrives in scenarios with consistent damage intake, allowing the DK to sustain through prolonged encounters․ It’s ideal for players who prefer a reactive, self-sufficient tanking style․

Hybrid Builds – Adapting to Specific Encounters

Blood DKs benefit from flexible talent builds, adjusting to unique raid or dungeon challenges․ A common hybrid involves shifting points from the Frost tree to the Unholy tree for increased damage output and threat generation on multi-target encounters․

This allows for quicker enemy dispatch and improved control․ Conversely, bolstering the Frost tree further enhances rune regeneration for sustained self-healing․ Experimentation is key to finding the optimal balance for each specific fight, maximizing both survivability and performance․

Gearing and Best in Slot (BiS) Items

Optimizing gear is crucial for Blood DKs; prioritize item level, then stats like Health, Strength, and Stamina, focusing on raid and dungeon rewards․

Early Game Gearing (Heroic Dungeons)

Focus on acquiring gear from Heroic dungeons to establish a solid foundation․ Prioritize items with Health and Stamina, as survivability is paramount at this stage․ Look for Strength on gear to boost damage output, enhancing threat generation․ Don’t overlook the value of gems and enchants; even basic ones provide noticeable improvements․

Prioritize upgrading weapon frequently, as it significantly impacts damage and threat․ Consider utilizing the Valor Points system to purchase desirable items from the dungeon vendor․ Remember to consistently upgrade rings, necks, and trinkets as they offer substantial stat boosts․

Late Game Gearing (Raids)

Raids are the primary source for best-in-slot gear; Prioritize items offering a combination of Health, Strength, and Critical Strike․ Stamina remains crucial for survivability, but optimizing damage is also vital for threat․ Focus on obtaining gear with appropriate gem slots to maximize stat customization․

Seek out raid-specific trinkets that provide beneficial effects during encounters․ Regularly evaluate gear upgrades, considering both static and dynamic stat weights․ Don’t underestimate the power of set bonuses; they can significantly enhance performance․

Itemization Priorities – What to Look For

Prioritize gear with Health, Strength, and Critical Strike․ Health is paramount for survivability, while Strength boosts damage and threat generation․ Critical Strike synergizes with Death Strike for self-healing․ Stamina provides a larger health pool, enhancing resilience․

Look for items with socket bonuses that complement your stat priorities․ Versatility can be valuable, but generally falls lower in priority․ Consider the unique effects of each item and how they contribute to overall performance during raid encounters․

Rotations and Priority System

Maintain Bone Shield uptime, prioritize Death Strike for healing, and weave in Heart Strike for threat․ Rune management is crucial for sustained tanking;

Single-Target Rotation

The core single-target rotation revolves around maximizing Death Strike usage for self-healing and maintaining Bone Shield’s damage reduction․ Begin with Heart Strike to build initial threat, then prioritize Death Strike whenever available, ensuring runes are efficiently spent․

Follow up with Heart Strike when Death Strike is on cooldown․ Utilize Rune Tap proactively to regenerate runes, preventing downtime․ Continuously monitor Bone Shield’s duration and reapply it before it expires․ This cycle ensures consistent threat and survivability throughout the encounter, adapting to rune procs as they occur․

Multi-Target Rotation

When facing multiple targets, the Blood DK rotation shifts to prioritize area-of-effect (AoE) abilities alongside consistent single-target threat․ Utilize Heart Strike frequently on each target to build initial threat, then weave in Death Strikes as available, focusing on the highest-priority targets․

Dancing Rune Weapon becomes crucial for amplifying AoE damage and threat․ Maintain Bone Shield uptime and utilize Rune Tap to ensure continuous rune regeneration, maximizing sustained AoE capability and survivability during intense multi-target engagements․

Maintaining Bone Shield Uptime

Consistent Bone Shield uptime is paramount for Blood DK survivability, providing significant damage reduction․ Prioritize reapplication before it expires, utilizing Rune Tap to generate runes if necessary․ Efficient rune management is key; avoid rune starvation by proactively planning Bone Shield casts․

Mastering this aspect of the rotation allows for sustained tanking, minimizing incoming damage and maximizing self-healing through Death Strike, ultimately ensuring survival in challenging encounters․

Blood DK in Raids – Encounter Strategies

Adapting to raid encounters requires understanding boss mechanics and utilizing Blood DK’s toolkit effectively․ Positioning and cooldown management are crucial for success․

General Raid Tips

Maintaining high uptime on Bone Shield is paramount for mitigating incoming damage, ensuring consistent damage reduction throughout encounters․ Prioritize threat generation on the primary target, utilizing Heart Strike frequently alongside Death Strike for self-healing․

Effective cooldown usage, particularly Vampiric Blood and Anti-Magic Shell, is vital during periods of intense damage․ Communicate with your healers regarding cooldown timings to optimize survivability․

Be mindful of positioning to minimize avoidable damage and maximize the effectiveness of defensive abilities․ Always anticipate boss mechanics and prepare accordingly․

Specific Encounter Considerations (Example: Magmaw)

During the Magmaw encounter, prioritize positioning to avoid lava flows and molten explosions․ Utilize Vampiric Blood proactively before anticipated bursts of damage from his slam attack․ Maintain consistent threat on Magmaw, utilizing Heart Strike frequently to counter threat loss from adds․

Coordinate with the raid to manage add spawns effectively, ensuring they don’t overwhelm the tanking rotation․

Be prepared to use Icebound Fortitude to mitigate physical damage from Magmaw’s melee attacks․

Specific Encounter Considerations (Example: Ragnaros)

Facing Ragnaros demands careful management of Lava Wave timings; utilize Anti-Magic Shell to absorb initial magical damage․ Prioritize threat on Ragnaros while quickly addressing Sulfuron Hand adds to prevent raid-wide damage․ Employ Vampiric Blood during predictable damage phases like Centrifugal Wave․

Maintain Bone Shield uptime to mitigate consistent physical damage․

Coordinate with healers to manage the incoming damage and maximize self-healing from Death Strike․

Consumables and Professions

Optimize performance with potions, flasks, and beneficial food buffs․ Jewelcrafting and Enchanting provide stat boosts, enhancing survivability and threat generation capabilities․

Potions and Flasks

For raiding, utilize potions of Greater Healing and Powerful Thick Blood for immediate health recovery and damage reduction․ Flasks of Stoneblood are essential, providing a substantial increase to overall health․ Consider using potions of Speed during encounters requiring swift positioning or movement․

Potion of Tongues can be valuable for communication during complex raid scenarios․ Remember to manage potion cooldowns effectively, strategically using them during periods of intense damage or critical moments․ Proper consumable usage significantly enhances survivability․

Food Buffs

Prioritize food providing Stamina and Strength buffs for increased health and damage output․ Roasted Clefthoof is a reliable choice, offering a balanced stat increase․ Consider utilizing fish feasts during raid downtime to provide beneficial buffs to the entire group․

Always ensure your food buff is active before engaging in challenging content․ Regularly replenish food supplies to maintain consistent performance․ Small, consistent buffs are more effective than relying solely on potions during critical moments․

Useful Professions (Jewelcrafting, Enchanting)

Jewelcrafting allows for the creation of powerful gems to slot into gear, significantly boosting key stats like Strength, Stamina, and Critical Strike․ Enchanting provides opportunities to further enhance equipment with beneficial enchantments․

These professions offer substantial self-sufficiency and cost savings․ Investing in them provides a competitive edge, allowing for customization and optimization of your Blood Death Knight’s build․

everquest tailoring guide

EverQuest Tailoring Guide: A Comprehensive Overview (February 16, 2026)

Welcome, aspiring tailor! This comprehensive guide, updated today – February 16, 2026 – will navigate you through the intricacies of EverQuest tailoring․
From initial skill-ups to mastering advanced techniques, we’ll cover everything․
The forums suggest efficient leveling paths, and YouTube offers visual learning resources․

Embark on a journey to craft powerful gear and become a renowned artisan within Norrath, utilizing the latest information available to players․

Tailoring in EverQuest is a vibrant profession centered around the creation of clothing, armor, and various useful items․ It’s a skill that allows players to become self-sufficient in acquiring gear, and even generate income by crafting items for others․ Unlike some professions focused solely on combat enhancements, tailoring offers a diverse range of possibilities, from aesthetically pleasing outfits to powerful protective garments․

Initially, tailoring focuses on simpler cloth armor and basic garments․ However, as your skill increases, you unlock the ability to craft more complex and valuable items, including cultural armor sets and specialized gear․ The recent discussions on EverQuest forums (February 16, 2026) highlight the desire for efficient leveling strategies, indicating a strong player base actively engaged in mastering this profession․

This guide aims to provide a structured path for leveling tailoring from its inception to the maximum skill cap of 222․ We will explore the most effective methods for gathering resources, crafting recipes, and maximizing your tailoring experience․ Whether you’re a newcomer to EverQuest or a seasoned veteran, this guide will equip you with the knowledge to excel in the art of tailoring․ Remember to consult resources like the P99 wiki and YouTube tutorials for supplementary information․

Why Level Tailoring?

Investing time in tailoring offers a multitude of benefits within EverQuest; Primarily, it grants independence from relying on others for gear․ You can craft your own armor, reducing the need to endlessly farm dungeons or purchase expensive items from the marketplace․ This self-sufficiency is particularly valuable for players seeking a more immersive and controlled gameplay experience․

Beyond personal use, tailoring presents a lucrative economic opportunity․ Crafted items, especially those with desirable stats or unique appearances, are consistently in demand․ Players are always seeking upgrades, and a skilled tailor can capitalize on this need․ The EverQuest forums (February 16, 2026) demonstrate a clear player interest in optimizing tailoring for efficiency, suggesting a strong potential for profit․

Furthermore, tailoring unlocks access to unique cosmetic options and cultural armor sets, allowing for character customization and expression․ It’s a profession that rewards dedication with both practical advantages and aesthetic enhancements․ Mastering tailoring isn’t just about crafting; it’s about becoming a vital part of the EverQuest economy and shaping your character’s identity․

Tailoring Skill Caps and Progression

Currently, the maximum tailoring skill achievable in EverQuest is 222․ Progression isn’t linear; certain skill ranges require specific recipes and materials to advance efficiently․ As noted in forum discussions (February 16, 2026), leveling from 82 to 222 involves distinct phases, each with optimal crafting strategies․

The initial climb, 82-88, focuses on foundational recipes․ Moving to 88-108 requires more specialized materials, and so on, up to 158․ Beyond this point, the progression shifts towards non-cultural recipes, offering a broader range of crafting options․ It’s crucial to understand these breakpoints to avoid wasting resources on ineffective combines․

Skill gains are not guaranteed with every craft․ Success rates depend on the recipe’s difficulty and your current skill level․ Utilizing appropriate skill-ups, as outlined on P99 wiki (referenced in forum posts), is essential for minimizing failures and maximizing progression speed․ Careful planning and resource management are key to reaching the tailoring skill cap․

Required Resources for Tailoring

Tailoring in EverQuest demands a diverse array of resources, ranging from common cloths to rare silks and specialized components․ Early levels primarily utilize readily available materials like woven cloth, spider silk, and simple hides․ However, as your skill increases, the requirements become significantly more demanding․

Higher-level recipes often necessitate rarer materials such as dragon scales, griffon feathers, and various types of magical essences․ These components are typically obtained through hunting, questing, or trading with other players․ Furthermore, tailoring frequently requires combining materials with trims – dyes, embellishments, and binding agents – to create finished products․

Resource acquisition is a core aspect of successful tailoring․ Efficient harvesting, strategic trading, and a keen understanding of market prices are vital․ Maintaining a steady supply of essential materials will prevent bottlenecks in your crafting process․ Remember to consider the cost-effectiveness of obtaining resources versus purchasing pre-made items․

Gathering Materials: A Guide to Harvesting

Securing a consistent supply of materials is paramount for any aspiring EverQuest tailor․ While some resources can be purchased from vendors or the auction house, self-sufficiency through harvesting offers significant cost savings and control․ Several skills complement tailoring in this regard, notably foraging and, to a lesser extent, skinning․

Foraging allows you to gather plant-based fibers like spider silk, cotton, and various herbs used in dyes and embellishments․ Skinning provides hides and leathers, essential for crafting armor and certain clothing items․ However, tailoring itself doesn’t directly grant harvesting abilities; relying on complementary skills or trading with skilled harvesters is crucial․

Efficient harvesting involves understanding spawn locations, utilizing appropriate tools, and maximizing yield․ Knowledge of resource respawn timers is also invaluable․ Consider investing in skills that boost harvesting rates or provide access to rarer materials․ Remember that competition for resources can be fierce, especially in popular zones․

Early Level Tailoring (1-82)

The initial stages of tailoring, levels 1-82, focus on establishing a foundation and building skill through repetitive crafting․ Primarily, this involves creating basic cloth items like bandages, simple tunics, and trousers․ These early recipes require readily available materials, minimizing initial investment․ Focus on volume crafting – making numerous low-level items to quickly gain skill points․

Vendor-purchased materials are perfectly acceptable at this stage, as the cost is relatively low․ Don’t worry about maximizing profit; the goal is efficient skill progression․ Experiment with different cloth types to familiarize yourself with the crafting interface and material requirements․ The forums suggest this phase is about building momentum, not optimization․

Prioritize recipes that offer consistent skill-ups, even if the resulting items are of limited use․ Consider crafting items for personal use or selling excess materials on the auction house to recoup some costs․ This early grind sets the stage for more complex and rewarding crafting later on․

Leveling Tailoring 82-88

Reaching the 82-88 skill range marks a transition in EverQuest tailoring, demanding slightly more focused material acquisition․ While still relying on readily available resources, you’ll begin crafting items with more specific material requirements․ This is where efficient harvesting or strategic purchasing becomes crucial․ The forums indicate this level range benefits from consistent crafting of specific items․

Focus on recipes that provide a good balance between skill gain and material cost․ Experiment with combining different cloth types with basic trims to unlock new recipes and expand your crafting knowledge․ Consider crafting items that are in demand on the auction house, allowing you to offset material costs and potentially generate a small profit․

Don’t be afraid to explore different crafting paths and experiment with new recipes․ This phase is about refining your crafting skills and preparing for the more challenging recipes that lie ahead․ Maintaining a steady flow of materials is key to maximizing your leveling speed․

Leveling Tailoring 88-108

The 88-108 skill bracket in EverQuest tailoring introduces a noticeable increase in complexity and material requirements․ This phase requires a more dedicated approach to resource gathering or a willingness to invest in materials from the marketplace․ The forums suggest focusing on specific recipes to maximize skill gains during this period․

Expect to utilize more refined materials and potentially encounter recipes with higher failure rates․ Careful planning and a solid understanding of material combinations are essential․ Consider specializing in a particular type of tailoring, such as cloth armor or bags, to streamline your crafting process and improve efficiency․

Experiment with different trim combinations to unlock new recipes and enhance the quality of your crafted items․ Don’t hesitate to seek guidance from experienced tailors or consult online resources for optimal crafting strategies․ Consistent effort and a strategic approach will propel you through this challenging, yet rewarding, skill range․

Leveling Tailoring 108-115

Reaching the 108-115 skill range in EverQuest tailoring marks a transition towards more specialized and valuable crafting opportunities․ This is where you’ll begin to unlock recipes for higher-tier items, often requiring rarer and more expensive materials․ Efficiency becomes paramount, as the cost of failed crafts can quickly accumulate․

Focus on recipes that offer a good balance between skill gain and material cost․ Consider crafting items that are in high demand on the marketplace to offset your expenses and potentially generate a profit․ Networking with other players and understanding market trends will be invaluable during this phase․

Experimentation with different material combinations is encouraged, but always weigh the potential rewards against the risk of wasting valuable resources․ Utilize tailoring skill calculators and online databases to optimize your crafting strategies and minimize losses․ Consistent dedication and a keen eye for opportunity will pave the way for success․

Leveling Tailoring 115-124

The 115-124 skill bracket in EverQuest tailoring demands a more strategic approach to leveling․ You’re now firmly within the mid-range, capable of producing items with significant utility and value․ However, material costs continue to rise, and competition among tailors intensifies․

Prioritize recipes that offer a substantial skill increase per craft, even if they require slightly more expensive materials․ Focus on crafting items that are frequently used by adventurers, such as spell scrolls or stat-boosting garments․ Consider specializing in a particular niche to establish yourself as a go-to tailor for specific goods․

Regularly monitor the auction house and player trade channels to identify profitable crafting opportunities․ Don’t be afraid to experiment with different material combinations to discover hidden recipes or optimize existing ones․ Remember, patience and persistence are key to mastering this challenging but rewarding skill․

Leveling Tailoring 124-131

Reaching the 124-131 range in EverQuest tailoring signifies a transition towards more complex and rewarding crafting opportunities․ This is where you begin to unlock recipes for higher-tier items, demanding greater skill and resourcefulness; Efficiency becomes paramount, as material costs escalate and time investment increases․

Focus on recipes that provide a good balance between skill gain and material expense․ Consider crafting items with a high demand among players, such as those used in raids or challenging dungeons․ Explore the possibility of creating custom-made gear for fellow adventurers, offering personalized services for a premium price․

Don’t neglect the importance of networking with other players․ Building relationships with adventurers and guilds can provide a steady stream of commissions and valuable insights into market trends․ Remember to continuously refine your crafting techniques and stay abreast of new recipes and strategies․

Leveling Tailoring 131-135

The 131-135 skill bracket in EverQuest tailoring presents a crucial stepping stone towards mastery․ This range demands a more strategic approach to leveling, as efficient resource management and recipe selection become increasingly important․ You’ll be crafting items with greater complexity and higher potential value, but also facing increased competition․

Prioritize recipes that offer a substantial skill increase per craft, minimizing wasted materials and maximizing your progress․ Consider focusing on items that are frequently consumed or require regular replacement, ensuring a consistent demand for your creations․ Explore opportunities to specialize in a particular niche, such as crafting specific types of armor or accessories․

Actively monitor the auction house and player marketplaces to identify profitable crafting opportunities․ Adapt your production strategy based on market fluctuations and emerging trends․ Remember to maintain a strong network of contacts within the EverQuest community, fostering relationships that can lead to lucrative commissions and valuable insights․

Leveling Tailoring 135-142

Reaching the 135-142 skill range in EverQuest tailoring signifies a transition into more advanced crafting techniques and materials․ This phase requires a deeper understanding of recipe requirements and the fluctuating market demands․ Efficiency is key; focus on minimizing material costs while maximizing skill gains․

At this level, consider diversifying your crafting portfolio․ Experiment with recipes that utilize rarer materials, potentially unlocking access to higher-tier items with greater profit margins․ Don’t neglect the importance of scouting the auction house for undervalued components – a shrewd tailor can significantly reduce production expenses․

Networking with other players remains vital․ Joining a guild or establishing relationships with merchants can provide access to exclusive materials and lucrative crafting commissions․ Remember to consistently evaluate your crafting strategy, adapting to market changes and optimizing your production process for maximum efficiency and profitability․

Leveling Tailoring 142-151

The 142-151 skill bracket in EverQuest tailoring demands a refined approach to crafting, focusing on recipes that offer both skill gains and potential for profit․ This is a crucial stage for establishing yourself as a capable artisan, capable of producing sought-after items․

Prioritize recipes that utilize materials readily available on the market, minimizing downtime spent on resource gathering․ Consider investing in crafting assistants or utilizing guild resources to streamline the production process․ Experiment with different combinations of materials to discover hidden recipes or optimize existing ones․

Monitoring auction house trends is paramount․ Identify items with high demand and low supply, allowing you to capitalize on market opportunities․ Don’t be afraid to specialize in a particular niche, such as crafting specific types of armor or accessories․ Building a reputation for quality and reliability will attract a loyal customer base and ensure a steady stream of income․

Leveling Tailoring 151-155

Reaching the 151-155 range in EverQuest tailoring signifies a transition towards more complex and rewarding crafting opportunities․ This phase requires a deeper understanding of material properties and recipe interactions to maximize skill gains and profitability․

Focus on recipes that demand rarer materials, as these often yield the highest skill increases․ Consider investing in advanced harvesting tools to improve your resource gathering efficiency․ Collaboration with other players, particularly those specializing in complementary professions like foraging or mining, can prove invaluable․

Experiment with tailoring embellishments and alterations to create unique and customized items․ Mastering these techniques will not only enhance your crafting skills but also increase the value of your products․ Continuously monitor the auction house and adjust your crafting strategy based on market demands․ Remember, adaptability is key to success in the dynamic world of EverQuest tailoring․

Leveling Tailoring 155-158

The 155-158 skill bracket in EverQuest tailoring presents a brief but crucial stepping stone towards the higher tiers of the profession․ While seemingly small, these skill points unlock access to recipes that are foundational for later, more lucrative crafting endeavors․ Efficiency is paramount during this stage, as the gains per craft begin to diminish․

Prioritize recipes that utilize readily available materials, minimizing downtime spent on resource gathering․ Focus on volume crafting – producing a large quantity of items, even if the individual skill gains are modest – to accelerate your progression․ Consider utilizing tailoring camps or group crafting sessions to maximize output and share resources with fellow artisans․

Don’t neglect the importance of researching potential future crafting opportunities․ Familiarize yourself with the materials and recipes required for the 158-222 range, allowing you to proactively gather resources and prepare for the next phase of your tailoring journey․ Strategic planning will save you time and frustration in the long run․

Leveling Tailoring 158-222 (Non-Cultural)

Reaching skill 158 marks a significant transition in EverQuest tailoring, opening the door to the “Non-Cultural” recipe range․ This phase focuses on crafting items applicable across all races and classes, broadening your potential customer base and increasing profitability․ However, material costs and crafting complexity generally increase as well․

The key to efficient leveling between 158 and 222 lies in identifying high-yield, cost-effective recipes․ Focus on items with consistent demand, such as cloaks, bracers, and various forms of armor․ Regularly monitor the bazaar and auction house to identify market trends and adjust your crafting focus accordingly․

Don’t underestimate the value of utilizing tailoring assistants and crafting macros to streamline the process․ These tools can significantly reduce crafting time and minimize the risk of errors․ Remember to continuously refine your resource gathering strategies to maintain a steady supply of essential materials․

Strategic planning and market awareness are crucial for maximizing your tailoring profits during this extended skill range․

Profitable Tailoring Recipes

Identifying profitable tailoring recipes is paramount to success in EverQuest․ While market fluctuations are constant, certain items consistently generate strong returns․ High-demand items include those required for raids, trials, and popular progression content․ Focus on crafting components used in multiple recipes, increasing your sales volume․

Currently, cloaks and bracers remain reliable sources of income, particularly those with desirable stats and augment slots․ Experiment with combining different materials to create unique items that cater to niche markets․ Regularly analyze bazaar prices and competitor offerings to optimize your pricing strategy․

Don’t overlook the potential of crafting trade skill assistants․ These items are always in demand, providing a steady stream of income․ Consider specializing in a particular type of gear to establish yourself as a go-to crafter within the community․

Remember, profitability isn’t solely about the recipe itself; it’s about efficient resource acquisition and smart market positioning․

Advanced Tailoring Techniques

Mastering advanced tailoring techniques unlocks the true potential of the profession in EverQuest․ Beyond simple crafting, these methods involve manipulating recipes, utilizing secondary skills, and understanding the nuances of material properties․ Successful tailoring requires a deep understanding of the game’s crafting system․

Experiment with combining cultural and non-cultural materials to discover unique item variations․ Learn to effectively utilize tailoring assistants to improve crafting success rates and reduce material waste․ Focus on maximizing skill gains through efficient recipe selection, particularly during periods of rapid skill advancement․

Understanding the impact of augmentations and embellishments is crucial for creating high-value items․ Research current market trends to identify sought-after combinations․ Don’t be afraid to explore alternative crafting methods and share your discoveries with the community․

Continuous learning and adaptation are key to becoming a truly skilled tailor in Norrath․

Resources and Further Information

Expanding your knowledge beyond this guide is essential for mastering EverQuest tailoring․ Several valuable resources are available to assist you on your crafting journey․ The official EverQuest forums (Daybreak Games Forums) provide a platform for discussion, recipe sharing, and troubleshooting․

The P99 Wiki remains a useful reference for classic tailoring information, though some recipes may differ on live servers․ YouTube channels (YouTube) offer visual guides and tutorials on various tailoring techniques․ Remember to verify information across multiple sources․

Consider joining a tailoring guild or community to collaborate with other crafters and stay updated on the latest trends․ Regularly check online marketplaces to monitor material prices and identify profitable crafting opportunities․ Embrace experimentation and continuous learning to refine your skills and maximize your tailoring potential within the world of EverQuest․

armstrong cable tv guide and listings

Armstrong Cable TV Guide and Listings: A Comprehensive Overview (Updated February 16‚ 2026)

Updated February 16‚ 2026‚ this guide provides a detailed look at Armstrong cable TV listings‚ covering service areas‚ access options‚ and channel lineups.

We’ll explore both California/Connellsville and Butler/Zelienople‚ PA‚ offerings‚ alongside troubleshooting and support information for a seamless viewing experience.

Armstrong Cable‚ a prominent provider of telecommunications services‚ has a long-standing history of delivering television entertainment to communities across several states. Primarily serving areas in Pennsylvania‚ Ohio‚ New York‚ and West Virginia‚ Armstrong offers a diverse range of cable television packages designed to cater to varied viewing preferences and budgets.

Understanding the available channel lineups and how to access program guides is crucial for maximizing your entertainment experience. This comprehensive guide focuses on Armstrong’s offerings as of February 16‚ 2026‚ providing detailed information on channel packages‚ local listings for specific areas like California and Connellsville‚ PA‚ as well as Butler and Zelienople‚ PA.

We will delve into both the official Armstrong resources and helpful third-party websites for finding what you want to watch. Whether you prefer browsing online‚ utilizing the interactive program guide‚ or simply knowing what’s available in your area‚ this guide aims to be your go-to resource for all things Armstrong Cable.

Armstrong Cable Service Areas

Armstrong Cable primarily focuses its services within a concentrated geographic footprint‚ serving communities throughout Pennsylvania‚ Ohio‚ New York‚ and West Virginia. While a complete‚ exhaustive list is extensive‚ key areas within Pennsylvania include regions surrounding Pittsburgh‚ such as Butler and Zelienople‚ as well as towns like California and Connellsville.

Service availability can vary even within these states‚ depending on local infrastructure and expansion efforts. Armstrong continually invests in upgrading its network to reach more customers and improve service quality. It’s important to verify service availability at a specific address through the Armstrong website or by contacting customer support.

This guide specifically highlights channel listings for California and Connellsville‚ PA‚ and Butler and Zelienople‚ PA‚ recognizing these as key service locations. Understanding your specific service area is vital‚ as channel lineups and package options can differ based on location. Checking the Armstrong website with your zip code will confirm your local offerings.

Accessing Armstrong Cable Listings

Armstrong cable subscribers have multiple avenues for accessing TV listings. Traditionally‚ the Interactive Program Guide (IPG)‚ accessible directly through your television‚ has been a primary method. This on-screen guide allows browsing by channel‚ time‚ or program title. However‚ increasingly‚ customers are turning to digital options for greater convenience.

Online TV guides‚ both on Armstrong’s official website and through various third-party providers‚ offer a more dynamic and searchable experience. These platforms often include program descriptions‚ ratings‚ and the ability to set reminders. Accessing listings via a web browser or mobile app provides flexibility beyond the living room.

Understanding these different access points is crucial for maximizing your viewing experience. Whether you prefer the simplicity of the on-screen guide or the advanced features of online platforms‚ Armstrong provides options to suit diverse preferences. Regularly checking for updates ensures you have the most current and accurate program information;

Online TV Guide Options

Beyond the traditional on-screen guide‚ Armstrong cable customers benefit from a range of online TV guide options. These digital resources offer enhanced features and accessibility compared to older methods. Several third-party TV listing websites compile schedules from various providers‚ including Armstrong‚ presenting a unified and searchable interface.

These websites often allow users to personalize their experience by selecting favorite channels and setting up email or mobile alerts for upcoming shows. Many also integrate with social media platforms‚ enabling easy sharing of viewing plans. The convenience of accessing listings from any device – computer‚ tablet‚ or smartphone – is a significant advantage.

However‚ it’s important to verify the accuracy of listings from third-party sources against Armstrong’s official website guide‚ as discrepancies can occasionally occur. Utilizing a combination of resources ensures you have the most reliable information for planning your viewing schedule.

Armstrong’s Official Website Guide

Armstrong’s official website serves as a primary resource for accessing the most accurate and up-to-date TV listings. The online guide typically mirrors the Interactive Program Guide (IPG) available directly on your television‚ offering a familiar interface. Users can browse channels‚ view program schedules‚ and often find detailed descriptions of shows and movies.

A key benefit of using the official guide is its direct connection to Armstrong’s programming data‚ minimizing the risk of inaccuracies found on some third-party sites. The website often includes features like a search function‚ allowing you to quickly locate specific programs or channels.

Furthermore‚ Armstrong may offer exclusive content or promotions through its online guide‚ making it a valuable destination for subscribers. Regularly checking the website ensures you’re aware of any channel changes or special programming events. Accessing this guide requires an Armstrong account login for full functionality.

Third-Party TV Listing Websites

While Armstrong’s official website is recommended‚ several third-party TV listing websites offer alternative ways to find program schedules. Popular options include sites like Zap2it‚ TVGuide.com‚ and others specializing in comprehensive TV data. These platforms often aggregate listings from multiple providers‚ potentially offering a broader view of available content.

However‚ it’s crucial to exercise caution when using these sources. Listings may not always be entirely accurate for Armstrong Cable‚ and channel lineups can differ. Always cross-reference information with Armstrong’s official guide to confirm program times and channel availability.

These websites can be useful for quick searches or discovering programs across various networks‚ but reliability can vary. User reviews and comparisons can help identify the most dependable third-party options for Armstrong subscribers. Remember to prioritize official sources for the most precise information.

Understanding Armstrong Channel Packages

Armstrong Cable offers a tiered system of channel packages designed to cater to diverse viewing preferences and budgets. Understanding these options is key to maximizing your entertainment experience. Packages generally range from basic‚ providing essential local and national networks‚ to expanded tiers with a wider selection of channels.

Premium channel add-ons‚ such as HBO‚ Showtime‚ and Starz‚ are available to supplement any base package. These offer exclusive content like original series‚ blockbuster movies‚ and sporting events. Armstrong frequently updates its package offerings‚ so checking the latest details on their website is recommended.

Consider your household’s viewing habits when selecting a package. If you primarily watch local news and network television‚ a basic package may suffice. For sports enthusiasts or movie buffs‚ expanded packages and premium add-ons are likely worthwhile investments.

Basic Cable Packages

Armstrong’s basic cable packages represent the most affordable entry point to their television service. Typically‚ these packages include a core selection of local channels – think ABC‚ NBC‚ CBS‚ FOX‚ and PBS – ensuring access to local news‚ weather‚ and popular network programming.

Alongside local broadcasts‚ basic packages generally feature a handful of national cable networks‚ often including options for family-friendly entertainment and news. While the exact channel lineup varies by location‚ the focus remains on providing essential viewing options at a competitive price.

These packages are ideal for viewers with limited television consumption or those primarily interested in staying informed about local events. Armstrong often positions these as a starting point‚ allowing customers to upgrade to expanded tiers as their needs evolve. Check the Armstrong website for specific channel lists available in your area.

Expanded Cable Packages

Armstrong’s expanded cable packages build upon the foundation of their basic offerings‚ delivering a significantly broader range of channels to cater to diverse viewing preferences. These tiers typically include a substantial increase in entertainment‚ sports‚ and news networks‚ providing something for everyone in the household.

Expect to find popular cable channels like ESPN‚ Discovery‚ TNT‚ USA‚ and many more within these packages. Expanded options often introduce dedicated movie channels‚ offering a constant stream of cinematic content. These packages represent a sweet spot for many viewers‚ balancing affordability with a comprehensive channel selection.

Armstrong frequently structures these packages with different tiers – Silver‚ Gold‚ and Platinum‚ for example – each offering incremental increases in channel count and premium content. Detailed channel lineups are readily available on the Armstrong website‚ allowing customers to compare options and choose the package that best suits their needs.

Premium Channel Add-ons

Armstrong Cable enhances its channel offerings with a variety of premium channel add-ons‚ allowing subscribers to customize their viewing experience. These additions typically require a separate monthly fee‚ but provide access to exclusive content not available through standard cable packages.

Popular options often include HBO‚ offering critically acclaimed series‚ blockbuster movies‚ and compelling documentaries. Showtime delivers a similar experience with its own slate of original programming and films. Other frequently available add-ons encompass Starz‚ with a vast library of movies and series‚ and dedicated sports packages like NFL RedZone for avid football fans.

Subscribers can typically add and remove these premium channels at any time‚ providing flexibility to match their current viewing interests. Armstrong often promotes special offers and bundles‚ making premium channels more accessible and affordable. Detailed pricing and channel lineups for each add-on are available on the Armstrong website or through customer support.

Channel Lineups: California & Connellsville‚ PA

Armstrong Cable provides a specific channel lineup tailored for customers in California and Connellsville‚ Pennsylvania. This lineup aims to offer a diverse range of programming‚ encompassing local broadcasts‚ national networks‚ and specialized channels to cater to varied interests.

The channel selection is categorized into sections like Local Channels‚ News & Entertainment‚ and Sports & Movies‚ ensuring easy navigation for viewers. Local channels provide regional news‚ weather‚ and community programming‚ while national networks deliver popular shows and events.

Entertainment options range from family-friendly programming to adult-oriented content‚ and sports enthusiasts can enjoy channels dedicated to various sports leagues and events. Armstrong frequently updates its channel lineup‚ so it’s recommended to check the official website or interactive program guide for the most current information. Specific channel numbers may vary based on the subscriber’s chosen package.

Local Channels ー California/Connellsville

Armstrong Cable in California and Connellsville‚ PA‚ prioritizes providing access to essential local broadcasting. These channels keep residents connected to their community with hyper-local news‚ weather updates‚ and important civic announcements. Viewers can reliably tune in for coverage of local events‚ school board meetings‚ and regional happenings;

Typically‚ the lineup includes major network affiliates like CBS‚ NBC‚ ABC‚ and FOX‚ ensuring access to national programming alongside local content. Additionally‚ Armstrong often carries local independent stations offering diverse programming and community-focused shows.

These local channels are a vital resource for staying informed about what’s happening in the immediate area. Channel numbers can vary‚ so consulting the current Armstrong TV guide is recommended. Access to these channels is generally included in all Armstrong cable packages‚ providing a foundational viewing experience for local residents.

News & Entertainment Channels ⎯ California/Connellsville

Armstrong Cable in California and Connellsville‚ PA‚ offers a robust selection of news and entertainment channels catering to diverse interests. For those seeking up-to-the-minute information‚ channels like CNN‚ MSNBC‚ and Fox News provide 24/7 coverage of national and international events.

Entertainment options are plentiful‚ with channels such as USA Network‚ TNT‚ and TBS delivering popular dramas‚ comedies‚ and reality shows. Lifetime and Hallmark Channel provide a focus on movies and series geared towards a broader audience.

Beyond these staples‚ Armstrong often includes channels like A&E‚ History Channel‚ and Discovery‚ offering documentaries and factual programming. Access to these channels depends on the specific cable package selected‚ with expanded packages offering a wider variety of options. Regularly checking the Armstrong guide ensures you’re aware of any channel lineup changes.

Sports & Movie Channels ⎯ California/Connellsville

Armstrong Cable in California and Connellsville‚ PA‚ provides sports enthusiasts and movie buffs with a compelling channel lineup. Sports fans can follow their favorite teams on channels like ESPN‚ ESPN2‚ and Fox Sports‚ covering a wide range of athletic events from professional leagues to college competitions.

For movie lovers‚ Armstrong offers several options‚ including HBO‚ Showtime‚ and Cinemax‚ delivering the latest blockbuster films and critically acclaimed series. Turner Classic Movies (TCM) provides a curated selection of classic films for those with a nostalgic preference.

Depending on your package‚ you may also have access to channels like NFL Network and MLB Network for dedicated sports coverage. Remember that premium movie channels typically require an additional subscription. Checking the Armstrong channel guide is recommended to confirm availability and scheduling.

Channel Lineups: Butler & Zelienople‚ PA

Armstrong Cable delivers a diverse channel selection to residents of Butler and Zelienople‚ Pennsylvania. The specific channels available depend on the chosen cable package‚ ranging from basic to expanded tiers with premium add-ons.

Customers in these areas can anticipate a mix of local broadcasting‚ national networks‚ and specialized programming. Armstrong strives to provide comprehensive coverage of news‚ entertainment‚ sports‚ and family-friendly content.

Detailed channel lists‚ categorized by genre‚ are readily accessible through Armstrong’s official website and interactive program guide. These resources allow subscribers to easily navigate the available options and discover new programming. Regularly updated listings ensure accuracy and reflect any channel changes or additions. For the most current information‚ consulting the official Armstrong resources is always recommended.

Local Channels ⎯ Butler/Zelienople

Armstrong Cable in Butler and Zelienople‚ PA‚ prioritizes access to essential local broadcasting. Subscribers typically receive a robust selection of channels dedicated to regional news‚ weather‚ and community programming.

Expect to find prominent network affiliates like CBS‚ NBC‚ ABC‚ and FOX‚ ensuring coverage of national and local events. Additionally‚ Armstrong often includes local independent stations‚ providing a platform for hyperlocal content and diverse perspectives.

These local channels are crucial for staying informed about community happenings‚ emergency alerts‚ and local sports coverage. Armstrong understands the importance of these connections and consistently works to deliver a reliable and comprehensive local channel lineup. Check the official Armstrong channel guide for the most up-to-date listing specific to your area within Butler and Zelienople.

News & Entertainment Channels ー Butler/Zelienople

Armstrong Cable in Butler and Zelienople offers a diverse range of news and entertainment channels to cater to varied interests. For news enthusiasts‚ expect access to national networks like CNN‚ MSNBC‚ and Fox News‚ providing 24/7 coverage of current events.

Entertainment options are plentiful‚ featuring channels like USA Network‚ TNT‚ Lifetime‚ and A&E‚ offering a mix of dramas‚ comedies‚ and reality television. Subscribers can also find dedicated channels for home improvement (HGTV)‚ cooking (Food Network)‚ and history (History Channel).

Armstrong frequently updates its channel lineup‚ so checking the official guide is recommended. These channels provide a broad spectrum of content‚ ensuring there’s something for everyone in the Butler and Zelienople viewing area.

Sports & Movie Channels ー Butler/Zelienople

Armstrong Cable in Butler and Zelienople delivers a robust selection of sports and movie channels for avid fans. Sports programming includes ESPN‚ ESPN2‚ and potentially regional sports networks covering local teams and events. Viewers can catch live games‚ sports news‚ and analysis throughout the day.

Movie enthusiasts will appreciate access to channels like HBO‚ Showtime‚ Cinemax‚ and Starz‚ offering a rotating selection of blockbuster films and original series. Turner Classic Movies (TCM) provides a curated library of classic cinema.

Depending on the package‚ Armstrong may also offer channels dedicated to specific sports like NFL Network or MLB Network. Regularly checking the updated channel listings ensures you don’t miss out on your favorite games or premieres.

Navigating the Armstrong Interactive Program Guide (IPG)

Armstrong’s Interactive Program Guide (IPG) is your central hub for discovering and scheduling your TV viewing. Accessible directly through your cable box‚ the IPG offers a user-friendly interface to browse channels and program listings.

The guide displays a grid-like layout‚ showing programs currently airing and those scheduled for the future. You can easily scroll through channels and time slots to find something to watch. Armstrong’s IPG isn’t just a listing; it’s interactive‚ allowing you to set reminders‚ record programs‚ and access channel information.

Familiarizing yourself with the IPG’s features will significantly enhance your TV experience. Features like searching for specific shows or actors‚ and creating personalized watchlists‚ are readily available. Mastering the IPG unlocks the full potential of your Armstrong cable service.

Using the On-Screen Guide

Accessing the on-screen guide is simple – typically‚ pressing the “Guide” button on your Armstrong remote will bring it up. Once displayed‚ use the arrow keys on your remote to navigate through the channel listings. The current time is usually indicated along the left side‚ with channels listed horizontally.

Highlighting a program will often display a brief synopsis. To view more detailed information‚ look for an “Info” or “Details” button on your remote and press it while the program is highlighted. This will reveal a longer description‚ cast information‚ and potentially parental ratings.

Remember that the layout and specific button functions may vary slightly depending on your cable box model. Experiment with the different colored buttons on your remote to discover additional features and shortcuts within the on-screen guide.

Setting Favorite Channels

Armstrong’s Interactive Program Guide (IPG) allows you to personalize your viewing experience by creating a list of favorite channels. This feature streamlines navigation‚ letting you quickly access the channels you watch most often. Typically‚ you can add a channel to your favorites by highlighting it within the guide and pressing the “Favorites” or “F” button on your remote.

Once added‚ your favorite channels can usually be accessed through a dedicated “Favorites” section within the guide. This section often appears as a separate category alongside the full channel lineup. Some systems allow you to create multiple favorite channel lists‚ catering to different family members or viewing preferences.

Consult your Armstrong cable box manual for specific instructions‚ as the exact steps may vary depending on your equipment. Regularly updating your favorites ensures a tailored and efficient channel-surfing experience.

Searching for Programs

Armstrong’s Interactive Program Guide (IPG) offers a robust search function‚ enabling you to quickly locate specific programs‚ actors‚ or genres. Access the search feature‚ usually indicated by a magnifying glass icon or a dedicated “Search” button on your remote. Input your search terms using the on-screen keyboard.

The IPG will then display a list of results matching your query‚ spanning across various channels and time slots. You can often filter search results by date‚ time‚ channel‚ or genre to refine your search. Selecting a program from the results will typically display detailed information‚ including a synopsis‚ cast list‚ and air times.

Remember to check for future airings and set reminders directly from the search results. Utilizing the search function saves time and ensures you don’t miss your favorite shows.

Troubleshooting Guide Issues

Experiencing problems with Armstrong’s Interactive Program Guide (IPG)? Several common issues can disrupt your viewing experience. First‚ ensure your cable box is properly connected and receiving a signal. A simple reboot – unplugging the box for 30 seconds and then plugging it back in – often resolves minor glitches.

If the guide is frozen or unresponsive‚ try clearing the cache through the box’s settings menu (consult your user manual for specific instructions). Outdated firmware can also cause issues; check for and install any available updates. If search functionality isn’t working‚ double-check your spelling and ensure a stable internet connection if using interactive features.

Persistent problems may indicate a broader service outage. Before contacting support‚ check Armstrong’s website or social media for reported outages in your area.

Common Problems & Solutions

No Signal: Verify cable connections to the TV and box. Reboot the cable box. If the issue persists‚ contact Armstrong support.

Frozen Guide: Unplug the cable box for 60 seconds‚ then reconnect. Clear the IPG cache via the settings menu. Ensure the box has adequate ventilation.

Incorrect Listings: Confirm your zip code is correctly entered in the guide settings. Sometimes‚ a system refresh from Armstrong’s end is needed.

Remote Not Working: Replace the batteries. Reprogram the remote to your TV and cable box. Check for obstructions blocking the signal.

Pixelation/Static: Tighten all cable connections. A signal booster might be necessary for weak signals. Contact Armstrong if the problem continues‚ as it could be a network issue.

Contacting Armstrong Customer Support

Phone Support: Armstrong offers 24/7 customer support via phone. The main customer service number is readily available on their official website. Expect potential wait times during peak hours.

Online Chat: For quick assistance‚ utilize the live chat feature on the Armstrong website. This is ideal for simple inquiries and troubleshooting steps.

Website Support: The Armstrong website (link to be added) features a comprehensive FAQ section and troubleshooting guides addressing common issues related to cable TV and listings.

Social Media: Armstrong maintains a presence on platforms like Facebook and Twitter. While not a primary support channel‚ they often respond to customer inquiries and provide updates.

In-Person Support: Visit a local Armstrong office for personalized assistance. Locations and hours of operation can be found on their website. Be prepared to provide your account information.

montreal sex guide

Montreal Sex Guide: An Overview (February 16, 2026)

Montréal, Québec’s largest city, comprises 19 diverse boroughs, offering varied experiences for those seeking connections within its vibrant urban landscape․

Montreal’s dating scene is as diverse and multifaceted as the city itself, reflecting its unique blend of European charm and North American modernity․ Situated as Québec’s largest city, composed of 19 boroughs, it presents a wide array of opportunities for connection․ The city’s cultural landscape fosters a generally open and accepting atmosphere, though understanding local nuances is key․

Expect a mix of casual encounters and those seeking more serious relationships․ The prevalence of French language and culture adds a distinctive layer, influencing communication styles and social interactions․ Navigating this scene requires a blend of confidence, respect, and a willingness to embrace the city’s vibrant energy․ From bustling nightlife to intimate cafes, Montreal offers a backdrop for every type of romantic pursuit․

Understanding Montreal’s Culture & Attitudes Towards Dating

Montreal’s dating culture is significantly shaped by its unique position within Québec, blending European traditions with North American openness․ A key aspect is the importance of directness, though often tempered with politeness – a characteristic of Quebecois social norms․ While generally accepting, a degree of traditionalism persists, particularly regarding initial courtship rituals․

Understanding basic French phrases demonstrates respect and can greatly enhance interactions․ The city’s 19 boroughs each possess distinct atmospheres, influencing local attitudes․ Expect a more relaxed pace compared to some North American cities, with an emphasis on enjoying the moment․ Open-mindedness and genuine curiosity about the local culture are highly valued, fostering more meaningful connections within this diverse urban environment․

Navigating Montreal’s Boroughs for Hookups

Montreal’s 19 boroughs each offer unique vibes for casual encounters, ranging from bohemian enclaves to trendy, upscale districts, catering to diverse preferences․

Plateau Mont-Royal: Bohemian & Casual

The Plateau Mont-Royal exudes a distinctly bohemian and relaxed atmosphere, making it a prime location for more casual encounters․ Characterized by colorful row houses, winding streets, and a thriving arts scene, this borough attracts a diverse crowd of students, artists, and young professionals․

Expect a less-pressured, more laid-back dating scene here․ Numerous cozy bars and cafes provide intimate settings for meeting people, while Parc La Fontaine offers opportunities for daytime connections․ The area’s generally accepting and open-minded vibe fosters a comfortable environment for exploring possibilities․ It’s a place where authenticity is valued, and connections often blossom organically․

Mile End: Artistic & Alternative

Mile End presents a distinctly artistic and alternative vibe, attracting a creative and open-minded demographic․ This borough, known for its independent boutiques, bagel shops, and vibrant mural scene, fosters a unique energy ideal for those seeking unconventional connections․

The dating scene in Mile End tends to be less focused on superficiality and more on shared interests and intellectual compatibility․ Expect to find individuals who appreciate authenticity and value genuine connection․ Numerous art galleries, performance spaces, and independent cafes provide ample opportunities to meet like-minded people․ It’s a place where expressing individuality is celebrated, and casual encounters often evolve into something more meaningful․

Downtown Montreal: Modern & Fast-Paced

Downtown Montreal embodies a modern and fast-paced energy, attracting young professionals and a diverse crowd․ This central hub boasts a concentration of high-rise buildings, upscale restaurants, and bustling nightlife venues, creating a dynamic atmosphere for those seeking quick connections․

The dating scene here is often characterized by efficiency and a focus on immediate attraction․ Expect a more direct approach, with individuals often prioritizing convenience and compatibility․ Numerous bars, clubs, and events cater to a diverse range of tastes, offering ample opportunities for meeting potential partners․ It’s a place where ambition and social activity intertwine, making it ideal for those seeking a vibrant and energetic hookup experience․

Old Montreal: Historic & Tourist-Focused

Old Montreal, with its cobblestone streets and historic architecture, presents a unique and romantic backdrop for encounters, though distinctly different from other boroughs․ Heavily populated by tourists, the area offers a blend of local charm and international visitors, creating a diverse, albeit transient, dating pool․

While not known as a primary hookup hotspot, Old Montreal’s numerous bars, wine lounges, and upscale hotels provide opportunities for more sophisticated connections․ Expect a slower pace and a greater emphasis on ambiance and conversation․ The area attracts individuals seeking a more refined experience, potentially leading to longer-term connections alongside casual encounters․ Be mindful of the tourist element; intentions may vary widely․

Griffintown: Trendy & Upscale

Griffintown, a rapidly developing area, attracts a young, professional crowd with its modern condos, trendy restaurants, and upscale bars․ This borough offers a distinctly different vibe compared to Old Montreal or the Plateau, leaning towards a more sophisticated and ambitious dating scene․

Expect to find individuals focused on career and lifestyle, potentially seeking partners with similar aspirations․ The area’s numerous bars and lounges provide ample opportunities for meeting people, with a focus on after-work socializing․ While not overtly a cruising area, Griffintown’s vibrant nightlife and stylish atmosphere foster a climate conducive to casual encounters and more serious connections alike․ Discretion is valued here, reflecting the area’s upscale character․

Popular Hookup Spots in Montreal

Montréal’s diverse boroughs boast numerous venues – from lively bars and nightclubs to discreet saunas – catering to various preferences for casual encounters․

Bars & Nightclubs

Montréal’s nightlife pulsates with energy, offering a diverse range of bars and nightclubs ideal for meeting people․ Saint-Denis Street is renowned for its bustling atmosphere and numerous bars, attracting a younger, student-focused crowd eager for casual connections․ Expect lively music and a vibrant social scene․

Crescent Street, conversely, presents a more upscale and polished nightlife experience․ This area draws a diverse clientele, including tourists and locals, with its trendy bars and clubs․ Both areas provide ample opportunities for initiating conversations and potentially finding a hookup․ Remember to be respectful and aware of your surroundings while enjoying Montréal’s exciting nightlife․ The city’s vibrant energy makes these spots prime locations for those seeking spontaneous encounters․

Saint-Denis Street Bars

Saint-Denis Street embodies Montréal’s youthful and energetic spirit, boasting a concentration of bars particularly popular with students and those seeking a casual atmosphere․ These establishments frequently feature live music, affordable drinks, and a lively, unpretentious vibe․ Expect a diverse crowd, making it easy to strike up conversations and connect with potential partners․

The bars along Saint-Denis are known for their relaxed settings, encouraging mingling and spontaneous interactions․ It’s a fantastic location for those who prefer a less formal approach to meeting people․ Be prepared for a bustling environment, especially on weekends, and remember to prioritize safety and respect while enjoying the vibrant nightlife․ This street offers a readily accessible and energetic scene for hookups․

Crescent Street Nightlife

Crescent Street presents a more polished and upscale nightlife experience compared to Saint-Denis, attracting a diverse crowd seeking a sophisticated atmosphere․ Expect trendy bars, stylish lounges, and a generally more glamorous vibe․ This area is known for its lively patios during warmer months, creating an open and inviting space for socializing․

The bars on Crescent Street often feature DJs, themed nights, and a focus on cocktails, making it ideal for those who enjoy a more curated nightlife experience․ While potentially more expensive than other areas, Crescent Street offers a higher chance of encountering a well-dressed and outgoing crowd․ It’s a prime location for those seeking a more refined and potentially lucrative hookup scene․

Saunas & Bathhouses

Montreal boasts a historically prominent sauna and bathhouse culture, offering discreet venues for relaxation and potential encounters․ These establishments often cater to a diverse clientele, providing a more open and accepting environment for exploring sexual interests․ While specific details require further research to ensure current accuracy, historically, these spaces have been known as hubs for casual connections․

Expect varying levels of privacy and openness depending on the specific establishment․ Some prioritize strict etiquette and relaxation, while others are more explicitly geared towards sexual activity․ Researching reviews and understanding the specific rules of each location is crucial before visiting․ Remember to prioritize respectful behavior and consent in these environments, as with any social interaction․

Cruising Areas

Montreal offers several public spaces historically known as cruising areas, though activity levels and police presence can fluctuate․ Parc La Fontaine, with its expansive greenery and secluded paths, has long been cited as a location for discreet encounters․ Similarly, Mount Royal Park, particularly in more isolated areas, attracts individuals seeking casual connections․

However, it’s crucial to exercise extreme caution when utilizing these spaces․ Public cruising carries inherent risks, including potential legal consequences and safety concerns․ Be aware of your surroundings, avoid engaging in overtly visible acts, and prioritize personal security․ Discretion and respect for the environment are paramount․ Remember that laws regarding public indecency are enforced, and responsible behavior is essential․

Parc La Fontaine

Parc La Fontaine, a sprawling green space in the Plateau Mont-Royal, has a longstanding reputation as a discreet cruising location within Montreal․ Its mature trees, winding paths, and relatively secluded corners offer opportunities for those seeking casual encounters․ The park’s size allows for a degree of privacy, attracting individuals during evenings and weekends․

However, potential cruisers should be acutely aware of the risks involved․ Increased police patrols and the possibility of public exposure necessitate extreme caution․ Discretion is key; avoid overt displays and be mindful of surrounding park users․ Prioritize personal safety and be prepared to move on if the environment feels unsafe or uncomfortable․ Remember, public indecency laws are enforced․

Mount Royal Park

Mount Royal Park, designed by Frederick Law Olmsted, presents a more challenging environment for discreet encounters than Parc La Fontaine, yet remains a known cruising spot․ Its vastness and hilly terrain offer pockets of seclusion, particularly along the less-traveled paths and wooded areas, especially during the late evening and night․ The panoramic views add to the allure for some․

However, the park’s size also means greater visibility and potential for interruption․ Police presence is frequent, and the park is popular with families and joggers, demanding a high level of caution․ Prioritize safety by being aware of your surroundings and avoiding risky behavior․ Discretion is paramount; avoid drawing attention to yourself and be prepared to leave if necessary․

Online Dating & Apps in Montreal

Digital platforms like Tinder, Bumble, Feeld, and OkCupid are widely used in Montréal for meeting people, ranging from casual dates to hookups․

Tinder in Montreal: Usage & Trends

Tinder remains a dominant force in Montreal’s dating scene, boasting a large user base across all boroughs․ Its popularity stems from its simplicity and accessibility, catering to a broad spectrum of intentions – from casual encounters to more serious relationships․

Trends indicate a significant portion of users are between 18-35, with a noticeable presence of university students and young professionals․ Profile aesthetics often lean towards showcasing an active lifestyle, highlighting interests in arts, music, and outdoor activities․

Compared to other cities, Montreal Tinder users appear more open to bilingual communication, with many profiles including French language skills․ Expect a generally respectful atmosphere, though, like any platform, caution is advised; Success often hinges on a compelling profile and initiating engaging conversations․

Bumble: Empowering Women in Montreal Dating

Bumble distinguishes itself in Montreal’s dating landscape by prioritizing female agency․ The app’s core mechanic – requiring women to initiate the conversation – resonates with Montreal’s progressive values and fosters a more controlled experience for female users․

Usage trends reveal a slightly older demographic compared to Tinder, with a higher concentration of users aged 25-45 seeking meaningful connections․ Profiles often emphasize career aspirations, intellectual pursuits, and a desire for respectful interactions․

Montreal women on Bumble generally appreciate thoughtful openers and genuine interest beyond superficial compliments․ The platform’s emphasis on quality over quantity contributes to a reputation for attracting individuals seeking more than just casual hookups, though those options are also present․

Other Dating Apps (Feeld, OkCupid)

Beyond Tinder and Bumble, Montreal’s dating scene embraces niche platforms catering to diverse preferences․ Feeld, a relationship-focused app, attracts individuals exploring alternative relationship structures – polyamory, kink, and open relationships – finding a receptive audience within the city’s open-minded community․

OkCupid remains a viable option, particularly for those prioritizing detailed profiles and compatibility matching․ Its extensive questionnaire allows users to articulate their values, interests, and sexual orientations, fostering connections based on shared beliefs․

These apps often see higher engagement amongst Montreal’s artistic and academic circles․ While user bases are smaller than mainstream apps, they offer a focused environment for finding like-minded individuals seeking specific types of connections, beyond conventional dating norms․

Safety Considerations for Hookups

Prioritize your well-being: practice safe sex, be aware of potential scams, and understand the legal framework surrounding consensual activities in Montréal․

Protecting Yourself from STIs

Navigating Montreal’s hookup scene requires prioritizing sexual health․ Consistent and correct condom use remains the most effective method for preventing the spread of sexually transmitted infections (STIs)․ Regular STI testing is crucial, even in seemingly monogamous relationships, as asymptomatic infections are common․ Several clinics throughout the city offer confidential testing and treatment options, easily accessible to residents and visitors․

Beyond condoms, consider discussing STI status with potential partners before engaging in sexual activity․ Open communication fosters trust and allows for informed decision-making․ Vaccination against HPV and Hepatitis B offers additional protection․ Remember, responsible sexual behavior isn’t just about protecting yourself; it’s about respecting your partner’s health as well․ Resources are readily available to promote safe and healthy sexual practices within Montréal․

Avoiding Scams & Catfishing

The anonymity of online dating and hookup apps in Montreal presents opportunities for scams and catfishing․ Be wary of profiles with overly glamorous photos or inconsistent information․ Reverse image search can verify if a profile picture is stolen from elsewhere online․ Avoid individuals who quickly profess strong feelings or request financial assistance, even for seemingly legitimate reasons․

Never share personal financial details or send money to someone you’ve only met online․ Meet in public places for initial encounters and inform a friend of your whereabouts․ Trust your instincts – if something feels off, it probably is․ Report suspicious profiles to the dating app or platform․ Protecting your personal information and exercising caution are vital for a safe and positive experience in Montreal’s hookup scene․

Legal Aspects of Consensual Sex

In Canada, and specifically within Montreal, consensual sexual activity between adults is legal․ However, it is crucial to understand and respect the legal definition of consent․ Consent must be freely given, informed, and ongoing; silence or lack of resistance does not imply consent․

Coercion, manipulation, or incapacitation (due to alcohol or drugs) invalidate consent․ Sexual activity with someone under the age of 16 is illegal, regardless of consent․ Be aware of laws regarding public indecency and ensure any activity adheres to these regulations․ Understanding and respecting boundaries is paramount․ Ignorance of the law is not a defense; prioritize clear communication and mutual respect to ensure all encounters are legal and ethical within Montreal’s legal framework․

Montreal’s LGBTQ+ Scene & Hookup Options

Montreal boasts a thriving LGBTQ+ community, particularly in Le Village Gai, offering numerous bars, clubs, and events catering to diverse preferences and connections․

Gay Village (Le Village Gai)

Le Village Gai, Montreal’s vibrant Gay Village, is a concentrated hub of LGBTQ+ life, radiating energy and acceptance․ Situated primarily along Sainte-Catherine Street East, between René-Lévesque Boulevard and Mont-Royal Avenue, it’s easily identifiable by its rainbow-colored pedestrian street and welcoming atmosphere․

This area is packed with bars, clubs, restaurants, and shops specifically catering to the LGBTQ+ community and allies․ It’s a prime location for meeting people, enjoying nightlife, and experiencing a strong sense of community․ Beyond the entertainment options, Le Village Gai hosts numerous events throughout the year, including the iconic Montreal Pride Festival, drawing visitors from across the globe․

The Village offers a safe and inclusive space for exploration and connection, making it a central point for hookups and longer-term relationships within Montreal’s LGBTQ+ scene․

LGBTQ+ Friendly Bars & Clubs

Beyond Le Village Gai, Montreal boasts a wealth of LGBTQ+ friendly bars and clubs scattered throughout the city, offering diverse atmospheres and experiences․ These venues extend the welcoming spirit beyond the concentrated Village area, providing options for every preference․

Popular choices include Unity, a long-standing staple known for its energetic dance floor and themed nights, and Bar Salon, offering a more relaxed lounge vibe․ Other notable spots like Heaven and Club Soda frequently host LGBTQ+ events and attract a diverse crowd․ Many mainstream bars also actively welcome and cater to the LGBTQ+ community, fostering inclusivity․

These establishments provide safe spaces for socializing, dancing, and potential connections, contributing significantly to Montreal’s thriving LGBTQ+ hookup scene․

Tips for Success in Montreal’s Hookup Scene

Embrace basic French, understand Quebecois culture, and prioritize respectful, open-minded interactions to navigate Montreal’s diverse and welcoming hookup environment effectively․

Learning Basic French Phrases

While many Montrealers, particularly in tourist areas, speak English, demonstrating an effort to communicate in French is highly appreciated and can significantly enhance your interactions․ Knowing even a few basic phrases shows respect for the local culture and can open doors to more genuine connections․

Start with greetings like “Bonjour” (hello) and “Bonsoir” (good evening)․ “S’il vous plaît” (please) and “Merci” (thank you) are essential for politeness․ Simple questions like “Comment ça va?” (How are you?) or “Parlez-vous anglais?” (Do you speak English?) can be incredibly useful․

Don’t be afraid to attempt French, even if it’s imperfect! Locals are generally patient and will appreciate the gesture․ Resources like Duolingo or online phrasebooks can quickly equip you with essential vocabulary․ A little effort goes a long way in Montreal’s social scene․

Understanding Quebecois Culture

Quebecois culture is distinct from the rest of Canada, rooted in French heritage and a strong sense of identity․ Understanding this cultural nuance is crucial for navigating Montreal’s social landscape successfully․ Quebecois people generally value directness and authenticity, but also politeness and respect․

Be aware that humor can be different; self-deprecation and playful teasing are common․ Public displays of affection are generally accepted, but avoid overly aggressive or forward behavior․ Showing genuine interest in Quebec’s history, arts, and music will be well-received․

Remember that Quebec has a unique legal and social framework․ Respecting local customs and traditions demonstrates sensitivity and increases your chances of positive interactions, both socially and romantically․

Being Respectful & Open-Minded

Montreal thrives on diversity, and a respectful, open-minded approach is paramount․ Embrace the city’s multiculturalism and be accepting of different lifestyles and preferences․ Consent is absolutely essential in all interactions; clear communication is key to ensuring everyone feels comfortable and safe․

Avoid making assumptions based on stereotypes․ Be mindful of personal boundaries and respect individual choices․ Demonstrate genuine curiosity about others and their backgrounds․ A non-judgmental attitude fosters trust and creates a more positive experience for everyone involved․

Remember that cultural norms can vary, so be observant and adaptable․ Treat everyone with dignity and kindness, and prioritize ethical behavior in all your encounters․

unit 5 revolutions study guide

Unit 5 Revolutions Study Guide: An Overview (1750-1900)

This comprehensive guide explores pivotal revolutions between 1750-1900, examining Enlightenment ideals, nationalism, and industrialization’s impact on global shifts and societal transformations.

The period from 1750 to 1900 witnessed an unprecedented wave of revolutions reshaping the Atlantic world and beyond. Driven by Enlightenment thought and burgeoning nationalism, these upheavals challenged existing power structures. This unit delves into the causes, key events, and lasting consequences of revolutions in America, France, Haiti, and Latin America, alongside the rise of industrialization and its global impact, preparing students for AP World History assessments.

Key Concepts & Themes

Central to this era are concepts like Enlightenment philosophies, revolutionary ideologies, and the potent force of nationalism. Examining causes and effects of revolutions, alongside environmental factors influencing industrialization, is crucial. Understanding shifts in production methods and developing historical arguments using evidence are key skills for analyzing this transformative period.

The Enlightenment & Its Influence

The Enlightenment spurred new understandings of the world and human relationships, profoundly impacting political thought and fueling revolutionary movements globally.

Enlightenment Philosophies: Core Ideas

Central to the Enlightenment were empiricism and reason, challenging traditional authority. Philosophers like Locke emphasized natural rights – life, liberty, and property – influencing political discourse. Montesquieu advocated separation of powers, while Rousseau championed social contracts and popular sovereignty. These ideas questioned absolute monarchies and promoted individual freedoms, laying the intellectual groundwork for revolutions.

Impact on Political Thought

Enlightenment thought profoundly reshaped political landscapes, inspiring demands for representative government and constitutionalism. Concepts of natural rights fueled calls for liberty and equality, challenging existing power structures. The American and French Revolutions directly embodied these ideals, advocating for citizen participation and limitations on governmental authority, ultimately impacting global political movements.

The American Revolution (1775-1783)

A colonial revolt against British rule, driven by Enlightenment ideals and grievances over taxation, resulting in the birth of a new, independent nation.

Causes of the American Revolution

Growing colonial discontent stemmed from British policies like taxation without representation, exemplified by acts following the French and Indian War. Enlightenment philosophies, advocating for natural rights and self-governance, fueled revolutionary fervor. Restrictions on colonial trade and increasing British control over colonial affairs further exacerbated tensions, ultimately leading to armed conflict and the pursuit of independence.

Key Events & Figures

Significant events include the Boston Tea Party, the Battles of Lexington and Concord, and the pivotal Battle of Saratoga; Key figures like George Washington, leading the Continental Army, and Thomas Jefferson, authoring the Declaration of Independence, were instrumental. Benjamin Franklin’s diplomatic efforts secured crucial foreign support, ultimately securing American victory and independence from British rule.

Significance & Global Impact

The American Revolution inspired revolutionary movements worldwide, demonstrating that colonial independence from empires was achievable. It championed Enlightenment ideals of liberty and self-governance, influencing the French Revolution and Latin American independence struggles. This sparked debates about rights, sovereignty, and the legitimacy of established power structures globally, reshaping political thought.

The French Revolution (1789-1799)

A period of radical social and political upheaval, the French Revolution dramatically altered France’s trajectory, transitioning from monarchy to republic and beyond.

Social & Economic Conditions in Pre-Revolutionary France

France faced stark inequalities: a rigid social hierarchy divided into three Estates, with the clergy and nobility enjoying privileges while the Third Estate bore the tax burden. Economic hardship, fueled by lavish spending by the monarchy, costly wars, and poor harvests, created widespread discontent. Rising bread prices sparked unrest, exacerbating existing social tensions and contributing to revolutionary fervor among the populace.

Stages of the Revolution: From Estates-General to Napoleon

The Revolution unfolded in phases: from the Estates-General’s convocation and the storming of the Bastille, through the Reign of Terror’s radicalism, to the Directory’s instability. Napoleon Bonaparte’s rise capitalized on this chaos, establishing a consulate and eventually crowning himself emperor, effectively ending the revolutionary period and ushering in a new era for France.

The Reign of Terror & Its Aftermath

Dominated by Maximilien Robespierre and the Committee of Public Safety, the Reign of Terror (1793-1794) employed mass executions to suppress counter-revolutionaries. Its aftermath saw Robespierre’s fall, a Thermidorian Reaction, and the establishment of the Directory – a corrupt and ineffective government ultimately overthrown by Napoleon, signaling a shift in French power dynamics.

The Haitian Revolution (1791-1804)

A successful slave revolt, Haiti’s revolution, led by Toussaint Louverture, established the first free black republic, profoundly impacting the Atlantic world.

Saint-Domingue Before the Revolution

Before 1791, Saint-Domingue, a French colony, was the wealthiest in the Caribbean, fueled by brutal slave labor on sugar plantations. A rigid social hierarchy existed, with white planters at the top, followed by gens de couleur (free people of color), and enslaved Africans constituting the vast majority. This system generated immense wealth for France but fostered deep resentment and a volatile environment ripe for rebellion, driven by the desire for freedom and equality.

Toussaint Louverture & the Fight for Independence

Toussaint Louverture, a formerly enslaved man, emerged as the brilliant leader of the Haitian Revolution. He skillfully navigated complex alliances and military campaigns, defeating French, Spanish, and British forces; Louverture’s leadership transformed a slave revolt into a sophisticated struggle for independence, ultimately leading to the establishment of Haiti in 1804 – a landmark achievement against colonialism.

Impact of the Haitian Revolution

The Haitian Revolution profoundly impacted the Atlantic world, instilling fear in slaveholding societies and inspiring abolitionist movements. It demonstrated the potential for enslaved people to overthrow their oppressors, challenging racial hierarchies and colonial power structures. However, Haiti faced economic hardship and international isolation, a consequence of its revolutionary path and former colonial powers’ resistance.

Latin American Revolutions (1808-1826)

Inspired by Enlightenment ideals, Latin American colonies revolted against European powers, led by figures like Bolívar and San Martín, seeking independence and self-determination.

Causes of Independence Movements

Several factors fueled Latin American independence, including Enlightenment philosophies questioning colonial rule, social hierarchies favoring Peninsulares, and economic restrictions imposed by European powers. Napoleon’s invasion of Spain created a power vacuum, while Creole elites desired greater political and economic control. Existing grievances, combined with revolutionary fervor, ultimately sparked widespread uprisings across the region, challenging established imperial structures.

Key Leaders: Simón Bolívar, José de San Martín

Simón Bolívar, “The Liberator,” spearheaded independence movements in Venezuela, Colombia, Ecuador, Peru, and Bolivia, advocating for a unified Gran Colombia. José de San Martín liberated Argentina, Chile, and Peru, employing strategic military campaigns. Though differing on political visions—Bolívar favoring centralism, San Martín a more federal approach—both were instrumental in dismantling Spanish colonial authority in South America.

Challenges of Independence & Formation of New Nations

Newly independent Latin American nations faced immense hurdles: political fragmentation, economic instability due to disrupted trade, and social divisions stemming from colonial hierarchies. Establishing stable governments proved difficult, often resulting in caudillo rule. External threats from European powers and internal conflicts hindered progress towards lasting unity and prosperity.

Nationalism & Revolution

Nationalism emerged as a potent force, inspiring revolutionary movements across Europe and Latin America, fueled by shared identities and desires for self-determination.

The Rise of Nationalism as a Revolutionary Force

Nationalism profoundly reshaped the political landscape, uniting people through common languages, religions, and customs. Governments strategically utilized these shared identities to bolster ideologies and state-building efforts. However, this burgeoning sense of unity simultaneously sparked resistance against established powers, igniting rebellions and revolts driven by liberal and democratic ideals, ultimately fueling revolutionary fervor across the globe.

Nationalism in Different Contexts (Europe, Latin America)

In Europe, nationalism often manifested as unification movements, like Italy and Germany, seeking to consolidate fragmented states. Conversely, in Latin America, it fueled independence struggles against colonial rule, forging new national identities from diverse populations. Both regions experienced nationalism as a potent force, though shaped by unique historical and political circumstances, driving significant change.

Causes & Effects of Revolutions (1750-1900)

Revolutions stemmed from Enlightenment ideas, social inequalities, and economic grievances, resulting in political upheaval, new nation-states, and lasting global changes.

Common Causes Across Revolutions

Across the 1750-1900 period, revolutions shared recurring causes: Enlightenment philosophies challenging existing power structures, widespread social and economic inequalities fueling discontent, and ineffective or oppressive governance. Rising nationalism fostered desires for self-determination, while external pressures—like imperial ambitions—often triggered conflict. These interwoven factors created volatile conditions ripe for revolutionary change globally.

Long-Term Effects & Global Changes

Revolutions from 1750-1900 spurred lasting global changes, including the spread of Enlightenment ideals and democratic principles, the rise of nation-states, and increased political participation. Industrialization accelerated, reshaping economies and societies, while imperialism expanded, driven by revolutionary fervor and resource demands. These shifts fundamentally altered the world order.

Environmental Factors & Industrialization

Resource availability fueled industrial growth from 1750-1900, but also caused significant environmental consequences, impacting landscapes and contributing to pollution.

Resource Availability & Industrial Growth

The period from 1750 to 1900 witnessed unprecedented industrial expansion directly linked to accessible natural resources like coal and iron ore. These resources powered new machines and factories, driving economic growth and urbanization. However, this growth wasn’t uniform; regions with abundant resources experienced faster industrialization, creating global economic disparities and shifting power dynamics.

Environmental Consequences of Industrialization

Rapid industrial growth from 1750-1900 brought significant environmental costs. Increased coal consumption led to air and water pollution, impacting public health and ecosystems. Deforestation occurred to provide resources and land for factories. These consequences, largely unaddressed at the time, laid the groundwork for modern environmental challenges.

Modes & Locations of Production

Industrialization dramatically altered production methods and geographical centers, shifting from home-based systems to factory settings and concentrating output in urban areas.

Changes in Production Methods

The period witnessed a monumental shift from manual labor to mechanized production, fueled by innovations like the steam engine and power loom. This transition spurred the factory system, concentrating workers and resources. Mass production techniques emerged, increasing efficiency and lowering costs, fundamentally altering the scale and speed of manufacturing processes globally, impacting social structures and economies.

Geographical Shifts in Production

Industrialization triggered significant geographical changes, concentrating production in areas with abundant resources like coal and iron ore – notably Britain, Western Europe, and the Northeastern United States. New industrial centers emerged, drawing rural populations seeking employment. This led to urbanization and altered global trade patterns, establishing new economic powerhouses.

Argumentation & Historical Evidence

Students will hone skills in constructing historical arguments, utilizing relevant evidence from Unit 5’s key concepts and developments to support their claims effectively.

Developing Historical Arguments

Crafting compelling historical arguments requires a nuanced understanding of causation, continuity, and change during the revolutionary period. Students must formulate a thesis, acknowledging complexity, and avoiding simple generalizations. Effective arguments demonstrate analytical thinking, connecting evidence to support a focused claim about revolutions between 1750 and 1900.

Using Evidence to Support Claims

Robust historical claims demand substantial evidence – primary sources, data, and scholarly interpretations – relevant to the revolutions of 1750-1900. Students should contextualize evidence, explaining its significance and limitations. Analyzing diverse perspectives strengthens arguments, demonstrating a sophisticated grasp of historical complexities and nuanced interpretations.

Key Terms & Vocabulary

Mastering essential terms – like Enlightenment, nationalism, and revolution – within their historical context is crucial for understanding this period’s complex transformations.

Defining Essential Terms

Key vocabulary unlocks a deeper comprehension of the revolutionary era. Students must define concepts like “Enlightenment,” encompassing reason and individual rights, and “nationalism,” the fervent identification with a nation. Understanding “revolution” itself – a fundamental shift in power or organization – is paramount. Terms like “industrialization,” “empiricism,” and “ideology” are also vital for contextualizing the period’s sweeping changes and intellectual currents.

Understanding Historical Context

Grasping the broader context is crucial for analyzing revolutions. Consider the Atlantic world’s interconnectedness from 1750-1900, fueled by trade and Enlightenment ideas. Recognize how pre-existing social hierarchies, economic inequalities, and political grievances fostered revolutionary sentiment. Examining state-building efforts and the rise of liberal ideals provides essential background for interpreting these transformative events.

Review Questions & Practice

Assess your understanding with sample questions focusing on Enlightenment thought, revolutionary causes, and effects, preparing you effectively for the AP World History exam.

Sample Questions for Unit 5

Consider these questions: How did Enlightenment philosophies influence revolutionary movements? Analyze the causes and consequences of the French Revolution’s Reign of Terror. Compare and contrast the leadership styles of Simón Bolívar and Toussaint Louverture.

Evaluate the role of nationalism in 19th-century Europe. How did industrialization contribute to revolutionary unrest?

Preparing for the AP World History Exam

Focus your exam preparation on understanding the interconnectedness of revolutions, Enlightenment thought, and rising nationalism. Practice crafting arguments using historical evidence, analyzing causes and effects, and comparing diverse revolutionary contexts. Master key vocabulary and be prepared to synthesize information across different regions and time periods.

hills feeding guide

Hills Feeding Guide: A Comprehensive Overview (Updated 02/16/2026)

Hills Science Plan offers tailored nutrition for dogs of all life stages and sizes, ensuring optimal health through precise feeding guidelines. Understanding these guides, found on packaging, is crucial for proactive weight management and overall wellbeing.

Understanding Hills Science Plan Food

Hills Science Plan isn’t just dog food; it’s a commitment to scientifically-backed nutrition. Formulated by veterinarians and pet nutritionists, each recipe is designed to meet the specific needs of your dog based on their age, breed size, and activity level.

The core philosophy centers around providing complete and balanced nutrition, utilizing high-quality ingredients. Hills prioritizes digestibility, ensuring your dog absorbs the maximum benefit from every meal. This translates to improved energy levels, a healthier coat, and stronger immunity.

Furthermore, Hills emphasizes proactive health management. Their formulas aren’t simply about addressing deficiencies; they’re about supporting long-term wellness and preventing potential health issues. The feeding guides are integral to this approach, helping owners provide the correct amount of food for optimal body condition.

The Importance of a Proper Feeding Guide

A precise feeding guide is paramount for maintaining your dog’s ideal weight and overall health. Overfeeding can lead to obesity, increasing the risk of diabetes, joint problems, and heart disease. Conversely, underfeeding can result in malnutrition and weakened immunity.

Hills’ feeding guides aren’t one-size-fits-all; they consider factors like age, breed, and activity level. Utilizing these guides ensures your dog receives the appropriate caloric intake to support their individual needs. Consistent monitoring of your dog’s body condition score is also vital.

Accurate portion control, guided by the Hills recommendations, promotes a healthy metabolism and supports optimal organ function. Remember, treats and table scraps contribute to caloric intake and should be factored into the daily feeding amount.

Hills Science Plan: Different Formulas

Hills Science Plan recognizes that dogs have unique nutritional requirements based on their size and life stage. Consequently, they offer a diverse range of formulas meticulously crafted to address these specific needs. These include specialized options for Small & Mini, Large Breed, and Medium Breed adult dogs.

Each formula features precisely balanced nutrients, supporting optimal digestion, healthy muscle maintenance, and vibrant skin and coat health. Hills also provides tailored puppy formulas, categorized by breed size – Mini, Medium, and Large – to promote healthy development and growth.

Mature Adult formulas, like the Medium Breed option, incorporate ingredients to support aging dogs’ specific needs, such as joint health and cognitive function. Choosing the correct formula is the first step towards ensuring your dog receives optimal nutrition.

Small & Mini Adult Dog Food

Hills Science Plan Small & Mini Adult dog food with Chicken is specifically formulated for dogs weighing up to 20 pounds fully grown. This tailored nutrition recognizes that smaller breeds have faster metabolisms and require smaller kibble sizes for easier chewing and digestion.

The formula provides precise levels of protein and fat to support lean muscle mass and ideal body weight. It also includes essential nutrients to promote healthy skin, a shiny coat, and strong immunity. The feeding guide on the bag provides clear instructions based on your dog’s weight, ensuring they receive the appropriate amount of food.

Remember, these are starting points, and adjustments may be needed based on activity level and individual needs. Big on love, small in size – this formula delivers complete, balanced nutrition for your little companion.

Large Breed Adult Dog Food

Hills Science Plan Large Breed Adult dog food is designed for dogs weighing over 55 pounds when fully grown. This formula acknowledges the unique needs of larger breeds, particularly their susceptibility to joint issues and the importance of controlled growth.

It features a precise balance of calcium and phosphorus to support strong bones and joints. The formula also includes high-quality protein to maintain lean muscle mass and provides optimal levels of L-Carnitine to support a healthy metabolism; Feeding guidelines are categorized based on weight, offering a clear starting point for portion control.

Remember to monitor your dog’s body condition and adjust feeding amounts accordingly. Science Plan Adult large breed is categorized to help maintain optimal health and wellbeing for your majestic companion.

Medium Breed Adult Dog Food

Hills Science Plan Medium Breed Adult dog food caters to dogs weighing between 20 and 50 pounds at maturity. This formula is carefully crafted to meet the specific energy and nutritional requirements of medium-sized breeds, supporting their active lifestyles and overall vitality.

It contains high-quality protein for maintaining lean muscle, and essential fatty acids for a healthy skin and coat. The balanced blend of nutrients promotes optimal digestion and supports a strong immune system. Feeding guidelines are clearly displayed on the packaging, categorized by your dog’s weight, providing a convenient starting point.

Consistent monitoring of your dog’s body condition is key, allowing for adjustments to the feeding amount to maintain an ideal weight and ensure a long, healthy life.

Hills Science Plan Puppy Food

Hills Science Plan Puppy food is specifically formulated to support the healthy development of puppies, providing the essential nutrients needed for strong bones, muscles, and immune systems. Recognizing the unique needs of growing puppies is paramount, and Hills offers tailored formulas based on breed size – Mini, Medium, and Large.

These formulas contain high-quality protein, DHA for brain and eye development, and a balanced calcium-to-phosphorus ratio for optimal skeletal growth. The feeding guide on each bag provides recommended daily amounts based on the puppy’s age and weight, serving as a crucial starting point.

Remember, puppies require more frequent feedings than adult dogs, and adjusting the amount based on individual activity levels and growth rate is essential for maintaining a healthy weight.

Mini Puppy Food Feeding Guidelines

Hills Science Plan Puppy Healthy Development Mini Chicken is designed for small-breed puppies, providing tailored nutrition for their rapid growth phase. The feeding guide for this formula considers the high energy requirements of miniature breeds. Puppies aged up to 3 months typically require 4 meals daily, gradually reducing to 3, then 2 as they mature.

For example, a 2kg puppy needs approximately 55g of dry food per day, while a 5kg puppy requires around 130g. These amounts are estimates; monitor your puppy’s body condition and adjust accordingly.

Consistent monitoring of weight and body condition is vital. Always provide fresh water and transition to adult food around 9-12 months, following a gradual 7-day mixing process.

Medium Puppy Food Feeding Guidelines

Hills Science Plan Chicken Medium Puppy Dog Food supports the healthy development of medium-breed puppies. These puppies benefit from a specifically formulated diet to support bone and muscle growth. The feeding guide varies based on the puppy’s weight and age, typically starting with 3-4 meals daily for younger puppies, decreasing to 2 as they mature.

A 5kg medium puppy requires approximately 130g of dry food daily, while a 10kg puppy needs around 240g. Refer to the bag’s feeding guide for precise amounts based on weight.

Regularly assess your puppy’s body condition; adjust portions to maintain an ideal weight. Ensure constant access to fresh, clean water. Transition to adult food around 12 months, using a 7-day gradual mixing process.

Large Breed Puppy Food Feeding Guidelines

Hills Science Plan Large Breed Puppy food is designed to support healthy bone and joint development in larger breeds, mitigating risks associated with rapid growth. Puppies require a carefully balanced diet to ensure optimal wellbeing during this crucial phase.

Feeding guidelines are weight-dependent; a 20kg large breed puppy needs approximately 550g of dry food daily, increasing to 620g at 30kg, 770g at 40kg, and 910g at 50kg. Always consult the bag for the most accurate recommendations.

Monitor your puppy’s body condition regularly and adjust portions accordingly to maintain a healthy weight. Divide the daily amount into multiple meals, especially for younger puppies. Provide constant access to fresh water and transition to adult food around 18-24 months, gradually mixing over seven days.

Transitioning to Hills Science Plan

Hills Science Plan prioritizes digestive health during dietary changes. A gradual transition is vital to avoid stomach upset and ensure your dog readily accepts the new food. Begin by mixing a small amount of Hills with your dog’s current food, approximately 25% Hills and 75% existing food.

Over a seven-day period, incrementally increase the proportion of Hills while decreasing the old food. For example, Day 2: 50% Hills/50% old food; Day 3: 75% Hills/25% old food. By Day 7, your dog should be fully transitioned to 100% Hills Science Plan.

Monitor your dog’s stool consistency during the transition. If diarrhea occurs, slow down the process and consult your veterinarian. This careful approach supports a smooth digestive adaptation and maximizes the benefits of Hills’ advanced nutrition.

Decoding the Feeding Chart

Hills Science Plan feeding charts are designed for convenience, providing starting points for optimal nutrition. These charts primarily utilize two key factors: your dog’s current weight and their age/life stage. Locate your dog’s weight range on the chart to find the recommended daily feeding amount in cups or grams.

Remember, these are guidelines, and individual needs vary. Active dogs or those with higher metabolisms may require more food, while less active dogs may need less. Pay close attention to your dog’s body condition score – you should be able to feel, but not easily see, their ribs.

The chart also indicates adjustments for puppies, adults, and mature adults, reflecting their changing nutritional requirements. Consistent monitoring and adjustments based on your dog’s individual response are essential for maintaining a healthy weight.

Weight-Based Feeding Amounts

Hills Science Plan feeding charts prominently feature weight-based recommendations, serving as the foundational step in determining appropriate portions. Locate your dog’s weight range on the chart – for example, a 20lb puppy will have a different recommendation than a 50lb adult. The chart then correlates this weight to a specific daily food amount, typically expressed in cups or grams.

It’s crucial to use a standard measuring cup to ensure accuracy. Slight variations in cup size can significantly impact the amount of food delivered. Remember that these amounts are starting points and should be adjusted based on activity level, metabolism, and body condition. Regularly assess your dog’s weight and adjust accordingly to maintain an ideal physique.

Consider splitting the daily amount into multiple meals, especially for puppies, to support healthy growth and digestion.

Age-Based Feeding Adjustments

Hills Science Plan recognizes that nutritional needs evolve with a dog’s age, necessitating adjustments to feeding amounts. Puppies, experiencing rapid growth, require more calories per pound of body weight than adult dogs. Conversely, mature adult dogs often benefit from reduced caloric intake to prevent weight gain due to decreased activity levels.

Puppy formulas are specifically designed with higher protein and fat content to support development. As dogs transition to adulthood, shift to an adult formula and adjust portions based on the weight-based feeding guide. Senior or mature adult dogs may require even further adjustments, potentially including formulas tailored for aging joints and metabolic changes.

Always consult the specific feeding guide on the bag, as it will detail age-appropriate recommendations for your dog’s life stage.

Adjusting Food Amounts for Optimal Weight

Maintaining an ideal body condition is paramount for your dog’s health. Regularly assess your dog’s weight and body condition score – you should be able to feel, but not easily see, their ribs. If your dog is gaining weight, gradually decrease the daily food amount by 10-20%. Conversely, if they are losing weight, increase the amount by a similar percentage.

Hills Science Plan feeding guides provide a starting point, but individual metabolisms and activity levels vary. Active dogs require more calories than sedentary ones. Monitor your dog’s response to adjustments over several days, and make further changes as needed. Consistent monitoring and adjustments are key to proactive weight management.

Remember, small, incremental changes are preferable to drastic alterations in food intake.

Reading the Hills Feeding Guide on the Bag

Hills Science Plan packaging provides a convenient feeding guide tailored to your dog’s life stage and size. Locate the chart on the back of the bag, which correlates your dog’s weight with recommended daily feeding amounts. These amounts are expressed in cups or grams of dry food.

Pay close attention to the weight ranges; choose the range that best matches your dog’s current weight. The guide often includes separate recommendations for puppies, adults, and mature adults. Remember these are starting points, and adjustments may be necessary based on activity level and individual metabolism.

Always use a standard measuring cup to ensure accurate portion control. Consistent measurement is vital for maintaining optimal weight and health.

Ingredients and Nutritional Value

Hills Science Plan dog food prioritizes high-quality ingredients to deliver complete and balanced nutrition. Real meat, such as chicken or beef, is often the primary ingredient, providing essential protein for muscle maintenance and development. The formulas also include wholesome grains, vegetables, and fruits, offering vital vitamins, minerals, and antioxidants.

Hills focuses on digestibility, ensuring maximum nutrient absorption. Each formula is carefully crafted to meet or exceed established nutritional standards. Key nutrients include Vitamin E for immune support, Omega-6 fatty acids for skin and coat health, and a balanced blend of essential fatty acids.

The inclusion of ActivBiome+ technology further enhances gut health, promoting optimal digestion and nutrient uptake.

Hills Science Plan Mature Adult Formulas

Hills Science Plan Mature Adult formulas are specifically designed to meet the evolving needs of aging dogs, supporting a healthy and active lifestyle in their senior years. These formulas recognize that older dogs often experience changes in metabolism, activity levels, and digestive health.

Key features include precisely balanced nutrition to help maintain ideal body weight, supporting joint health with ingredients like glucosamine and chondroitin, and promoting cognitive function. The Medium Breed Mature Adult formula, for example, utilizes ActivBiome+ technology to support a balanced gut microbiome.

These formulas often contain antioxidants to bolster the immune system and are formulated for optimal digestibility, ensuring senior dogs can readily absorb essential nutrients. Careful consideration is given to protein levels to maintain muscle mass.

Medium Breed Mature Adult Feeding

Hills Science Plan Medium Breed Mature Adult dog food with Chicken provides 100% complete and balanced nutrition, specifically tailored for medium-sized dogs aged 7+ years. This formula supports a healthy metabolism, crucial for maintaining an ideal body condition as activity levels naturally decrease with age.

Feeding guidelines are weight-based; a 10-20 kg dog typically requires 120-210 grams daily, while a 20-30 kg dog needs 210-300 grams. Always refer to the bag for the most accurate recommendations and adjust based on your dog’s individual needs and activity level.

The formula’s ActivBiome+ technology promotes optimal digestive health, and its antioxidant blend supports a strong immune system. Consistent monitoring of your dog’s weight and body condition is essential to ensure they are receiving the appropriate amount of food.

ActivBiome Technology in Hills Food

Hills incorporates ActivBiome+ technology into many of its Science Plan formulas, representing a significant advancement in canine digestive health. This proprietary blend of prebiotic fiber and synergistic nutrients works within the gut microbiome to nourish beneficial bacteria.

ActivBiome+ supports balanced gut flora, enhancing digestive health and promoting stronger immunity. A healthy gut microbiome is vital for nutrient absorption, optimal stool quality, and overall wellbeing. This technology isn’t just about addressing digestive upset; it’s about proactively fostering a resilient gut environment.

Hills’ research demonstrates that ActivBiome+ can contribute to improved digestion and a more comfortable gastrointestinal experience for dogs. It’s a key component in their commitment to providing scientifically formulated nutrition for a long and healthy life;

Macronutrient and Micronutrient Balance

Hills Science Plan dog food is meticulously formulated to deliver an optimal balance of macronutrients – high-quality protein, fats, and carbohydrates – essential for energy and maintaining lean muscle mass. This precise ratio supports a fast metabolism, crucial for overall health and vitality in dogs.

Beyond macronutrients, Hills prioritizes micronutrient inclusion. Essential vitamins and minerals are carefully added to support immune function, bone health, and various physiological processes. This comprehensive approach ensures dogs receive complete and balanced nutrition at every life stage.

The specific balance is tailored to each formula, considering breed size, age, and activity level. This dedication to scientific formulation ensures that Hills provides not just sustenance, but a foundation for a long, healthy, and active life for your canine companion.

Dry Food Measurement Conversion

Accurate measurement is vital when using Hills Science Plan dry dog food to ensure your pet receives the correct caloric intake. While the feeding charts on the bag provide guidance in cups, understanding volume-to-weight conversions is beneficial for precision.

A “cup” of dry food isn’t a standardized unit; density varies between formulas. Generally, 1 cup of Hills dry food equates to approximately 8-10 ounces by weight. However, always refer to the specific product packaging for the most accurate conversion information.

Using a kitchen scale to weigh the food is the most reliable method, guaranteeing consistent portions. This is particularly important during transitions or when managing weight. Consistent measurements, combined with regular weight monitoring, contribute to optimal health and wellbeing for your dog.

Proactive Weight Management with Hills

Hills Science Plan empowers proactive weight management through tailored formulas and diligent feeding practices. Regularly monitoring your dog’s body condition score (BCS) is key – feeling for ribs without excessive fat cover is a good indicator. Adjust feeding amounts based on BCS and activity levels.

The feeding guide provides a starting point, but individual needs vary. If your dog is gaining weight, slightly reduce the daily portion. Conversely, increase it if they’re losing weight. Small, incremental adjustments are preferable to drastic changes.

Hills’ focus on balanced nutrition supports lean muscle mass, contributing to a healthy metabolism. Remember to account for treats and chews within the daily caloric allowance, ensuring a holistic approach to weight control and overall health.

Resources for Further Information

For comprehensive guidance on Hills Science Plan feeding, explore the official Hills Pet Nutrition website. It offers detailed feeding charts, breed-specific recommendations, and articles on canine nutrition. Your veterinarian remains the best resource for personalized advice, considering your dog’s unique health profile.

Hills’ customer support team is readily available to answer questions and provide assistance with selecting the appropriate formula and determining optimal feeding amounts. Online forums and communities dedicated to dog health can also offer valuable insights and shared experiences.

Remember to utilize the resources on the Hills packaging itself, including the feeding guide and ingredient list. Staying informed and proactive ensures your canine companion receives the tailored nutrition they deserve for a long, healthy life.

glock gen 3 guide rod

Glock Gen 3 Guide Rod: A Comprehensive Guide (Updated 02/16/2026)

Today’s date is 02/16/2026. This guide explores Glock Gen 3 guide rods, covering types, upgrades, installation, and troubleshooting for optimal firearm performance.

The Glock Gen 3 guide rod is a crucial component within the pistol’s recoil system, often overlooked yet vital for smooth and reliable operation. Understanding its role is paramount for Glock enthusiasts and those seeking to enhance their firearm’s performance. This guide, updated as of February 16, 2026, delves into the specifics of these rods, exploring factory options, aftermarket upgrades – including stainless steel and titanium variants – and the impact they have on recoil management and overall longevity.

We’ll examine how guide rods interact with the recoil spring, influencing accuracy and addressing potential issues like stuck components. Furthermore, we’ll briefly touch upon the differences between Gen 3 and Gen 4 guide rods, ensuring compatibility and informed decision-making for your Glock pistol. This introduction sets the stage for a comprehensive exploration of this essential firearm part.

What is a Glock Gen 3 Guide Rod?

The Glock Gen 3 guide rod is a cylindrical metal component situated beneath the recoil spring within the Glock pistol’s slide. It serves as a central axis for the spring’s movement during the recoil cycle, effectively channeling and controlling the energy generated by firing. Typically constructed from steel in factory models, aftermarket options introduce materials like stainless steel and titanium for enhanced performance characteristics.

Its primary function isn’t to directly absorb recoil, but rather to provide a stable pathway for the spring, ensuring consistent and reliable cycling of the slide. The guide rod’s design contributes significantly to the pistol’s overall operational efficiency. Understanding its construction and role is key to appreciating the benefits of potential upgrades and maintaining optimal firearm function, as of today, 02/16/2026.

The Function of the Guide Rod in Glock Operation

During firing, the Glock’s slide moves rearward, driven by the expanding gases and the momentum of the bullet. The recoil spring, guided by the rod, absorbs and then releases this energy, returning the slide to its forward position to chamber a new round. The guide rod ensures the spring compresses and expands in a linear fashion, preventing binding or uneven pressure.

Without a properly functioning guide rod, the spring’s energy wouldn’t be efficiently harnessed, leading to potential malfunctions like failure to feed or failure to return to battery. It’s a critical component in the pistol’s short-recoil operating system, contributing to its renowned reliability. As of 02/16/2026, maintaining this component is vital for consistent performance.

Types of Glock Gen 3 Guide Rods

Glock Gen 3 pistols utilize factory, stainless steel, and titanium guide rods, alongside combinations with varying recoil spring weights for customized performance.

Factory Glock Guide Rods

Glock’s original guide rods, standard in Gen 3 models, are constructed from a robust polymer-coated steel alloy. These components effectively manage recoil and slide movement during cycling. While reliable and cost-effective, factory rods are sometimes perceived as contributing to sharper recoil impulses compared to aftermarket alternatives. They represent a balance between durability and affordability, suitable for general use and self-defense applications.

The factory guide rod integrates seamlessly with the Glock recoil spring, functioning as a crucial element in the pistol’s operating system. Replacement is generally only necessary due to wear, damage, or as part of a broader upgrade strategy. Maintaining the factory guide rod through regular cleaning and inspection ensures continued reliable operation. They are a dependable starting point for most Glock owners.

Aftermarket Stainless Steel Guide Rods

Stainless steel guide rods offer a significant upgrade over factory polymer-coated steel options, prized for their enhanced durability and resistance to bending or deformation. These rods typically exhibit a polished finish, contributing to smoother slide travel and potentially reduced friction. Many shooters report a noticeable decrease in felt recoil when switching to stainless steel, improving control during rapid fire.

Stainless steel’s inherent strength makes these guide rods a popular choice for high-round-count shooters and those seeking increased reliability. They are generally compatible with factory recoil springs, though matching weights are recommended for optimal performance. While slightly heavier than titanium alternatives, stainless steel provides an excellent balance of strength, cost, and recoil mitigation, making them a favored upgrade.

Aftermarket Titanium Guide Rods

Titanium guide rods represent a premium upgrade, focusing on weight reduction for faster cycling and improved maneuverability. Significantly lighter than both factory and stainless steel options, titanium minimizes reciprocating mass, potentially leading to quicker follow-up shots and reduced fatigue during extended shooting sessions. Despite their reduced weight, titanium rods maintain impressive strength and durability, resisting bending and wear.

However, titanium’s lighter weight may result in a slight increase in perceived recoil, as less mass is counteracting the slide’s momentum. Careful spring weight selection is crucial to optimize performance with a titanium guide rod. While generally more expensive than stainless steel, the weight savings and potential performance gains make titanium a compelling choice for competitive shooters and those prioritizing lightweight builds.

Recoil Spring Guide Rod Combinations

Glock guide rods don’t typically come with recoil springs; they are sold separately, allowing customization to match shooting style and ammunition. Understanding this interplay is vital. Heavier recoil springs slow the slide, reducing felt recoil but potentially increasing the risk of failures to eject. Lighter springs increase speed but amplify recoil.

Aftermarket combinations often offer a wider range of spring weights than the factory setup. Experimentation is key to finding the optimal balance. Consider your typical use case – competition, self-defense, or range practice – when selecting a spring weight. Proper tuning ensures reliable operation and maximizes accuracy. Always prioritize safety and function over simply minimizing recoil.

Benefits of Upgrading the Guide Rod

Upgrading a Glock Gen 3 guide rod can yield reduced recoil, improved reliability, enhanced accuracy, and increased component longevity for a smoother shooting experience.

Reduced Recoil

A primary benefit of upgrading the Glock Gen 3 guide rod is a noticeable reduction in perceived recoil. Aftermarket guide rods, particularly those constructed from titanium, are significantly lighter than the factory steel components. This weight reduction directly impacts the overall recoil impulse, lessening the force transferred to the shooter’s hand during each shot.

The lighter guide rod assembly contributes to a faster cycling of the slide, further mitigating felt recoil. While the difference may seem subtle, consistent shooters will appreciate the diminished fatigue and improved control, especially during extended range sessions or competitive shooting. Reduced recoil also aids in faster follow-up shots and enhanced accuracy by minimizing shooter flinch.

Improved Reliability

Upgrading to an aftermarket Glock Gen 3 guide rod can demonstrably improve the firearm’s reliability. Factory Glock guide rods, while functional, can experience wear and deformation over time, particularly with high-volume shooting or use of various ammunition types. This wear can lead to malfunctions, such as failures to feed or eject.

High-quality aftermarket guide rods, crafted from materials like stainless steel or titanium, offer increased durability and resistance to bending or breaking. A properly fitted guide rod ensures consistent and smooth slide movement, reducing friction and stress on critical components. This translates to a more dependable firearm, capable of functioning flawlessly under demanding conditions, enhancing overall confidence in the weapon’s performance.

Enhanced Accuracy

A frequently overlooked benefit of upgrading a Glock Gen 3 guide rod is the potential for enhanced accuracy. While a guide rod isn’t a direct accuracy-enhancing component like a match-grade barrel, its influence on consistent slide movement plays a crucial role. Reduced friction and a smoother recoil cycle contribute to minimizing disturbances during the bullet’s exit from the chamber.

Aftermarket guide rods, particularly those with tighter tolerances, help maintain a more consistent lockup between the slide and barrel. This consistency translates to tighter groupings and improved shot placement. While the gains may be subtle, they become noticeable, especially when combined with other accuracy-enhancing upgrades, ultimately leading to a more precise shooting experience.

Increased Longevity of Components

Upgrading the Glock Gen 3 guide rod can significantly contribute to the extended lifespan of your firearm’s internal components. The original factory guide rod, while functional, can experience wear and fatigue over time, particularly with high-volume shooting. This wear transmits stress to other critical parts like the recoil spring and slide rails.

Aftermarket guide rods, crafted from materials like stainless steel or titanium, offer superior durability and resistance to deformation. By absorbing and distributing recoil energy more effectively, they reduce the strain on the frame, slide, and locking block. This lessened stress translates to fewer cracked frames, worn rails, and broken parts, ultimately saving on repair costs and maintaining firearm reliability for years to come;

Installation and Disassembly

Proper guide rod replacement requires specific tools and careful execution. This section details step-by-step instructions for safe removal and installation of your Glock Gen 3 guide rod.

Tools Required for Guide Rod Replacement

Successfully replacing your Glock Gen 3 guide rod demands a few essential tools to ensure a safe and efficient process. First, a Glock-specific punch set is crucial for driving out pins without damaging the firearm. A quality set will include punches of varying sizes to accommodate different pin diameters. Secondly, a proper set of screwdrivers – both flathead and Phillips – are needed for disassembly of certain components.

Additionally, a pair of needle-nose pliers can be incredibly helpful for manipulating small parts like the recoil spring. Eye protection is absolutely mandatory to shield your eyes from flying springs or pin fragments. A clean workspace, ideally covered with a gunsmithing mat, will prevent lost parts and scratches. Finally, a small amount of quality gun lubricant will aid in reassembly and ensure smooth operation of the new guide rod and spring.

Step-by-Step Guide to Removing the Old Guide Rod

Begin by ensuring your Glock is unloaded and safe. Remove the slide from the frame. Next, using a Glock-specific punch, carefully push out the recoil spring guide rod stop pin located at the front of the slide. Gently remove the guide rod stop. Now, carefully compress the recoil spring and guide rod assembly, allowing you to remove the captured recoil spring.

Slowly release the spring tension, and fully remove the old guide rod. Be mindful of the spring’s force; control is key. Inspect the removed components for wear or damage. Note the orientation of the guide rod for correct reinstallation of the new one. Proper technique prevents damage to the slide or injury to yourself during this process.

Step-by-Step Guide to Installing a New Guide Rod

Begin by compressing the recoil spring, ensuring it’s adequately compressed for insertion. Carefully insert the new guide rod into the slide’s recoil spring channel, guiding the spring along with it. Ensure the guide rod is fully seated within the slide. Align the guide rod stop with its corresponding hole in the slide.

Using a Glock-specific punch, gently tap the guide rod stop pin back into place, securing the assembly. Verify the pin is fully seated and doesn’t protrude. Cycle the slide manually several times to confirm smooth operation and proper spring function. Double-check that the guide rod moves freely within the slide.

Comparing Guide Rod Materials

Stainless steel and titanium guide rods offer distinct advantages. This section details their durability, weight, and cost, aiding informed decisions for Glock Gen 3 upgrades.

Stainless Steel vs. Titanium: A Detailed Comparison

When considering Glock Gen 3 guide rod materials, stainless steel and titanium present compelling options, each with unique characteristics. Stainless steel guide rods are renowned for their exceptional durability and wear resistance, making them a reliable choice for high-round-count firearms and demanding applications. They generally offer a longer service life and are less prone to deformation under stress.

However, titanium guide rods excel in weight reduction, significantly decreasing the overall mass of the firearm’s slide assembly. This lighter weight can contribute to faster cycling and potentially improved accuracy. While titanium is strong, it’s generally less resistant to wear than stainless steel. Cost is also a factor; titanium guide rods typically command a higher price point due to the material’s inherent expense and more complex manufacturing processes.

Ultimately, the ideal choice depends on individual priorities. If longevity and robustness are paramount, stainless steel is the preferred option. If weight savings and a slight performance edge are desired, titanium is a viable alternative.

Durability and Wear Resistance

Regarding Glock Gen 3 guide rods, durability and wear resistance are critical factors influencing long-term reliability. Stainless steel guide rods consistently demonstrate superior performance in these areas. The inherent hardness of stainless steel resists deformation and wear, even under the intense cyclical stresses generated during firing. This makes them exceptionally well-suited for high-volume shooting and rigorous use.

Titanium, while strong, exhibits comparatively lower wear resistance. Over extended periods, titanium can experience surface wear, particularly at contact points within the slide. However, this wear is often minimal and may not significantly impact functionality for most shooters. Proper lubrication and maintenance are crucial for maximizing the lifespan of any guide rod material.

Choosing a durable guide rod minimizes the risk of failure and ensures consistent firearm operation, contributing to overall safety and reliability.

Weight Considerations

When selecting a Glock Gen 3 guide rod, weight is a significant factor, particularly for concealed carry or competition shooting where every ounce matters. Titanium guide rods offer a substantial weight reduction compared to their stainless steel counterparts. This lighter weight can marginally decrease the overall firearm weight, potentially improving comfort during extended carry and slightly reducing felt recoil.

However, the weight difference is often relatively small and may not be noticeable for all shooters. Stainless steel guide rods, while heavier, contribute to a more substantial feel in the firearm, which some shooters prefer. The impact of weight on recoil is also subtle and varies based on individual shooting technique and firearm configuration.

Ultimately, the choice between titanium and stainless steel depends on prioritizing weight savings versus a more robust feel.

Cost Analysis

The price of Glock Gen 3 guide rods varies considerably based on material and manufacturer. Factory Glock guide rods are the most affordable option, typically ranging from $10 to $20. Aftermarket stainless steel guide rods generally fall within the $25 to $50 price range, depending on brand and features.

Titanium guide rods represent the premium option, with prices often exceeding $75 and potentially reaching over $100 for high-end models. Recoil spring combinations, including the guide rod and spring, can range from $30 to $80, depending on the spring weight and manufacturer.

Consider the long-term value when evaluating cost. While titanium is more expensive upfront, its durability may offset the initial investment. Factor in shipping costs and potential installation fees when comparing prices from different vendors.

Troubleshooting Common Issues

Addressing stuck guide rods or failures requires careful inspection and potential replacement. Preventative maintenance, including cleaning and lubrication, is crucial for reliability.

Guide Rod Failure Symptoms

Recognizing guide rod failure is vital for safe Glock operation. Several symptoms indicate a potential issue requiring immediate attention. Increased difficulty in disassembly, particularly during field stripping, is a common sign. A noticeable change in the slide’s action – sluggishness or inconsistent cycling – can also point to a failing guide rod.

Furthermore, observe for excessive play or wobble within the guide rod assembly. This indicates wear or breakage. Unusual noises during cycling, such as clicking or scraping, should not be ignored. Finally, diminished accuracy and increased felt recoil can indirectly suggest a compromised guide rod impacting the firearm’s overall performance. Regular inspection during cleaning helps detect early warning signs.

Addressing Stuck Guide Rods

A stuck Glock Gen 3 guide rod can be frustrating, but careful methods can resolve it. First, ensure the firearm is unloaded and safe. Gently attempt to rotate the guide rod slightly while applying firm, even pressure to pull it forward. Avoid excessive force, which could damage components.

If rotation doesn’t work, a quality gun lubricant applied around the guide rod’s base can help loosen it. Allow the lubricant to penetrate for a few minutes. Using a non-marring punch or tool, carefully apply pressure to the baseplate, avoiding damage to the finish. Patience is key; repeated gentle attempts are more effective than brute force. If issues persist, consult a qualified gunsmith.

Preventative Maintenance

Consistent preventative maintenance extends the life of your Glock Gen 3 guide rod and ensures reliable operation. Regularly clean and lubricate the guide rod and surrounding components during routine firearm maintenance. Use a quality gun lubricant specifically designed for firearms to prevent corrosion and reduce friction.

Inspect the guide rod for any signs of wear, damage, or deformation during cleaning. Pay close attention to the recoil spring and ensure it’s properly seated. Avoid over-lubrication, as excess lubricant can attract dirt and debris. Proper storage in a dry environment also contributes to longevity. Following these steps minimizes the risk of a stuck or failing guide rod.

Glock Gen 3 vs. Gen 4 Guide Rod Differences

Gen 4 Glocks feature a dual recoil spring assembly, differing from the single spring in Gen 3 models, impacting guide rod compatibility and performance.

Compatibility Considerations

When selecting a guide rod, ensuring compatibility with your specific Glock Gen 3 model is paramount. While most aftermarket guide rods are designed for standard Gen 3 frames, variations exist. Specifically, consider if your pistol has undergone any modifications, such as frame alterations or aftermarket slide cuts. These changes can affect guide rod fitment.

Furthermore, compatibility extends to the recoil spring. Aftermarket guide rods often come as a complete assembly, including a matched recoil spring. Using an incompatible spring weight can negatively impact cycling and reliability. Always verify the spring weight is appropriate for your ammunition and intended use. Finally, be aware that Gen 4 Glock models utilize a different recoil spring system, rendering Gen 3 guide rods incompatible without additional parts.

Performance Variations

Switching from a factory Glock Gen 3 guide rod to an aftermarket option can yield subtle, yet noticeable, performance differences. Stainless steel guide rods generally offer increased durability and minimal functional change, primarily impacting longevity. Titanium guide rods, being lighter, can theoretically reduce reciprocating mass, potentially leading to slightly faster cycling and reduced felt recoil.

However, these variations are often marginal and dependent on other factors like ammunition and individual shooter technique. Some users report improved accuracy with aftermarket rods due to consistent spring pressure. Conversely, improperly matched recoil spring weights can decrease performance, causing malfunctions or increased felt recoil. Thorough testing with various loads is crucial to determine the optimal setup for your specific Glock Gen 3.

Guide Rod and Recoil Spring Selection

Optimal performance requires careful matching of guide rod weight to recoil spring rates, ensuring reliable cycling and minimizing felt recoil for your Glock Gen 3.

Matching Guide Rods to Recoil Spring Weights

Selecting the correct recoil spring weight is crucial when upgrading your Glock Gen 3 guide rod. A heavier guide rod, like stainless steel, often pairs well with a slightly lighter recoil spring to maintain proper cycling. Conversely, a lighter titanium guide rod may benefit from a standard or slightly heavier spring.

Understanding spring rates is key; lower rates reduce recoil but can cause malfunctions with heavier loads, while higher rates increase recoil but improve reliability with stronger ammunition. Experimentation within recommended ranges is often necessary to find the ideal combination for your specific Glock Gen 3, ammunition type, and shooting style. Consider factors like intended use – competition, self-defense, or range practice – when making your selection.

Understanding Recoil Spring Rates

Recoil spring rates are measured in pounds, indicating the force required to compress the spring. Lower rates (e.g., 13-15 lbs) reduce felt recoil and muzzle flip, beneficial for faster follow-up shots, but may increase the risk of malfunctions with underpowered ammunition. Higher rates (e.g., 17-19 lbs) enhance reliability with heavier loads and suppress overtravel, but increase perceived recoil.

Glock Gen 3 pistols typically ship with a standard rate spring. When upgrading the guide rod, adjusting the spring rate allows fine-tuning of the firearm’s cycling and recoil characteristics. Matching the spring rate to the guide rod material and intended ammunition is vital for optimal performance and consistent accuracy. Careful consideration ensures a smooth and reliable shooting experience.

Where to Purchase Glock Gen 3 Guide Rods

Glock Gen 3 guide rods are available from reputable online retailers and local gun stores, ensuring quality and proper fit for your firearm.

Reputable Online Retailers

When sourcing a Glock Gen 3 guide rod online, prioritize established retailers known for genuine firearm parts and excellent customer service. Several platforms consistently receive positive feedback from Glock enthusiasts. Brownells is a widely respected source, offering a comprehensive selection and detailed product information. MidwayUSA is another excellent option, frequently featuring competitive pricing and fast shipping.

Additionally, consider retailers specializing in Glock components, as they often possess deeper expertise and a wider range of options. Always verify the retailer’s return policy and ensure they are authorized to sell firearm parts in your jurisdiction. Reading customer reviews can provide valuable insights into the retailer’s reliability and product quality before making a purchase.

Local Gun Stores

Supporting local gun stores offers several advantages when purchasing a Glock Gen 3 guide rod. These stores provide a personalized shopping experience, allowing you to physically inspect the product and receive expert advice from knowledgeable staff. They can assist in determining the correct guide rod for your specific Glock model and intended use.

Furthermore, local stores often foster a sense of community among firearm owners, providing opportunities to connect with fellow enthusiasts. Purchasing locally also contributes to the local economy and supports businesses within your area. Don’t hesitate to ask about installation services or recommendations for qualified gunsmiths if you’re not comfortable performing the replacement yourself.

Considerations for Choosing a Vendor

When sourcing a Glock Gen 3 guide rod, careful vendor selection is crucial. Prioritize retailers with established reputations for quality and customer service. Verify they stock genuine parts or reputable aftermarket brands. Examine return policies – a flexible return policy safeguards against receiving a defective or incorrect item.

Read customer reviews to gauge other buyers’ experiences with the vendor. Competitive pricing is important, but don’t solely base your decision on cost; reliability and support are paramount. Ensure the vendor clearly states shipping costs and delivery timelines. Finally, confirm the vendor complies with all applicable firearm parts regulations.