3d printer filament guide

Navigating the world of 3D printing begins with understanding filaments – the materials that bring digital designs to life. This comprehensive guide explores filament types,
properties, and applications, empowering you to select the ideal material for successful prints.

Choosing the correct filament is crucial for achieving desired results, impacting print quality, strength, and durability. Let’s delve into the specifics!

What is 3D Printer Filament?

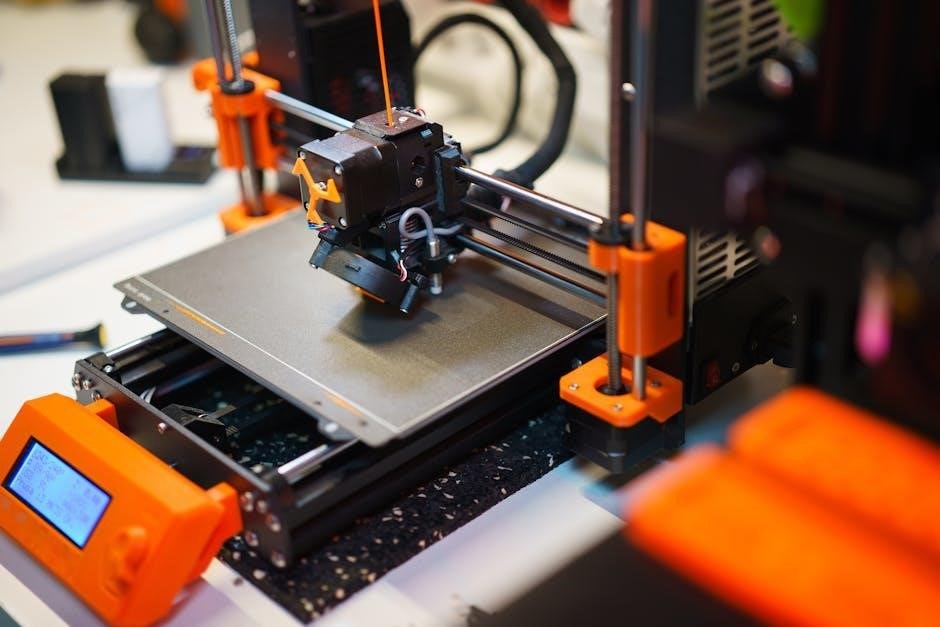
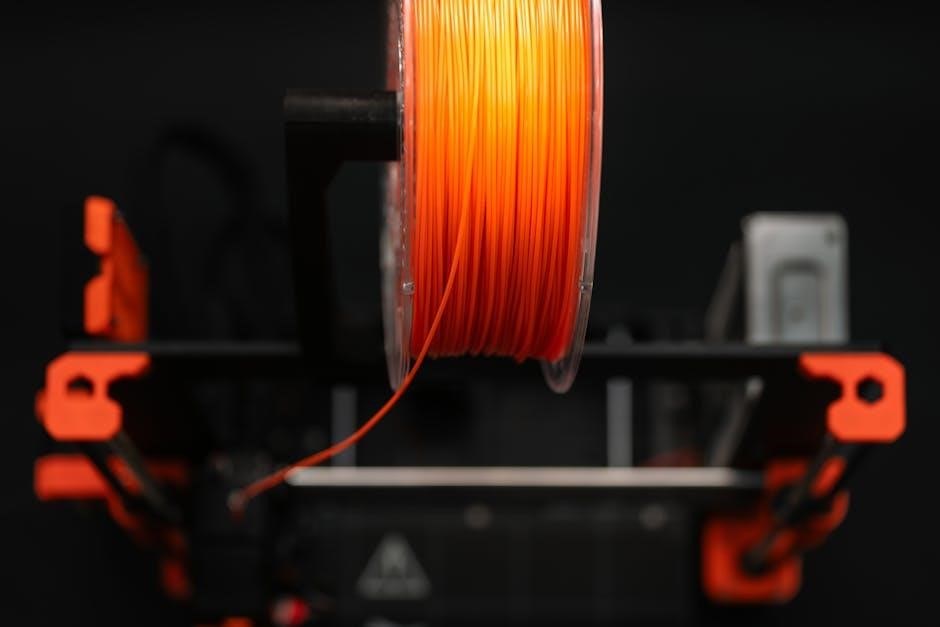
3D printer filament is the thermoplastic material fed through a 3D printer’s nozzle to create three-dimensional objects, layer by layer. Typically supplied on spools, it’s the “ink” for your 3D printer, available in various materials like PLA, ABS, PETG, and more specialized options.

These materials are heated and extruded, solidifying as they cool, forming the desired shape. Filament diameter, commonly 1.75mm or 2.85mm, must match your printer’s specifications. Understanding filament composition is key, as each material possesses unique characteristics impacting print quality, strength, and application suitability.

Why Choosing the Right Filament Matters

Selecting the appropriate filament is paramount to 3D printing success. Incorrect material choices can lead to frustrating issues like poor adhesion between layers, resulting in weak or delaminated prints. Brittleness can cause parts to fracture easily, while warping occurs when the material shrinks unevenly during cooling.

The right filament ensures optimal strength, durability, and functionality for your project. Considering factors like heat resistance, flexibility, and chemical exposure is vital. Matching the filament to the intended application guarantees a finished product that meets your specific needs and expectations.

Common 3D Printer Filament Types

Several filaments dominate the 3D printing landscape, each offering unique characteristics. PLA, ABS, and PETG are widely used due to their balance of printability and properties.

PLA Filament (Polylactic Acid)

PLA is a popular thermoplastic derived from renewable resources like cornstarch or sugarcane, making it biodegradable under specific conditions. Known for its ease of printing, PLA requires lower temperatures and doesn’t typically necessitate a heated bed.

PLA’s properties include rigidity and a relatively low melting point, resulting in parts that are strong but can become brittle. It exhibits minimal warping and odor during printing, making it ideal for beginners.

PLA: Properties and Characteristics

PLA is characterized by its low printing temperature, minimal odor, and biodegradability. It’s a rigid material with good detail reproduction.

PLA: Ideal Applications

PLA excels in creating prototypes, educational models, toys, and decorative items. It’s not recommended for parts requiring high heat resistance or durability.

PLA boasts a glass transition temperature of around 60°C, meaning it softens and loses rigidity at relatively low temperatures. This impacts its suitability for heat-exposed applications. It’s known for its low odor during printing, a significant advantage for indoor use.

PLA exhibits excellent detail reproduction, making it ideal for intricate designs and models. However, it’s relatively brittle compared to other filaments and can be prone to cracking under stress. Its rigidity contributes to dimensional stability during printing.

Key characteristics include biodegradability (in industrial composting facilities) and a low printing temperature range (180-220°C).

PLA shines in applications prioritizing aesthetics and ease of printing. It’s perfect for prototyping, educational models, and visual aids where high strength isn’t paramount. Think architectural models, figurines, and decorative items – PLA’s detail reproduction excels here.

Low-stress parts and non-functional prototypes also benefit from PLA’s simplicity. It’s a fantastic choice for beginners due to its forgiving nature. However, avoid using PLA for parts subjected to significant heat, impact, or prolonged outdoor exposure.

Common uses include toys, phone cases (for aesthetic purposes), and artistic creations.

ABS Filament (Acrylonitrile Butadiene Styrene)

ABS is a robust thermoplastic known for its durability and resistance, making it a popular choice for functional parts. It offers a good balance of strength, toughness, and heat resistance compared to PLA. This filament is widely used in manufacturing and engineering applications requiring a more resilient material.

ABS exhibits higher temperature resistance, allowing it to withstand more demanding environments. It’s often favored for parts that will experience stress or impact, like automotive components and protective casings. However, printing ABS requires careful consideration due to its tendency to warp.

ABS: Properties and Characteristics

ABS filament boasts impressive mechanical properties, including high impact strength and good tensile strength. It’s a relatively rigid material, offering excellent durability for functional prototypes and end-use parts. ABS also demonstrates good chemical resistance, making it suitable for applications involving exposure to various substances.

A key characteristic of ABS is its higher glass transition temperature (around 105°C) compared to PLA. This means it can withstand higher temperatures without deforming. However, this also contributes to its propensity to warp during printing, requiring a heated bed and often an enclosure for optimal results.

ABS: Ideal Applications & Considerations

ABS excels in applications demanding durability and heat resistance, such as automotive parts, protective cases, and functional prototypes subjected to stress. Its strength makes it suitable for items needing repeated use or exposure to impact. LEGO bricks are famously made from ABS, highlighting its toughness!

However, printing with ABS requires careful consideration. Warping is a common issue, necessitating a heated bed (100-110°C) and ideally an enclosed printer to maintain consistent temperatures. ABS also emits fumes during printing, so good ventilation is crucial. Nozzle temperature typically ranges from 230-260°C.

PETG Filament (Polyethylene Terephthalate Glycol-modified)

PETG is a popular choice, bridging the gap between PLA’s ease of printing and ABS’s strength. It’s a glycol-modified version of PET (used in water bottles), offering improved impact resistance, flexibility, and chemical resistance compared to its predecessor. PETG boasts excellent layer adhesion, resulting in robust prints.

This filament is known for its versatility, making it suitable for both functional parts and aesthetic models. It exhibits lower warping tendencies than ABS and doesn’t require a heated chamber, simplifying the printing process for many users. Typical printing temperatures range from 220-250°C.

PETG: Properties and Characteristics

PETG presents a unique combination of desirable properties. It’s inherently strong and durable, exhibiting good tensile strength and impact resistance. Notably, PETG demonstrates excellent chemical resistance, withstanding exposure to various substances. Its relatively low shrinkage rate minimizes warping during printing, a common issue with ABS.

Furthermore, PETG is partially crystalline, contributing to its toughness and dimensional stability. It’s also food-safe, making it suitable for printing containers holding consumables. The material is slightly flexible, offering a degree of pliability without sacrificing rigidity. PETG is also known for its glossy finish.

PETG: Advantages over PLA and ABS

PETG bridges the gap between PLA and ABS, offering benefits of both while mitigating their drawbacks. Compared to PLA, PETG boasts superior strength, durability, and heat resistance, making it suitable for functional parts. Unlike ABS, PETG doesn’t require a heated bed for successful printing, simplifying the process.

It also exhibits lower odor and warping tendencies than ABS, improving the printing experience. While PLA is easier to print, PETG’s enhanced mechanical properties and chemical resistance make it a more versatile choice for a wider range of applications. PETG offers a balance of printability and performance.

Engineering Filaments

Engineering filaments offer enhanced mechanical and thermal properties, exceeding standard materials like PLA and ABS. These specialized plastics are designed for demanding applications requiring durability and resilience.

Nylon Filament (Polyamide)

Nylon filament, a polyamide thermoplastic, is renowned for its exceptional strength, flexibility, and durability. It exhibits high resistance to wear, abrasion, and many chemicals, making it suitable for functional prototypes and end-use parts.

Common applications include gears, hinges, and other components needing robust performance. However, nylon presents printing challenges due to its tendency to absorb moisture, requiring careful drying before use.

Printing nylon often necessitates heated build plates and enclosures to prevent warping and ensure layer adhesion. Despite these complexities, the resulting parts offer superior mechanical properties compared to many other filaments.

Nylon: Strength, Flexibility & Durability

Nylon: Applications and Printing Challenges

Nylon’s inherent properties deliver exceptional performance in 3D printed parts. It boasts high tensile strength, meaning it resists breaking under tension, and excellent flexibility, allowing it to bend without snapping. This combination makes it ideal for functional parts subjected to stress.

Furthermore, nylon exhibits remarkable durability, resisting wear and tear over time. Its abrasion resistance is significantly higher than PLA or ABS, ensuring longevity. These characteristics position nylon as a top choice when demanding mechanical performance is paramount.

It’s a truly robust material!

Nylon’s strength and durability unlock diverse applications. It’s frequently used for functional prototypes, gears, hinges, and other mechanical components requiring resilience. Applications extend to the automotive, robotics, and even fashion industries, where flexible and strong parts are needed.

However, nylon presents printing challenges. It’s highly hygroscopic, readily absorbing moisture from the air, leading to printing defects. A dry filament is crucial! Printing often requires higher temperatures and a heated bed, and an enclosure is recommended to manage warping. Proper preparation is key to success.

Polycarbonate (PC) Filament

Polycarbonate is renowned for exceptional strength and heat resistance, making it ideal for demanding applications. This engineering filament boasts high impact resistance and can withstand temperatures significantly higher than PLA or ABS. It’s often chosen for parts needing durability and stability in harsh environments.

However, printing with polycarbonate demands specific conditions. High nozzle temperatures (270-310°C) and a heated bed (110-130°C) are essential. An enclosed printer is strongly recommended to prevent warping and ensure layer adhesion. Proper ventilation is also important due to potential fumes.

Polycarbonate: High Strength & Heat Resistance

Polycarbonate (PC) filament distinguishes itself through remarkable mechanical properties. It exhibits exceptional tensile strength, surpassing many other 3D printing materials, and boasts superior impact resistance, making it less prone to fracturing under stress. This inherent durability makes PC ideal for functional parts and prototypes.

Furthermore, PC demonstrates excellent thermal stability. Its high glass transition temperature allows it to maintain structural integrity at elevated temperatures – typically up to 110°C, and sometimes higher – far exceeding the heat resistance of common filaments like PLA and ABS. This makes it suitable for automotive or aerospace components.

Polycarbonate: Printing Requirements

Printing with Polycarbonate demands a well-prepared 3D printing setup. A heated bed is absolutely essential, typically maintained between 110-130°C, to ensure proper adhesion and prevent warping; An enclosed printer is highly recommended to maintain a consistent, elevated ambient temperature, minimizing layer separation.

Nozzle temperatures also need to be high, generally ranging from 260-300°C. Due to PC’s abrasive nature, a hardened steel nozzle is crucial to resist wear. Slow print speeds are recommended to allow the material to cool and solidify correctly, and proper drying of the filament before use is vital to prevent printing defects.

Specialty & Advanced Filaments

Beyond standard materials, specialty filaments unlock unique capabilities. These include flexible TPU, strong carbon fiber composites, and others, expanding design possibilities and functional applications.

TPU/TPE Filament (Thermoplastic Polyurethane/Elastomer)

TPU and TPE filaments offer exceptional flexibility, making them ideal for parts requiring elasticity, like phone cases, gaskets, or wearable items. These materials boast high impact resistance and durability, absorbing shock and stress effectively.

However, printing with TPU/TPE presents unique challenges. Slower print speeds are generally required to prevent filament buckling and ensure proper layer adhesion. Direct drive extruders are often preferred over Bowden setups for better control. Careful calibration of retraction settings is also crucial for minimizing stringing.

TPU/TPE: Flexibility and Applications

The defining characteristic of TPU/TPE is its remarkable flexibility, allowing for the creation of parts that can bend, stretch, and compress without breaking. This makes them perfect for applications demanding resilience and conformability. Common uses include flexible phone cases, durable seals, and functional prototypes needing rubber-like properties.

Beyond these, TPU/TPE excels in creating wearable technology components, custom insoles, and even tires for small robotics projects. Its ability to absorb impact makes it suitable for protective gear and damping elements, offering a unique blend of strength and pliability.

TPU/TPE: Printing Considerations

Printing with TPU/TPE requires a slower print speed to ensure proper layer adhesion and prevent filament buckling. Direct drive extruders are highly recommended, as they offer better control and reduce the risk of filament tangling. Retraction settings need careful adjustment – too much can cause jams, while too little leads to stringing.

A heated bed isn’t always essential, but can improve adhesion. Experimentation is key! Due to its flexibility, TPU/TPE can be challenging to support; designs should be optimized to minimize the need for supports whenever possible. Patience and fine-tuning are vital for successful TPU/TPE prints.

Carbon Fiber Reinforced Filaments

Carbon fiber filaments combine a base polymer, typically PLA or PETG, with short carbon fibers, dramatically increasing strength and rigidity. These filaments offer exceptional stiffness and dimensional stability, making them ideal for functional parts and prototypes requiring high performance. However, the addition of carbon fiber introduces unique printing challenges.

Notably, carbon fiber is abrasive, leading to increased nozzle wear. Hardened steel nozzles are essential to prevent premature failure. Careful temperature control and proper bed adhesion are also crucial for successful prints with these advanced materials.

Carbon Fiber: Increased Strength & Rigidity

Carbon fiber reinforcement significantly elevates a filament’s mechanical properties. The addition of these fibers dramatically boosts tensile strength and flexural modulus, resulting in parts that are considerably stiffer and more durable than those printed with standard materials. This enhancement makes carbon fiber filaments excellent choices for applications demanding high structural integrity.

The fibers distribute stress throughout the part, reducing the likelihood of deformation or breakage under load. This is particularly beneficial for creating lightweight yet robust components, ideal for robotics, drones, and automotive applications.

Carbon Fiber: Abrasiveness and Nozzle Wear

A significant drawback of carbon fiber filaments is their abrasive nature. The hard carbon fibers can rapidly wear down standard brass printer nozzles, leading to decreased print quality and potential nozzle failure. This wear manifests as a widening of the nozzle orifice, impacting dimensional accuracy and surface finish.

To mitigate this, hardened steel or ruby-tipped nozzles are strongly recommended. These materials offer superior resistance to abrasion, extending nozzle lifespan and ensuring consistent performance when working with carbon fiber-reinforced materials. Regular nozzle inspection is also crucial.

Filament Properties to Consider

Key filament properties dictate print success. Strength, heat resistance, flexibility, and chemical/UV resistance are vital factors influencing material selection for specific applications.

Strength and Durability

Strength and durability are paramount when 3D printing functional parts or items subjected to stress. Different filaments exhibit vastly different mechanical properties. PLA, while easy to print, is relatively brittle. ABS offers improved strength and impact resistance, making it suitable for more demanding applications.

Engineering filaments like Nylon and Polycarbonate excel in these areas, providing exceptional toughness and resistance to wear and tear. Carbon fiber reinforcement further enhances strength and rigidity. Consider the intended use of your print – will it bear weight, withstand impacts, or endure repeated use? Selecting a filament with appropriate strength is crucial for longevity.

Heat Resistance

Heat resistance defines a filament’s ability to maintain its structural integrity at elevated temperatures. PLA has a relatively low glass transition temperature, softening and deforming easily with heat. ABS offers better heat resistance, suitable for parts exposed to moderate temperatures.

For applications requiring high-temperature performance, Polycarbonate (PC) is an excellent choice, withstanding significant heat without losing shape. Nylon also exhibits good heat resistance. Consider the operating environment of your printed object; if it will be exposed to sunlight, engine heat, or other thermal stressors, selecting a heat-resistant filament is vital.

Flexibility and Impact Resistance

Flexibility and impact resistance are key when a part needs to bend, stretch, or withstand forceful impacts. Rigid filaments like PLA and ABS are prone to cracking under stress. TPU and TPE filaments, however, are highly flexible and exhibit excellent impact resistance, making them ideal for phone cases or flexible joints.

Nylon also offers a good balance of strength and flexibility. Carbon fiber reinforced filaments increase rigidity but can reduce impact resistance. Consider the intended use; if the part will experience bending or impacts, prioritize flexible or impact-resistant materials.

Chemical Resistance & UV Resistance

Chemical and UV resistance determine a part’s longevity when exposed to harsh environments. PLA is generally poor in both areas, susceptible to degradation from moisture, chemicals, and sunlight. ABS offers better chemical resistance but can yellow and become brittle with prolonged UV exposure.

PETG demonstrates good resistance to many chemicals and moderate UV resistance. Nylon excels in chemical resistance, while Polycarbonate provides superior UV stability. For outdoor applications or parts contacting chemicals, selecting filaments with appropriate resistance is vital for maintaining structural integrity and appearance.

Choosing the Right Filament for Your Project

Selecting the ideal filament hinges on your project’s demands and your 3D printer’s capabilities. Consider application requirements, desired properties, and printer compatibility for optimal results.

Considering Application Requirements

Before selecting a filament, meticulously analyze your project’s intended use. Is it a decorative item, a functional part, or something requiring high durability?

For purely aesthetic prints, PLA often suffices. However, if the object will endure stress, heat, or outdoor exposure, consider ABS, PETG, Nylon, or Polycarbonate.

Think about flexibility – TPU/TPE is ideal for bendable parts. Chemical resistance is vital for containers, while UV resistance matters for outdoor applications.

Precisely defining these needs narrows your filament choices, ensuring a successful and long-lasting final product. Prioritize function over form when necessary!

Compatibility with Your 3D Printer

Not all filaments are universally compatible with every 3D printer. Check your printer’s specifications regarding supported materials and temperature ranges.

Some filaments, like ABS, require a heated bed and enclosure to prevent warping. Printers designed for PLA may struggle with higher-temperature materials.

Nozzle size also matters; abrasive filaments like carbon fiber necessitate hardened steel nozzles to resist wear. Ensure your extruder can handle the filament’s diameter.

Upgrading printer components might be necessary for certain filaments. Always research compatibility before purchasing to avoid frustration and potential damage.

study guide for the book of john

Delving into John’s narrative requires careful study, as it presents a unique perspective on Jesus Christ, differing from the Synoptic Gospels.

This study guide aids in navigating its complex passages, fostering a deeper understanding of scripture and its application to modern life.

Unique Perspective of John

John’s Gospel distinguishes itself from Matthew, Mark, and Luke through its profoundly theological and reflective approach. While the Synoptics emphasize Jesus’s actions and teachings within a historical context, John focuses on revealing Jesus’s divine identity and eternal nature.

This study guide highlights how John presents Jesus not merely as a teacher or prophet, but as the very Word of God incarnate – “In the beginning was the Word, and the Word was with God, and the Word was God” (John 1:1).

The narrative prioritizes extended discourses, intimate conversations, and symbolic imagery, inviting readers into a deeper contemplation of Jesus’s significance and a personal relationship with Him. It’s a journey into understanding belief and eternal life.

Authorship and Date

Traditionally, the Gospel of John is attributed to John the Apostle, one of Jesus’s twelve disciples, though internal evidence and early church tradition support this claim. However, some scholars propose a Johannine community shaped the final form of the text over time.

Determining a precise date is challenging. Most scholars place its composition between 85-95 AD, making it the latest of the four Gospels. This study guide acknowledges this scholarly debate.

A later date explains the more developed theological themes and distinct style compared to the Synoptics, reflecting a mature understanding of Jesus within the early church context. Understanding authorship aids interpretation.

Audience and Purpose

John’s Gospel wasn’t primarily written for those already familiar with Jewish customs, unlike the Synoptic Gospels. This study guide recognizes its broader, likely Gentile, audience. The text frequently explains Jewish practices, suggesting a readership needing cultural context.

The primary purpose isn’t simply to recount events, but to present Jesus as the divine Son of God, the Messiah, and to inspire belief leading to eternal life.

John explicitly states his intention (John 20:31) – that readers might believe Jesus is the Christ and have life in His name. This focus shapes the narrative and theological emphasis throughout the Gospel.

Key Themes in John

Central to John’s Gospel are themes of Jesus’ divinity, belief’s power, the conflict between light and darkness, and the transformative role of water and the Spirit.

The Divinity of Jesus Christ

A cornerstone of John’s Gospel is the explicit declaration of Jesus’ divine nature. Unlike the Synoptic Gospels, which subtly reveal this truth, John boldly proclaims Jesus is God – “In the beginning was the Word, and the Word was with God, and the Word was God” (John 1:1).

This theme permeates the entire book, evidenced through Jesus’ “I AM” statements, echoing God’s self-revelation to Moses. These declarations – “I am the bread of life,” “I am the good shepherd,” and “I am the way, the truth, and the life” – assert Jesus’ unique authority and identity as the divine Son of God.

Understanding this foundational truth is crucial for interpreting John’s narrative and grasping the full scope of Jesus’ mission and saving work.

Belief and Eternal Life

Central to John’s message is the connection between believing in Jesus and receiving eternal life. This isn’t merely intellectual assent, but a profound trust and reliance on Jesus as the Son of God and the Messiah. John repeatedly emphasizes that belief isn’t a one-time event, but a continuing relationship.

Eternal life, in John’s context, isn’t simply endless existence, but a quality of life experienced now through fellowship with God. Jesus states, “I came that they may have life, and have it abundantly” (John 10:10).

This abundant life is available to all who believe, offering hope and purpose beyond the limitations of earthly existence.

Light and Darkness

A prominent motif throughout John’s Gospel is the symbolic contrast between light and darkness. Jesus is presented as the “Light of the world” (John 8:12), revealing truth and exposing falsehood. Darkness represents ignorance, sin, and separation from God, while light signifies God’s presence, truth, and salvation.

This imagery isn’t merely poetic; it reflects a spiritual reality; Those who follow Jesus walk in the light, experiencing freedom and understanding. Conversely, those who reject Him remain in darkness, bound by their own misconceptions and desires.

John illustrates that the light overcomes the darkness, offering hope for transformation and reconciliation with God.

Water and the Spirit

Central to John’s theology is the interplay between water and the Spirit, particularly highlighted in the encounter with Nicodemus (John 3). Jesus explains that being “born of water and the Spirit” is essential for entering the Kingdom of God. Water symbolizes physical birth and cleansing, while the Spirit represents spiritual rebirth and transformation.

This isn’t simply about baptism; it’s about a radical change of heart, empowered by the Holy Spirit. The living water Jesus offers (John 4) quenches spiritual thirst, providing eternal life and satisfaction.

Water and Spirit together signify complete renewal and a new identity in Christ.

Structure of the Book of John

John’s Gospel unfolds through a distinct structure: Prologue, Book of Signs, Book of Glory, and Epilogue, revealing Jesus’s divine nature progressively.

Prologue (John 1:1-18)

The Prologue of John’s Gospel is a profound poetic introduction, establishing Jesus as the eternal Word – Logos – existing with God from the beginning. This section dramatically declares Jesus’s divinity and role in creation (“In the beginning was the Word…”).

It highlights the Word as life and light, battling the darkness. Studying this passage reveals John’s unique theological emphasis on Jesus’s pre-existence and divine identity.

The Prologue foreshadows the entire Gospel’s themes, presenting Jesus as the fulfillment of Old Testament prophecies and the source of truth and grace. Understanding this foundational text is crucial for interpreting the rest of John’s account.

The Book of Signs (John 1:19-12:50)

John 1:19-12:50, known as the Book of Signs, presents a series of miracles – signs – performed by Jesus, each revealing His divine nature and authority. These aren’t merely displays of power, but invitations to belief.

Key signs include the wedding at Cana, healing the official’s son, and raising Lazarus from the dead. Each miracle sparks debate and reveals the growing conflict between Jesus and religious leaders.

Studying this section emphasizes how Jesus’s actions consistently point to His identity as the Messiah, prompting a decision: belief or rejection. The signs serve as evidence for those seeking truth.

The Book of Glory (John 13:1-20:31)

John 13-20, the Book of Glory, shifts focus to Jesus’s final hours, revealing His glory through intimacy with His disciples and ultimate sacrifice. It begins with the humble act of foot washing, demonstrating servant leadership and foreshadowing His impending death.

The Last Supper and Jesus’s farewell discourse emphasize love, obedience, and the promise of the Holy Spirit. His crucifixion and resurrection are presented as the culmination of God’s plan for salvation.

This section highlights Jesus’s control over events, even in suffering, and affirms His victory over death, offering eternal life to believers.

Epilogue (John 21:1-25)

John 21 serves as an epilogue, offering a post-resurrection appearance of Jesus to His disciples. This chapter recounts a miraculous catch of fish, a symbolic re-commissioning of Peter, and a poignant conversation addressing Peter’s denial.

Jesus reaffirms Peter’s love and restores him to fellowship, entrusting him with the care of His flock. The epilogue provides closure, emphasizing forgiveness, restoration, and the ongoing mission of the disciples.

It subtly reinforces themes of belief and discipleship, solidifying the Gospel’s message and leaving readers with a sense of hope and purpose.

Detailed Study of Key Sections

Exploring pivotal passages – the Prologue, Wedding at Cana, Nicodemus encounter, and more – unlocks profound insights into John’s theological depth and Jesus’ identity.

The Prologue: “In the Beginning Was the Word” (John 1:1-18)

This foundational passage establishes Jesus as the eternal Logos, existing with God from the beginning. It echoes Genesis 1:1, proclaiming Jesus as the creative force behind all existence.

Key themes emerge: divinity, creation, and the revelation of God through Jesus. The “Word” became flesh, dwelling among us, full of grace and truth.

Study points include: analyzing the poetic structure, understanding the concept of Logos in Greek philosophy, and tracing the Old Testament foreshadowing of Jesus’ role.

Consider how John contrasts light and darkness, signifying truth and falsehood, life and death. This prologue sets the stage for the entire Gospel, revealing Jesus’ pre-existence and divine nature.

The Wedding at Cana: Jesus’ First Sign (John 2:1-12)

This narrative unveils Jesus’ glory through a miraculous act – transforming water into wine. It’s presented as his first “sign,” demonstrating his divine power and initiating his public ministry.

Key observations: Mary’s faith prompts Jesus’ intervention, highlighting her role as an intercessor. The wine’s superior quality symbolizes the abundance of grace offered through Jesus.

Study questions: What does this miracle reveal about Jesus’ identity? How does it foreshadow the “new wine” of the Kingdom of God?

Consider the symbolism of the wedding feast itself, representing the union between Christ and the Church. This event establishes a pattern of revelation and belief throughout John’s Gospel.

Nicodemus and the New Birth (John 3:1-21)

This pivotal encounter between Jesus and Nicodemus explores the concept of spiritual rebirth – being “born again.” Nicodemus, a Pharisee and ruler, seeks Jesus at night, symbolizing a desire for truth shrouded in darkness.

Jesus explains that entering the Kingdom of God requires a spiritual transformation, not merely adherence to religious law. This new birth is achieved through faith in Jesus Christ and the work of the Holy Spirit.

Key themes: God’s love for the world, manifested in the gift of his Son. The necessity of belief for eternal life.

Reflect on the contrast between earthly and spiritual realities, and the profound implications of being born of the Spirit.

The Woman at the Well (John 4:1-42)

This remarkable dialogue between Jesus and a Samaritan woman challenges societal norms and reveals Jesus’ identity as the Messiah. Crossing cultural and gender boundaries, Jesus initiates a conversation, offering “living water” – a metaphor for eternal life.

The woman’s initial skepticism gives way to recognition as Jesus reveals her hidden past, demonstrating his divine knowledge. This encounter highlights Jesus’ compassion and inclusivity, extending salvation beyond Jewish boundaries.

Key themes: Breaking down barriers, worship in Spirit and truth, Jesus as the source of living water.

Consider the implications of Jesus’ willingness to engage with the marginalized and the transformative power of encountering him personally.

Jesus Heals a Paralytic (John 5:1-18)

This healing narrative at the pool of Bethesda demonstrates Jesus’ authority over sickness and his divine power. A paralytic man, waiting for the stirring of the waters, is healed by Jesus’ simple command – “Get up, pick up your mat and walk.”

The healing occurs on the Sabbath, sparking controversy with Jewish leaders who accuse Jesus of violating Sabbath laws. Jesus defends his actions, asserting his unity with the Father and his right to do good on any day.

Key themes: Divine authority, Sabbath observance, Jesus’ relationship with the Father.

Reflect on Jesus’ compassion and his challenge to rigid religious interpretations.

The Bread of Life Discourse (John 6:22-59)

Following the miraculous feeding of the 5,000, Jesus delivers a profound discourse on the true bread from heaven – himself. He contrasts the temporary satisfaction of physical bread with the eternal life offered through belief in him.

Jesus declares, “I am the bread of life; whoever comes to me shall not hunger, and whoever believes in me shall never thirst.” This emphasizes the spiritual nourishment he provides, surpassing physical needs.

The discourse challenges listeners to move beyond superficial understanding and embrace a deeper faith. It foreshadows the Eucharist, symbolizing Jesus’ sacrificial body given for the world.

Reflect on the meaning of spiritual nourishment and the importance of faith in Jesus.

The Healing of the Man Born Blind (John 9:1-41)

This remarkable story presents Jesus healing a man blind from birth, a powerful sign demonstrating his divine authority and revealing spiritual truths. The healing isn’t simply a physical restoration, but a catalyst for exploring themes of sight, blindness, and understanding.

The Pharisees, representing religious authority, react with skepticism and ultimately excommunicate the healed man for defending Jesus. This highlights the spiritual blindness of those who reject him, despite clear evidence.

The healed man’s journey from darkness to light symbolizes the transformation experienced through faith in Jesus. He proclaims Jesus as the light of the world, offering spiritual vision to all who believe.

Consider the contrast between physical and spiritual blindness.

Lazarus and the Resurrection (John 11:1-57)

This pivotal narrative showcases Jesus’ power over death, a profound demonstration of his divinity and a foreshadowing of his own resurrection. When Lazarus falls ill, Jesus deliberately delays his return, emphasizing the glory that will result from this miracle.

The story highlights Jesus’ compassion for Mary and Martha, as well as his deep friendship with Lazarus. His grief upon seeing their sorrow underscores his humanity, even as he prepares to perform an extraordinary act.

Jesus commands, “Lazarus, come forth!” and Lazarus emerges from the tomb, still bound in grave clothes. This miracle compels belief, yet also stirs opposition from the religious leaders.

Reflect on the significance of Jesus’ statement, “I am the resurrection and the life.”

The Last Supper and Foot Washing (John 13:1-17)

This intimate scene reveals Jesus’ humility and profound love for his disciples. Prior to the Passover meal, Jesus performs the act of foot washing, a task typically reserved for servants, demonstrating a radical example of servant leadership.

He instructs his disciples to follow suit, emphasizing the importance of mutual service and love within the Christian community. This act foreshadows the sacrifice he is about to make for them.

The betrayal of Judas is subtly introduced, adding a layer of tension and foreshadowing the events to come. Jesus knows his time is near and prepares his disciples for his departure.

Consider how this act of service challenges conventional notions of power and leadership.

Jesus’ Farewell Discourse (John 14-16)

These chapters contain Jesus’ most extended teaching, offering comfort and guidance to his disciples as he prepares them for his departure. He assures them of his continued presence and promises to send the Holy Spirit, the Advocate, to guide them into all truth.

Jesus emphasizes the importance of abiding in him, comparing their relationship to that of a vine and its branches. He warns of persecution and trials they will face, but assures them of victory through faith.

Key themes include love, obedience, and the indwelling of the Holy Spirit. Reflect on how these promises offer hope and strength in the face of adversity.

The Passion Narrative (John 18-19)

John’s account of Jesus’ arrest, trial, and crucifixion differs in detail from the Synoptic Gospels, emphasizing Jesus’ sovereignty and control throughout his suffering. The narrative highlights the contrast between Jesus’ innocence and the injustice of his accusers.

Key moments include Jesus’ prayer in Gethsemane, his interactions with Pilate, and his crucifixion. Consider the symbolism of the scourging, the crown of thorns, and the inscription “King of the Jews.”

Reflect on the profound love and sacrifice demonstrated by Jesus’ willingness to endure such suffering for the salvation of humanity. This section reveals the ultimate fulfillment of God’s redemptive plan.

The Resurrection Appearances (John 20-21)

John’s depiction of the resurrection focuses on personal encounters with the risen Christ, confirming his identity and offering proof of victory over death. Mary Magdalene’s initial disbelief and subsequent joy are powerfully portrayed.

The appearance to the disciples, with Thomas’s initial skepticism and eventual confession, underscores the importance of faith based on evidence. Jesus’ commissioning of the disciples to continue his work is central.

Chapter 21 provides a post-resurrection encounter with Jesus and Peter, restoring Peter’s leadership and emphasizing forgiveness and service. This section affirms the reality of the resurrection and its transformative power.

Symbolism in the Gospel of John

John’s Gospel richly employs symbolism; water signifies life and cleansing, while light represents truth and Jesus as the illuminating Word.

Shepherd and sheep imagery portrays Jesus as the Good Shepherd, offering protection and guidance to his followers.

Water as a Symbol of Life

Throughout John’s Gospel, water consistently appears as a potent symbol, extending far beyond mere physical sustenance. It represents spiritual life, cleansing, and rebirth, central themes within the narrative. The encounter with the Samaritan woman at the well (John 4:1-42) vividly illustrates this, where Jesus offers “living water” – a metaphor for eternal life accessible through faith in Him.

This isn’t simply hydration; it’s a transformative experience quenching a deeper spiritual thirst. Furthermore, water is intrinsically linked to baptism and the work of the Holy Spirit, signifying purification and a new beginning. Consider Nicodemus’s conversation with Jesus (John 3:5), emphasizing birth “of water and the Spirit.”

Water, therefore, isn’t just an element; it’s a gateway to understanding the divine offer of eternal life presented by Jesus.

Light as a Symbol of Truth

In the Gospel of John, light functions as a powerful and recurring symbol, intrinsically connected to truth, revelation, and the very essence of God. The prologue (John 1:4-5) boldly proclaims Jesus as “the Light,” entering a world shrouded in darkness. This isn’t merely physical illumination; it’s the unveiling of divine truth, exposing falsehood and offering spiritual clarity.

The contrast between light and darkness is fundamental, representing the battle between good and evil, faith and unbelief. Those who “love darkness rather than light” (John 3:19) reject Jesus and remain in ignorance.

Following Jesus, therefore, means walking in the light, embracing truth, and allowing His revelation to transform one’s life. Light embodies God’s presence and the path to salvation.

Shepherd and Sheep Imagery

Throughout John’s Gospel, the poignant imagery of a shepherd and his sheep profoundly illustrates Jesus’ relationship with His followers. This isn’t a novel concept – it draws upon familiar Old Testament symbolism representing God’s care for Israel. However, John uniquely portrays Jesus as the Good Shepherd (John 10:11-18), willing to lay down His life for His sheep.

This sacrifice demonstrates ultimate love and protection. Unlike a hired hand who abandons the flock at danger, the Good Shepherd actively defends and rescues His sheep.

Believers are depicted as sheep, reliant on the Shepherd’s guidance and vulnerable without His protection. Recognizing Jesus’ voice and following Him leads to eternal life.

Historical and Cultural Context

Understanding John necessitates recognizing first-century Palestine’s Jewish customs, political climate under Roman rule, and its distinct relationship to the Synoptic Gospels.

Jewish Customs and Traditions

Exploring Jewish life during Jesus’ time is crucial for interpreting John’s Gospel. Familiarity with Sabbath observance, dietary laws (kashrut), and temple practices illuminates many passages.

Understanding Jewish festivals – Passover, Sukkot, and Hanukkah – provides context for key events like the cleansing of the temple.

Concepts like ritual purity, messianic expectations, and differing religious sects (Pharisees, Sadducees, Essenes) shape the dialogues and conflicts depicted.

John frequently employs Jewish symbolism and allusions, requiring knowledge of their cultural significance. Recognizing these nuances enhances comprehension and avoids misinterpretations of Jesus’ interactions and teachings within a first-century Jewish framework.

Political Landscape of First-Century Palestine

Understanding the Roman occupation is vital when studying John’s Gospel. Palestine was under Roman rule, governed by figures like Pontius Pilate, whose authority significantly impacted Jewish life.

Herod Antipas, a local ruler, also wielded considerable power, influencing events in Galilee.

Political tensions were high, fueled by resentment towards Roman taxation and control.

Jewish aspirations for independence and the emergence of messianic hopes existed within this volatile environment. John’s portrayal of Jesus’ interactions with Roman officials and Jewish leaders must be viewed through this lens, recognizing the inherent political risks and implications of his ministry.

Relationship to the Synoptic Gospels

John’s Gospel differs significantly from Matthew, Mark, and Luke – the Synoptic Gospels. While they share some common material, John presents a unique theological emphasis and narrative style.

The Synoptics focus on Jesus’ ministry in Galilee, while John concentrates on Judea.

John’s account includes extended discourses and symbolic language absent in the Synoptics.

Scholars debate the relationship, with some suggesting independence and others proposing dependence or shared sources. Understanding these distinctions is crucial for a comprehensive study, allowing for a richer appreciation of each Gospel’s distinct portrayal of Jesus and his message.

Applying John to Modern Life

John’s teachings emphasize belief, love, and understanding Jesus’ identity – principles profoundly relevant today. Embracing these concepts fosters a meaningful and transformative faith journey.

The Importance of Belief

Throughout John’s Gospel, belief – or faith – isn’t merely intellectual assent but a transformative trust in Jesus as the Christ, the Son of God. This belief isn’t static; it’s demonstrated through obedience to His commands and a life reflecting His love.

John highlights that believing leads to eternal life (John 3:16), a central theme. It’s not simply knowing about Jesus, but knowing Him personally. The text emphasizes that signs and miracles serve to evoke belief, pointing towards Jesus’ divine nature.

A study guide focusing on John should encourage readers to examine their own faith – is it genuine, active, and producing fruit? The Gospel challenges us to move beyond superficial understanding to a profound, life-altering belief in Jesus Christ.

Living a Life of Love

John’s Gospel inextricably links belief with love – not just a feeling, but a demonstrable action. Jesus commands His followers to love one another as He has loved them (John 13:34-35), establishing love as a hallmark of true discipleship. This love extends beyond fellow believers to encompass all people.

A study guide exploring John should emphasize that love isn’t merely a suggestion, but a new commandment. It’s a reflection of God’s own love for humanity, manifested in the gift of His Son.

Practically, this means prioritizing selflessness, forgiveness, and compassion in daily life. It’s about embodying the character of Christ and demonstrating His love through our words and deeds, impacting the world around us.

Understanding Jesus’ Identity

A central focus of John’s Gospel is revealing Jesus’ divine identity – He is not merely a prophet, but the eternal Word of God made flesh (John 1:1-14). This study guide must unpack the “I AM” statements throughout the text, echoing God’s self-revelation to Moses.

Exploring these declarations – “I am the bread of life,” “I am the good shepherd,” “I am the way, the truth, and the life” – unveils Jesus’ unique authority and relationship with the Father.

Furthermore, understanding Jesus’ identity requires recognizing His pre-existence, His role in creation, and His ultimate purpose: to offer eternal life to all who believe in Him. This is the core message of John.

yealink t46s user guide

The Yealink T46S is a professional-grade SIP phone, designed for business use. It includes a quick start guide and user manual for streamlined setup and operation.

What is the Yealink T46S?

The Yealink T46S is a sophisticated IP desk phone tailored for modern business communications. It’s designed to deliver crystal-clear voice quality and a user-friendly experience. This phone supports various codecs like G.711, G.722, and more, ensuring compatibility with diverse network environments.

As a professional-level device, the T46S comes equipped with a comprehensive user manual to guide users through setup, configuration, and advanced features. It’s wall-mountable, offering flexible deployment options within any workspace.

Key Features and Benefits

The Yealink T46S boasts several key features, including HD voice quality, a user-friendly interface, and support for Power over Ethernet (PoE). Benefits include streamlined communication, enhanced productivity, and cost-effectiveness. Its wall-mountable design saves valuable desk space.

The included user manual simplifies setup and configuration. Support for multiple voice codecs ensures excellent call clarity. The T46S provides a reliable and feature-rich communication solution for businesses of all sizes, improving overall efficiency.

Package Contents

Upon unboxing your Yealink T46S, you’ll find the SIP phone itself, along with a handset and a coiled handset cord. A network cable is included for initial wired connection to your network. Crucially, the package contains a comprehensive user manual, detailing setup and operation.

Additionally, a stand is provided for desktop placement. While a power adapter may be optional depending on PoE support, it’s often included; Verify all components are present before proceeding with installation, referencing the quick start guide.

Initial Setup

Begin by unpacking the Yealink T46S and connecting the necessary cables. Refer to the included user manual for detailed guidance on the setup process.

Unboxing and Hardware Overview

Upon unboxing your Yealink T46S, you’ll find the IP phone itself, a handset with a cord, and a convenient quick start guide. The phone is designed for flexible placement, supporting both desktop and wall-mounting options via a separate bracket. Inspect the rear panel for connection ports – including Ethernet for network connectivity and power input. The front features a clear display screen and intuitive navigation keys; Familiarize yourself with the layout as detailed in the user manual; this will aid in initial configuration and daily operation.

Connecting the Phone

To connect your Yealink T46S, begin by plugging the provided Ethernet cable into the phone’s network port and your network switch or router. This establishes network connectivity for SIP registration. Next, connect the power adapter to the phone and a suitable power outlet. Ensure the power supply matches the phone’s requirements. Finally, connect the handset cord to the designated port on the phone’s base. Refer to the user manual for detailed diagrams and troubleshooting tips if you encounter any connection issues.

Powering On the Device

Once the Ethernet cable and power adapter are securely connected, press the power button located on the Yealink T46S. The phone will initiate its startup sequence, displaying the Yealink logo and loading necessary firmware. Allow a few moments for the phone to fully boot up and establish a network connection. Consult the user manual if the phone fails to power on or displays error messages during startup. Proper power connection is crucial for optimal performance.

Basic Phone Operations

The Yealink T46S facilitates standard phone functions like making, answering, holding, and transferring calls, all easily managed through its intuitive interface.

Making a Call

To initiate a call on your Yealink T46S, you can utilize several methods. Directly dial the desired phone number using the keypad, and then press the green “Send” or “Call” button. Alternatively, access frequently dialed numbers from your speed dial settings.

You can also select a contact directly from the phonebook, navigating through the list or using the search function to locate the intended recipient. The phone will display the call status, including duration and connection details, throughout the call.

Answering a Call

When receiving an incoming call on your Yealink T46S, the phone will display the caller ID, if available. To answer the call, simply press the green “Answer” or speakerphone button. You can also use a connected headset to answer the call privately.

The display will clearly indicate the active call status, including the duration. If you wish to reject the call, press the red “Reject” button, which may forward the call to voicemail or another designated number, depending on your system configuration.

Call Hold and Resume

During an active call on your Yealink T46S, you can place the caller on hold by pressing the “Hold” button. The display will indicate the call is on hold. To resume the call, simply press the “Hold” button again. This toggles between hold and active call states.

Multiple calls can be placed on hold, and you can cycle through them using the appropriate navigation keys. Be mindful of hold time limits configured by your system administrator to avoid call drops.

Call Transfer

The Yealink T46S facilitates call transfer, allowing you to connect an active call to another extension. Initiate transfer by pressing the “Transfer” button during a call. Enter the destination extension number using the keypad. You can preview the call before completing the transfer, ensuring the recipient is available.

Blind transfer is also possible, immediately connecting the caller without preview. Confirm the transfer using the designated key, completing the process and disconnecting from the original call.

Navigating the User Interface

The Yealink T46S features an intuitive interface. Utilize navigation keys to access menus, settings, and features for efficient phone management and operation.

Understanding the Display

The Yealink T46S boasts a high-resolution graphical LCD screen, providing a clear and informative user experience. The display presents crucial call information, including caller ID, call duration, and status icons. It also showcases menu options and settings for easy navigation.

Brightness is adjustable to suit various lighting conditions. The screen intuitively displays softkeys, dynamically changing based on the current phone function. Understanding the display layout is fundamental to effectively utilizing the phone’s capabilities and managing communications.

Using the Navigation Keys

The Yealink T46S utilizes a set of navigation keys for intuitive menu access and control. The directional keys – up, down, left, and right – allow you to scroll through options and make selections within the user interface.

The central ‘OK’ key confirms your choices, while the ‘Cancel’ or ‘Back’ key returns you to the previous screen. Mastering these keys is essential for efficiently navigating settings, accessing the phonebook, and managing call functions. Practice using them to become familiar with the phone’s layout.

Accessing the Main Menu

To access the main menu on your Yealink T46S, typically you’ll press the ‘Menu’ or ‘Options’ key located on the phone’s interface; This action reveals a comprehensive list of settings and features.

Within the main menu, you can configure network settings, manage your phonebook, adjust audio preferences, and access advanced functionalities. Utilize the navigation keys to scroll through the options and select the desired setting for customization. Explore to unlock the phone’s full potential.

Advanced Features

The Yealink T46S offers voicemail configuration, a robust phonebook, detailed call history management, and customizable speed dial options for efficient communication.

Configuring Voicemail

To configure voicemail on your Yealink T46S, access the phone’s menu, typically through the ‘Settings’ or ‘Features’ option. Navigate to the voicemail section and enter the assigned voicemail number provided by your system administrator. You may need to set a password for secure access.

Follow the on-screen prompts to record a greeting. Ensure the greeting is clear and professional. Regularly check your voicemail for new messages, utilizing the dedicated voicemail key or menu option for convenient access and message playback.

Using the Phonebook

The Yealink T46S features a built-in phonebook for storing frequently dialed numbers. Access the phonebook through the main menu, typically labeled ‘Directory’ or ‘Contacts’. You can add new contacts directly on the phone, inputting names and corresponding numbers.

Entries can be edited or deleted as needed. The phonebook facilitates quick dialing, enhancing efficiency. Some systems allow synchronization with server-based directories, providing a centralized contact list for all users.

Call History Management

The Yealink T46S maintains detailed call logs, categorized into Sent, Received, and Missed calls. Access these logs via the ‘Call History’ or ‘Recent Calls’ menu option. Each entry displays the date, time, and number dialed or received.

You can typically redial numbers directly from the call history. The phone may also allow you to view call durations and save specific entries to your phonebook for future use, streamlining communication tracking.

Speed Dial Setup

The Yealink T46S facilitates quick calling with its speed dial functionality. Users can assign frequently contacted numbers to speed dial keys for instant access. This is typically configured through the phone’s web interface or the main menu under ‘Phonebook’ or ‘Speed Dial’.

Assign numbers to specific keys (often 2-9) for one-touch dialing, enhancing efficiency. The system supports both single-digit and multi-digit speed dial entries, improving call connection times.

Network Configuration

The Yealink T46S requires network settings, including SIP configuration, to connect to a VoIP service. Options include DHCP or static IP addressing for network access.

Understanding SIP Settings

SIP (Session Initiation Protocol) settings are crucial for the Yealink T46S to register and communicate with your VoIP provider. These settings typically include the SIP server address, port number, and transport protocol (UDP or TCP). You’ll also need to configure your SIP user name, authentication password, and potentially a proxy server address, depending on your provider’s requirements. Correct SIP settings ensure successful call establishment and reliable voice communication. Incorrect configurations will lead to registration failures and inability to make or receive calls.

Configuring Network Settings

Network settings define how your Yealink T46S connects to your local network and the internet. You can configure these settings manually or utilize DHCP (Dynamic Host Configuration Protocol) for automatic assignment of an IP address. Manual configuration requires specifying an IP address, subnet mask, gateway, and DNS server addresses. Ensure these settings are compatible with your network infrastructure. Proper network configuration is vital for reliable VoIP communication and access to online services.

DHCP and Static IP Addressing

DHCP automatically obtains network settings from your router, simplifying setup. If your network supports DHCP, the Yealink T46S will receive an IP address, subnet mask, gateway, and DNS server automatically. Alternatively, you can assign a static IP address manually. This requires entering these details directly into the phone’s network configuration. Choose a static IP outside the DHCP range to avoid conflicts, ensuring consistent connectivity.

Customization Options

The Yealink T46S allows personalization of volume, ringtones, and display settings to match user preferences and optimize the calling experience within the workspace.

Adjusting Volume Levels

The Yealink T46S provides multiple volume controls for a tailored audio experience. Users can independently adjust the handset volume, headset volume, and speakerphone volume to optimal levels. Volume adjustments are easily accessible through the phone’s user interface, typically found within the settings menu.

Navigate to the settings, then audio settings, to find the volume sliders. Fine-tune each setting to ensure clear communication during calls, accommodating different environments and personal hearing preferences. Remember to test the volume levels after each adjustment.

Setting Ringtone Preferences

The Yealink T46S allows users to personalize their incoming call experience by customizing ringtone preferences. Access the settings menu on the phone to locate the ringtone options. Typically, a selection of pre-loaded ringtones is available for choosing a preferred sound.

Users can preview each ringtone before selecting it. Some models may also support uploading custom ringtones. Adjusting the ringtone volume is also possible within the settings, ensuring it’s audible but not disruptive. Personalize your phone today!

Display Settings

The Yealink T46S offers several display customization options to enhance user experience. Through the settings menu, users can adjust screen brightness for optimal visibility in different lighting conditions. Wallpaper customization is also frequently available, allowing for personalization.

Font size adjustments cater to individual visual preferences. Date and time formats can be modified to suit regional or personal needs. Screen timeout settings control how long the display remains active during inactivity, conserving energy. Explore these options today!

Troubleshooting Common Issues

Common issues with the Yealink T46S include no dial tone, poor audio, and registration problems. Refer to the user manual for solutions.

No Dial Tone

Experiencing no dial tone on your Yealink T46S? First, verify the handset cord is securely connected to both the phone and the base. Confirm the phone is properly registered with your VoIP service provider; check network connectivity. Ensure the correct line key is selected before dialing.

Review SIP settings within the phone’s interface, consulting the user manual for proper configuration. A power cycle of both the phone and your network equipment can often resolve temporary glitches. If the issue persists, contact your IT administrator or Yealink support.

Poor Audio Quality

If you’re experiencing poor audio quality with your Yealink T46S, begin by checking your network connection for stability and bandwidth limitations. Verify the microphone isn’t muted and adjust the volume levels on both the phone and your headset (if applicable). Confirm codec settings are appropriately configured within the phone’s interface.

Consult the user manual for optimal codec choices. Interference from other devices or a faulty network cable can also contribute; try a different cable or location. Contact your VoIP provider to rule out issues on their end.

Registration Problems

Encountering registration issues with your Yealink T46S? Double-check your SIP server address, username, and password within the phone’s settings, ensuring accuracy. Verify your network connection is active and allows outbound traffic on ports 5060 (SIP) and 5061 (TLS). Refer to the user manual for specific port requirements.

Confirm your VoIP provider’s server is online and accepting registrations. A firewall might be blocking communication; adjust settings accordingly. Rebooting both the phone and your network equipment can often resolve temporary glitches.

Firmware Updates

Regular firmware updates enhance the Yealink T46S’s performance and security. Check the Yealink support website for the latest version and update instructions;

Checking for Updates

To verify if a new firmware version is available for your Yealink T46S, navigate to the phone’s settings menu. Typically, this involves accessing the “System” or “Maintenance” section within the user interface. From there, select “Firmware Update” or a similarly named option;

The phone will then attempt to connect to the Yealink update server to check for available downloads. If an update is found, the phone will display the version number and provide instructions for initiating the update process. Regularly checking ensures optimal performance and security.

Updating the Firmware

Once a firmware update is available on your Yealink T46S, carefully follow the on-screen prompts to begin the installation. It’s crucial not to power off the phone during this process, as it could lead to device malfunction. The update process may take several minutes to complete.

A progress bar will indicate the status. Upon successful completion, the phone will automatically reboot. Verify the new firmware version in the “System” or “About” section of the settings menu.

Resetting the Phone

The Yealink T46S supports both soft and factory resets. A soft reset reboots the device, while a factory reset restores default settings.

Soft Reset

Performing a soft reset on your Yealink T46S is a simple process that restarts the phone without altering any of your customized settings or configurations. This is a useful troubleshooting step for minor glitches or temporary performance issues. To initiate a soft reset, navigate to the phone’s main menu, typically accessed via the navigation keys. Within the menu, locate the ‘Restart’ or ‘Reboot’ option and select it. The phone will then power down and automatically restart, restoring normal operation.

Factory Reset

A factory reset on the Yealink T46S restores the phone to its original, out-of-the-box settings, erasing all personalized configurations, including network settings, account details, and custom preferences. This should only be performed as a last resort when troubleshooting significant issues. Access the main menu using the navigation keys, then locate the ‘Settings’ or ‘Advanced’ section. Within these options, find and select ‘Factory Reset’. Confirm your choice, as this process is irreversible and requires re-configuration.

Wall Mounting Instructions

The Yealink T46S is wall-mountable, saving workspace. Utilize the included mounting bracket, ensuring secure attachment to the wall for optimal phone positioning.

Mounting Bracket Installation

Begin by carefully unpacking the Yealink T46S mounting bracket and verifying all components are present. Locate a suitable wall surface, ensuring it can support the phone’s weight. Mark the desired mounting points, utilizing a level to guarantee a straight installation.

Drill pilot holes at the marked locations, then securely attach the bracket to the wall using appropriate screws (not always included). Ensure the bracket is firmly fixed before proceeding. Double-check stability before mounting the phone itself, preventing potential falls or damage.

Securing the Phone

Once the mounting bracket is firmly installed, carefully align the Yealink T46S phone with the bracket’s designated slots. Gently slide the phone downwards until it clicks securely into place. Verify a snug fit, ensuring the phone doesn’t wobble or feel loose.

To further secure the device, some models may include screws to fasten the phone to the bracket. Tighten these screws gently, avoiding over-tightening which could damage the phone or bracket. Regularly inspect the connection for stability.

Technical Specifications

The Yealink T46S supports codecs like G.711, G.722, and G.723.1, utilizing network protocols for reliable communication, and requires a standard power supply.

Codec Support (G.711, G.722, etc.)

The Yealink T46S boasts comprehensive codec support, ensuring high-quality voice communication across various network conditions. Key codecs include G.711μ/a, offering standard voice quality, and G.722, providing wideband audio for enhanced clarity. Additionally, it supports G.723.1 for lower bandwidth scenarios and CNG for comfortable noise generation. These codecs contribute to flexible deployment options and optimized audio experiences, adapting to diverse network infrastructures and user preferences. The phone’s codec capabilities ensure clear and reliable conversations.

Network Protocols

The Yealink T46S supports essential network protocols for seamless integration into existing IP telephony infrastructures. These include standard protocols like TCP/IP, UDP, and SIP, facilitating reliable communication. It also supports HTTP/HTTPS for web-based configuration and firmware updates. Furthermore, the phone incorporates protocols like ARP, DNS, DHCP, and ICMP, ensuring efficient network discovery and address assignment. These protocols collectively enable robust connectivity and simplified network management for businesses of all sizes.

Power Requirements

The Yealink T46S is designed for efficient power consumption and compatibility with standard power adapters. It typically operates on a DC 5V power supply, drawing approximately 1.2A. The phone supports Power over Ethernet (PoE) via 802.3af, simplifying deployment by eliminating the need for a separate power adapter. Utilizing PoE allows for both power and data transmission over a single Ethernet cable, streamlining installation and reducing cabling clutter.

Resources and Support

Yealink provides extensive online support, including a dedicated support website and downloadable user manuals for the T46S model, ensuring easy assistance.

Yealink Support Website

Yealink’s official support website serves as a central hub for all T46S related resources. Users can navigate to the Knowledge Base section, specifically filtering for IP Phone documentation. A robust search function allows quick access to frequently asked questions, troubleshooting guides, and the latest firmware updates. The website also provides direct access to download the complete user manual in PDF format, offering detailed instructions for setup, configuration, and advanced features. Furthermore, contact information for technical support is readily available, ensuring users can receive personalized assistance when needed.

User Manual Download

The Yealink SIP-T46S user manual, available as a PDF, provides comprehensive guidance for optimal phone utilization. This document details initial setup, including unboxing and connecting the device. It covers basic operations like making and answering calls, alongside advanced features such as voicemail configuration and speed dial setup. Network configuration, troubleshooting common issues, and firmware update procedures are also thoroughly explained. Downloading the manual ensures users have a readily accessible reference for maximizing the phone’s capabilities and resolving any potential problems.

tv guide gci

GCI TV Guide: A Comprehensive Overview (Updated February 16, 2026)

GCI offers diverse channel packages, including Smart Plus Total, Popular Plus, and Smart, with options like Disney, FOX News, and local Anchorage channels.

What is GCI?

GCI is a leading communications provider serving Alaska, renowned for delivering reliable internet, television, and mobile services across the state. Originally founded as General Communication Inc. in 1979, GCI has grown to become a vital infrastructure component for Alaskans, connecting communities and enabling access to essential services.

The company’s television service, GCI TV, provides a wide array of channel packages tailored to diverse viewing preferences. From basic local channels to premium entertainment and news options, GCI aims to cater to every household. Recent regulatory approvals concerning financial secrecy related to potential ownership changes highlight GCI’s prominence within the Alaskan telecommunications landscape, demonstrating ongoing scrutiny and importance.

Understanding the GCI TV Service

GCI TV service delivers entertainment through various packages, offering a blend of local Anchorage channels – like ABC/KYUR, FOX/KTBY, and CBS/KTVA – alongside national networks. Viewers can access news from sources like FOX News and CNN, and enjoy family-friendly options such as Disney Channel and Disney Junior.

The service is accessible via traditional cable connections, and increasingly, through online and mobile platforms. Channel lineups vary based on location and package selection, with specific guides available for Anchorage (October 2019) and Kodiak (January 2021); GCI continually updates its offerings, ensuring viewers have access to a comprehensive and evolving television experience.

GCI Channel Packages: A Detailed Breakdown

GCI structures its television service around tiered packages, catering to diverse viewing preferences and budgets. The Smart Plus Total package provides the most comprehensive channel selection, including Disney Channel HD, Bravo, and FOX News HD. The Smart Popular Plus package offers a balanced selection, featuring popular networks and local channels.

The base Smart package delivers essential channels for everyday viewing. Specific channels like Telemundo Alaska HD Plus and E! HD are available depending on the chosen tier. GCI’s AK Choice TV options in Kodiak (January 2021) and Anchorage (October 2019) demonstrate the localized channel variations within these packages.

Smart Plus Total Package

GCI’s Smart Plus Total package represents the pinnacle of their television offerings, delivering an extensive channel lineup for discerning viewers. As of January 2021 in Kodiak, this package includes Disney Channel HD (Channel 83), Bravo (Channel 681), Disney XD HD (Channel 84), BET (Channel 682), and FOX News HD (Channel 85).

Further enriching the experience are channels like People TV (Channel 683), Fuse HD (Channel 86), Telemundo Alaska (Channel 684), and E! HD (Channel 90). This tier also provides access to C-SPAN3 (Channel 687), BBC America HD (Channel 96), and Disney Junior, ensuring broad entertainment options for the entire family.

Smart Popular Plus Package

GCI’s Smart Popular Plus package strikes a balance between channel variety and affordability, catering to a wide range of viewing preferences. In Anchorage, as of October 2019, subscribers gain access to key news and entertainment channels. This includes FOX News Channel (Channel 653), CNN (Channel 654), and HLN (Channel 655) for staying informed.

Entertainment options are plentiful with Telemundo Alaska HD Plus (Channel 70) and CBS/KTVA HD Total (Channel 71). Local access is also prioritized with ABC/KYUR HD Smart (Channel 68) and FOX/KTBY HD Popular (Channel 69), alongside Cheddar (Channel 656) and The Weather Channel, providing a comprehensive viewing experience.

Smart Package

GCI’s Smart package delivers a solid foundation of entertainment, offering a curated selection of channels for diverse tastes. While details are limited to the provided data, the package aims to provide essential viewing options at a competitive price point. It includes access to local Anchorage channels like ABC/KYUR HD Smart (Channel 68) and FOX/KTBY HD Popular (Channel 69), ensuring viewers stay connected to local programming.

Furthermore, the Smart package provides access to news through FOX News Channel (Channel 653) and CNN (Channel 654). It also features Telemundo Alaska HD Plus (Channel 70) and CBS/KTVA HD Total (Channel 71), completing a well-rounded channel lineup.

Key Channels Available on GCI

GCI boasts a comprehensive channel lineup catering to varied interests. Entertainment options are plentiful, featuring Disney Channel HD (Channel 83), Disney XD HD (Channel 84), Bravo (Channel 681), and E! HD (Channel 90). For families with younger children, Disney Junior provides engaging content. News enthusiasts can rely on FOX News HD (Channels 85 & 653), CNN (Channel 654), and HLN (Channel 655) for up-to-date coverage.

Additionally, Telemundo Alaska HD Plus/Telemundo Alaska (Channels 70 & 684) offers Spanish-language programming. These key channels, available across different packages, demonstrate GCI’s commitment to providing a diverse and satisfying viewing experience for its subscribers.

News Channels on GCI

GCI provides access to several prominent news channels, ensuring subscribers stay informed about current events. FOX News HD is available on Channels 85 & 653, offering a conservative perspective on the news. CNN (Channel 654) delivers 24/7 coverage of national and international happenings, while HLN (Channel 655) focuses on in-depth reporting and analysis.

These channels collectively provide a range of viewpoints and reporting styles, allowing viewers to form their own informed opinions. GCI’s inclusion of these key news sources demonstrates a commitment to providing comprehensive and diverse news coverage for its customer base.

FOX News HD (Channel 85 & 653)

FOX News HD, accessible on GCI channels 85 and 653, is a leading cable news channel known for its conservative viewpoint and dynamic presentation of current events. The channel delivers a mix of breaking news coverage, political analysis, and opinion-based commentary. Viewers can expect a focus on stories relating to politics, business, and national security.

FOX News HD consistently ranks among the most-watched news networks in the United States, attracting a broad audience seeking a particular perspective on the day’s headlines. GCI subscribers benefit from high-definition clarity when tuning into this influential news source.

CNN (Channel 654)

CNN, available on GCI channel 654, is a globally recognized 24-hour news network providing comprehensive coverage of international and domestic events. The channel features live reporting, in-depth investigations, and a diverse range of news programs. Viewers can expect up-to-the-minute updates on breaking news, political developments, and business headlines.

CNN distinguishes itself through its extensive network of correspondents and commitment to journalistic integrity. GCI customers gain access to a vital source of information, offering a broad perspective on global affairs. The channel’s programming includes interviews with newsmakers and expert analysis, keeping viewers informed and engaged.

HLN (Channel 655)

HLN, accessible on GCI channel 655, delivers a unique blend of news and entertainment programming. Formerly known as CNN Headline News, HLN now focuses on true crime, documentaries, and compelling storytelling. Viewers can anticipate a diverse lineup featuring in-depth investigations, captivating mysteries, and real-life dramas.

While maintaining a news foundation, HLN differentiates itself with a focus on personality-driven shows and immersive narratives. GCI subscribers benefit from access to a channel that provides both informative content and engaging entertainment. The network’s programming often explores complex cases and offers a fresh perspective on current events, appealing to a broad audience.

Entertainment Channels on GCI

GCI provides a robust selection of entertainment channels catering to diverse tastes. Subscribers can enjoy popular networks like Disney Channel HD (Channel 83) and Disney XD HD (Channel 84), offering family-friendly programming and animated adventures. For adults, Bravo (Channel 681) delivers captivating reality shows, scripted dramas, and lifestyle content.

Furthermore, E! HD (Channel 90) provides access to celebrity news, red carpet events, and exclusive entertainment coverage. These channels, alongside others in the GCI lineup, ensure there’s something for everyone seeking quality entertainment. GCI’s commitment to variety makes it a compelling choice for television viewers.

Disney Channel HD (Channel 83)

Disney Channel HD, available on GCI channel 83, is a cornerstone of family entertainment. It broadcasts a wide array of original series, animated hits, and classic Disney movies, appealing to children and families alike. Viewers can immerse themselves in the magical worlds of popular characters and storylines.

The channel consistently delivers fresh content, including live-action comedies and engaging animated adventures. GCI subscribers with the Smart Plus Total package, as of January 2021, have direct access to this beloved channel. It’s a key component of GCI’s dedication to providing quality programming for all ages, fostering shared viewing experiences.

Disney XD HD (Channel 84)

Disney XD HD, found on GCI channel 84, caters to a slightly older demographic within the Disney family of networks. It features action-packed animated series, live-action adventures, and sports-related programming, primarily targeting tweens and teens; The channel offers a dynamic blend of comedy and excitement.

Subscribers with the Smart Plus Total package, as highlighted in the January 2021 GCI channel lineup for Kodiak, can enjoy uninterrupted access to Disney XD HD. It complements Disney Channel by providing a distinct programming style, ensuring a diverse range of entertainment options for GCI customers and their families.

Bravo (Channel 681)

Bravo, available on GCI channel 681, is a premier destination for sophisticated entertainment. The network is renowned for its original scripted series, reality television, and a curated selection of films. Viewers can expect compelling dramas, captivating reality shows focusing on lifestyle and relationships, and a diverse range of engaging content.

According to the January 2021 GCI channel guide for Kodiak, Bravo is included in the Smart Plus Total package. This allows subscribers access to popular shows and exclusive programming. Bravo’s blend of high-quality content makes it a valuable addition to the GCI channel lineup, appealing to a broad audience seeking premium television experiences.

E! HD (Channel 90)

E! HD, found on GCI channel 90, delivers a captivating mix of celebrity news, pop culture coverage, and reality television. Viewers can stay up-to-date on the latest Hollywood happenings, red carpet events, and the lives of their favorite stars. The channel features both original programming and acquired content, ensuring a constant stream of engaging entertainment.

The January 2021 GCI channel guide for Kodiak confirms E! HD is part of the Smart Plus Total package, providing subscribers with access to exclusive celebrity interviews and behind-the-scenes glimpses. E! HD’s focus on entertainment and celebrity lifestyle makes it a popular choice for GCI customers seeking a glamorous viewing experience.

Family & Kids Channels on GCI

GCI provides a robust selection of channels dedicated to family entertainment and children’s programming. Key offerings include Disney Channel HD (Channel 83) and Disney XD HD (Channel 84), delivering popular animated series and live-action shows for kids of all ages. Additionally, Disney Junior is available, catering specifically to preschool viewers with educational and engaging content.

The Kodiak channel guide, effective January 2021, highlights Disney Channel HD as part of the Smart Plus Total package. These channels ensure families have access to quality, age-appropriate entertainment options. GCI’s commitment to family-friendly programming makes it a preferred choice for households with children.

Disney Junior

Disney Junior, a cornerstone of GCI’s family programming, is specifically designed for preschoolers and young children. This channel features a vibrant lineup of shows focused on early childhood education and entertainment, fostering creativity and imagination. Programs emphasize social-emotional learning, problem-solving, and musical exploration.

According to the January 2021 Kodiak channel guide for the Smart Plus Total package, Disney Junior is a valued inclusion. It provides a safe and engaging viewing experience for the youngest members of the family. GCI recognizes the importance of quality children’s content and consistently delivers through channels like Disney Junior.

Local Channels on GCI (Anchorage)

GCI in Anchorage provides access to essential local channels, keeping viewers connected to community news, weather, and events. The October 2019 channel guide details specific channel placements based on package selection. ABC/KYUR HD Smart is available on channel 68, delivering local programming and national broadcasts in high definition.

FOX/KTBY HD Popular can be found on channel 69, while CBS/KTVA HD Total airs on channel 71. Telemundo Alaska HD Plus/Telemundo Alaska offers Spanish-language programming on channels 70 and 684. These local affiliations ensure Anchorage residents stay informed and entertained with relevant content through their GCI subscription.

ABC/KYUR HD Smart (Channel 68)

ABC/KYUR HD Smart, channel 68 on GCI in Anchorage, delivers a comprehensive blend of national ABC programming and locally produced news, weather, and community-focused content. As part of the “Smart” package, viewers enjoy high-definition broadcasts of popular shows, live sports events, and breaking news coverage.

This channel serves as a vital source of information for Anchorage residents, providing updates on local happenings and connecting them to the broader national network. The “HD Smart” designation signifies a commitment to quality viewing, offering a crisp and clear picture. GCI subscribers can rely on channel 68 for reliable and engaging television programming.

FOX/KTBY HD Popular (Channel 69)

FOX/KTBY HD Popular, channel 69 on GCI’s lineup in Anchorage, provides access to nationally syndicated FOX programming alongside local Alaskan news and entertainment. Included within the “Popular” package, this channel delivers a diverse range of content, from prime-time dramas and comedies to live sporting events and in-depth news reporting.

Anchorage viewers benefit from high-definition broadcasts, ensuring a visually immersive experience. KTBY’s local programming complements the national feed, keeping residents informed about community events and regional issues. The “HD Popular” designation highlights GCI’s dedication to providing quality television options for its subscribers, making channel 69 a key component of their viewing experience.

CBS/KTVA HD Total (Channel 71)

CBS/KTVA HD Total, channel 71 within the GCI “Total” package, delivers a comprehensive viewing experience to Anchorage residents. This channel broadcasts high-definition content from the CBS network, including popular prime-time shows, live sports coverage – such as NFL football – and breaking news updates. KTVA’s local news programming provides essential coverage of Alaskan events and community stories.

Subscribers to the “Total” package enjoy a premium selection of channels, and CBS/KTVA HD is a cornerstone of that offering. The “HD” designation ensures a crisp, clear picture quality, enhancing the overall viewing pleasure. GCI’s commitment to providing a robust channel lineup is exemplified by the inclusion of this vital local and national broadcast.

Telemundo Alaska HD Plus/Telemundo Alaska (Channels 70 & 684)

Telemundo Alaska HD Plus (Channel 70) and Telemundo Alaska (Channel 684) are key components of GCI’s channel offerings, particularly for viewers interested in Spanish-language programming. These channels broadcast a diverse range of content, including telenovelas, news, sports, and entertainment shows tailored to the Alaskan Hispanic community. The “HD Plus” designation on channel 70 indicates a high-definition broadcast experience.

GCI recognizes the importance of cultural diversity and provides these channels to cater to a broader audience. Viewers can stay connected with Latin American culture and current events through Telemundo’s programming. Access to both standard and high-definition versions ensures flexibility for different viewing preferences and equipment capabilities within the GCI service.

GCI Channel Lineups by Location

GCI’s channel availability varies depending on the viewer’s location within Alaska, necessitating specific channel guides for different regions. As of October 2019, the AK Choice TV lineup for Anchorage differed from that of Kodiak, which was updated in January 2021. These localized guides ensure subscribers receive accurate information regarding available channels within their service area.

The Anchorage guide includes channels like ABC/KYUR HD Smart (Channel 68) and FOX/KTBY HD Popular (Channel 69), while Kodiak subscribers have access to options like Disney Channel HD (Channel 83) and FOX News HD (Channel 85). GCI provides these tailored guides to optimize the viewing experience and reflect regional programming preferences.

Anchorage Channel Guide (October 2019)

GCI’s AK Choice TV guide for Anchorage, effective October 2019, details channel availability across various packages. Subscribers with the Smart Popular Plus Total package could access FOX News Channel on channel 653. ABC/KYUR HD Smart was available on channel 68, providing local network programming.

For national news, CNN was listed on channel 654, and HLN on channel 655. Telemundo Alaska HD Plus broadcast on channel 70, offering Spanish-language content. CBS/KTVA HD Total was available on channel 71, completing the major network coverage. The Weather Channel also featured prominently in the lineup, catering to Alaskan climate interests.

Kodiak Channel Guide (January 2021)

GCI’s AK Choice TV lineup for Kodiak, effective January 2021, showcased the Smart Plus Total package offerings. Entertainment options included Disney Channel HD on channel 680, alongside Bravo on 681 and Disney XD HD on 684. News coverage was provided by FOX News HD, accessible on channel 85, and Telemundo Alaska on channel 684.

Further entertainment choices included BET on 682, People TV on 683, Fuse HD on 86, C-SPAN3 on 687, and BBC America HD on 96. Family programming was enhanced with Disney Junior availability. This selection aimed to provide a comprehensive viewing experience for Kodiak residents.

Accessing the GCI TV Guide

GCI provides multiple convenient avenues for accessing their comprehensive TV guide. Customers can utilize the Online GCI TV Guide, offering a readily available schedule directly through their web browser. For on-the-go access, GCI offers a dedicated Mobile App, allowing viewers to browse listings from smartphones and tablets.

These digital platforms enable effortless channel browsing and program discovery. The guides typically display program titles, descriptions, and start times, simplifying the viewing experience. GCI’s commitment to accessibility ensures customers can easily find and enjoy their favorite shows, regardless of location or device.

Online GCI TV Guide

GCI’s Online TV Guide serves as a central hub for program information, accessible through any web browser. This digital resource provides a detailed, up-to-date schedule of all available channels and programming. Users can easily navigate by channel, time, or program title to find specific content.

The online guide often includes program descriptions, allowing viewers to make informed decisions about what to watch. It’s a convenient alternative to traditional printed guides, offering real-time updates and a user-friendly interface. Accessing the Online GCI TV Guide eliminates the need for manual searching and ensures viewers stay informed about upcoming shows.

GCI Mobile App

GCI’s dedicated mobile app extends the functionality of the Online TV Guide directly to your smartphone or tablet. This application provides on-the-go access to channel listings, program schedules, and detailed show descriptions, mirroring the online experience.

The app’s intuitive interface allows for quick and easy browsing, enabling users to discover new content and plan their viewing schedules while away from home. Push notifications can alert users to upcoming favorite shows or breaking news. The GCI Mobile App offers a convenient and personalized television viewing experience, enhancing accessibility and control.

Troubleshooting GCI TV Guide Issues

GCI customers occasionally encounter issues with the TV guide, ranging from inaccurate listings to complete unavailability. First, ensure your set-top box is properly connected and receiving a signal. A simple reboot of the device often resolves temporary glitches.

If problems persist, verify your channel package subscription is current, as guide access is tied to your service level. Check the GCI website or mobile app for known outages or maintenance affecting guide functionality. Contacting GCI customer support is recommended for complex issues, providing them with your account details and a description of the problem.

GCI Regulatory Information & Financial Secrecy

GCI, like all telecommunications providers, operates under the regulatory oversight of the Regulatory Commission of Alaska. This commission ensures fair practices and service quality for Alaskan consumers. Recent reports indicate a controversial development: attorneys representing telecom billionaire John Malone have filed requests for financial secrecy with the Commission.

These requests, unanimously approved, raise questions about transparency regarding GCI’s financial dealings and potential ownership changes. While the specifics remain confidential, such actions often precede significant corporate restructuring or acquisitions, potentially impacting service offerings and pricing for GCI customers.

Comparing GCI to Other TV Providers in Alaska

GCI stands as a major television provider in Alaska, but faces competition from satellite services and smaller regional cable operators. While GCI offers a robust channel lineup, including local Anchorage stations like ABC/KYUR and FOX/KTBY, competitors may specialize in specific programming packages or offer broader national coverage.

Factors like pricing, internet bundling options, and customer service quality are crucial when comparing providers. GCI’s channel guides, available online and via a mobile app, provide a convenient way to explore available content. However, potential customers should thoroughly research all options to determine the best fit for their viewing preferences and budget within Alaska’s unique market.

GCI Customer Support & Contact Information

GCI provides multiple avenues for customer support, essential for navigating channel lineups and resolving any TV guide issues. Customers can access assistance through their website’s support section, offering FAQs and troubleshooting guides. A dedicated customer service phone line is available for direct communication with representatives, addressing billing inquiries or technical difficulties.

Furthermore, GCI offers support via social media platforms, providing a convenient channel for quick questions. For complex problems, in-person assistance may be available at select GCI retail locations. Prompt and helpful customer service is vital for ensuring a positive viewing experience, especially when utilizing the GCI TV guide features.

rhode island blue card study guide

Rhode Island Blue Card Study Guide: An Overview

The Rhode Island Blue Card is essential for firearm ownership, requiring a 50-question exam covering safety and state laws.

Currently, a hunter education card from another state does not qualify for a Blue Card, though it may assist with hunting licenses.

Exam locations include the DEM Permit Application Center and RIDEM-approved dealers; however, they cannot issue the cards directly.

What is the Rhode Island Blue Card?

The Rhode Island Blue Card serves as a permit required for the purchase of firearms within the state. It demonstrates that an individual possesses a fundamental understanding of safe firearm handling practices and is knowledgeable about Rhode Island’s specific firearms laws. Obtaining this card is a crucial step for anyone intending to legally own a handgun or long gun in Rhode Island.

Unlike a hunting license, the Blue Card focuses solely on firearm safety and legal compliance. A hunter education card issued by another state will not be accepted in lieu of completing the Rhode Island Blue Card requirements. However, possessing a valid hunting license from another state might be beneficial when applying for a Rhode Island hunting license, but it doesn’t substitute the Blue Card.

The process involves studying the provided materials and successfully passing a 50-question exam.

Eligibility Requirements for the Blue Card

To be eligible for a Rhode Island Blue Card, applicants must meet certain basic requirements outlined by the Rhode Island Division of Environmental Management (RIDEM). Generally, applicants must be at least 18 years of age and not prohibited from possessing a firearm under state or federal law. This includes individuals convicted of felony offenses, domestic violence misdemeanors, or those with specific mental health adjudications.

Applicants must also be residents of Rhode Island, or provide documentation justifying their need for the card if they are not residents. There are no specific educational prerequisites, but demonstrating a willingness to learn and adhere to firearm safety regulations is essential.

Successfully completing the Blue Card exam is a mandatory requirement, proving competency in firearm safety and Rhode Island laws.

Where to Take the Blue Card Exam

The Rhode Island Blue Card exam is conveniently offered at multiple locations throughout the state, providing accessibility for prospective cardholders. Primarily, exams are administered at the DEM’s Permit Application Center (PAC) located in Providence. However, applicants can also find testing opportunities at various RIDEM-approved firearms dealers and sporting clubs dispersed across Rhode Island.

To schedule an in-person exam at the PAC, individuals must complete and submit a request form online. It’s important to note that these testing locations – dealers and clubs – cannot directly issue the Blue Cards themselves.

Instead, completed exams are submitted to RIDEM for grading and official issuance of results.

Exam Content and Preparation

Preparation for the Blue Card exam centers around the “Today’s Handgun Safety Basics and Rhode Island Firearms Laws” booklet, covering crucial safety and legal aspects.

“Today’s Handgun Safety Basics and Rhode Island Firearms Laws” Booklet

This booklet serves as the primary study resource for the Rhode Island Blue Card exam, comprehensively detailing essential firearm safety principles and the specific regulations governing firearms within the state.

The 50-question exam is directly based on the information contained within its pages, making thorough review absolutely critical for success. Expect questions probing your understanding of safe handling practices, proper storage techniques, and the legal framework surrounding firearm ownership, transportation, and usage in Rhode Island.

Candidates should dedicate sufficient time to carefully read and digest the booklet’s content, paying close attention to key definitions, legal requirements, and safety protocols. Mastering the material presented in this resource is the most effective path to achieving a passing score on the Blue Card examination.

Exam Format: Multiple Choice and True/False

The Rhode Island Blue Card exam utilizes a straightforward format, consisting entirely of multiple-choice and true/false questions designed to assess your comprehension of firearm safety and Rhode Island’s related laws. This structure aims to efficiently evaluate your knowledge base without requiring extensive written responses.

Prepare to encounter a variety of questions testing your understanding of safe handling procedures, storage requirements, legal restrictions, and responsible firearm ownership. Familiarize yourself with recognizing accurate statements and identifying incorrect assertions.

Effective preparation involves not only memorizing facts but also understanding the underlying principles. Practice answering questions in both formats to build confidence and refine your test-taking strategy, ensuring you can accurately apply your knowledge during the exam.

Number of Questions on the Blue Card Exam

The Rhode Island Blue Card exam is comprised of a total of 50 questions, representing a comprehensive assessment of your understanding of firearm safety principles and Rhode Island’s specific firearms laws. This standardized length ensures a consistent evaluation process for all applicants seeking to obtain their Blue Card.

These 50 questions are strategically distributed between multiple-choice and true/false formats, demanding a broad knowledge base. Applicants should anticipate questions covering topics ranging from safe handling practices and proper storage techniques to legal regulations regarding ownership and transportation.

Adequate preparation is crucial, as covering the material in the “Today’s Handgun Safety Basics and Rhode Island Firearms Laws” booklet is essential for success on this 50-question examination.

Passing Score Requirements

Successfully completing the Rhode Island Blue Card exam requires demonstrating a solid understanding of firearm safety and state regulations. While the exact passing score isn’t explicitly stated, applicants must achieve a satisfactory result on the 50-question assessment. This implies a need for comprehensive study and retention of the material presented in the official study booklet, “Today’s Handgun Safety Basics and Rhode Island Firearms Laws.”

A strong performance across both the multiple-choice and true/false sections is vital. Focusing on key concepts related to safe handling, storage, and legal compliance will significantly increase your chances of meeting the required threshold.

RIDEM evaluates the completed exams, and results are issued following their grading process, confirming whether a passing score was achieved.

Exam Details and Logistics

To schedule an in-person exam, submit a request via form to DEM’s Permit Application Center. Testing is also available at RIDEM-approved locations statewide.

Requesting an In-Person Exam Date/Time

Individuals seeking to take the Blue Card exam in person must initiate the process by completing and submitting the designated form available through the Rhode Island Department of Environmental Management (RIDEM). This form is specifically designed to request a scheduled exam date and time at the DEM’s Permit Application Center (PAC), conveniently located in Providence, Rhode Island.

It’s important to note that submitting the form does not guarantee an immediate appointment. RIDEM staff will review submissions and contact applicants to confirm availability and finalize exam arrangements. Applicants should allow sufficient time for processing and communication.

While the PAC offers in-person testing, remember that numerous RIDEM-approved firearms dealers and sporting clubs throughout the state also administer the Blue Card exam. However, these locations are not authorized to issue the Blue Cards themselves; they must submit completed exams to RIDEM for grading and official issuance of results.

RIDEM-Approved Firearms Dealers and Sporting Clubs

Rhode Island provides convenient access to the Blue Card exam through a network of Department of Environmental Management (RIDEM)-approved firearms dealers and sporting clubs located across the state. These locations serve as alternative testing centers to the DEM Permit Application Center in Providence, offering greater flexibility for applicants.

However, it is crucial to understand a key distinction: these approved locations are authorized to administer the exam, but they cannot issue the actual Blue Cards. Completed exams must be submitted to RIDEM for official grading and the subsequent issuance of results.

To find a complete and up-to-date list of RIDEM-approved testing centers, applicants should consult the official RIDEM Division of Fish and Wildlife website or contact them directly. This ensures access to the most current information regarding locations and any specific requirements they may have.

Blue Card Grading and Issuance Process

Following completion of the Blue Card exam, whether administered at the DEM Permit Application Center or a RIDEM-approved firearms dealer/sporting club, the exam materials are submitted to the Rhode Island Department of Environmental Management (RIDEM) for official grading. It’s important to remember that testing locations themselves do not have the authority to issue the Blue Cards.

RIDEM personnel meticulously evaluate the exam responses, assessing the applicant’s understanding of firearm safety principles and Rhode Island’s specific firearms laws. Once grading is complete, applicants will be notified of their results.

Successful candidates will then have their Blue Cards issued and mailed directly from RIDEM. The processing time for grading and issuance can vary, so applicants are encouraged to check the RIDEM website for current estimates.

Firearm Safety and Storage

Safe handling requires thorough cleaning, lightly oiled metal parts, and locked storage when not in use, especially between seasons.

Record serial numbers and photos for personal documentation.

Safe Firearm Handling Practices

Prioritizing safety is paramount when handling any firearm. Always treat every firearm as if it is loaded, maintaining a conscious awareness of its potential danger. Keep your finger off the trigger until you are ready to shoot, and always be certain of your target and what lies beyond it.

Never point a firearm at anything you do not intend to shoot, and be mindful of the four primary safety rules. Proper muzzle control is crucial; always direct the muzzle in a safe direction. Regularly inspect firearms to ensure they are in good working order, and familiarize yourself with the specific operation of each firearm you use.

Safe handling also includes responsible ammunition storage and awareness of potential hazards in your surroundings. Remember, consistent adherence to these practices minimizes the risk of accidents and promotes responsible firearm ownership.

Proper Firearm Storage Techniques

Secure firearm storage is legally and ethically vital, preventing unauthorized access and accidental discharge. When storing firearms for extended periods, like between seasons, thoroughly clean them first. Lightly oil metal parts to prevent rust and corrosion, ensuring longevity and reliable function.

Store firearms in a locked rack or gun safe, inaccessible to children and unauthorized individuals. Keep ammunition stored separately from firearms, also under lock and key. Maintaining detailed personal records, including serial numbers and photographs, is a prudent practice for identification and security.

Regularly inspect storage conditions to ensure continued security and prevent deterioration. Proper storage isn’t just about legal compliance; it’s about responsible ownership and safeguarding against potential tragedies.

Cleaning and Maintaining Firearms

Regular cleaning is paramount for firearm safety and reliability. After each use, disassemble and thoroughly clean all components, removing powder residue, fouling, and debris. Utilize appropriate cleaning solvents and brushes designed for firearms, following manufacturer instructions carefully.

Lightly oil metal parts after cleaning to prevent rust and corrosion, especially during storage. Inspect for wear and tear, addressing any issues promptly. A well-maintained firearm functions safely and accurately, extending its lifespan and ensuring dependable performance.

Consistent maintenance isn’t merely about preserving the firearm’s condition; it’s a fundamental aspect of responsible gun ownership, demonstrating respect for the tool and prioritizing safety for yourself and others.

Rhode Island Firearms Laws

Understanding Rhode Island’s regulations is crucial for legal firearm ownership, encompassing restrictions, transportation rules, and key state-specific requirements for responsible gun handling.

Key Rhode Island Firearms Regulations

Rhode Island’s firearm laws necessitate a Blue Card for legal purchase and possession, demanding comprehensive knowledge of state statutes. Regulations cover safe handling, storage, and transportation protocols, ensuring responsible gun ownership throughout the state.

Applicants must demonstrate proficiency in these areas via a 50-question exam, based on the “Today’s Handgun Safety Basics and Rhode Island Firearms Laws” booklet. Understanding these regulations is paramount, as they dictate lawful firearm practices.

These laws aim to balance Second Amendment rights with public safety, establishing clear guidelines for residents. Proper storage, including thoroughly cleaning and lightly oiling metal parts before long-term storage in a locked rack, is emphasized.

Restrictions on Firearm Ownership

Rhode Island imposes specific restrictions on firearm ownership, beyond simply obtaining a Blue Card. Individuals convicted of felony offenses are prohibited from possessing firearms, aligning with federal regulations. Domestic violence restraining orders also trigger firearm restrictions, prioritizing safety for protected individuals.

Certain mental health conditions may disqualify individuals from firearm ownership, requiring careful consideration of legal precedents. The state maintains a database to track disqualifying events, ensuring compliance with these restrictions.

Applicants must truthfully disclose any relevant history during the Blue Card application process; false statements can lead to denial and potential legal consequences. Understanding these limitations is crucial for responsible gun ownership within Rhode Island’s legal framework.

Transportation of Firearms in Rhode Island

Rhode Island law dictates specific requirements for transporting firearms, even for licensed Blue Card holders. Generally, firearms must be unloaded and securely encased during transport, preventing unauthorized access. This includes placement in a locked container within a vehicle, inaccessible to passengers.

Transporting a firearm directly to or from a shooting range, hunting location, or authorized repair facility is permitted under these conditions. However, openly carrying a firearm while transporting it is generally prohibited, emphasizing discretion and safety.

Crossing state lines with a firearm requires adherence to both Rhode Island and the destination state’s laws. It’s crucial to research and comply with all applicable regulations to avoid legal issues. Responsible transport is a key component of safe firearm ownership.

Resources and Further Information

For inquiries, contact RIDEM Division of Fish and Wildlife at 401-539-0019. Study booklets and potential practice exams aid preparation for the Blue Card exam.

RIDEM Division of Fish and Wildlife Contact Information

To reach the Rhode Island Department of Environmental Management (RIDEM), specifically the Division of Fish and Wildlife’s Outdoor Education Office for Blue Card related questions, you can directly call them at 401-539-0019. This is the primary point of contact for clarifying eligibility requirements, understanding how hunter education cards from other states might apply to RI hunting licenses (but not the Blue Card itself), and obtaining general guidance regarding the application process.

While a dedicated webpage solely for Blue Card information isn’t prominently featured, the RIDEM website (dem.ri.gov) offers broader resources on firearms and hunting regulations. Expect helpful assistance from the Outdoor Education Office regarding the exam content, testing locations, and the overall process of obtaining your Rhode Island Blue Card. They are equipped to address specific concerns and provide up-to-date information.

Availability of Study Materials and Practice Exams

The core study material for the Rhode Island Blue Card exam is the booklet titled “Today’s Handgun Safety Basics and Rhode Island Firearms Laws.” This booklet comprehensively covers the information assessed during the 50-question test, which includes both multiple-choice and true/false questions. While RIDEM doesn’t appear to offer official practice exams, thorough review of this booklet is crucial for success.

Online resources may offer study guides and practice questions, but their accuracy and relevance should be carefully evaluated. Focus on mastering the content within the official RIDEM publication. Understanding safe firearm handling, proper storage, cleaning procedures, and Rhode Island’s specific firearms regulations are key. Prioritize the official booklet to ensure you’re prepared for the exam’s content and format.

Reciprocity with Other States’ Hunter Education Cards

Regarding reciprocity, it’s important to understand that a Hunter Education Course Card issued by any state other than Rhode Island will not directly qualify you for a Rhode Island Blue Card. This means completing a hunter education course in another state does not exempt you from taking and passing the Rhode Island Blue Card exam.

However, possessing a valid hunter education card from another state can be beneficial when applying for a Rhode Island Hunting License. For specific details regarding how out-of-state hunter education cards are applied to hunting license eligibility, contact the RIDEM Division of Fish and Wildlife’s Outdoor Education Office directly at 401-539-0019. They can provide clarification on accepted documentation and any applicable requirements;

chain guide mtb

Chain Guides for Mountain Bikes: A Comprehensive Guide (Updated February 16‚ 2026)

Recent news highlights the unfortunate passing of Tim Very‚ a talented musician‚ yet simultaneously‚ mountain biking enthusiasts seek reliable chain retention solutions.
Chain guides are crucial components‚ preventing dropped chains and ensuring smooth‚ uninterrupted rides across diverse terrains‚ enhancing overall performance and enjoyment.

Mountain bike chain guides have evolved significantly‚ becoming essential for riders tackling challenging trails. Initially‚ they addressed chain retention issues prevalent with older drivetrain setups‚ particularly those utilizing multiple chainrings. However‚ even with the rise of 1x drivetrains – designed to minimize drops – chain guides remain valuable.

They offer an added layer of security‚ especially during aggressive riding where impacts and rough terrain can still dislodge the chain. Modern chain guides aren’t simply about preventing drops; they contribute to quieter rides by minimizing chain slap against the frame. This introduction will explore the world of MTB chain guides‚ covering types‚ benefits‚ compatibility‚ and maintenance‚ ensuring you choose the right guide for your riding style and bike.

What is a Chain Guide and Why Do You Need One?

A chain guide is a device mounted to your mountain bike’s frame‚ strategically positioned to physically guide and retain the chain on the chainring(s). It typically consists of a backplate that sits close to the chainring and side plates that prevent lateral chain movement;

Why are they needed? Dropped chains interrupt your flow‚ potentially causing crashes or damage. While modern 1x systems with clutch derailleurs have improved retention‚ they aren’t foolproof. Chain guides provide extra security‚ particularly on rough terrain. They also reduce chain slap‚ minimizing noise and protecting your frame from wear‚ ultimately enhancing your riding experience and confidence.

Types of Chain Guides

Chain guides broadly fall into two categories: internal and external. Internal guides are integrated into the frame‚ often found on newer mountain bikes‚ offering a cleaner aesthetic and lighter weight. They typically work in conjunction with a clutch derailleur for optimal chain retention.

External chain guides mount directly to the bottom bracket shell and are compatible with a wider range of frames. They offer robust chain retention‚ making them popular for aggressive riding disciplines like downhill and enduro. Some external guides are modular‚ allowing customization with different backplates and side plates.

Internal Chain Guides

Internal chain guides represent a modern approach to chain retention‚ seamlessly integrated within the bicycle frame’s design. These guides typically work in harmony with derailleurs featuring clutch mechanisms‚ enhancing their effectiveness. They offer a streamlined appearance and contribute to a reduction in overall bike weight‚ appealing to riders prioritizing efficiency.

However‚ compatibility is key; internal guides are generally found on newer frames specifically designed to accommodate them. They often provide sufficient retention for trail and all-mountain riding‚ but may not be as robust as external options for extreme downhill applications.

External Chain Guides

External chain guides mount directly to the bike’s bottom bracket shell‚ offering a more universal fit across a wider range of frame designs. These guides utilize a backplate and often an upper guide to physically contain the chain‚ providing a higher level of security against derailment‚ particularly in challenging terrain.

They are a popular choice for downhill and enduro riders where maximum chain retention is paramount. While generally more visible and potentially heavier than internal guides‚ external models offer robust protection and are often more adjustable to suit various chainring sizes.

Benefits of Using a Chain Guide

Employing a chain guide delivers substantial advantages for mountain bikers. Primarily‚ they drastically reduce the likelihood of dropped chains‚ preventing ride interruptions and potential damage to your drivetrain. This is especially vital for 1x drivetrains‚ where chain retention is inherently more challenging.

Beyond reliability‚ chain guides enhance drivetrain efficiency by minimizing chain slap against the frame‚ reducing noise and protecting the paintwork. They also contribute to a more confident and controlled riding experience‚ allowing riders to push their limits without fear of mechanical issues.

Chain Guide Compatibility: Frame and Drivetrain Considerations

Selecting a compatible chain guide requires careful consideration of both your frame and drivetrain setup. Frame compatibility hinges on mounting points – ISCG (Integrated Spindle Chain Guide) tabs are common‚ but not universal. Direct mount options are also prevalent‚ demanding specific frame designs.

Drivetrain compatibility centers around the number of chainrings. Guides are designed for 1x‚ 2x‚ or 3x systems‚ influencing the guide’s backplate and roller configuration. Ensuring proper alignment and clearance is crucial for optimal performance and preventing rubbing or interference.

Compatibility with Different Frame Materials

Chain guide compatibility isn’t significantly dictated by frame material—aluminum‚ carbon fiber‚ or steel—but by the presence of appropriate mounting standards. ISCG tabs are generally found across all materials‚ though carbon frames require careful torque specifications during installation to avoid damage.

Direct mount systems demand precise frame geometry‚ irrespective of the material. While material doesn’t directly impact fitment‚ carbon frames necessitate extra caution to prevent over-tightening and potential cracking around the mounting points. Always consult the frame manufacturer’s guidelines.

Compatibility with 1x‚ 2x‚ and 3x Drivetrains

Chain guide selection hinges on your drivetrain configuration. 1x drivetrains‚ increasingly popular‚ benefit most from guides‚ preventing chain drops due to the lack of a front derailleur. Guides for 1x systems are typically simpler and lighter.

2x and 3x systems‚ while less common now‚ require guides designed to accommodate the front derailleur and multiple chainrings. These guides are more complex‚ offering broader chain retention. Ensure the guide’s backplate clears the derailleur cage. Compatibility charts from manufacturers are crucial for proper fitment.

Top Chain Guide Brands and Models

Several brands consistently deliver high-performance chain guides. Race Face offers durable options like the Turbine‚ known for its robust construction and reliable chain retention. e*thirteen provides a range‚ including the TRS+ guide‚ favored for its lightweight design and compatibility.

MRP (Mountain Racing Products) stands out with the AMG guide‚ praised for its adjustability and secure fit. These brands cater to various budgets and riding styles‚ offering both internal and external guide options. Researching specific models within each brand is key to finding the best fit for your bike and needs.

Race Face Chain Guides

Race Face chain guides are renowned for their durability and performance‚ catering to a wide spectrum of mountain biking disciplines. The Turbine model is a flagship product‚ constructed from high-strength materials to withstand demanding trail conditions. They offer both ISCG and direct-mount options‚ ensuring compatibility with numerous frame designs.

Race Face guides prioritize secure chain retention‚ minimizing the risk of drops during aggressive riding. Their designs often incorporate replaceable skid plates‚ extending the guide’s lifespan. Riders appreciate the brand’s commitment to quality and reliability‚ making Race Face a popular choice among enthusiasts.

ethirteen Chain Guides

ethirteen has long been a prominent name in chain retention‚ offering a diverse range of chain guides for various riding styles. Their TRS+ series is particularly well-regarded‚ featuring a lightweight yet robust construction. These guides excel in demanding downhill and enduro applications‚ providing exceptional chain security.

ethirteen distinguishes itself with innovative designs‚ often incorporating features like adjustable backplates for fine-tuning chain tension. Compatibility is a key strength‚ with options available for ISCG05‚ ISCG03‚ and direct-mount systems. Riders consistently praise ethirteen guides for their performance and longevity on the trails.

MRP Chain Guides

MRP (Mountain Racing Products) consistently delivers high-performance chain guides known for their durability and precise engineering. Their AMg line is a popular choice among aggressive trail and enduro riders‚ offering a balance of weight and strength. MRP guides are designed to minimize chain slap and maintain consistent chainline‚ improving drivetrain efficiency.

A standout feature of MRP guides is their focus on simplicity and ease of installation. They offer both internal and external guide options‚ catering to a wide range of frame and drivetrain configurations. Riders appreciate the reliable performance and quiet operation of MRP chain guides on challenging terrain.

Chain Guide Installation: A Step-by-Step Guide

Proper installation is vital for optimal chain guide performance. Begin by removing the existing chain device‚ if present. Attach the guide’s backplate to the frame’s ISCG tabs (or BB shell for non-ISCG frames) using the provided bolts‚ ensuring correct alignment. Next‚ install the upper guide‚ adjusting its height to match the chainring size.

Carefully thread the chain through the guide’s rollers. Tighten all bolts to the manufacturer’s specified torque. Finally‚ verify proper chainline and tension; the guide should run smoothly without rubbing. Regularly check bolt tightness after initial rides.

Chain Guide Maintenance and Adjustment

Consistent maintenance extends your chain guide’s lifespan and ensures peak performance; Regularly inspect the guide for wear and tear‚ particularly the rollers and backplate. Cleaning is crucial; use a mild degreaser and brush to remove dirt and grime‚ then re-lubricate the rollers.

Adjusting tension is key to preventing chain drops. If the chain is rubbing‚ slightly loosen the upper guide. Conversely‚ tighten it if the chain is bouncing. Periodically check and tighten all mounting bolts to prevent loosening during aggressive riding. A well-maintained guide equals a smoother ride.

Cleaning Your Chain Guide

A clean chain guide operates efficiently and prolongs its lifespan. Begin by removing the guide from your bike. Use a brush and a mild degreaser‚ like citrus-based cleaners‚ to dissolve accumulated grime and chain lubricant. Pay close attention to the rollers and the inner surfaces where debris tends to collect.

Avoid harsh solvents that can damage plastic components. Rinse thoroughly with water‚ ensuring all degreaser residue is removed. Dry completely with a clean cloth before re-installation. Regular cleaning‚ ideally after every few rides‚ keeps your guide functioning optimally and prevents premature wear.

Adjusting Chain Guide Tension

Proper chain guide tension is vital for effective chain retention. Too little tension allows chain slap and potential derailment‚ while excessive tension creates friction and wear. Most guides utilize adjustment screws or spacers to fine-tune the fit. Begin by ensuring the guide sits flush against the chain without binding.

Gradually tighten the tension screw‚ checking for smooth chain movement through the guide. The chain should move freely without excessive rubbing or resistance. Periodically re-check tension‚ especially after initial installation and during trailside maintenance‚ to maintain optimal performance and prevent chain drops.

Troubleshooting Common Chain Guide Issues

Even with proper installation‚ issues can arise. Chain guide rubbing often indicates incorrect tension or misalignment; loosen the guide slightly and re-align it with the chainring. Persistent chain drops despite using a guide suggest insufficient tension‚ a worn guide‚ or a bent backplate. Inspect the guide for damage and replace if necessary.

Ensure compatibility with your drivetrain and frame. Check mounting bolts are secure and the guide isn’t interfering with suspension movement. Regular cleaning prevents buildup that can exacerbate these problems‚ maintaining smooth operation and reliable chain retention on the trails.

Chain Guide Rubbing on Chain

Chain rubbing signifies a misalignment or excessive tension; Begin by loosening the chain guide’s mounting bolts slightly‚ allowing for minor adjustments. Carefully re-align the guide so it runs parallel with the chainring‚ ensuring the chain flows freely without contact. Inspect the backplate for any bends or damage that could be causing interference.

If rubbing persists‚ check for frame flex affecting the guide’s position during riding. A small amount of grease on the guide’s contact points can sometimes alleviate minor friction. Avoid overtightening‚ as this exacerbates the issue; aim for smooth‚ silent operation.

Chain Still Dropping with a Chain Guide

Persistent chain drops despite a guide indicate a deeper issue. First‚ verify the chain guide is correctly installed and compatible with your drivetrain – 1x‚ 2x‚ or 3x. Inspect chain length; an improperly sized chain is a common culprit. Ensure the chainring bolts are securely tightened‚ as looseness can cause misalignment.

Check for worn chainring teeth – hooked or severely worn teeth dramatically increase drop risk. Consider a clutch derailleur alongside the guide for enhanced retention‚ especially on rough terrain. Finally‚ confirm the guide’s backplate isn’t damaged or bent‚ hindering its function.

Chain Guides vs. Chain Retention Devices (Clutches)

Chain guides and clutch derailleurs both combat chain drop‚ but function differently. Chain guides physically block the chain‚ offering robust security‚ particularly downhill. Clutch derailleurs utilize a friction mechanism within the derailleur body‚ increasing chain tension and resisting bouncing.

Many riders combine both for maximum security‚ especially with 1x drivetrains. Clutches are generally quieter and lighter‚ while guides provide a more definitive barrier. Consider your riding style; aggressive descents benefit from a guide‚ while trail riding may suffice with a clutch alone.

The Role of Chain Guides in Different Riding Styles

Chain guide necessity varies with riding discipline. Enduro and downhill riders‚ facing rough terrain and aggressive maneuvers‚ greatly benefit from the security of a robust chain guide‚ minimizing drops during critical moments. Trail and all-mountain riders experience varied conditions; a guide offers peace of mind‚ though modern clutch derailleurs often suffice.

For cross-country‚ where efficiency is paramount‚ a guide is less common‚ prioritizing weight savings. Ultimately‚ the choice depends on terrain severity and rider confidence‚ balancing security against potential weight and complexity.

Enduro and Downhill Riding

In the demanding worlds of enduro and downhill mountain biking‚ chain retention is paramount. These disciplines involve incredibly rough terrain‚ high speeds‚ and aggressive riding styles‚ significantly increasing the risk of chain drops. A robust chain guide isn’t merely an accessory; it’s essential equipment.

External chain guides are favored for their superior security‚ providing a physical barrier against derailment. Reliability is key‚ as a dropped chain can lead to crashes or lost race time. Riders prioritize durability and adjustability to handle varied track conditions‚ ensuring consistent performance.

Trail and All-Mountain Riding

For trail and all-mountain riders‚ a balance between weight‚ security‚ and versatility is crucial. These riders encounter a wider range of terrain‚ from smooth flow trails to rocky‚ technical climbs and descents. Chain guides offer peace of mind‚ minimizing the frustration of dropped chains during extended rides.

Internal chain guides are popular choices‚ offering a lighter weight and more streamlined profile. However‚ external guides are also viable‚ particularly for riders tackling more aggressive trails. The goal is reliable chain retention without sacrificing pedaling efficiency or adding unnecessary bulk to the bike.

Chain Guide Materials: What’s Best?

Chain guides are constructed from various materials‚ each offering distinct advantages and disadvantages. Plastic chain guides are the most affordable and lightest option‚ suitable for less demanding trails and riders prioritizing weight savings. Aluminum chain guides provide a robust and durable solution‚ ideal for aggressive riding and rough terrain‚ offering excellent impact resistance.

Carbon fiber chain guides represent the premium end of the spectrum‚ combining exceptional strength-to-weight ratios with vibration damping properties. The best material depends on your budget‚ riding style‚ and the level of abuse your chain guide will endure. Consider the trade-offs between cost‚ weight‚ and durability.

Plastic Chain Guides

Plastic chain guides represent the entry point in terms of both price and weight. Typically constructed from high-density polyethylene (HDPE) or nylon‚ they offer a cost-effective solution for riders prioritizing affordability. These guides excel in minimizing weight‚ making them popular among cross-country racers and riders focused on climbing efficiency;

However‚ plastic guides generally lack the durability of metal counterparts‚ being more susceptible to wear and breakage under intense conditions. They are best suited for less aggressive riding and may require more frequent replacement. Despite limitations‚ plastic guides provide adequate chain retention for many trail applications.

Aluminum Chain Guides

Aluminum chain guides strike a balance between durability‚ weight‚ and cost‚ making them a popular choice for trail and all-mountain riders. Machined from 6061-T6 aluminum‚ these guides offer significantly increased strength compared to plastic options‚ resisting deformation and providing long-lasting performance. They are capable of withstanding the demands of rough terrain and aggressive riding styles.

While heavier than plastic guides‚ the added robustness is often considered a worthwhile trade-off. Aluminum guides frequently feature replaceable wear plates‚ extending their lifespan and reducing overall maintenance costs. They represent a solid investment for riders seeking reliable chain retention.

Carbon Fiber Chain Guides

Carbon fiber chain guides represent the pinnacle of lightweight performance‚ appealing to racers and weight-conscious riders. Constructed from high-modulus carbon fiber‚ these guides minimize rotational weight‚ contributing to faster acceleration and improved climbing efficiency. They offer an exceptional strength-to-weight ratio‚ rivaling aluminum while being noticeably lighter.

However‚ carbon fiber guides typically come with a higher price tag and may be more susceptible to impact damage than metal alternatives. Careful inspection for cracks or delamination is crucial after crashes or significant impacts. Despite the cost‚ the performance benefits make them a desirable upgrade for serious riders.

Chain Guide Weight and its Impact on Performance

The weight of a chain guide‚ though seemingly minor‚ can subtly influence a mountain bike’s handling and efficiency. Lighter guides‚ particularly those made from carbon fiber or refined plastics‚ reduce unsprung weight‚ improving suspension responsiveness and traction‚ especially on technical terrain. This is crucial for racers seeking marginal gains.

Heavier aluminum guides offer increased durability but add rotational mass‚ potentially slowing acceleration and making the bike feel less nimble. The impact is more noticeable during rapid acceleration and frequent changes in direction. Choosing a guide weight should align with riding style and priorities – performance versus robustness.

Cost Considerations: Budget vs. High-End Chain Guides

Chain guide prices vary significantly‚ ranging from affordable plastic options to premium‚ lightweight models. Budget-friendly guides‚ typically constructed from durable plastics‚ provide adequate chain retention for recreational riders and trail use‚ often costing between $30-$70. However‚ they may lack the refinement and weight savings of higher-end alternatives.

High-end guides‚ utilizing aluminum or carbon fiber‚ prioritize weight reduction and precise fit‚ commanding prices from $80 to over $200. These are favored by racers and aggressive riders demanding optimal performance and durability. Consider your riding intensity and budget when selecting a chain guide.

Future Trends in Chain Guide Technology

Innovation in chain guide design is ongoing‚ driven by the demands of modern mountain biking. Expect to see increased integration with drivetrain components‚ offering seamless compatibility and improved performance. Material science will likely yield even lighter and stronger guides‚ potentially utilizing advanced polymers and carbon fiber composites.

Adjustability will become more refined‚ allowing riders to fine-tune chain retention for various chainring sizes and riding styles. Furthermore‚ we may witness the development of “smart” chain guides incorporating sensors to monitor chain wear and alert riders to potential issues‚ enhancing reliability and safety.

Where to Buy Chain Guides

Chain guides are widely available through various channels‚ catering to diverse budgets and preferences. Major online retailers like Amazon‚ Chain Reaction Cycles‚ and Jenson USA offer extensive selections from numerous brands. Local bike shops (LBS) provide expert advice and fitting services‚ ensuring compatibility with your specific bike.

Direct-to-consumer brands such as Race Face and MRP also sell directly through their websites‚ often offering exclusive deals. Checking manufacturer websites is crucial for the latest models and promotions. Comparing prices across different retailers is recommended to secure the best value.

Chain Guide Terminology Explained

Understanding key terms enhances informed decision-making. A chainring is the toothed wheel the chain engages with. Chain retention refers to preventing chain drops. ISCG (Integrated Spindle Chain Guide) mounts directly to the bottom bracket shell. Direct mount guides attach to specific frame mounts‚ offering a cleaner look.

Backplate refers to the guide’s rear section‚ while the cage directs the chain. Tensioners adjust chain tightness. Bash guards protect the chainring from impacts. Knowing these terms helps when researching‚ comparing models‚ and discussing needs with bike shop professionals.

Resources for Further Research

Expanding your knowledge base is crucial for optimal bike maintenance. Pinkbike.com offers extensive reviews and user forums dedicated to mountain bike components‚ including chain guides. BikeRadar.com provides in-depth articles and buying guides. MTBmag.com features expert opinions and product testing.

YouTube channels like GMBN (Global Mountain Bike Network) offer visual guides on installation and adjustment. Manufacturer websites – Race Face‚ e*thirteen‚ and MRP – provide detailed specifications and compatibility information. Local bike shops are invaluable resources for personalized advice and hands-on assistance.

Choosing the Right Chain Guide for Your MTB

Selecting the ideal chain guide hinges on your riding style and drivetrain setup. For aggressive downhill and enduro riding‚ robust external guides are paramount. Trail and all-mountain riders can benefit from lighter internal options. Consider frame compatibility and desired level of chain security.

Prioritize quality brands like Race Face‚ e*thirteen‚ and MRP for proven performance. Don’t underestimate the importance of proper installation and regular maintenance. A well-chosen and maintained chain guide translates to fewer dropped chains‚ increased confidence‚ and more enjoyable rides.

genshin guide to ingenuity

Genshin Impact Guide to Ingenuity: A Comprehensive Overview (Updated 02/16/2026)

Welcome‚ Travelers! This guide dives deep into maximizing Ingenuity in Genshin Impact‚ especially with the 5.8 update’s focus on reactions and efficient team building.

Ingenuity‚ within the world of Teyvat‚ represents a player’s ability to strategically leverage the game’s complex systems – primarily Elemental Reactions – to overcome challenges. The recent 5.8 update significantly amplifies the importance of this skill‚ demanding optimized team compositions and swift character rotations for success in the Spiral Abyss and against new threats.

This isn’t simply about raw power; it’s about understanding how power is generated and applied. Mastering Ingenuity means recognizing elemental synergies‚ prioritizing reaction damage‚ and adapting to constantly evolving combat scenarios. This guide will equip you with the knowledge to excel‚ starting with a foundational understanding of the core concepts.

What is Ingenuity? Defining the Core Concept

Ingenuity in Genshin Impact transcends merely building strong characters; it’s the art of maximizing efficiency through strategic gameplay. At its heart lies the understanding that consistent damage isn’t always the highest damage. Instead‚ it’s about consistently triggering powerful Elemental Reactions.

This involves recognizing which elements complement each other‚ understanding reaction priorities‚ and building teams specifically designed to enable these interactions. The 5.8 update emphasizes this‚ rewarding players who can quickly cycle through characters to maintain a constant flow of reactions. It’s about smart play‚ not just stat optimization.

The Importance of Elemental Reactions

Elemental Reactions are the cornerstone of Ingenuity in Genshin Impact. They aren’t simply bonus damage; they fundamentally alter combat flow and potential. Mastering these reactions is crucial‚ especially with the 5.8 update’s increased emphasis on reaction-based teams.

Understanding how elements interact – Pyro with Hydro for Vaporize‚ Electro with Dendro for Aggravate – unlocks significantly higher damage ceilings than raw attack power alone. Efficiently chaining reactions‚ alongside quick character rotations‚ is now paramount for tackling challenging content like the Spiral Abyss.

Synergies Between Elements: A Detailed Breakdown

Dendro and Hydro create Bloom‚ a powerful reaction spawning Dendro Cores. Hyperbloom‚ triggered by Electro on these cores‚ delivers substantial damage. Pyro and Hydro yield Vaporize‚ amplifying damage based on the triggering element. Pyro and Cryo produce Melt‚ similarly boosting damage output. Electro and Cryo form Superconduct‚ reducing enemy Physical RES.

Electro and Dendro enable Aggravate/Spread‚ significantly increasing Elemental DMG. Recognizing these core synergies‚ and building teams around them‚ is vital for maximizing Ingenuity. The 5.8 update heavily rewards players who can consistently trigger and capitalize on these elemental interactions.

Reaction Priority and Damage Calculation

Understanding reaction priority is crucial. When multiple reactions are possible‚ Genshin Impact follows a specific order. Electrocharged and Superconduct generally take precedence. Mastering this order allows for intentional reaction chaining. Damage calculation varies per reaction; Vaporize and Melt scale with character stats and the triggering element’s level.

Bloom reactions depend on Dendro Core detonation. Hyperbloom’s damage scales with the Electro character’s level. Efficient rotations and quick character switching are key to maximizing reaction uptime‚ especially in the challenging Spiral Abyss of update 5.8.

Team Composition for Ingenuity

Successful Ingenuity hinges on synergistic team building. The 5.8 update emphasizes elemental reactions‚ demanding careful consideration of character roles and elemental coverage. Hyperbloom teams‚ leveraging Dendro and Hydro‚ are currently strong contenders. Aggravate/Spread teams‚ focusing on Electro and Dendro‚ offer high single-target damage.

Vaporize and Melt teams remain potent. Pyro’s explosive potential requires precise timing and consistent application. Prioritize characters who can reliably trigger these reactions‚ and remember quick rotations are vital for sustained damage output in the Spiral Abyss.

Hyperbloom Teams: Maximizing Dendro and Hydro

Hyperbloom teams excel at consistent‚ off-field damage. Core components include a Dendro applicator (Nahida‚ Alhaitham) and Hydro applicators (Xingqiu‚ Yelan). These characters consistently apply their elements‚ creating Bloom cores. Electro characters (Raiden Shogun‚ Kuki Shinobu) trigger Hyperbloom‚ dealing significant Dendro damage.

Focus on maximizing Hydro and Dendro application. Energy Recharge is crucial for consistent Burst uptime. Consider a flexible fourth slot for shielding‚ healing‚ or additional sub-DPS to address specific content challenges. This composition thrives in the current 5.8 meta.

Aggravate/Spread Teams: Electro and Dendro Dominance

Aggravate/Spread teams leverage the synergy between Electro and Dendro for high single-target damage. Key characters include Dendro applicators like Nahida or Alhaitham‚ paired with Electro drivers such as Cyno or Yae Miko. These teams focus on maximizing consistent Electro and Dendro application to trigger these reactions repeatedly.

Electro characters benefit from Crit Rate and Crit Damage. Dendro characters should prioritize Elemental Mastery. Energy Recharge is vital for consistent Burst uptime. These teams are particularly effective in Spiral Abyss‚ capitalizing on the 5.8 update’s emphasis on elemental reactions;

Vaporize/Melt Teams: Pyro’s Explosive Potential

Vaporize and Melt teams center around amplifying Pyro damage through Hydro and Cryo reactions‚ respectively. Characters like Hu Tao‚ Diluc‚ or Lyney excel as main DPS‚ benefiting immensely from these damage multipliers. Consistent application of Hydro (Xingqiu‚ Yelan) or Cryo (Ganyu‚ Kaeya) is crucial for maximizing reaction uptime.

Prioritize Pyro DPS Crit stats and Elemental Mastery on supporting characters. Energy Recharge is also important for frequent Burst usage. These teams remain potent in the current meta‚ offering substantial damage output‚ especially within the challenging Spiral Abyss encounters of update 5.8.

Character Roles and Their Impact on Ingenuity

Successful Ingenuity-focused teams require a clear understanding of character roles. The Main DPS consistently delivers damage‚ often triggering reactions. Sub-DPS characters enable these reactions and contribute significant off-field damage‚ crucial for sustained output. Support characters provide buffs‚ healing‚ or utility‚ enhancing team survivability and reaction potential.

Synergy between roles is paramount. A well-rounded team ensures consistent reaction triggers and optimal damage amplification. Understanding each character’s strengths and weaknesses is vital for building effective compositions‚ particularly when tackling the challenges presented in Genshin Impact 5.8.

The Main DPS: Consistent Damage Output

The Main DPS is the cornerstone of any Ingenuity team‚ responsible for sustained damage and frequently initiating elemental reactions. Characters like Neuvillette or Hu Tao excel here‚ boasting high personal damage and the ability to consistently apply their element. Optimizing their talents‚ artifacts (focusing on Crit Rate/Damage and Elemental Mastery)‚ and weapon choices is crucial.

Effective DPS rotation is key. Seamlessly weaving normal attacks with elemental skills and bursts maximizes reaction potential. Consider energy recharge needs to maintain burst uptime‚ especially in prolonged fights like those found in Spiral Abyss.

Sub-DPS: Enabling Reactions and Off-Field Damage

Sub-DPS characters are reaction engines‚ providing consistent elemental application even when not actively on-field. Xingqiu and Yelan are prime examples‚ offering Hydro application for Vaporize or Electro-Charged teams. Nahida excels in Dendro application for Hyperbloom and Spread compositions.

Prioritize Energy Recharge and Elemental Mastery on Sub-DPS units. This ensures frequent burst usage and amplified reaction damage. Off-field damage scaling is also vital; talents that enhance damage while off-field are highly valuable for maximizing overall team output.

Support Characters: Buffs‚ Healing‚ and Utility

Effective support characters elevate Ingenuity-focused teams by providing crucial buffs‚ reliable healing‚ and essential utility. Bennett’s ATK buff and healing are universally valuable‚ while Kazuha’s Elemental DMG Bonus significantly amplifies reaction damage.

Consider supports that enhance Energy Recharge for frequent burst uptime. Zhongli’s shield offers interruption resistance‚ crucial for consistent reactions. Prioritize supports that complement your team’s elemental composition and address its weaknesses‚ ensuring smooth rotations and sustained damage output.

Spiral Abyss and Ingenuity: Floor-Specific Strategies

The Spiral Abyss demands adaptable Ingenuity-based teams. Genshin Impact 5.8’s challenges prioritize elemental reactions and swift rotations. Floor 12 currently favors teams excelling in consistent damage and reaction triggers. Prepare for diverse enemy compositions requiring flexible strategies.

Focus on maximizing reaction potential for each chamber. Quick-swap teams are highly effective‚ enabling frequent elemental applications. Analyze enemy weaknesses and adjust your team accordingly. Mastering character rotations and energy management is key to conquering the Abyss’s latest trials.

Floor 12 Challenges: Current Meta and Solutions (5.8 Update)

Floor 12 in the 5.8 update presents formidable foes demanding optimized Ingenuity. Hyperbloom teams‚ leveraging Dendro and Hydro‚ are currently dominating the meta due to their consistent damage output. Aggravate/Spread compositions also shine‚ capitalizing on Electro and Dendro synergies.

Key to success lies in efficient rotations and maximizing reaction uptime. Prioritize characters with strong off-field damage and elemental application. Consider bringing an energy recharge support to ensure consistent burst availability. Adapt your strategy based on chamber-specific enemy resistances and attack patterns.

Adapting to Changing Abyss Lineups

The Spiral Abyss constantly evolves‚ requiring flexible Ingenuity strategies. Don’t rigidly adhere to a single team; be prepared to swap characters and adjust compositions based on new enemy types and elemental shields. Analyze enemy weaknesses – Pyro immunity demands alternative approaches.

Prioritize versatility over raw power. Characters capable of multiple reactions or providing diverse utility are invaluable. Experiment with different team archetypes and refine rotations to counter specific challenges. Staying informed about community findings and meta shifts is crucial for consistent success.

Weekly Bosses and Ingenuity: Paralogism and Beyond

Weekly Bosses demand optimized Ingenuity for efficient clears. The new Paralogism boss‚ accessible post-Mondstadt Interlude Quest‚ presents unique mechanics requiring specific counter-strategies. Understanding its attack patterns and elemental vulnerabilities is paramount;

Don’t overlook the “quick start” option! This allows challenging the boss without full domain completion‚ ideal for initial attempts. Team composition should prioritize sustained damage and interruption potential. Mastering Ingenuity principles translates directly into faster clear times and reduced Resin consumption.

Paralogism Boss Guide: Mechanics and Counter-Strategies

Paralogism’s core mechanic revolves around shifting elemental alignments. The boss cycles through resistances‚ demanding adaptable teams capable of exploiting weaknesses. Prioritize characters who can consistently apply elements‚ triggering reactions even through shields.

Interrupting its charged attacks is crucial. Utilize crowd control abilities – Freeze‚ Stun‚ or Knockback – to prevent devastating damage. Focus on maximizing Elemental Mastery for amplified reaction damage. A well-coordinated rotation‚ leveraging Ingenuity‚ will significantly reduce the challenge.

Quick Start Options for Boss Challenges

Facing Paralogism unprepared? Utilize the “Quick Start” option! This allows challenging the boss without completing the preceding Mondstadt Interlude Quest fully. However‚ be warned: this mode offers reduced rewards and increased difficulty.

Focus on maximizing damage output. Prioritize characters with high individual DPS and consistent elemental application. Reaction-based teams are still viable‚ but require precise timing and execution. Adapt your strategy based on the boss’s current elemental alignment‚ and remember to bring sufficient healing!

Artifact Sets for Ingenuity-Focused Builds

Optimizing your artifacts is crucial for maximizing Ingenuity. Gilded Dreams is a top choice‚ significantly boosting elemental reaction damage – perfect for reaction-heavy teams. Deepwood Memories excels in Dendro-centric compositions‚ amplifying the effects of Dendro-related reactions like Bloom and Hyperbloom.

For Energy Recharge focused builds‚ consider the 4-Piece Emblem of Severed Fate. This set provides a substantial Energy Recharge bonus and increases Burst damage‚ enabling frequent reactions. Remember to prioritize stats like Elemental Mastery and Crit Rate/Damage based on your team composition!

Gilded Dreams: Boosting Elemental Reaction Damage

Gilded Dreams is the premier artifact set for maximizing elemental reaction damage in Genshin Impact. Its 2-piece bonus grants an impressive 18% increase to Elemental Mastery‚ while the 4-piece set provides an additional 18% Elemental Mastery bonus when triggering an Elemental Reaction.

This effect stacks up to three times‚ offering a substantial damage amplification. It’s exceptionally effective on characters who frequently apply elements and trigger reactions‚ making it ideal for Hyperbloom‚ Vaporize‚ and Melt teams. Prioritize Elemental Mastery substats for optimal performance!

Deepwood Memories: Enhancing Dendro Reactions

Deepwood Memories is crucial for amplifying Dendro-related reactions like Bloom‚ Hyperbloom‚ and Spread. The 2-piece bonus provides a 15% Dendro DMG Bonus‚ a solid foundation for Dendro-centric builds. However‚ the true power lies in its 4-piece effect.

This set reduces the opponent’s Dendro RES by 30% for 8 seconds after triggering a Burning‚ Bloom‚ Hyperbloom‚ or Burgeon reaction. This substantial reduction significantly boosts the damage of subsequent Dendro reactions‚ making it essential for maximizing Dendro team potential.

4-Piece Emblem of Severed Fate: Energy Recharge and Burst Damage

The 4-Piece Emblem of Severed Fate is a powerhouse for characters reliant on their Elemental Bursts. It provides a significant 20% Energy Recharge increase‚ crucial for consistent Burst uptime. More importantly‚ it boosts Elemental Burst DMG by 25%.

This bonus is further amplified by 15% for every point of Energy Recharge above 60%‚ up to a maximum of 75%. This makes it ideal for characters who frequently use their Bursts to drive reactions‚ offering substantial damage output.

Weapon Choices for Ingenuity

Selecting the right weapon is vital for maximizing Ingenuity-focused builds. Catalysts often shine in reaction teams‚ providing Energy Recharge or boosting Elemental Mastery. Options like the Favonius Codex excel at generating energy for the entire team‚ enabling frequent Burst usage.

For Swords‚ Claymores‚ and Polearms‚ prioritize weapons that support DPS or Sub-DPS roles. Weapons with Energy Recharge substats or passive abilities that enhance Elemental Reaction damage are highly valuable. Consider options that complement your character’s kit and team composition.

Catalysts for Reaction-Based Teams

Catalysts are premier choices for characters driving Elemental Reactions. The Magic Guide exemplifies this‚ increasing Elemental Skill damage – crucial for triggering reactions. Favonius Codex provides consistent Energy Recharge‚ fueling frequent Bursts for sustained reaction output.

Wanderer’s Troupe boosts Elemental Mastery‚ directly amplifying reaction damage. Sacrificial Fragments offer a chance to reset Elemental Skill cooldowns‚ enabling more frequent reactions. Prioritize catalysts that synergize with your team’s core reactions and character roles‚ maximizing overall Ingenuity.

Swords‚ Claymores‚ and Polearms: Supporting DPS and Sub-DPS

For supporting roles‚ weapon choice hinges on team needs. Freedom-Sworn boosts team-wide Elemental Mastery‚ ideal for reaction-focused compositions. Blackcliff Longsword enhances damage against defeated enemies‚ useful in quick-swap teams.

Wolf-Fang offers increased ATK after using Elemental Skill‚ benefiting Sub-DPS characters. Serpent Spine (Claymore) provides scaling damage boosts‚ but at a HP cost. Favonius Lance grants Energy Recharge‚ supporting Burst-reliant characters. Prioritize weapons that complement your character’s role and enhance reaction potential.

Talent Prioritization for Key Characters

Maximizing Ingenuity demands strategic Talent investment. Prioritize Elemental Skill and Burst levels for characters central to triggering reactions. For reaction-focused DPS‚ focus on talents directly increasing reaction damage. Sub-DPS characters benefit from talents enhancing off-field damage and Energy Recharge.

Consider Constellations; some significantly amplify reaction potential. However‚ talents generally offer more consistent improvements. Carefully evaluate each character’s role and tailor Talent upgrades accordingly‚ ensuring smooth rotations and maximized elemental synergy.

Focusing on Elemental Skill and Burst Levels

Elemental Skill and Burst levels are paramount for Ingenuity builds. Skills often apply elements consistently‚ fueling reactions‚ while Bursts deliver significant damage or widespread elemental application. Prioritize these over Normal Attack talents‚ especially for characters designed around enabling reactions.

Higher Burst levels drastically increase damage output and duration of elemental effects. Skill upgrades improve application frequency and reduce cooldowns‚ leading to tighter rotations. Invest strategically‚ considering a character’s core function within your team composition.

Constellation Value and Impact on Ingenuity

Constellations can significantly amplify a character’s Ingenuity potential‚ but aren’t always essential. Some constellations unlock new reaction-based mechanics or drastically improve elemental application. Others offer substantial damage boosts to skills and bursts‚ enhancing overall reaction potency.

Prioritize constellations that directly support reaction synergies; For example‚ constellations increasing skill uptime or burst damage for reaction-focused characters are highly valuable. However‚ a well-built team with optimized talents can often outperform a constellation-reliant one.

fortisase ordering guide

FortiSASE Ordering Guide: A Comprehensive Overview (Updated 02/16/2026)

This guide details Fortinet’s FortiSASE and Zero Trust solutions, covering remote user subscriptions, branch connectivity, and SKU information for ordering purposes.

FortiSASE represents a revolutionary shift in network security, converging networking and security into a single, cloud-delivered service. It’s designed to address the evolving needs of modern, distributed enterprises by providing secure and reliable access to applications and data, regardless of user location.

This integrated platform simplifies IT management, reduces complexity, and enhances security posture. FortiSASE delivers a comprehensive suite of security features, including Secure Web Gateway (SWG), Cloud Access Security Broker (CASB), Firewall-as-a-Service (FWaaS), and SD-WAN capabilities.

Furthermore, FortiSASE Sovereign offers a dedicated solution for organizations requiring data residency and control, enabling the delivery of private SASE services. This ordering guide provides essential details for understanding and procuring FortiSASE solutions, ensuring a smooth deployment and optimal performance.

What is FortiSASE Sovereign?

FortiSASE Sovereign is a specialized, turnkey solution meticulously crafted for organizations demanding utmost control over their data and infrastructure. It empowers customers to deliver private SASE services, catering to both internal and external consumption needs, ensuring data sovereignty and compliance with stringent regulations.

This offering is particularly valuable for large enterprises, federal agencies, and service providers operating in highly regulated industries. It provides a dedicated and isolated environment, allowing complete ownership and management of security policies and data.

FortiSASE Sovereign facilitates the creation of a secure and compliant network perimeter, enabling organizations to confidently embrace cloud adoption and digital transformation while maintaining complete control over their sensitive information. It’s a robust solution for those prioritizing data privacy and regulatory adherence.

Target Audience for FortiSASE

FortiSASE is strategically designed to address the evolving security needs of a diverse range of organizations. Its core value proposition resonates strongly with large enterprises grappling with complex, distributed networks and a growing remote workforce.

Federal agencies, subject to rigorous compliance mandates and heightened security threats, will find FortiSASE’s robust features and control capabilities invaluable. Service providers seeking to offer differentiated, secure access service edge (SASE) solutions to their clients also represent a key target audience.

Essentially, any organization prioritizing secure, cloud-delivered networking and security, with a need for centralized management and consistent policy enforcement, will benefit from FortiSASE. This includes businesses undergoing digital transformation and those seeking to enhance their zero-trust security posture.

FortiSASE Components & Licensing

FortiSASE utilizes a user-based licensing model, offering access to all SASE capabilities with a low Minimum Orderable Quantity of 50 users (MoQ).

FortiSASE Compute Region Add-On

The FortiSASE Region Add-On delivers a one-year subscription for the Comprehensive tier of FortiSASE Compute Region, enhancing performance and localized processing. This add-on is crucial for organizations requiring data residency or low-latency access within specific geographic locations. It allows customers to deploy FortiSASE capabilities closer to their users and branch offices, optimizing the user experience and ensuring compliance with regional regulations.

This subscription provides the necessary compute resources to run FortiSASE services within the chosen region, including Secure Web Gateway, Cloud Firewall, and Zero Trust Network Access. It’s designed to scale with your needs, offering flexibility and control over your SASE infrastructure. Consider this add-on when expanding your FortiSASE deployment or when specific regional requirements dictate localized processing.

User-Based Licensing Model

FortiSASE utilizes a straightforward user-based licensing model, granting access to all SASE capabilities with a remarkably low Minimum Orderable Quantity (MoQ) of just 50 users. This simplifies procurement and aligns costs directly with the number of users accessing the SASE services. Unlike complex, feature-gated licensing schemes, FortiSASE provides comprehensive protection – including Secure Web Gateway, Cloud Firewall, and Zero Trust Network Access – to every licensed user.

This model offers scalability and cost-effectiveness, allowing organizations to easily add or remove users as their needs evolve. It eliminates the need to purchase separate licenses for individual security features, streamlining management and reducing administrative overhead. Explore the Fortinet FortiSASE Ordering Guide for detailed information and to leverage AI chat for instant answers regarding licensing options.

Minimum Orderable Quantity (MoQ)

A key advantage of FortiSASE is its industry-leading Minimum Orderable Quantity (MoQ) of only 50 users. This exceptionally low MoQ makes FortiSASE accessible to organizations of all sizes, from small businesses to large enterprises, without requiring substantial upfront investment. Many competing SASE solutions impose significantly higher MoQ requirements, creating barriers to entry for smaller deployments.

The 50-user MoQ simplifies initial deployment and allows organizations to pilot FortiSASE with a manageable user group before scaling across the entire network. This flexible approach minimizes risk and enables a phased rollout, ensuring a smooth transition to a secure access service edge architecture. Detailed information regarding MoQ and licensing can be found within the comprehensive FortiSASE Ordering Guide.

Ordering Information & SKUs

This section provides comprehensive details on FortiSASE product SKUs, including options for Secure Private Access, Secure Edge Management, and bandwidth add-ons.

FortiSASE Product SKU Details

FortiSASE offers a flexible, user-based licensing model, granting access to all SASE capabilities with a remarkably low Minimum Orderable Quantity (MoQ) of just 50 users. This streamlined approach simplifies procurement and deployment. Customers can augment account bandwidth with the FortiSASE account-level bandwidth add-on, SKU FC1-10-FSASE-471-01-DD, available in 25 Mbps increments.

Furthermore, specialized connectors enhance functionality: the SD-WAN Connector for FortiSASE Secure Private Access and the SASE Connector for FortiSASE Secure Edge Management. The FortiSASE Region Add-On (FC1-10-EMS05-766-02-12) delivers a one-year subscription to the Comprehensive tier of FortiSASE Compute Region, providing localized processing and enhanced performance. Detailed ordering information and a complete product guide are readily available for download, ensuring a clear understanding of available options.

SD-WAN Connector for FortiSASE Secure Private Access

The SD-WAN Connector seamlessly integrates FortiSASE with existing SD-WAN deployments, extending secure access to private applications and resources. This connector is crucial for organizations leveraging SD-WAN infrastructure while desiring enhanced security and Zero Trust Network Access (ZTNA) capabilities. It enables a phased migration to a full SASE architecture, protecting sensitive data without disrupting current network investments.

By combining the strengths of FortiSASE and SD-WAN, businesses gain granular control over application access, reducing the attack surface and improving compliance posture. The connector facilitates secure remote access for users, regardless of location, ensuring consistent security policies are enforced. Detailed SKU information and ordering guidance are available within the comprehensive FortiSASE Ordering Guide, simplifying the procurement process.

SASE Connector for FortiSASE Secure Edge Management

The SASE Connector is a vital component for managing and orchestrating FortiSASE’s security features at the network edge. It provides centralized visibility and control over security policies, enabling administrators to efficiently manage access to cloud applications and resources. This connector streamlines operations, reducing complexity and improving the overall security posture.

Specifically designed for FortiSASE Secure Edge Management, it allows for consistent policy enforcement across all locations and users. The ordering guide details the necessary SKUs for procurement, ensuring a smooth deployment process. Leveraging this connector, organizations can benefit from enhanced threat protection, data loss prevention, and secure web gateway functionalities, all managed through a unified platform. It’s a key element in achieving a robust and scalable SASE architecture.

FortiSASE Account-Level Bandwidth Add-On

For organizations requiring increased throughput, the FortiSASE Account-Level Bandwidth Add-On provides a flexible solution to augment existing capacity. This add-on allows customers to supplement their initial bandwidth allocation, ensuring optimal performance for all users and applications. It’s particularly useful for businesses experiencing growth or seasonal spikes in network traffic.

Available via SKU FC1-10-FSASE-471-01-DD, bandwidth is added in increments of 25 Mbps, offering granular control over resource allocation. This pay-as-you-grow model optimizes cost-effectiveness, avoiding unnecessary upfront investment. The ordering guide clearly outlines the process for purchasing and applying these bandwidth additions to existing FortiSASE accounts. This ensures consistent connectivity and a seamless user experience, even during peak demand, bolstering overall network reliability and productivity.

Deployment & Management

FortiSASE offers flexible deployment options, streamlined user authentication, and robust monitoring capabilities for comprehensive control and visibility of your secure access service edge.

FortiSASE Deployment Options

FortiSASE provides versatile deployment models to suit diverse organizational needs. Customers can leverage a fully cloud-delivered approach, benefiting from scalability and reduced on-premises infrastructure. Alternatively, a hybrid deployment allows integration with existing security investments, offering a phased migration path.

For organizations requiring maximum control and data residency, a dedicated FortiSASE Compute Region Add-On delivers a private, single-tenant SASE service. This option is ideal for large enterprises, federal agencies, and service providers delivering private SASE services. Deployment considerations include network topology, user locations, and security requirements. FortiSASE supports both direct internet access and connectivity through SD-WAN fabrics, ensuring optimal performance and user experience.

User Authentication in FortiSASE

FortiSASE prioritizes secure access through robust user authentication mechanisms. It seamlessly integrates with existing identity providers via industry-standard protocols like SAML, OAuth, and OpenID Connect. This allows organizations to leverage their current investments in identity management systems, simplifying administration and enhancing security.

Multi-factor authentication (MFA) is strongly recommended and supported, adding an extra layer of protection against unauthorized access. FortiSASE also supports certificate-based authentication for enhanced security and compliance. Granular access policies can be defined based on user identity, device posture, and application context, ensuring that only authorized users can access sensitive resources.

FortiSASE Monitoring Capabilities

FortiSASE provides comprehensive monitoring capabilities through FortiManager and FortiAnalyzer, offering real-time visibility into network performance, security threats, and user activity. Administrators can leverage detailed dashboards and reports to gain insights into SASE deployment health and identify potential issues proactively.

Centralized logging and analytics enable efficient troubleshooting and forensic investigations. FortiSASE monitors web traffic, SaaS application usage, and security events, providing valuable data for security analysis and compliance reporting. Customizable alerts notify administrators of critical events, allowing for rapid response to security incidents.

Security Features & Compliance

FortiSASE delivers robust web traffic and SaaS application protection, alongside content inspection features like antivirus, web filtering, and application control.

Web Traffic & SaaS Application Protection

FortiSASE provides comprehensive protection for both web traffic and Software-as-a-Service (SaaS) applications, ensuring a secure digital experience for users. This is achieved through a multi-layered security approach that combines advanced threat intelligence with real-time analysis.

The solution effectively safeguards against a wide range of web-based threats, including malware, phishing attacks, and malicious websites. For SaaS applications, FortiSASE offers granular control and visibility, allowing organizations to enforce security policies and prevent data breaches.

Content inspection, a core component of this protection, utilizes techniques like deep packet inspection and sandboxing to identify and block malicious content before it reaches users. This proactive approach minimizes the risk of compromise and ensures the integrity of sensitive data.

Content Inspection Features (Antivirus, Web Filtering, Application Control)

FortiSASE’s robust content inspection capabilities are central to its security posture, employing a suite of features including advanced antivirus, comprehensive web filtering, and granular application control. Antivirus protection utilizes multiple engines to detect and neutralize malware, safeguarding users from malicious software.

Web filtering allows administrators to categorize and control access to websites, blocking access to risky or inappropriate content. Application control provides visibility into application usage and enables policies to restrict or allow specific applications, minimizing bandwidth consumption and security risks.

Logging capabilities provide detailed records of inspected content, aiding in incident response and compliance reporting. These features work in concert to deliver a layered defense against evolving threats, ensuring a secure and productive user experience.

FortiSASE Security Compliance (AICPA Standards)

FortiSASE is engineered to meet stringent security standards, notably demonstrating compliance with the AICPA (American Institute of Certified Public Accountants) standards. This commitment ensures a high level of security, availability, and confidentiality for customer data and operations.

Compliance encompasses a thorough process, including regular audits and assessments to validate security controls. Available reports detail the scope of the assessment, identified controls, and testing procedures. Key principles underpinning this compliance include robust data protection measures, access controls, and incident response protocols.

This adherence to AICPA standards provides customers with assurance that FortiSASE operates with a strong security foundation, mitigating risks and supporting regulatory requirements.

Operational Technology & Ordering System

The Operational Technology Ordering Guide, alongside the ordering management system, requires security considerations to prevent unauthorized access and potential vulnerabilities.

Operational Technology Ordering Guide

The Operational Technology (OT) Ordering Guide provides crucial details for organizations integrating FortiSASE within operational technology environments. This specialized guide focuses on the unique requirements and considerations when deploying SASE solutions to protect critical infrastructure. It outlines specific SKU recommendations tailored for OT deployments, ensuring compatibility and optimal performance within industrial control systems (ICS) and supervisory control and data acquisition (SCADA) networks.

The guide details how to properly configure FortiSASE to address the distinct security challenges of OT, including protocol inspection, anomaly detection, and secure remote access for OT personnel. It also covers best practices for segmentation, micro-segmentation, and integration with existing OT security tools. Furthermore, the guide emphasizes the importance of adhering to industry-specific compliance standards relevant to operational technology environments, ensuring a robust and secure SASE implementation.

Ordering Management System Security Considerations

Security within the Ordering Management System (OMS) is paramount when procuring and managing FortiSASE licenses and subscriptions. A compromised OMS could allow malicious actors to execute arbitrary code, potentially impacting the entire security posture. Robust security measures are essential to protect sensitive ordering data and prevent unauthorized access or modifications.

Key considerations include implementing strong authentication mechanisms, such as multi-factor authentication (MFA), and enforcing strict role-based access control (RBAC) to limit user privileges. Regular security audits and vulnerability assessments are crucial to identify and remediate potential weaknesses within the OMS. Furthermore, secure coding practices and thorough input validation are necessary to prevent injection attacks. Maintaining up-to-date security patches and monitoring system logs for suspicious activity are also vital components of a comprehensive security strategy for the FortiSASE OMS.

sezane sizing guide

Sezane Sizing Guide: A Comprehensive Overview (Updated February 16, 2026)

Navigating Sezane’s sizing requires understanding their French roots, alongside US, UK, and EU conversions․ This guide offers detailed charts and fit insights for both menswear and womenswear, including shoes․

Sezane, the beloved French brand, offers a distinctly Parisian aesthetic, but understanding their sizing can be a little tricky for international shoppers․ Unlike standardized US sizing, Sezane primarily operates on a French sizing system, necessitating conversions for customers in the US, UK, and beyond․ This guide aims to demystify the process, providing a comprehensive overview to ensure a perfect fit․

Many find themselves between sizes, particularly with a size 4/6 being a common scenario, or a 27 in Madewell jeans as a reference point․ Sezane’s commitment to quality and flattering silhouettes means precise measurements are key․ We’ll break down each category – from tops and dresses to denim and outerwear – with detailed charts and fit notes, empowering you to shop confidently and embrace the Sezane style․

Understanding French Sizing vs․ US/UK/EU Sizing

French sizing generally runs smaller than US sizing, and often differs from UK and EU standards․ A French size 38, for example, typically corresponds to a US size 6 or a UK size 10․ However, these are broad generalizations, and variations exist between brands․ Sezane provides detailed size charts on their website, crucial for accurate conversions․

It’s important to note that EU sizing can also overlap with French sizing, but isn’t always a direct match․ Italian (IT) and Japanese (JP) sizing require further conversion, adding another layer of complexity․ Always prioritize Sezane’s specific charts, and when in doubt, consider reading customer reviews for insights into how items generally fit․ Comparing your measurements to their provided guidelines is the best approach․

Womenswear Sizing

Sezane’s womenswear collection offers a range of styles, from elegant dresses to perfectly-cut jeans․ Accurate sizing is key to enjoying their Parisian aesthetic․

Tops & Shirts

Sezane’s tops and shirts are known for their classic French style and quality fabrics․ Understanding the fit is crucial for a flattering look․ Generally, Sezane tops run true to size, but some styles may lean slightly small, particularly more fitted designs․

Referencing a size 4/6 for a 5’4” frame weighing around 135 pounds can be a helpful starting point․ Many customers find themselves between sizes, so checking the specific garment measurements is always recommended․

Consider the fabric; lighter materials may drape differently than structured cotton․ Don’t hesitate to consult the Sezane website’s size chart for detailed conversions between French, US, and UK sizing to ensure the perfect fit for your wardrobe․

Sezane Top Size Chart (FR/US/UK)

Below is a general Sezane top size chart, offering conversions to assist with accurate ordering․ Please note that variations can occur between styles, so always check individual product descriptions․

French (FR) US UK Bust (inches)
34 2 6 32-33
36 4 8 34-35
38 6 10 36-37
40 8 12 38-39

This chart serves as a guide; individual fits may vary․ For the most precise measurement, refer to Sezane’s official website, as they frequently update their sizing information․

How Sezane Tops Generally Fit (True to Size, Small, Large?)

Generally, Sezane tops tend to run slightly small, particularly in more fitted styles․ Many customers report needing to size up, especially if they are between sizes or have a larger bust․

For relaxed-fit blouses or oversized shirts, sticking to your usual size often works well․ However, for structured tops or those with a more tailored silhouette, consider ordering one size larger for a comfortable fit․ A customer who is typically a size 4/6 and a size 27 in Madewell jeans, finds herself between sizes․

Always consult the specific product measurements provided on Sezane’s website to ensure the best fit․ Reading customer reviews can also offer valuable insights into how different styles run․

Dresses

Sezane dresses offer a variety of silhouettes, each with its unique fit characteristics․ Understanding these nuances is key to finding your perfect size․

Wrap dresses generally run true to size, allowing for adjustable fit based on how tightly you tie the waist․ Shirt dresses, however, can sometimes feel a bit snug across the bust or shoulders, so sizing up might be preferable․ For more structured dresses, like those with fitted bodices, it’s advisable to consult the size chart carefully․

Pay close attention to the dress length measurements, especially if you are petite or tall․ Customer reviews often mention whether a dress runs short or long, providing valuable guidance․

Sezane Dress Size Chart (FR/US/UK)

Below is a general Sezane dress size conversion chart․ Please note that variations can occur between different dress styles, so always refer to the specific product page for the most accurate measurements․

French (FR) US UK
34 2 6
36 4 8
38 6 10
40 8 12
42 10 14

Important: Bust, waist, and hip measurements are crucial for dress selection․ Compare your measurements to Sezane’s chart to determine the best fit․

Specific Dress Styles & Their Fit (e․g․, Wrap Dresses, Shirt Dresses)

Sezane’s dress styles offer diverse fits, requiring careful consideration․ Wrap dresses generally run true to size, adjustable via the tie, flattering various body shapes․ However, those with a larger bust might consider sizing up for comfort․

Shirt dresses often have a relaxed, slightly oversized fit․ Many customers suggest taking their usual size for a comfortable, effortless look, or sizing down if you prefer a more fitted silhouette․ Pay attention to the fabric; lighter materials may drape differently․

For bodycon or more structured dresses, a precise fit is essential․ Refer to detailed measurements and consider reading customer reviews for insights into specific style sizing․

Knitwear

Sezane’s knitwear collection embodies Parisian chic, but sizing can vary based on the yarn and cut․ Generally, their sweaters and cardigans run true to size, allowing for comfortable layering․ However, thicker wool or cashmere blends may have a more substantial fit․

Consider your preferred styling when choosing a size․ For a relaxed, oversized look, some customers opt to size up, particularly in chunkier knits․ If you prefer a closer fit, stick to your usual size․ Pay attention to the length, as some styles are cropped or longer․

Always check the specific size chart for each knitwear piece, noting the chest and sleeve measurements to ensure a perfect fit․

Sezane Knitwear Size Chart (FR/US/UK)

Below is a general Sezane knitwear size chart, but always refer to the individual product description for the most accurate measurements, as variations occur․

FR Size US Size UK Size Chest (approx․ inches)
36 4 8 34-36
38 6 10 36-38
40 8 12 38-40
42 10 14 40-42

Please note: These are approximate conversions and chest measurements․ Sleeve length and overall garment length will also vary by style․ It’s recommended to compare these measurements to a similar knitwear piece you already own․

Considerations for Knitwear Fabrics (e․g․, Wool, Cashmere)

Sezane utilizes a variety of knitwear fabrics, each with unique properties impacting fit․ Wool blends often have less stretch, requiring a truer-to-size fit, or potentially sizing up for layering; Cashmere, known for its luxurious softness, tends to be more forgiving and can drape beautifully, allowing for a slightly relaxed silhouette․

Consider the knit’s gauge – a tighter knit will offer more structure and less give, while a looser knit will be more pliable․ Always check the fabric composition in the product details․ Delicate fabrics like cashmere may require hand washing, influencing how the garment maintains its shape over time․ Account for potential shrinkage with certain wools․

Jeans & Trousers

Sezane’s denim and trouser collection offers diverse fits, including high-waisted, slim-fit, and more relaxed styles․ Understanding your waist and inseam measurements is crucial for achieving the perfect fit․ Sezane jeans generally run true to size, but consider sizing up if you prefer a more comfortable, less fitted feel, especially with rigid denim․

Pay close attention to the rise – high-waisted styles sit at the natural waist, while lower rises sit on the hips․ Review the product description for stretch content, as this impacts sizing․ For trousers, check the leg opening measurement to ensure the desired silhouette․ Refer to the detailed size chart for specific waist and inseam conversions․

Sezane Denim Fit Guide (High-Waisted, Slim-Fit, etc․)

Sezane’s denim range caters to various preferences, featuring prominently high-waisted jeans designed to elongate the legs and cinch the waist․ Slim-fit options offer a classic, streamlined silhouette, hugging the body without being overly restrictive․ For a more relaxed vibe, explore their straight-leg and wide-leg styles, providing comfort and a modern aesthetic․

Consider the fabric composition; styles with elastane offer more stretch and flexibility․ The low-waisted options are also available, offering a vintage-inspired look․ When choosing, think about your body shape and desired level of comfort․ High-waisted styles pair well with tucked-in tops, while looser fits complement oversized sweaters․

Sezane Trouser Size Chart (FR/US/UK)

Understanding Sezane’s trouser sizing requires converting between French (FR), US, and UK measurements․ Generally, a FR 38 equates to a US 6/UK 10, FR 40 to US 8/UK 12, and FR 42 to US 10/UK 14․ However, it’s crucial to consult the specific chart for each style, as variations exist․

Waist measurements are key; Sezane trousers often run true to size, but those with a more fitted cut may require sizing up․ Hip measurements are also important, especially for wider-leg styles․ Always check the product description for detailed sizing information and customer reviews regarding fit․ Remember to compare your measurements to the official Sezane chart before ordering to ensure the perfect fit․

Waist & Inseam Measurements for Sezane Jeans

Accurate waist and inseam measurements are vital when purchasing Sezane jeans online․ Begin by measuring your natural waistline – not where your jeans typically sit – and your inseam from the crotch to the desired hem length․ Sezane’s high-waisted styles require precise waist measurements for a comfortable fit․

Refer to Sezane’s size chart, noting the corresponding waist size in inches or centimeters․ Pay close attention to inseam lengths, as these can vary significantly between styles (e․g․, cropped, full-length)․ If you’re between sizes, consider sizing up, especially for raw denim which may shrink slightly after washing․ Customer reviews often provide valuable insights into how specific styles fit in reality․

Outerwear

Sezane’s outerwear, encompassing coats and jackets, often presents a classic Parisian aesthetic․ When selecting a size, consider layering possibilities – will you typically wear thick sweaters underneath? If so, opting for the next size up is advisable to ensure comfortable movement․ Review the specific coat or jacket’s size chart, as fits can vary between styles․

Pay attention to shoulder seams; they should sit comfortably at the edge of your shoulders, not extending beyond them․ Sleeve length is also crucial – ideally, sleeves should reach your wrists․ Sezane’s outerwear tends to be true to size, but reading customer feedback regarding specific models can provide valuable insights into the actual fit․

Sezane Coat & Jacket Size Chart (FR/US/UK)

Below is a general Sezane coat and jacket size chart, offering conversions between French (FR), US, and UK sizes․ Please note that these are approximate and variations may occur depending on the specific garment’s cut and style․ Always refer to the individual product page for the most accurate measurements․

FR Size US Size UK Size Bust (cm) Waist (cm)
36 4 8 84-88 68-72
38 6 10 88-92 72-76
40 8 12 92-96 76-80

Layering Considerations for Sezane Outerwear

When selecting a Sezane coat or jacket, consider your layering needs․ Sezane outerwear often has a tailored fit, so accounting for sweaters or thicker layers is crucial for comfort and movement․ If you plan to wear bulky knitwear underneath, we recommend sizing up, particularly in the shoulders and chest․

For coats like the Gaspard, designed for colder weather, leaving room for a scarf and multiple layers is essential․ Conversely, lighter jackets like the Frankie may fit truer to size with a thinner sweater․ Pay attention to the coat’s material; wool coats offer more flexibility than more structured fabrics․

Menswear Sizing

Sezane’s menswear collection offers classic Parisian style; understanding their sizing charts for shirts, trousers, knitwear, and outerwear ensures a perfect fit․

Shirts & T-Shirts

Sezane’s shirts and t-shirts embody a relaxed yet refined aesthetic, but accurate sizing is crucial for achieving the desired look․ The brand utilizes French sizing, so referencing their size chart is essential, especially if you’re unfamiliar with European measurements․

Generally, Sezane menswear shirts run true to size, however, some customers find t-shirts to be slightly slimmer fitting․ Consider your chest and shoulder measurements when selecting a size․ If you’re between sizes, it’s often recommended to size up for a more comfortable and contemporary fit․

Pay close attention to the specific garment details, as some styles may have a more tailored or oversized cut; The Sezane website provides detailed size charts converting French sizes to US and UK equivalents, facilitating a more informed purchasing decision․

Sezane Mens Shirt Size Chart (FR/US/UK)

Below is a representative Sezane menswear shirt size chart, designed to assist in finding your perfect fit․ Please note that slight variations may occur between different shirt styles․ Always consult the specific product page for the most accurate measurements․

French (FR) US UK Chest (cm) Chest (in)
XS S 36 88-92 35-36
S M 38 92-96 36-38
M L 40 96-100 38-40
L XL 42 100-104 40-41
XL XXL 44 104-108 41-42

This chart is a general guide; individual styles may vary․

Trousers & Jeans

Sezane offers a curated selection of trousers and jeans, focusing on flattering silhouettes like high-waisted and slim-fit designs․ Understanding their sizing is crucial for achieving the perfect look․ Generally, Sezane jeans run true to size, but it’s always wise to check individual product details․

For trousers, pay close attention to both waist and inseam measurements․ Sezane provides detailed size charts, converting French sizes to US and UK equivalents․ Consider your body shape when selecting a style; high-waisted options elongate the legs, while slim-fit jeans offer a modern, streamlined aesthetic․ Refer to the specific product page for detailed measurements․

Sezane Mens Trouser Size Chart (FR/US/UK)

Below is a comprehensive chart to assist with Sezane menswear trouser sizing, converting French (FR) sizes to US and UK equivalents․ Please note that these are approximate conversions, and individual fits may vary slightly depending on the style and fabric․ Always refer to the specific product description for the most accurate information․

FR Size US Waist (inches) UK Waist (inches)
40 30 32
42 32 34
44 34 36
46 36 38

Measure your waist at its natural point for the most accurate fit․

Knitwear & Sweaters

Sezane’s knitwear collection offers a range of styles, from classic cashmere sweaters to cozy wool cardigans․ Generally, Sezane knitwear tends to run true to size, but consider the intended fit – some styles are designed to be more relaxed or oversized․ When selecting a size, think about whether you prefer a fitted or looser silhouette․

For finer gauge knits like cashmere, a closer fit is often preferred, while chunkier wool sweaters can be comfortably worn slightly larger․ Pay attention to the fabric composition; natural fibers like wool and cashmere may have some give, while synthetic blends may hold their shape more rigidly․

Sezane Mens Knitwear Size Chart (FR/US/UK)

Below is a general guide to Sezane’s menswear knitwear sizing, converting between French (FR), US, and UK sizes․ Please note that slight variations may occur depending on the specific style and fabric․

FR US UK Chest (inches)
XS S 36 36-38
S M 38 38-40
M L 40 40-42
L XL 42 42-44
XL XXL 44 44-46

Always refer to the individual product description for the most accurate sizing information․

Sezane’s outerwear, encompassing coats and jackets, often presents a tailored silhouette․ When selecting a size, consider layering possibilities for optimal comfort and fit throughout varying weather conditions․ Generally, Sezane’s coats run true to size, but those preferring a roomier fit for heavier knitwear might consider sizing up․

Refer to the specific coat or jacket’s size chart for precise measurements․ Pay close attention to shoulder width and sleeve length, as these are crucial for a flattering fit․ Consider the intended use – a streamlined trench coat versus a bulky puffer jacket will necessitate different sizing approaches․

Don’t hesitate to consult Sezane’s customer service for personalized guidance․

Sezane Mens Coat & Jacket Size Chart (FR/US/UK)

Below is a general guide; always check the specific product page for the most accurate measurements․ Sezane menswear sizing typically aligns with standard European cuts, requiring conversion for US and UK shoppers․

French (FR) US UK Chest (cm) Shoulder (cm)
38 S 38 96-100 44-46
40 M 40 100-104 46-48
42 L 42 104-108 48-50
44 XL 44 108-112 50-52

These are approximate conversions; individual styles may vary․

Shoes Sizing

Sezane shoes offer sizing across FR, US, UK, EU, IT, and JP standards․ Accurate measurement and referencing the detailed charts are crucial for the perfect fit․

Womens Shoes

Finding your perfect Sezane shoe size begins with understanding their comprehensive sizing chart, which thoughtfully incorporates measurements for French, US, UK, European (EU), Italian (IT), and even Japanese (JP) sizing systems․ This extensive coverage ensures a more accurate conversion for customers worldwide․

It’s highly recommended to measure your foot length in centimeters or inches and compare it directly to Sezane’s chart․ Remember that sizing can sometimes vary slightly between different styles – a pointed-toe boot will fit differently than a classic sneaker․

Consider your sock thickness when measuring, especially for boots and closed-toe shoes․ If you’re between sizes, Sezane generally advises sizing up, particularly for comfort․ Don’t hesitate to consult customer reviews for specific style feedback regarding fit, as real-world experiences can be invaluable․

Sezane Womens Shoe Size Chart (FR/US/UK/EU/IT/JP)

Below is a representative Sezane women’s shoe size chart, acknowledging potential slight variations per style․ Please use this as a general guide and always cross-reference with individual product details on the Sezane website․

FR US UK EU IT JP
35 5 3 35 35 22․5
36 5․5-6 4-4․5 36 36 23
37 6․5-7 5-5․5 37 37 23․5
38 7․5-8 6-6․5 38 38 24

This chart is a starting point; always prioritize measuring your foot length for the most accurate fit․

Mens Shoes

Sezane’s menswear shoe sizing follows a similar pattern to their womenswear, requiring careful attention to conversion charts․ While specific charts aren’t widely publicized, understanding the relationship between French, US, UK, EU, Italian, and Japanese sizes is crucial for a comfortable fit․

Generally, Sezane men’s shoes tend to run true to size, but it’s always recommended to consult the individual product description for any noted discrepancies․ Prioritize measuring your foot length in centimeters or inches and comparing it to the brand’s size guide, when available․

Consider the sock thickness you intend to wear with the shoes when measuring․

Sezane Mens Shoe Size Chart (FR/US/UK/EU/IT/JP)

Due to limited publicly available official charts, providing a precise Sezane men’s shoe size conversion is challenging․ However, a general guideline can be constructed based on standard conversions and customer feedback․ Please note these are approximations and individual styles may vary․

Here’s a commonly referenced conversion:

  • FR 40: US 7 / UK 6 / EU 40 / IT 40 / JP 25․0cm
  • FR 41: US 8 / UK 7 / EU 41 / IT 41 / JP 26․0cm
  • FR 42: US 9 / UK 8 / EU 42 / IT 42 / JP 27․0cm
  • FR 43: US 10 / UK 9 / EU 43 / IT 43 / JP 28․0cm
  • FR 44: US 11 / UK 10 / EU 44 / IT 44 / JP 29․0cm

Always double-check product-specific sizing information on the Sezane website․

General Shoe Fit Tips for Sezane

Sezane shoes often run true to size, but considering style variations is crucial․ For leather styles, anticipate some stretching with wear, potentially sizing down half a size for a snug fit initially․ With sneakers and more structured designs, sticking to your usual size is generally recommended․

Pay close attention to the shoe’s shape and material․ Pointed-toe shoes may feel tighter, while wider feet might benefit from sizing up․ Reading customer reviews specific to the shoe you’re interested in can provide valuable insights into fit experiences․

Measure your feet accurately before ordering, especially if you’re unsure of your size․ Consider wearing the socks you intend to wear with the shoes during measurement․

tv guide des moines

TV Guide Des Moines: A Comprehensive Overview (February 16, 2026)

Today, February 16, 2026, offers a diverse TV landscape in Des Moines. Highlights include live high school football – Nevada at Des Moines Christian on MC22.

Local Channels and Programming

Des Moines’ local television scene on February 16, 2026, is vibrant, offering a mix of news, entertainment, and community-focused programming. Caledonia broadcasts a diverse schedule, including current affairs, documentaries, and weather updates, catering to a broad audience. Expect comprehensive local news coverage from stations like WHO-TV 13, KCCI-TV 8, and KDCA-TV 19, providing up-to-the-minute reports on events across the Des Moines metropolitan area.

Beyond news, local channels feature a range of programming. Expect morning shows with community spotlights, daytime talk programs, and evening entertainment options. Several channels dedicate airtime to local high school sports, a significant draw for Des Moines viewers. Tonight’s featured event, the HSFB Nevada at Des Moines Christian game, will be a major focus for sports enthusiasts.

Community access channels also play a vital role, showcasing local events, government meetings, and public service announcements. These channels provide a platform for local voices and initiatives, fostering a sense of community engagement. Check local listings for specific times and program details, as schedules can vary.

National Network Schedules

On February 16, 2026, the major national networks – ABC, CBS, NBC, FOX, and PBS – present a compelling lineup for Des Moines viewers. Primetime programming features a blend of scripted dramas, comedies, reality competitions, and live events. ABC is anticipated to air the season finale of its hit drama series, while CBS showcases a new episode of its popular procedural crime show.

NBC’s schedule includes a live sporting event, potentially a nationally televised basketball game or hockey match, alongside its established comedy and drama blocks. FOX offers a mix of animated sitcoms and reality programming, appealing to a younger demographic. PBS continues its commitment to educational and cultural programming, featuring documentaries and public affairs shows.

Daytime network schedules are dominated by news programs, talk shows, and game shows. Evening news broadcasts provide national and international coverage, while daytime talk shows offer celebrity interviews and lifestyle segments. Streaming options increasingly influence network schedules, with networks often promoting their streaming platforms during broadcast programming.

Streaming Services Available in Des Moines

Des Moines residents have access to a comprehensive array of streaming services, offering alternatives and supplements to traditional broadcast television. Major players like Netflix, Hulu, Amazon Prime Video, and Disney+ dominate the market, providing vast libraries of movies, TV shows, and original content. These platforms cater to diverse tastes, from blockbuster films to critically acclaimed dramas and family-friendly entertainment.

Beyond the giants, specialized streaming services are gaining popularity. Paramount+, Peacock, and HBO Max offer exclusive content from their respective studios, appealing to niche audiences. Services like Tubi and Pluto TV provide free, ad-supported streaming options, offering a budget-friendly alternative.

Local Des Moines viewers also benefit from streaming services focused on sports, news, and local programming. Many traditional cable and satellite providers now offer their own streaming apps, allowing subscribers to access content on multiple devices. The increasing availability of high-speed internet in Des Moines fuels the growth of streaming, transforming how people consume television.

Des Moines Christian Programming

Des Moines offers a variety of Christian programming options across broadcast television and streaming platforms. Local channels frequently air religious services, talk shows, and educational programs geared towards faith-based audiences. These programs often feature local pastors and community leaders, fostering a sense of connection and spiritual guidance.

National Christian networks, such as TBN (Trinity Broadcasting Network), Daystar, and SonLife Broadcasting Network, are widely available in the Des Moines area via cable, satellite, and over-the-air broadcasts. These networks provide 24/7 Christian content, including worship services, Bible studies, and inspirational programming.

Furthermore, many churches in Des Moines stream their services and events online, extending their reach beyond the physical walls of the sanctuary. Streaming platforms and dedicated church websites offer convenient access to sermons, music, and community updates. This blend of traditional and digital platforms ensures that Christian programming remains accessible to a broad audience in Des Moines.

HSFB Nevada at Des Moines Christian ー Live Broadcast Details

Exciting high school football action is coming to Des Moines viewers on February 16, 2026! The Nevada High School Football team will be facing off against Des Moines Christian in a highly anticipated match. This game will be broadcast live on MC22, providing comprehensive coverage for local sports enthusiasts.

For those unable to watch on traditional television, the game will also be available via WATCH MC22, a streaming platform offering convenient access to live events. Viewers can access WATCH MC22 through their computers, tablets, or smartphones, ensuring they don’t miss a single play.

The broadcast is scheduled to begin with a pre-game show at 6:30 PM CST, followed by the kickoff at 7:00 PM CST. Expect play-by-play commentary, expert analysis, and sideline reporting to enhance the viewing experience. Don’t miss this thrilling contest between Nevada and Des Moines Christian!

MC22 and WATCH MC22 ー Channel Information

MC22 is a local Des Moines channel dedicated to broadcasting high school sports and community events. It’s a key destination for local sports fans, offering live coverage of football, basketball, and other athletic competitions throughout the year. MC22 is available on various cable and satellite providers within the Des Moines metropolitan area. Check your local provider’s channel lineup for specific channel numbers.

WATCH MC22 is the streaming counterpart to the traditional MC22 channel. It allows viewers to access live and on-demand content via the internet. This platform is perfect for those who have cut the cord or prefer watching on their mobile devices. Access WATCH MC22 through a web browser or by downloading the dedicated app, available on both iOS and Android platforms.

Both MC22 and WATCH MC22 aim to bring local sports to a wider audience, providing high-quality broadcasts and convenient viewing options. For detailed schedules and programming information, visit the official MC22 website.

Historical TV Listings ー Des Moines (January 27, 1988)

Delving into the TV listings of January 27, 1988, in Des Moines reveals a vastly different viewing landscape than today. Network television dominated, with ABC, CBS, and NBC offering a full slate of programming. Prime time likely featured popular shows like “Cosby Show,” “60 Minutes,” and “Dallas,” staples of 1980s television.

Local Des Moines channels, such as KCCI, WHO, and KDMC, would have interspersed network programming with local news, weather, and public affairs shows. Expect a strong emphasis on local coverage, reflecting the community’s interests. Commercial breaks were, of course, a significant part of the viewing experience, featuring advertisements reflecting the era’s products and trends.

Cable television was gaining traction, offering viewers a wider range of channels, including HBO and CNN. However, it wasn’t yet the ubiquitous force it is today. The TV Guide itself, a printed publication, was the primary source for discovering what was on, a far cry from today’s digital listings and on-demand services.

Historical TV Listings ー Oklahoma (January 27, 1956)

Examining Oklahoma television listings from January 27, 1956, paints a picture of television’s infancy. Broadcasting was still relatively new, with fewer channels and limited programming hours. Networks like NBC and CBS were establishing themselves, offering a mix of live dramas, variety shows, and news broadcasts.

Local Oklahoma City and Tulsa stations would have filled airtime with locally produced content, including news, weather, and community events. Antenna reception was crucial, and signal strength varied greatly depending on location. Black-and-white television was the standard, and the concept of color TV was still years away from widespread adoption.

Prime time entertainment likely consisted of shows like “I Love Lucy,” “The Ed Sullivan Show,” and early game shows. Commercials were simpler, often featuring jingles and straightforward product demonstrations. The TV Guide, though present, was less comprehensive than later editions, reflecting the limited number of available channels and programs. Television was rapidly becoming a central part of American life, even in 1956 Oklahoma.

Understanding Monastic Life & Its Cultural Impact

Monasticism, rooted in the pursuit of Christian devotion, profoundly shaped medieval European culture. Monasteries weren’t isolated retreats; they were centers of learning, preserving classical texts and fostering scholarship during turbulent times. The “sequela” – following Christ – dictated a life of prayer, work, and community, governed by strict rules like those of Saint Benedict.

These communities significantly impacted agriculture, developing innovative farming techniques and providing hospitality to travelers. Monks were often skilled artisans, producing illuminated manuscripts, metalwork, and other crafts. Their influence extended to music, with Gregorian chant becoming a cornerstone of Western musical tradition.

The concept of “moines lais” (lay brothers) and oblates broadened monastic participation, integrating individuals from various social strata. Monasteries also held economic power, managing land and resources. Historically, even relationships with the French monarchy were complex, sometimes involving military roles before a shift towards pacifism. The enduring legacy of monastic life continues to resonate today.

The Rule of Saint Benedict ー A Foundation for Monastic Order

The Rule of Saint Benedict, established in the 6th century, became the defining blueprint for Western monasticism. Organized into 73 chapters, it meticulously details all aspects of monastic life – from material needs and manual labor to intellectual pursuits and spiritual discipline. This wasn’t merely a set of prohibitions, but a practical guide for creating a balanced and harmonious community dedicated to prayer and self-sufficiency.

Central to the Rule is the concept of “ora et labora” – prayer and work. Benedictine monasteries emphasized a rhythm of life alternating between liturgical services (the “Opus Dei”) and productive work, preventing idleness and fostering humility. The Rule also stresses obedience to the abbot, communal living, and the importance of hospitality.

Its influence extended far beyond the Benedictine order, shaping the constitutions of numerous other monastic communities. The Rule’s emphasis on stability, simplicity, and a structured life provided a framework for preserving knowledge and fostering spiritual growth throughout the Middle Ages and beyond. It remains a foundational text for monastic orders today.

Lay Brothers & Oblates ー Roles within Monasteries

Beyond the core community of monastic vows, monasteries historically included Lay Brothers and Oblates, fulfilling vital, yet distinct, roles. Lay Brothers, often of lower social standing, performed manual labor – agriculture, crafts, and maintenance – essential for the monastery’s self-sufficiency. They lived within the monastic community, participating in communal life but with modified vows, focusing less on liturgical prayer and more on practical tasks.

Oblates represented a broader association with the monastery. These individuals, often laypeople living in the world, committed to a life aligned with Benedictine principles, offering support to the monastery through donations or services; They weren’t residents, but maintained a spiritual connection and benefited from the monastery’s prayers.

Historically, a unique category existed: “Moines Lais” (Lay Monks), sometimes described as disabled soldiers granted a place within monasteries, tasked with duties like ringing the bells. This demonstrates the monastery’s role as a provider of social welfare. These roles broadened the monastery’s reach and ensured its continued operation.

Historical Context: Monks and the French Monarchy

Throughout the 16th century in France, the relationship between monastic orders and the monarchy underwent a dramatic shift. Initially, monks weren’t simply religious figures; they were sometimes active participants in political and even military affairs. During the French Wars of Religion, particularly within the League, some monks were known to carry muskets and participate in processions, demonstrating a militant aspect to their faith.

However, as the monarchy consolidated power and sought to establish greater control, a deliberate effort was made to “pacify” the monastic orders. This involved diminishing their political influence and emphasizing their spiritual role. The monarchy recognized the potential for monasteries to become centers of dissent or opposition.

Royal foundations of monasteries also created a degree of dependence. “Moines Lais,” or Lay Monks – often veterans granted refuge – were obligated to the king and monastery, further solidifying royal influence. This historical context reveals a complex interplay between religious institutions and the evolving power dynamics of the French monarchy.

Recent News: Bird Deaths & Puffins (Macareux Moines)

Recent reports from French beaches are raising serious environmental concerns. Hundreds of birds have been discovered deceased along the coastline in recent weeks, prompting investigations into the cause of these widespread deaths. A particularly alarming aspect of this situation is the significant number of Macareux Moines – Atlantic Puffins – among the casualties.

These distinctive seabirds, recognizable by their vibrant orange beaks, are a vital part of the marine ecosystem. The high mortality rate observed is prompting fears about the health of the ocean and the potential impact on puffin populations. Experts are analyzing samples to determine if pollution, disease, or food scarcity are contributing factors.

This ecological crisis is receiving coverage on various news channels, and updates are expected to be featured in upcoming environmental segments on national networks. Viewers in Des Moines can stay informed through international news broadcasts and online resources.

Expressions & Idioms Featuring “Moine” (Monk)

The French word “moine” (monk) has permeated the language, giving rise to several colorful expressions and idioms. One common phrase, “Attendre quelqu’un comme les moines font l’abbé,” translates to waiting for someone as patiently as monks await their abbot – meaning to be punctual and not keep others waiting.

Another expression, “Faites brûler un moine!” is a somewhat archaic exclamation, historically used when facing a difficult or frustrating situation. Its origins are debated, but it suggests a desperate plea for intervention. The saying “L’habit ne fait pas le moine” is well-known, meaning “clothes do not make the man,” emphasizing that appearances can be deceiving.

Interestingly, “moine” also refers to a specific plumber’s tool, a type of wrench. This dual meaning highlights the historical connection between monastic life and skilled craftsmanship. These linguistic nuances, while seemingly unrelated to television, demonstrate the cultural depth embedded within the French language and its influence.

The Use of “Moine” as a Tool (Plumber’s Tool)

Beyond its religious connotations, “moine” (monk) designates a specialized tool utilized by plumbers, particularly in France and historically. This “moine” is a type of wrench, specifically designed for gripping and turning pipes and fittings, often in confined spaces where a standard wrench proves impractical.

The tool’s name likely stems from the posture a plumber might adopt while using it – bent over and working in a cramped position, resembling a monk in prayer or labor. It’s typically characterized by a curved jaw and a long handle, providing leverage and access to difficult-to-reach plumbing components.

A well-maintained “moine” is crucial for any plumbing task, ensuring a secure grip and preventing damage to pipes. It’s considered an essential part of a plumber’s toolkit. The tool must be cleaned regularly to maintain its functionality. While seemingly unrelated to television guides, this practical application of the word “moine” reveals a fascinating intersection of language, labor, and everyday life.

Monks in 16th Century France ー From Militancy to Pacification

The 16th century in France witnessed a dramatic shift in the role of monks, moving from active participation in political and even military affairs to a period of enforced pacification. During the French Wars of Religion, particularly linked to the League, some monastic orders weren’t solely devoted to prayer and scholarship.

Certain monks actively supported the Catholic cause, even carrying muskets in processions – a stark contrast to their traditional vows of peace. These “terrible preachers,” as they were sometimes called, embodied a militant religious fervor. However, this period of monastic militancy was relatively short-lived.

As the century progressed, and efforts were made to restore order, a conscious attempt was undertaken to “humanize” and pacify the monastic orders. The focus shifted back towards spiritual contemplation and charitable works. This transition reflected a broader societal desire for stability after decades of conflict. While historical records detail this shift, it’s a distant echo from today’s television programming in Des Moines.

Medieval Monasteries and Coping with Cold Weather

Life within medieval monasteries, particularly during the harsh winters, demanded ingenious strategies for maintaining warmth and functionality. These self-sufficient communities faced significant challenges in combating the cold, relying on architectural design and resourcefulness to survive. Thick stone walls provided insulation, while smaller windows minimized heat loss – a practical approach far removed from the comfort of modern Des Moines television viewing.

Monasteries often incorporated features like underfloor heating systems, utilizing hot air from the kitchens or bathhouses to warm communal areas. Cloisters offered sheltered walkways, protecting monks from the elements as they moved between buildings. Fuel sources, primarily wood, were carefully managed, and communal living fostered shared warmth.

The dedication to maintaining a habitable environment within the monastery walls allowed for the continuation of scholarly pursuits and religious observances, even during the coldest months. This resilience, a testament to medieval ingenuity, stands in contrast to simply changing the channel on a television in Des Moines today.

TV Guide Apps and Websites for Des Moines Viewers

Des Moines residents have a wealth of digital resources to navigate the ever-changing television landscape. Numerous apps and websites offer comprehensive TV listings, going beyond traditional printed guides. These platforms provide program schedules, channel information, and often, streaming options, ensuring viewers never miss their favorite shows – including live high school football like Nevada at Des Moines Christian on MC22.

Popular options include dedicated TV guide apps available for both iOS and Android devices. Websites like TVGuide.com and Zap2it.com offer searchable listings and personalized recommendations. Many cable and satellite providers also offer their own apps, allowing subscribers to manage their accounts and access on-demand content.

Furthermore, streaming service aggregators are becoming increasingly popular, consolidating content from multiple platforms into a single interface. These tools simplify the viewing experience, allowing Des Moines viewers to easily find and watch their desired programs, regardless of the source. Staying informed about TV schedules has never been easier.

Digital TV Transition and Antenna Recommendations

The transition to digital television is largely complete, but Des Moines viewers relying on over-the-air signals should ensure they have appropriate equipment. Older analog televisions require a digital converter box to receive digital broadcasts. Even with a converter, signal strength can vary depending on location and antenna quality.

For optimal reception, consider an outdoor antenna. These generally offer superior range and clarity compared to indoor models. However, indoor antennas can be sufficient for viewers closer to broadcast towers. When selecting an antenna, consider the channels you wish to receive and the distance from those towers.

AntennaWeb.org is a valuable resource for determining signal strength and recommended antenna types for specific Des Moines addresses. Factors like building materials and obstructions can impact signal reception. Regularly scanning for channels is also crucial to ensure your TV receives the latest available broadcasts, including local programming and events like HSFB Nevada at Des Moines Christian.

Cable and Satellite Provider Options in Des Moines

Des Moines residents have several options for cable and satellite television service. Major providers include Mediacom, offering a range of cable packages with varying channel lineups and internet bundling options. Spectrum is another prominent cable provider serving the area, known for its competitive pricing and promotional offers.

Satellite television is available through providers like Dish Network and DIRECTV. These services often provide access to a wider range of channels, including sports and premium movie networks, but may require professional installation and are susceptible to weather-related signal disruptions.

When comparing providers, consider factors beyond price, such as channel selection, DVR capabilities, and customer service ratings. Many providers offer online tools to compare packages and estimate monthly costs. Don’t forget to inquire about potential contracts and early termination fees. Access to live local events, like HSFB Nevada at Des Moines Christian, may vary by provider and package.

Troubleshooting TV Signal Issues in the Des Moines Area

Experiencing TV signal problems in Des Moines? Several factors can contribute to poor reception. For cable subscribers, begin by checking all cable connections to ensure they are secure and undamaged. A loose connection is a common culprit. If using an antenna, reposition it and rescan for channels – weather can shift antenna alignment.

Satellite TV signals are particularly vulnerable to inclement weather, such as heavy rain or snow. Clear any obstructions, like tree branches, from the satellite dish’s line of sight. Signal interference from nearby electronics is also possible; try moving devices away from the TV and receiver.

If issues persist, consult your provider’s troubleshooting resources online or contact their customer support. They can remotely diagnose the problem or schedule a technician visit. Remember that live broadcasts, such as HSFB Nevada at Des Moines Christian, require a strong, stable signal for optimal viewing.

Upcoming TV Events and Premieres in Des Moines

Des Moines viewers have a vibrant television schedule ahead! February 2026 promises a mix of live sports and fresh programming. Notably, keep an eye out for continued coverage of high school football, including potential playoff games following the February 16th Nevada at Des Moines Christian live broadcast on MC22 and WATCH MC22.

Beyond sports, local channels are gearing up for mid-winter entertainment. Expect announcements regarding new series premieres and special event programming in the coming weeks. Streaming services will also be updating their catalogs with new releases, offering a wide range of viewing options.

Check local listings and streaming platform guides regularly for the most up-to-date information. Don’t forget to explore options beyond traditional cable and satellite, utilizing TV guide apps and websites to maximize your viewing experience. Stay tuned for further details as premiere dates are confirmed!