EQ Baking Guide: An Essential Toolkit
Embark on a baking journey with confidence! This guide unveils crucial tools, from precise measuring aids to versatile mixers, ensuring delightful results.
Accurate equipment is paramount for consistent, high-quality baked goods, transforming recipes into edible masterpieces.
Whether you’re a novice or seasoned baker, mastering these essentials will elevate your creations. Explore the world of baking with the right tools!
Welcome to the world of EQ Baking! This approach centers around equipping yourself with the right tools – the “EQ” – to consistently achieve baking success. It’s more than just following a recipe; it’s understanding how the proper equipment impacts the final outcome. Many bakers initially rely on volume measurements (cups and spoons), but a growing movement advocates for weighing ingredients using a kitchen scale for unparalleled accuracy.
This isn’t about complexity, but about control. Precise measurements, facilitated by quality tools, minimize errors and ensure repeatable results. Whether you’re converting American recipes or simply striving for perfection, understanding baking conversions – from cups to grams – is key. Don’t underestimate the importance of seemingly small tools like measuring spoons, especially for ingredients like baking soda and salt, where even slight variations can alter the taste and texture.
EQ Baking empowers you to move beyond guesswork and embrace a scientific approach to creating delicious treats. It’s about building a toolkit that inspires confidence and unlocks your baking potential.
Why Accurate Equipment Matters in Baking
Baking is a science, and science demands precision. Unlike cooking, where adjustments can often be made by taste, baking relies on chemical reactions triggered by specific ingredient ratios. Inaccurate measurements can disrupt these reactions, leading to flat cakes, tough cookies, or inconsistent results. Even seemingly minor discrepancies – underestimating a teaspoon or overfilling a cup – can significantly impact the final product.
Using reliable equipment, like a calibrated kitchen scale, eliminates ambiguity and ensures consistent outcomes. This is particularly crucial when working with delicate pastries or recipes requiring precise ingredient balances. Investing in quality tools isn’t just about convenience; it’s about respecting the integrity of the recipe and maximizing your chances of success.
Furthermore, accurate tools foster confidence and encourage experimentation. Knowing your measurements are precise allows you to confidently adjust recipes and develop your own signature creations. Don’t underestimate the power of a well-equipped baking arsenal!
Measuring Tools: The Foundation of Precision
Precise measurements are the cornerstone of successful baking. From dry ingredients to liquids, accurate tools ensure consistent results and recipe adherence. Mastering these tools unlocks baking potential!
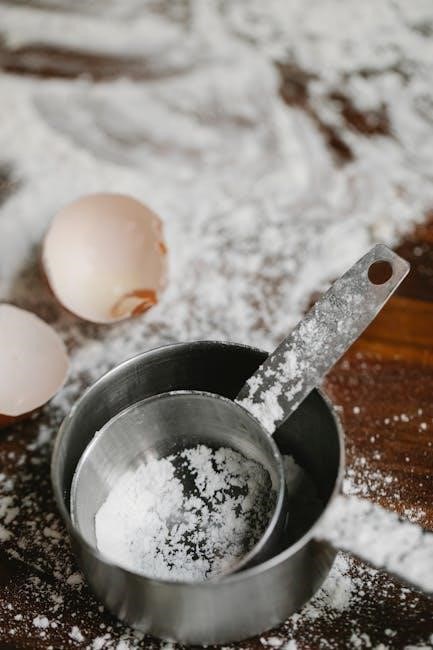
Dry Measuring Cups: Volume vs. Weight
Understanding the difference between measuring by volume and weight is crucial for baking accuracy. While dry measuring cups are commonly used, they can lead to inconsistencies due to variations in how ingredients settle and pack. Flour, in particular, is significantly affected by this.
Volume measurements (like cups) are convenient, but weight measurements (like grams) offer superior precision. Using a kitchen scale to weigh dry ingredients eliminates these variables, resulting in more reliable and repeatable baking outcomes. If you’re debating between the two, now is the perfect time to explore baking by weight!
For those still using cups, always spoon flour into the cup and level it off with a straight edge – avoid scooping directly from the bag, as this compacts the flour and leads to using too much. Remember, consistent results stem from consistent methods.
Liquid Measuring Cups: Reading the Meniscus
Accurately measuring liquids is fundamental to baking success, and understanding the meniscus is key. Liquid measuring cups, typically made of clear plastic or glass, allow you to view the liquid level. However, liquids don’t adhere to a perfectly flat surface; they curve upwards slightly where they meet the cup’s side, forming a meniscus.
To get a precise measurement, always read the measurement at the bottom of the meniscus. This ensures you’re accounting for the entire volume of the liquid. Avoid tilting the cup to meet your eye level, as this distorts the reading. Position the cup on a flat surface and view it directly.
Using a clear measuring cup with clearly marked lines is also essential. Consistent and accurate liquid measurements contribute significantly to the texture and structure of your baked goods, ensuring optimal results every time.
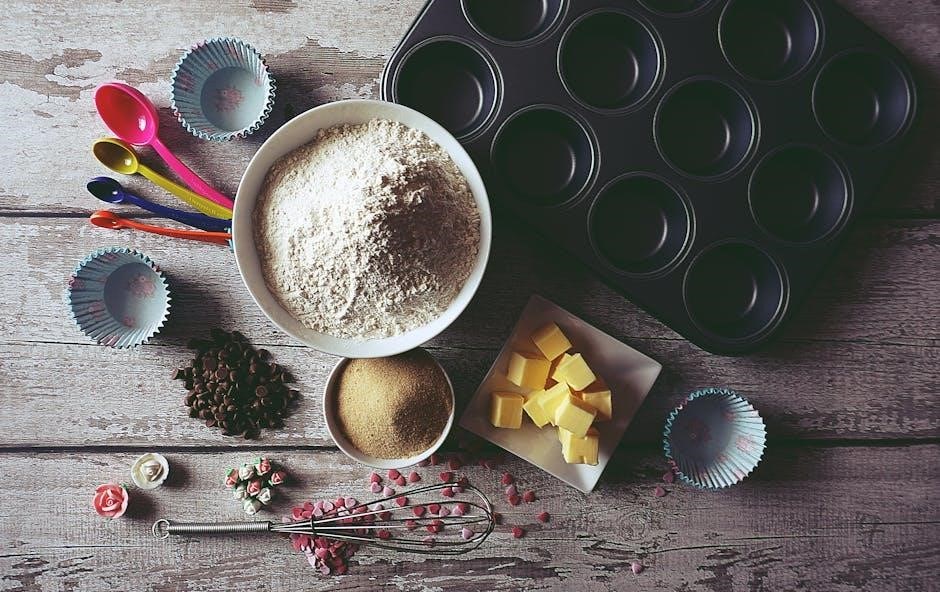
Measuring Spoons: Accuracy for Small Quantities
When recipes call for small amounts of ingredients – think baking powder, vanilla extract, or spices – measuring spoons are indispensable. These sets typically include standard sizes like ¼ teaspoon, ½ teaspoon, 1 teaspoon, and 1 tablespoon. Accuracy is crucial here, as even slight variations can impact the final flavor and texture of your baked goods.
People often underestimate or overestimate these smaller measurements, making precise spoons vital. Ensure your measuring spoons are level when scooping dry ingredients; avoid packing or heaping. For liquids, fill the spoon to the brim, being careful not to spill.
Investing in a quality set that nests neatly for easy storage is a smart move. If you frequently work with American recipes, having a dedicated set of measuring spoons will save you conversion headaches!
Kitchen Scale: The Gold Standard of Measurement
For ultimate precision in baking, a kitchen scale reigns supreme. While measuring cups and spoons are convenient, they rely on volume, which can vary based on ingredient density and how it’s packed. Scales measure by weight, providing consistent and reliable results every time.
If you’re serious about baking, especially more complex recipes, transitioning to weight measurements is highly recommended. It eliminates guesswork and ensures your baked goods turn out as intended. Many bakers find it simplifies the process and reduces errors.
Don’t hesitate to consult baking conversion charts to translate cup measurements into grams. Once you experience the accuracy of a kitchen scale, you may never go back to volume measurements! It’s a game-changer for consistent baking success.
Baking Conversions: Cups to Grams and Beyond
Navigating baking recipes often requires converting between different units of measurement. Especially when working with recipes from various sources – like American recipes using cups and metric recipes using grams – accurate conversions are crucial for success.
While a kitchen scale is the most precise method, understanding cup-to-gram equivalents is still valuable. Remember that conversions aren’t always exact, as ingredient density varies. Flour, for example, packs differently depending on how it’s measured.
Numerous online resources and conversion charts are available to assist you. Don’t hesitate to utilize these tools when adapting recipes. Accurate conversions ensure your baked goods maintain the correct texture and flavor. Mastering these conversions unlocks a world of baking possibilities!
Mixing & Preparation Tools

Essential for combining ingredients, this section covers bowls, whisks, spatulas, and mixers. These tools facilitate proper aeration, folding, and consistent batter development for optimal results!
Mixing Bowls: Sets for Different Needs
A variety of mixing bowls is indispensable in any well-equipped kitchen. Starting with a basic set – typically including small, medium, and large sizes – provides versatility for diverse baking tasks. Stainless steel bowls are popular for their durability, non-reactivity, and ease of cleaning, making them ideal for whipping egg whites or cream.
Glass bowls offer transparency, allowing you to observe ingredient incorporation, and are also excellent for melting chocolate or butter. Plastic bowls are lightweight and affordable, suitable for less demanding tasks. Consider nesting sets for convenient storage, saving valuable cabinet space.
For serious bakers, having multiple bowls of the same material is beneficial, preventing flavor transfer and streamlining the baking process. Deeper bowls minimize splattering during mixing, while bowls with non-slip bases offer stability. Investing in quality mixing bowls is a foundational step towards baking success!
Whisks: Balloon, Flat, and French
Whisks are essential for incorporating air and blending ingredients, but different types excel at specific tasks. The balloon whisk, with its rounded, balloon-shaped head, is perfect for whipping air into eggs, cream, or batters, creating light and fluffy textures. Its shape maximizes volume and aeration.
A flat whisk, featuring a wider, flatter shape, is ideal for deglazing pans, making sauces, or incorporating dry ingredients into wet ingredients without creating lumps. It efficiently reaches into corners and scrapes the bottom of bowls.
The French whisk, possessing a longer, narrower shape than the balloon whisk, is superb for emulsifying sauces and dressings, and for working in smaller bowls. Choosing a whisk with comfortable handle and durable construction ensures long-lasting performance. Having all three types expands your baking capabilities!
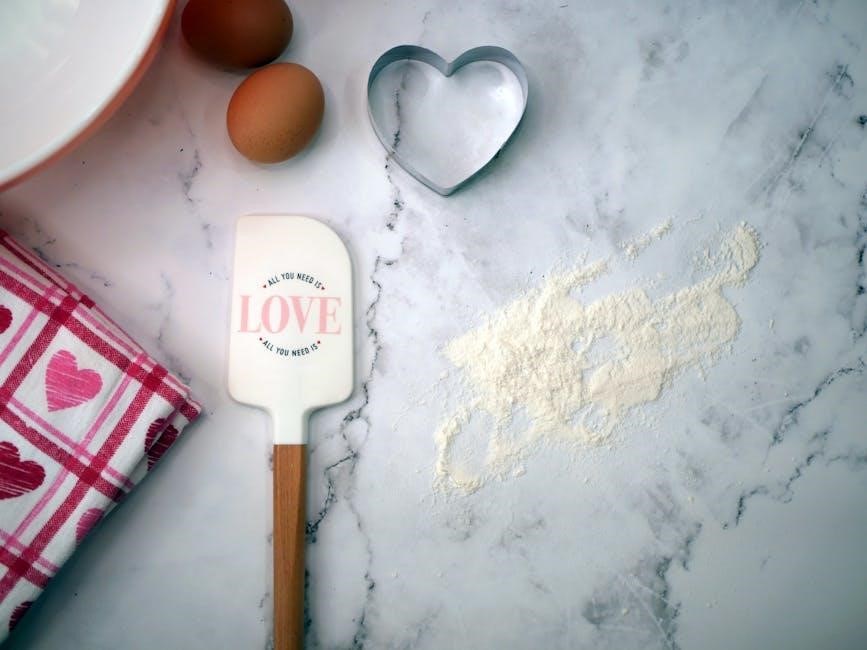
Rubber Spatulas: Scraping and Folding
Rubber spatulas are indispensable for bakers, offering versatility beyond simple mixing. Their flexible silicone or rubber head conforms to the shape of bowls, ensuring no batter goes to waste. Scraping down the sides of bowls is effortless, guaranteeing evenly incorporated ingredients.
Beyond scraping, rubber spatulas excel at gently folding delicate ingredients, like whipped cream or egg whites, into heavier mixtures. This technique preserves airiness and prevents deflating the batter, crucial for light and fluffy results.
Look for spatulas with a sturdy handle and heat-resistant silicone, allowing for use with hot pans and mixtures. Different sizes and shapes cater to various tasks – a smaller spatula for detail work, a larger one for bigger batches. A quality rubber spatula is a baker’s best friend!
Wooden Spoons: A Classic Choice
Wooden spoons represent a timeless baking tool, cherished for their simplicity and effectiveness. Unlike metal, wood doesn’t react with acidic ingredients, preserving the flavor of your creations. Their smooth surface won’t scratch delicate cookware, making them ideal for non-stick pans.
Wooden spoons are perfect for stirring thick batters, creams, and sauces, offering excellent control and leverage. The natural grain provides a comfortable grip, even during extended mixing. While requiring handwashing, a well-maintained wooden spoon can last a lifetime.
Choose spoons made from durable hardwoods like maple or beech. Avoid spoons with cracks or splinters. A classic wooden spoon embodies baking tradition, offering a reliable and gentle touch for all your mixing needs.
Electric Mixer: Stand vs. Handheld
Electric mixers dramatically simplify baking, but choosing between a stand mixer and a handheld model depends on your needs. Stand mixers, with their powerful motors and hands-free operation, excel at heavy-duty tasks like kneading dough or whipping large batches of cream. They offer consistent results and versatility with various attachments.
Handheld mixers are lightweight, affordable, and ideal for smaller recipes or quick mixing jobs. Their portability makes them convenient for limited kitchen space. While requiring constant holding, they provide sufficient power for most everyday baking tasks.
Consider frequency of baking and recipe complexity when deciding. Serious bakers benefit from a stand mixer’s power and convenience, while occasional bakers may find a handheld model sufficient.
Baking Pans & Molds
Select pans suited to your recipes! From classic cake pans to specialized molds, quality materials ensure even heating and easy release for perfect baked goods every time.

Cake Pans: Round, Square, and Bundt
Cake pans are foundational for any baker, with a variety of shapes influencing both the aesthetic and baking properties of your cakes. Round cake pans are incredibly versatile, ideal for classic layer cakes and providing even heat distribution for consistent baking. Square cake pans offer clean lines and are perfect for sheet cakes or cutting into precise portions.
Bundt pans, with their distinctive ring shape, create visually stunning cakes and often feature intricate designs. The central tube promotes even baking, resulting in a moist and tender crumb. When selecting cake pans, consider the material – aluminum is a popular choice for its excellent heat conductivity, while non-stick coatings simplify release.
Proper pan preparation is crucial; greasing and flouring (or using baking spray) prevents sticking and ensures your cake emerges flawlessly. Investing in a quality set of cake pans in various shapes will empower you to tackle a wide range of recipes and create beautiful, delicious cakes for any occasion.
Muffin Tins: Standard and Mini
Muffin tins are indispensable for creating perfectly portioned baked goods, from classic muffins and cupcakes to savory breakfast treats. Standard muffin tins typically hold 12 muffins, offering a versatile size for everyday baking. Mini muffin tins, on the other hand, produce bite-sized delights, ideal for parties or portion control.
The material of your muffin tin impacts baking; metal tins provide excellent heat conductivity for golden-brown muffins, while silicone tins offer easy release and cleanup. Using muffin liners is recommended to prevent sticking and simplify removal, though greasing the tin works well too.
Filling muffin tins consistently is key to uniform baking. A cookie scoop is a helpful tool for dispensing batter evenly. Whether you prefer standard or mini, a quality muffin tin is a baker’s essential, opening doors to endless possibilities for sweet and savory creations.
Loaf Pans: For Breads and Cakes
Loaf pans are a cornerstone of any baking toolkit, essential for crafting everything from rustic homemade breads to moist and delicious cakes. Available in various materials – metal, glass, and silicone – each offers unique baking characteristics. Metal pans excel at even heat distribution, promoting a golden-brown crust, while glass allows for visual monitoring of the bake.
Standard loaf pan sizes typically measure 8.5 x 4.5 inches or 9 x 5 inches, influencing baking times and the final shape of your loaf. For quick breads and cakes, a lighter-colored pan prevents over-browning. Proper preparation is crucial; greasing and flouring, or using parchment paper, ensures easy release.
Beyond bread and cake, loaf pans are surprisingly versatile, suitable for meatloaf, casseroles, and even brownies. Investing in a quality loaf pan unlocks a world of baking possibilities, making it a truly indispensable tool for any home baker.

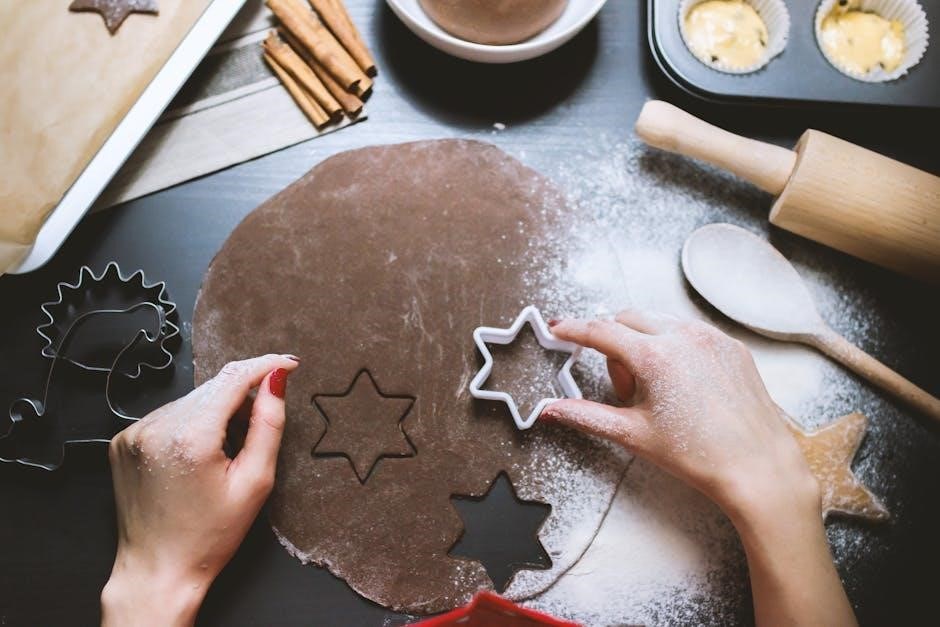
Cookie Sheets: Flat vs. Rimmed
Cookie sheets are fundamental for achieving perfectly baked cookies, but choosing between flat and rimmed options can significantly impact results. Flat sheets, lacking sides, facilitate easy lifting of delicate cookies and promote maximum air circulation for crisp bottoms. They’re ideal for macarons and lace cookies.
Rimmed baking sheets, conversely, offer containment, preventing spills and making them perfect for cookies with flowing glazes or toppings. They’re also versatile for roasting vegetables or baking sheet dinners. The rims help to maintain even heat distribution and prevent burning.
Material matters too; aluminum heats quickly and evenly, while insulated sheets prevent over-browning. Investing in both flat and rimmed sheets provides flexibility for diverse baking needs. Proper lining with parchment paper is key for effortless cookie removal and cleanup.
Pie Dishes: Glass, Ceramic, and Metal
Selecting the right pie dish is crucial for a beautifully baked pie, and the material significantly influences the outcome. Glass dishes allow for visual monitoring of browning, but heat more slowly and can sometimes result in a soggy bottom crust. They’re excellent for fruit pies where observing the bubbling filling is beneficial.
Ceramic dishes retain heat exceptionally well, promoting even baking and a flaky crust. They offer a rustic aesthetic and are ideal for quiches or custard pies. However, they can be prone to cracking with sudden temperature changes.
Metal pie dishes, particularly aluminum, heat rapidly and evenly, creating a golden, crisp crust. They’re a classic choice for all-crust pies like pumpkin or pecan. Dark metal absorbs heat more quickly, potentially requiring a slightly lower oven temperature.
Specialized Baking Tools
Elevate your baking artistry! Discover tools like rolling pins, pastry brushes, sifters, and piping bags, enhancing decoration and dough handling. These specialized items unlock new possibilities!
Rolling Pin: Material and Types
Choosing the right rolling pin significantly impacts your pastry success. Rolling pins come in a variety of materials, each offering unique benefits. Traditional wooden rolling pins are a classic choice, favored for their comfortable grip and ability to maintain a cool temperature – crucial when working with delicate doughs.
Marble rolling pins are heavier and stay cooler even longer, ideal for laminated doughs like croissants or puff pastry. Silicone rolling pins are non-stick and easy to clean, making them a convenient option for everyday baking.
Beyond material, consider the type. French rolling pins, tapered at the ends, require a different technique but offer excellent control. American rolling pins, with handles, are easier for beginners to use. Some rolling pins even feature adjustable thickness guides, ensuring uniform dough for pies and cookies. Investing in a quality rolling pin is a worthwhile step towards consistently beautiful baked goods.
Pastry Brushes: For Glazes and Washes
Pastry brushes are surprisingly versatile tools, extending far beyond simply brushing egg washes. These brushes are essential for applying glazes to pastries, creating a beautiful sheen and delicate sweetness. They’re also vital for applying melted butter to pie crusts, preventing sogginess and promoting golden-brown perfection.
Different bristle materials offer distinct advantages. Natural bristle brushes are excellent for applying delicate glazes, as they hold liquid well and release it evenly. Silicone pastry brushes are heat-resistant, easy to clean, and ideal for heavier washes or applying oil.
Consider the brush shape and size; angled brushes reach into corners, while larger brushes cover broader surfaces quickly; A good pastry brush ensures even application, enhancing both the appearance and texture of your baked creations. Don’t underestimate the power of a simple brush!
Sifter: Aerating Dry Ingredients
A sifter isn’t merely a relic of old-fashioned baking; it’s a tool that significantly impacts texture and consistency. Its primary function is to aerate dry ingredients like flour, cocoa powder, and powdered sugar, incorporating air for a lighter, more tender final product. This process also breaks up clumps, ensuring even distribution throughout your batter.
While not always strictly necessary, sifting is particularly crucial for delicate pastries like cakes and biscuits where a light crumb is desired. It prevents dense, uneven results caused by compacted ingredients. Modern bakers sometimes skip sifting, but it remains invaluable for achieving professional-quality textures.
Various sifter types exist, from simple mesh strainers to crank-operated sifters. Choose one that suits your baking frequency and needs. Properly sifted ingredients contribute to a superior bake, every time!
Bench Scraper: Cutting and Lifting Dough
The bench scraper, often overlooked, is a remarkably versatile tool for any baker. Constructed from stainless steel or sturdy plastic, it excels at several tasks beyond simply scraping dough off your work surface. It’s ideal for cleanly dividing dough into portions for rolls, cookies, or loaves, ensuring uniform sizes and shapes.
Beyond cutting, a bench scraper facilitates gentle lifting and transferring of delicate doughs, minimizing gluten development and preserving texture. It’s also incredibly useful for cleaning your work surface, gathering up stray flour, and even smoothing frosting on cakes.
Its straight edge provides precision, while the angled design aids in scooping. A bench scraper isn’t just a convenience; it’s a baker’s essential companion, streamlining workflow and enhancing results.
Piping Bags & Tips: For Decoration
Elevate your baked goods from simple to stunning with piping bags and tips! These tools unlock a world of decorative possibilities, transforming cakes, cupcakes, and cookies into edible works of art. Piping bags, available in disposable or reusable materials, hold your frosting or ganache, providing control and precision.
The real magic lies in the tips. A vast array of designs – round, star, petal, leaf – create diverse effects, from elegant borders and rosettes to intricate floral patterns and lettering. Mastering a few basic tips opens up endless creative avenues.
Whether you’re a beginner or an experienced decorator, piping bags and tips are indispensable for adding a professional touch and personalized flair to your baking creations. They truly allow your artistry to shine!
Cooling Rack: Preventing Soggy Bottoms
Don’t let a soggy bottom ruin your perfectly baked treats! A cooling rack is a deceptively simple, yet absolutely essential, piece of baking equipment. Its primary function is to allow air to circulate underneath your baked goods, preventing condensation and ensuring a crisp, even finish.
Immediately transferring cookies, cakes, or muffins to a cooling rack after removing them from the oven is crucial. Without this step, the residual heat and moisture can create a damp, unpleasant texture, especially on the underside.
Cooling racks come in various materials – wire, stainless steel, and even silicone – each offering different benefits. Invest in a sturdy rack to prevent breakage and ensure your baked goods cool properly, maintaining their delightful texture and appearance. It’s a small investment for a big impact!
Thermometers: Oven and Instant-Read
Precision temperature control is key to baking success, and thermometers are your allies! Don’t rely solely on oven dial settings; oven temperatures can be surprisingly inaccurate. An oven thermometer ensures your oven is truly at the temperature the recipe requires, leading to consistent results.
However, oven thermometers only tell part of the story. For checking the internal temperature of baked goods – crucial for cakes, breads, and custards – an instant-read thermometer is indispensable. This allows you to verify doneness, preventing underbaked or overbaked disasters.
Digital instant-read thermometers offer quick, accurate readings. Investing in both types of thermometers is a small price to pay for perfectly baked goods every time. Mastering temperature control unlocks a new level of baking confidence!