Frigidaire Stackable Washer Dryer Manual: A Comprehensive Guide
This manual provides essential guidance for Frigidaire stackable laundry centers, offering details on installation, operation, troubleshooting, and maintenance – covering models like MCL6040PSBB11 and LWN311SPSID.
Understanding Your Frigidaire Laundry Center
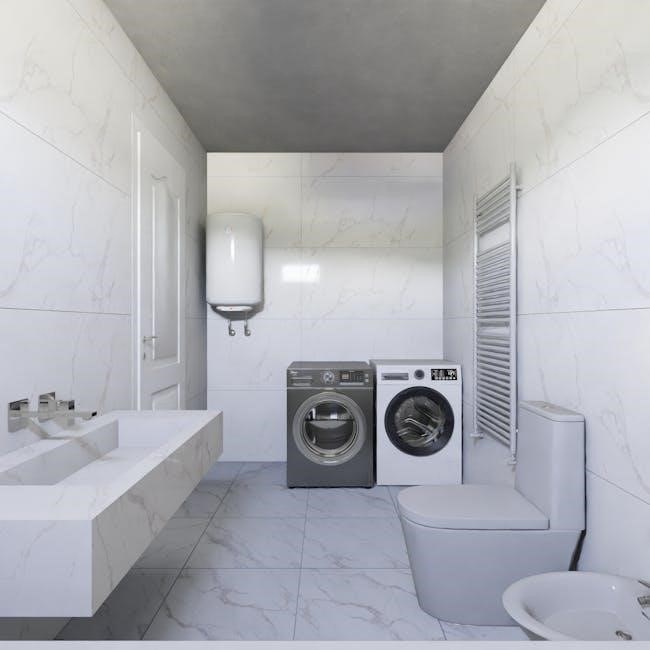
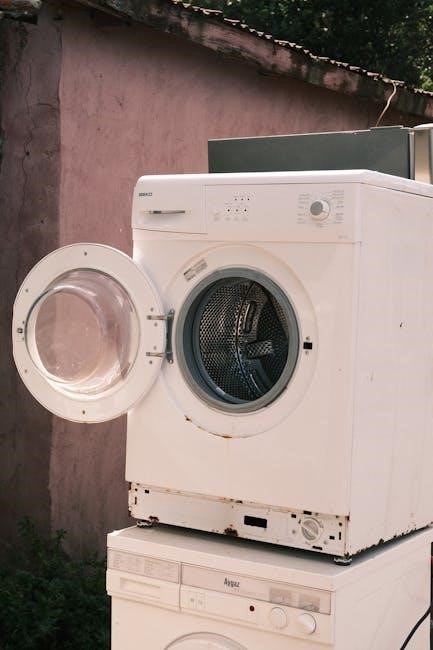
Your Frigidaire stackable laundry center is designed for efficient and convenient laundry care, combining a washer and dryer into a single, space-saving unit. These centers, like the Frigidaire Washer/Dryer Combo, boast features such as a 3.8 cu ft washer and a 5.5 cu ft dryer, often ENERGY STAR certified for reduced energy consumption.
Understanding the components – from the drum washing machine to the control panel – is crucial for optimal performance. Resources like service manuals (WF-XX.series.pdf) and parts catalogs (frigidaire_frs26kr4j) offer detailed insights into the machine’s inner workings. Familiarizing yourself with these aspects ensures effective use and simplifies maintenance, extending the lifespan of your appliance.
Model Number Identification & Where to Find It
Locating your Frigidaire laundry center’s model number is essential for accessing specific manuals, parts lists, and support resources. This unique identifier, crucial for troubleshooting and ordering replacements, is typically found on a label affixed to the appliance.
Common locations include: inside the washer/dryer door jamb, on the unit’s back panel, or beneath the control panel. Examples of model numbers include MCL6040PSBB11 and LWN311SPSID. Having this number readily available when contacting customer service or searching online for documentation – like the Frigidaire Washer/Dryer Combo Manual – will significantly expedite the process of finding the correct information for your specific model.
Safety Precautions & Warnings
Prioritize safety when installing and operating your Frigidaire stackable washer and dryer. Always disconnect power before performing maintenance or cleaning. Never attempt to repair the appliance yourself; contact qualified service personnel for assistance.
Be mindful of potential hazards: avoid overloading the washer or dryer, as this can cause instability. Ensure proper ventilation for the dryer to prevent fire risks. Keep flammable materials away from both units. Read all instructions in the manual before use. Improper installation or operation can lead to injury or damage. Follow all warning labels affixed to the appliance for safe and effective use.

Installation & Setup
Proper installation is crucial for optimal performance. This involves unpacking, inspecting for damage, securely stacking the units, and correctly connecting water and electrical supplies.
Unpacking and Initial Inspection
Carefully unpack your Frigidaire stackable washer and dryer, ensuring all packaging materials are removed from both units. Inspect both appliances thoroughly for any signs of shipping damage, such as dents, scratches, or broken parts. Document any damage immediately with photographs.
Verify that all included accessories are present, including the stacking kit hardware (if not pre-installed), drain hose, and any relevant documentation. Check the washer’s interior drum for any loose items left from the manufacturing process. Confirm the dryer’s lint filter is properly seated.
Retain all original packaging materials for potential returns or warranty claims. Report any missing or damaged components to the retailer or Frigidaire customer support promptly. A careful initial inspection prevents future complications.
Stacking Instructions & Required Hardware
Proper stacking requires the Frigidaire stacking kit, ensuring stability and safe operation. Confirm the kit includes all necessary brackets, screws, and straps for securing the dryer to the washer. Position the washer on a level surface before attempting to stack.
Carefully lift the dryer and align it with the mounting points on top of the washer; Secure the stacking brackets using the provided screws, tightening them firmly. Attach the anti-tip strap to both units and a nearby wall for added stability – this is crucial for safety.
Double-check all connections to ensure they are secure. Refer to the detailed diagrams in your manual for precise placement of hardware. Incorrect stacking can lead to instability and potential damage.
Water Supply Connection (Washer)
Connect the washer to both hot and cold water supplies using approved flexible supply hoses. Ensure the water pressure is between 20 and 100 psi for optimal performance. Inspect the hose connections for leaks after installation, tightening as needed.
Use new hoses to prevent potential issues with older, worn-out connections. Avoid cross-threading when attaching the hoses to the water inlet valves. A water hammer arrestor is recommended to minimize noise and protect your plumbing.
Turn on the water supply slowly and check for leaks again. Proper water connection is vital for the washer’s functionality and prevents water damage.

Operating Instructions ⎯ Washer
Familiarize yourself with the control panel for cycle selection and options; Properly sort laundry and use the detergent dispenser according to load capacity guidelines.
Control Panel Overview & Cycle Selection
The Frigidaire washer’s control panel features intuitive settings for various laundry needs. Key cycles include Normal, Delicates, Heavy Duty, and Quick Wash, each optimized for specific fabric types and soil levels. Utilize the temperature selection to choose between Hot, Warm, and Cold water washes, impacting cleaning effectiveness and energy consumption.
Spin speed options – Low, Medium, High, and No Spin – allow customization based on garment delicacy. Additional features like Extra Rinse and Soil Level adjustments provide further control. Carefully review the cycle guide to select the most appropriate setting for each load, ensuring optimal cleaning and fabric care. Remember to consult the full manual for detailed explanations of each cycle and feature.
Detergent Dispenser Guide
The Frigidaire washer’s detergent dispenser is typically divided into separate compartments for pre-wash detergent, main wash detergent, and fabric softener. Always use High Efficiency (HE) detergent, as standard detergents can create excessive suds and damage the machine. Carefully measure detergent according to the load size and soil level, following the detergent manufacturer’s instructions.
Pour liquid detergent into the designated compartment, avoiding overfilling. For powdered detergent, ensure it dissolves properly. The fabric softener compartment prevents direct contact with clothes, ensuring even distribution. Regularly clean the dispenser to prevent clogs and residue buildup, maintaining optimal performance. Refer to the manual for specific dispenser locations and cleaning procedures.
Load Capacity & Sorting Laundry
Frigidaire washers have a specific load capacity, typically around 3.8 cu ft; overloading can reduce cleaning effectiveness and damage the machine. Always check your model’s manual for the precise capacity. Sort laundry by color – whites, lights, and darks – to prevent dye transfer. Separate delicate items from heavier ones, using a mesh laundry bag for added protection.
Empty pockets and close zippers and hooks before loading. Check for loose buttons or embellishments that could cause damage. Avoid washing bulky items like comforters alone, as they can unbalance the machine. Distribute the load evenly around the drum to maintain balance during the wash cycle, ensuring optimal performance.

Operating Instructions ⎼ Dryer
This section details dryer cycle options and settings, including moisture sensor functionality, and emphasizes the importance of regular lint filter maintenance for safe operation.
Dryer Cycle Options & Settings
Frigidaire dryers offer a variety of cycles to cater to different fabric types and drying needs. Common settings include Normal, Delicate, Timed Dry, and Heavy Duty. The Normal cycle is ideal for everyday cottons and linens, while Delicate is designed for more fragile items.
Timed Dry allows you to set a specific drying duration, useful for smaller loads or items that don’t require a fully automated cycle. Heavy Duty is best suited for bulky items like towels and jeans. Temperature settings range from High to Low, with options for Air Dry (no heat).
Utilizing the moisture sensor functionality ensures clothes are dried efficiently, preventing over-drying and saving energy. The sensor detects the moisture level within the drum and automatically stops the cycle when clothes are sufficiently dry. Always consult the garment care label before selecting a cycle and temperature.
Lint Filter Maintenance
Regular lint filter cleaning is crucial for maintaining optimal dryer performance and safety. A clogged lint filter restricts airflow, leading to longer drying times, increased energy consumption, and potentially a fire hazard. The lint filter is typically located inside the dryer drum, either on the top or front panel.
After each load, remove the lint filter and clean it thoroughly by hand, removing all accumulated lint. Avoid using water or chemical cleaners, as these can damage the filter. Inspect the filter regularly for tears or damage and replace it if necessary.
Additionally, periodically clean the lint filter housing with a vacuum cleaner to remove any lingering lint buildup. Proper lint filter maintenance ensures efficient drying and minimizes the risk of dryer-related incidents, contributing to a safer laundry experience.
Moisture Sensor Functionality
Frigidaire dryers utilize moisture sensors to automatically detect the dampness level of clothes, ensuring optimal drying and preventing over-drying which can damage fabrics. These sensors, typically located inside the dryer drum, measure the electrical resistance of the clothes – wetter clothes have higher resistance.
The dryer adjusts the drying time based on the sensor readings, stopping the cycle when the selected dryness level is achieved. Ensure the sensors are clean and free of lint or residue for accurate readings; wipe them gently with a soft cloth if needed.
Overloading the dryer or using dryer sheets can sometimes interfere with sensor accuracy. Understanding this functionality allows for efficient and gentle fabric care, maximizing the lifespan of your garments and conserving energy.

Troubleshooting Common Issues
This section details solutions for typical problems, including washer drainage failures, dryer heating malfunctions, and deciphering error codes for Frigidaire models.
Washer Not Draining
If your Frigidaire washer isn’t draining, several issues could be the cause. First, check the drain hose for kinks or obstructions – ensure it isn’t bent or clogged. Verify the drain hose is properly inserted into the standpipe and isn’t pushed in too far, which can cause siphoning.

Next, inspect the drain pump filter. This filter catches lint and debris and can become blocked over time. Consult your model’s manual for its location and cleaning instructions. A clogged filter is a frequent culprit.
Finally, consider a potential issue with the drain pump itself. If the pump is faulty, it won’t be able to effectively remove water. Professional repair may be necessary in this case. Always disconnect power before attempting any internal inspection or repair.
Dryer Not Heating
A Frigidaire dryer failing to heat can stem from a few common problems. Initially, confirm the dryer is receiving power and the door switch is functioning correctly – a faulty switch prevents operation. Next, meticulously check the thermal fuse; this safety device blows if the dryer overheats, cutting off power to the heating element.

The heating element itself is a frequent cause. Use a multimeter to test for continuity; a break indicates a need for replacement. Also, inspect the gas valve (for gas dryers) or the timer/control board (for electric dryers) as these regulate heat.
Finally, a clogged lint filter restricts airflow, potentially causing overheating and triggering safety shutoffs. Ensure the lint filter is clean before each use. Disconnect power before any internal inspection.
Error Codes & Their Meanings
Frigidaire stackable washer dryers utilize error codes to diagnose issues, simplifying troubleshooting. While specific codes vary by model, common ones indicate problems. For example, a code relating to water supply suggests inlet valve issues or low water pressure. Drain-related codes point to a clogged drain pump or blocked drain hose.
Motor errors often signify a faulty motor or related wiring, requiring professional attention. Codes concerning the control board indicate internal electronic failures. Refer to your specific model’s manual for a complete list and detailed explanations of each error code.
Always disconnect power before attempting any repairs based on error code diagnostics. Ignoring error codes can lead to further damage.
Maintenance & Cleaning

Regular cleaning extends the life of your Frigidaire unit; utilize the washer cleaning cycle and maintain both interior and exterior surfaces for optimal performance.
Washer Cleaning Cycle Instructions
To maintain peak washer performance and hygiene, Frigidaire recommends utilizing the dedicated washer cleaning cycle regularly. Before initiating, ensure the washer drum is empty – remove all clothing and personal items. Add a washing machine cleaner, specifically formulated for high-efficiency washers, directly into the detergent dispenser.
Select the washer cleaning cycle on the control panel; this cycle uses hot water and increased agitation to effectively remove detergent residue, mineral buildup, and potential mold or mildew. Avoid interrupting the cycle once it has started, allowing it to complete its full duration.
For optimal results, perform this cleaning cycle monthly, or more frequently if you notice any lingering odors or visible residue. Regular use of the cleaning cycle will help prevent buildup and ensure your Frigidaire washer continues to deliver consistently clean laundry.
Exterior & Interior Cleaning Procedures
Maintaining a clean exterior enhances the appearance of your Frigidaire stackable unit. Regularly wipe down the cabinet with a damp cloth and mild detergent, avoiding abrasive cleaners that could cause damage. For stainless steel surfaces, use a stainless steel cleaner for a polished finish.
For interior cleaning, after each use, leave the washer door slightly ajar to promote ventilation and prevent mildew growth. Periodically wipe down the rubber door gasket with a damp cloth to remove any lingering moisture or debris. Inspect the detergent dispenser and remove any solidified residue.
Pay attention to the area around the washer drum, ensuring no small items are lodged within. A clean interior contributes to optimal performance and prevents unpleasant odors, extending the life of your appliance.
Long-Term Storage Guidelines
Preparing your Frigidaire stackable washer and dryer for extended storage requires careful attention. First, disconnect both units from the power supply and water lines. Thoroughly clean both the washer drum and dryer interior, removing all traces of detergent and lint to prevent mold or mildew.
Leave both doors slightly ajar to allow for air circulation. Consider placing moisture-absorbing packets inside to further combat humidity. Secure the power cords and hoses, preventing damage during storage. Protect the exterior surfaces with a dust cover or sheet.
Store the units in a dry, climate-controlled environment, avoiding extreme temperatures. Periodically check the units during storage to ensure no issues arise, maintaining their condition for future use.