White Plume Mountain PDF: A Comprehensive Guide
Discover a detailed exploration of the White Plume Mountain PDF, encompassing its availability, supplemental materials, and fan-created content.
Explore resources like Dungeon Magazine issues and downloadable maps, including the revised version and adventure path materials.
Find free PDF downloads and delve into Lawrence Schick’s classic dungeon design, a cornerstone of Dungeons & Dragons history.
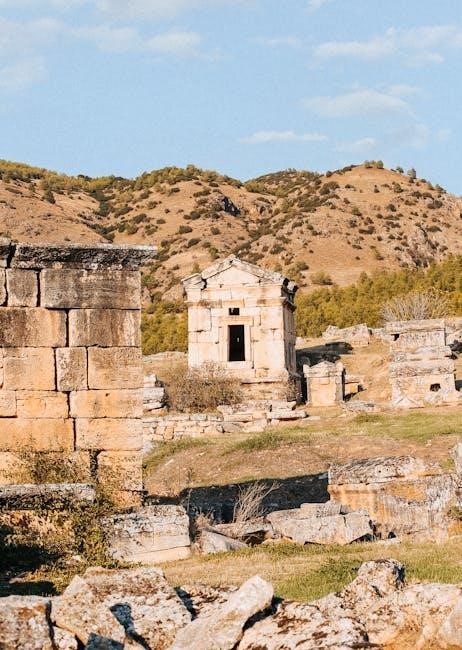
White Plume Mountain, originally published in 1987, stands as a celebrated adventure module for Advanced Dungeons & Dragons. Its enduring legacy stems from a unique design – a self-contained dungeon focused on challenges rather than a sprawling narrative. The availability of a White Plume Mountain PDF has significantly broadened access to this classic experience for modern players and Dungeon Masters.
This module isn’t tied to a larger campaign, offering a concentrated test of character abilities and problem-solving skills. Players navigate a series of elemental nodes, each guarded by a formidable creature and requiring specific solutions. The PDF format allows for easy distribution, printing of player handouts, and integration with digital tabletop platforms. It represents a pivotal piece of D&D history, readily available for exploration.
The module’s design emphasizes tactical combat and puzzle-solving, making it a favorite among those seeking a challenging and rewarding dungeon crawl.
Historical Context of the Module
White Plume Mountain emerged during a golden age of Dungeons & Dragons module creation, a period marked by innovative dungeon design and complex challenges. Released in 1987, it represented a shift towards more self-contained adventures, less reliant on expansive campaign settings. The subsequent availability of the White Plume Mountain PDF has allowed a new generation to experience this influential work.
The late 1980s saw a surge in popularity for AD&D, and modules like White Plume Mountain catered to players seeking focused, tactical gameplay. Its publication coincided with a growing interest in intricate dungeon layouts and challenging encounters. The PDF’s accessibility ensures the module’s historical significance isn’t lost, preserving a key artifact of tabletop RPG history.
It stands as a testament to the creativity of the era, readily available for study and play.
Lawrence Schick and the Creation of WPM
Lawrence Schick, a prominent figure in early Dungeons & Dragons development, is the mastermind behind White Plume Mountain. His design philosophy prioritized intricate puzzles and challenging encounters over traditional narrative, resulting in a uniquely tactical dungeon experience. The enduring popularity of the White Plume Mountain PDF is a direct result of his innovative approach.
Schick transitioned to Wizards of the Coast in 1997, continuing his contributions to the RPG landscape. However, White Plume Mountain remains a defining work in his portfolio. His focus on player agency and problem-solving within a confined space set it apart.
The PDF format allows players to directly engage with Schick’s vision, experiencing the dungeon as originally intended, cementing his legacy.
The Original Publication Details
White Plume Mountain first appeared as a standalone adventure module for Advanced Dungeons & Dragons, designed for character levels 5-10. The original publication offered players a self-contained dungeon crawl, distinct from sprawling campaign settings. Finding a White Plume Mountain PDF allows access to this classic experience.
Published in 1987, the module quickly gained recognition for its unique challenges and intricate design. It was 36 pages long, packed with detailed maps and encounter descriptions. The availability of the PDF ensures preservation of this influential work.
Early editions were often sought after by collectors, but the digital format has broadened accessibility, allowing a new generation to explore Schick’s creation.
Availability of the White Plume Mountain PDF
Locating a White Plume Mountain PDF is surprisingly straightforward in the modern era. Numerous online resources offer downloadable versions, ranging from official digital storefronts to fan-maintained archives. Websites dedicated to tabletop RPGs frequently host scans or digitally reformatted copies.
However, it’s crucial to exercise caution regarding download sources, ensuring they are reputable to avoid malware or copyright infringements. Several online forums and communities actively share links and discuss the best available versions.
Furthermore, platforms like DriveThruRPG often feature authorized digital releases, providing a legal and convenient way to acquire the PDF and support the creators;

Understanding the Adventure
Delve into White Plume Mountain’s unique structure, featuring multiple levels, challenging encounters, and powerful elemental nodes, all accessible via the PDF.
Overview of the Dungeon’s Structure
White Plume Mountain, as presented in its PDF format, is renowned for its unconventional dungeon design. Unlike linear crawls, it’s a self-contained complex with four distinct levels, each themed around a classical element – Earth, Water, Fire, and Air.
Each level isn’t simply a series of rooms; it’s a carefully constructed puzzle box. Players navigate interconnected chambers, facing unique challenges and guardians tied to the elemental theme. The PDF allows for easy reference to maps and room descriptions, crucial for understanding the layout.
The dungeon isn’t about looting as much as overcoming obstacles. Progression requires solving riddles, defeating elemental guardians, and acquiring specific items. The PDF’s detailed notes help Dungeon Masters manage these intricate encounters and ensure a rewarding experience for players exploring this iconic location.
Levels of White Plume Mountain
The White Plume Mountain PDF details four distinct levels, each representing a classical element. The Earth level features twisting passages and stone guardians, testing players’ resilience. The Water level presents flooded chambers and aquatic creatures, demanding adaptability.
The Fire level is a scorching labyrinth guarded by fiery beings, requiring careful planning and fire resistance. Finally, the Air level consists of floating platforms and wind elementals, challenging players’ agility and spatial reasoning.
The PDF provides detailed maps and descriptions for each level, highlighting unique features and encounters. Successfully navigating each level requires solving puzzles and defeating the elemental guardians, ultimately leading to the mountain’s heart and its secrets.
Key NPCs and Their Roles
The White Plume Mountain PDF reveals limited direct NPC interaction, focusing instead on the dungeon’s challenges. However, the spirits and guardians embody distinct roles. The four elemental guardians – representing Earth, Water, Fire, and Air – serve as the primary antagonists, each testing adventurers’ worthiness.
The spirit of the mountain itself, though not directly communicative, influences the dungeon’s environment and challenges. Past adventurers’ ghosts may offer cryptic clues or warnings, adding to the atmosphere.
The PDF emphasizes that overcoming these entities isn’t about negotiation, but about demonstrating mastery over their respective elements, making the dungeon itself the central “character” with whom players interact.
The Unique Challenges Within
The White Plume Mountain PDF showcases a departure from typical dungeon crawls, prioritizing elemental mastery over brute force. Each level presents a distinct elemental theme – Earth, Water, Fire, and Air – demanding specific solutions.
Challenges aren’t simply combat encounters; they involve intricate puzzles, environmental manipulation, and tests of skill aligned with each element. The dungeon’s design forces players to adapt and utilize creative problem-solving, rather than relying on conventional tactics.
The PDF highlights the lack of traditional treasure, instead rewarding players with the satisfaction of overcoming the elemental trials, making the journey itself the ultimate reward.
Dungeon Features and Encounters
Explore the White Plume Mountain PDF’s elemental nodes, unique traps, and diverse monster variety. Discover challenging combat and puzzle encounters within!
The Elemental Nodes and Their Guardians
Within the White Plume Mountain PDF, the dungeon’s core lies in its four elemental nodes – Earth, Air, Fire, and Water. Each node presents a distinct challenge, guarded by powerful creatures intrinsically linked to its element.
The Earth node is defended by a fearsome earth elemental and its minions, testing the party’s resilience. The Air node features a cunning wind spirit and aerial guardians, demanding strategic thinking. The Fire node houses a formidable fire giant and fiery creatures, requiring careful planning to overcome.
Finally, the Water node is protected by a powerful water elemental and aquatic horrors, emphasizing adaptability. Successfully navigating these nodes and defeating their guardians is crucial for progressing through the adventure, as detailed within the White Plume Mountain PDF.
The Role of the Magic Items
The White Plume Mountain PDF showcases a unique approach to magic items, presenting them not as rewards, but as integral components to overcoming the dungeon’s challenges. These aren’t simply stat boosters; they are required to access and conquer specific areas.
For example, the Winged Boots are essential for navigating the Air Node, while the Amulet of Proof Against Fire is vital for surviving the Fire Node’s intense heat. The dungeon is deliberately designed around these items, forcing players to locate and utilize them strategically.
This system, detailed within the PDF, shifts the focus from pure combat prowess to problem-solving and exploration, making the acquisition of these items a central and rewarding aspect of the adventure.
Traps and Puzzles in White Plume Mountain
The White Plume Mountain PDF reveals a dungeon brimming with intricate traps and challenging puzzles, demanding more than just brute force from adventurers. These aren’t random encounters; they are cleverly woven into the dungeon’s architecture and elemental themes.
Expect to encounter pressure plates, hidden passages, and riddles guarding access to key areas. The puzzles often require utilizing the unique properties of the magic items found within, creating a satisfying synergy between exploration and item acquisition.
Successfully navigating these obstacles, as detailed in the PDF, is crucial for progression, rewarding careful observation, logical thinking, and collaborative problem-solving amongst the party members.
Combat Encounters and Monster Variety
The White Plume Mountain PDF showcases a diverse range of combat encounters, moving beyond simple hack-and-slash scenarios. Players will face creatures thematically linked to the dungeon’s elemental nodes, demanding tactical approaches.
Expect battles against unique monsters, including guardians protecting the elemental powers and creatures warped by the mountain’s magic. The PDF details monster statistics and special abilities, ensuring balanced and challenging fights.
Strategic party composition and clever use of spells and abilities are vital for success. These encounters aren’t merely tests of strength, but also of resource management and adaptability, as outlined within the adventure’s documentation.

Running the Adventure
Utilize the White Plume Mountain PDF to expertly guide players through this classic dungeon, adapting it for various D&D editions and party levels.
Prepare handouts and maps for an immersive experience!
Character Levels and Party Composition
The White Plume Mountain PDF adventure is optimally designed for a party of four to six adventurers, falling within the level range of 5th to 10th level. Lower-level parties will face significant challenges, potentially requiring careful planning and tactical combat. Conversely, excessively high-level characters might find the encounters less stimulating.
A balanced party composition is highly recommended. Include characters proficient in combat, spellcasting, and problem-solving. Rogues are invaluable for navigating traps, while clerics or paladins provide essential healing and protection. Consider a mix of melee and ranged attackers to adapt to the diverse encounters within the mountain.
Dungeon Masters should adjust monster statistics and encounter difficulty based on the party’s size and experience. The White Plume Mountain PDF provides a solid foundation, but flexibility is key to ensuring an enjoyable and challenging experience for all players.
Adapting the Module for Different Editions
The original White Plume Mountain PDF was created for Advanced Dungeons & Dragons (AD&D). Adapting it to newer editions, like 5th Edition, requires some adjustments. Core mechanics, such as saving throws and ability checks, need conversion. Monster statistics should be updated using current edition resources.
Focus on maintaining the spirit of the adventure – the unique elemental nodes and challenging puzzles. Rather than a strict rules conversion, prioritize replicating the feel of exploration and discovery. Consider using existing 5e monsters with similar themes to those found in the original module.
Many online resources and fan communities offer guidance on adapting White Plume Mountain PDF to various editions. These can provide valuable insights and pre-made conversions, streamlining the adaptation process for Dungeon Masters.
Tips for Dungeon Mastering WPM
When running White Plume Mountain PDF, emphasize the dungeon’s non-linear structure. Players can tackle the elemental nodes in any order, fostering a sense of freedom. Prepare detailed descriptions of each node’s environment and the guardians’ personalities.
Encourage creative problem-solving. The puzzles aren’t always about finding the “right” answer, but about clever application of skills and spells. Be flexible and reward ingenuity. Don’t be afraid to adjust difficulty on the fly based on party performance.
Utilize player handouts and maps (available with the White Plume Mountain PDF and online) to enhance immersion. Remember the module is a challenge; let players struggle, but provide subtle clues when needed to avoid frustration.
Player Handouts and Maps
The White Plume Mountain PDF and associated online resources offer a wealth of materials to enhance player engagement. Dungeon Magazine 097, for example, provides valuable player handouts designed to deepen immersion within the adventure.
Detailed maps are crucial for navigating the complex, multi-level dungeon. Several versions are available for download, ranging from player-friendly overviews to detailed battlemaps. Consider using a virtual tabletop (VTT) to share maps dynamically.
Supplement these with your own creations! Hand-drawn maps or personalized notes can add a unique touch. Remember to tailor handouts to your players’ characters and playstyles, maximizing their impact and enjoyment.

The Shackled City Connection
Uncover how White Plume Mountain serves as a compelling prelude to the expansive Shackled City Adventure Path, enriching the overall campaign narrative.
Explore connections and integrate WPM seamlessly into a larger game.
White Plume Mountain as a Prelude
Consider White Plume Mountain not as a standalone adventure, but as a crucial introductory chapter to the sprawling Shackled City campaign. The PDF provides a contained, challenging dungeon experience that effectively prepares players for the larger political and geographical complexities ahead.
Specifically, the module introduces themes of ancient civilizations, powerful artifacts, and the dangers of unchecked magical power – all central tenets of the Shackled City narrative. Successfully navigating WPM’s elemental nodes and overcoming its guardians demonstrates a party’s competence and resourcefulness, qualities essential for survival in the harsh environment of the Shackled City itself.
Furthermore, the recovered magic items from WPM can serve as valuable assets throughout the campaign, offering a tangible reward for their initial efforts and establishing a sense of continuity. Utilizing the PDF in this manner elevates WPM beyond a simple dungeon crawl, transforming it into a foundational element of a truly epic adventure.
Connections to the Larger Campaign
The White Plume Mountain PDF seamlessly integrates into the Shackled City Adventure Path, offering narrative threads that extend far beyond the dungeon’s confines. Information gleaned from the module’s lore, particularly regarding the ancient inhabitants and the mountain’s magical origins, directly relates to the history of the Shackled City and its surrounding lands.
NPCs encountered, or even merely referenced, within WPM can reappear later in the campaign, providing familiar faces and potential allies (or enemies). The recovered artifacts aren’t simply treasure; they possess histories and powers that become relevant to the overarching plot.

Dungeon Masters can leverage the PDF to foreshadow future events, subtly hinting at the challenges and conflicts awaiting the party in the Shackled City, creating a cohesive and immersive campaign experience. This interconnectedness elevates WPM from a standalone adventure to an integral part of a larger, more compelling story.
Using WPM in a Shackled City Game
Integrating the White Plume Mountain PDF into a Shackled City campaign requires careful consideration of timing and narrative flow. Ideally, WPM serves as a prelude, introducing themes of ancient civilizations, powerful magic, and the dangers lurking beneath the surface of the world.
The PDF’s player handouts and maps can be adapted to fit the campaign’s aesthetic, ensuring a consistent visual experience. DMs should emphasize connections between WPM’s lore and the history of the Shackled City, rewarding players who actively seek out these links.
Consider using WPM as a means for the party to acquire crucial information or artifacts needed to progress in the main campaign, solidifying its importance and preventing it from feeling like a detached side quest. This approach maximizes the PDF’s value within the larger narrative.
Resources and Downloads
Access the White Plume Mountain PDF online through various sources, alongside supplemental fan content and maps. Explore forums and reviews for insights!
Finding the White Plume Mountain PDF Online
Locating a White Plume Mountain PDF requires navigating various online resources. Several websites archive older Dungeons & Dragons materials, offering downloadable PDFs, though legality can vary – always respect copyright. Dedicated D&D communities and forums frequently share links to these files, alongside discussions about their authenticity and quality.
Consider checking DriveThruRPG, a popular platform for tabletop RPG content, as it sometimes hosts scans or authorized digital versions of classic modules. Archive.org is another potential source, preserving older digital content. Be cautious when downloading from unfamiliar sites, ensuring your antivirus software is up-to-date to avoid potential malware. Remember to search specifically for “White Plume Mountain PDF” to refine your results and discover available options.
Explore resources like Dungeon Magazine archives for related content.
Supplemental Materials and Fan Content
Beyond the core White Plume Mountain PDF, a wealth of supplemental materials and fan-created content enhances the adventure. Players can find detailed maps, including those from the Shackled City Adventure Path, offering a visual aid for exploration. Numerous online forums host player handouts, pre-generated character sheets, and expanded monster statistics.
Discover fan-written expansions that integrate White Plume Mountain into larger campaigns, particularly connections to the Shackled City. Websites dedicated to D&D house rules and variant encounters often feature adaptations for different editions. Explore resources like Kidd Paul’s work for inspiration. Be mindful of content quality and ensure compatibility with your chosen ruleset when incorporating fan-made materials.
Utilize these resources to personalize your gaming experience.
Online Forums and Communities
Engage with a vibrant community of Dungeon Masters and players dedicated to White Plume Mountain! Numerous online forums, such as those found on RPGGeek and dedicated Dungeons & Dragons websites, serve as hubs for discussion, sharing experiences, and seeking advice.
Connect with fellow enthusiasts to exchange insights on adapting the module for different editions, overcoming challenging encounters, and utilizing supplemental materials. These communities often host downloadable resources, including player handouts and modified maps. Explore platforms like Reddit’s r/DnD for active threads and collaborative campaign ideas.
Benefit from collective wisdom and enhance your White Plume Mountain experience.
Reviews and Critical Analysis of the Module
Explore diverse perspectives on White Plume Mountain through numerous reviews and critical analyses available online. Many retro-review sites and Dungeons & Dragons blogs dissect the module’s strengths and weaknesses, examining its innovative dungeon design and challenging encounters.
Discover discussions surrounding the module’s complexity, suitability for different player levels, and lasting impact on the hobby. Critical assessments often highlight Lawrence Schick’s unique approach to puzzle design and the integration of elemental themes.
Consider these analyses when preparing to run the adventure, gaining valuable insights into potential pitfalls and opportunities for enhancing the player experience.

Legacy and Influence
Recognize White Plume Mountain’s profound impact on dungeon design, inspiring countless modules and shaping the landscape of Dungeons & Dragons for decades.
Understand its enduring appeal and lasting influence on the hobby.
WPM’s Impact on Dungeon Design

White Plume Mountain revolutionized dungeon design with its focus on unique challenges beyond simple monster encounters. It moved away from linear dungeon crawls, presenting a complex, multi-level structure demanding problem-solving and strategic thinking from players.
The module emphasized environmental puzzles and the clever use of elemental nodes, influencing subsequent designers to incorporate similar elements into their own creations. Its non-traditional approach, prioritizing exploration and interaction over pure combat, became a hallmark of well-regarded dungeons.
Schick’s design inspired a shift towards more intricate and rewarding dungeon experiences, moving beyond treasure-hunting to emphasize narrative and player agency. The availability of the White Plume Mountain PDF ensures its continued study and influence on modern dungeon masters and designers alike, solidifying its place as a foundational work.
Influence on Later D&D Modules
The innovative design of White Plume Mountain profoundly impacted subsequent Dungeons & Dragons modules, particularly those within the Against the Giants series. Its emphasis on complex, interconnected challenges and non-linear exploration resonated with designers seeking to elevate the gaming experience.
Modules following WPM often incorporated similar puzzle elements and a greater focus on environmental interaction. The availability of the White Plume Mountain PDF allowed designers to directly study and adapt Schick’s techniques, leading to more sophisticated dungeon layouts.
Even beyond Against the Giants, the influence can be seen in later adventures prioritizing player ingenuity and rewarding thorough exploration. WPM established a benchmark for dungeon complexity, inspiring a generation of designers to create more engaging and memorable adventures.
The Enduring Appeal of White Plume Mountain
The continued accessibility of the White Plume Mountain PDF fuels its enduring popularity among Dungeons & Dragons enthusiasts. Its unique structure, diverging from typical “monster-mash” dungeons, offers a refreshing challenge even decades after its initial release.
Players appreciate the emphasis on problem-solving and the rewarding feeling of overcoming intricate puzzles. The module’s self-contained nature makes it ideal for one-shot adventures or as a compelling side quest within larger campaigns.
Furthermore, the availability of online resources, fan-made maps, and critical analyses ensures that White Plume Mountain remains a vibrant topic of discussion and a beloved classic within the D&D community.
White Elephant Meaning and Cultural Context
Interestingly, the term “white elephant” carries a rich cultural history, originating in Thailand where sacred white elephants were considered symbols of royal status, yet also financially burdensome to maintain. This duality resonates with White Plume Mountain.
The module, while a masterpiece of dungeon design, presents a significant challenge for Dungeon Masters – a complex undertaking requiring dedicated preparation. Obtaining the White Plume Mountain PDF allows easy access, but mastering its intricacies is the “burden” of the DM.
Thus, the name subtly reflects the adventure’s nature: a valuable, yet demanding, experience. The availability of the PDF ensures the “elephant” doesn’t disappear, remaining a treasured, if challenging, piece of D&D lore.